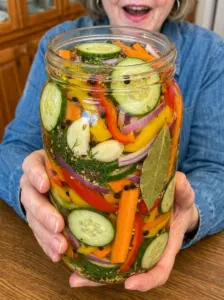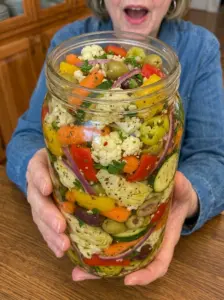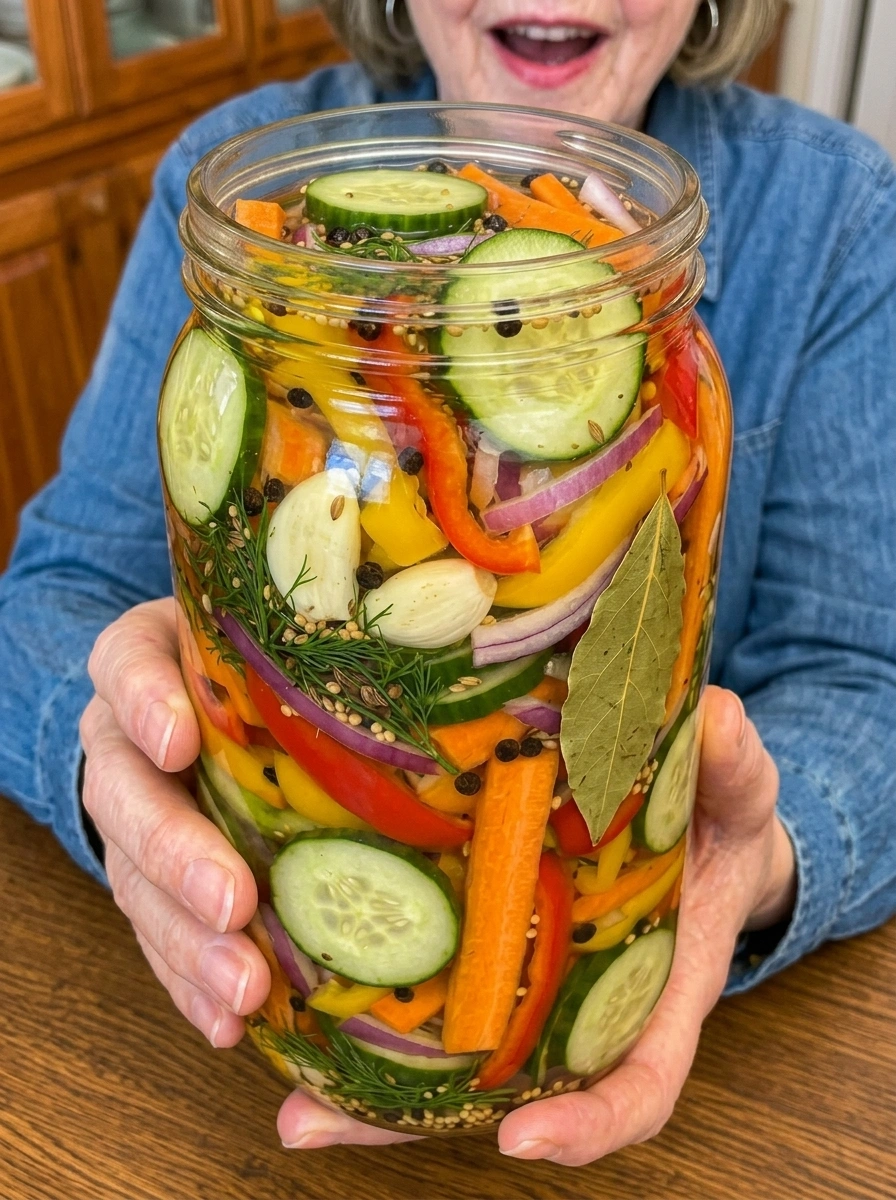
These Garlic Dill Refrigerator Pickled Vegetables are crunchy, tangy, and bursting with fresh dill and garlic flavor. Easy to make with no complicated canning required!
If you love the classic combination of garlic and dill in a crisp, tangy pickle, these Garlic Dill Refrigerator Pickled Vegetables are exactly the recipe you need. Crisp cucumbers, carrots, bell peppers, and red onion are packed into jars and covered with a simple vinegar brine infused with fresh garlic, dill, mustard seeds, and black peppercorns. The result is a batch of crunchy, herby, garlicky pickled vegetables that come together with minimal effort and no complicated canning process.
This recipe is a simple refrigerator pickle, meaning you can have a flavorful batch chilling in your refrigerator in no time. In as little as 12 hours (though 24–48 hours delivers the best garlic-dill flavor), you’ll have a colorful jar of pickled vegetables ready to top burgers, sandwiches, and salads, or enjoy straight from the jar.
Let’s dive into everything you need to know to make these crunchy, garlicky, dill-forward refrigerator pickled vegetables at home.
Why You’ll Love These Garlic Dill Refrigerator Pickled Vegetables
There are so many reasons to keep a jar of these in your refrigerator at all times:
Classic garlic-dill flavor. The combination of fresh garlic, dill, and mustard seed delivers that beloved, familiar pickle flavor everyone loves.
No canning required. As a refrigerator pickle, this recipe skips the need for a water bath canner or specialized canning knowledge.
Beautiful, colorful presentation. The mix of cucumbers, carrots, bell peppers, and red onion creates a vibrant, eye-catching jar.
Ready in as little as 12 hours. Unlike traditional pickling or fermenting methods, these vegetables deliver tangy, flavorful results quickly.
Fully customizable. This recipe is easy to adjust with more garlic, extra heat, or additional vegetables based on your preferences.
Incredibly versatile. These pickled vegetables work as a snack, a condiment, and a topping for a huge range of meals.
Ingredients You’ll Need
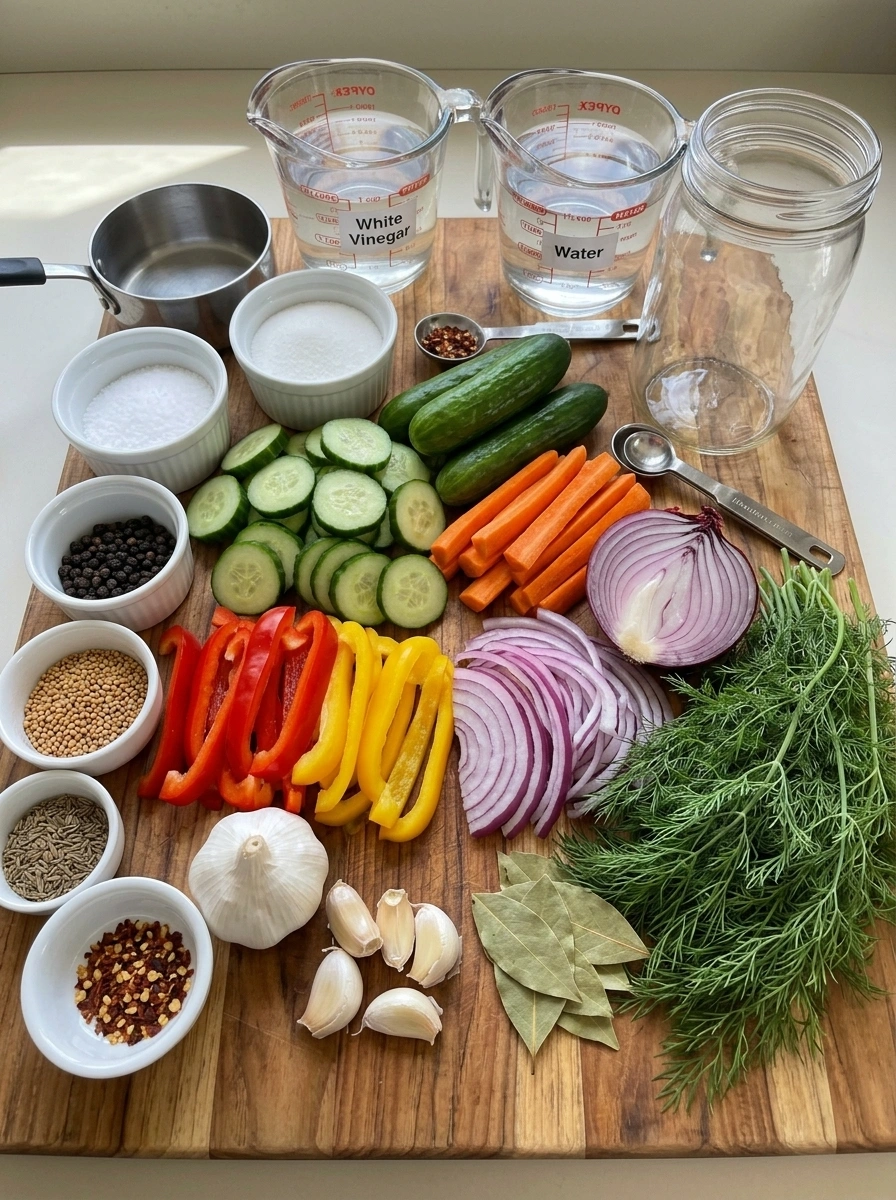
Here’s a breakdown of what goes into this crunchy, garlicky pickled vegetable recipe and why each ingredient plays a role.
- 2 cups baby cucumbers or Persian cucumbers, sliced — Adds classic, crisp pickle flavor and texture.
- 1 cup carrots, peeled and cut into sticks — Adds natural sweetness, crisp texture, and vibrant color.
- 1 cup red or yellow bell pepper, sliced — Adds sweetness and a pop of bright color.
- ½ medium red onion, thinly sliced — Adds a sharp, slightly sweet flavor that mellows as it pickles.
- 5–6 cloves fresh garlic, lightly crushed — Infuses the brine and vegetables with bold, aromatic garlic flavor.
- 1½ cups white vinegar — Forms the tangy, acidic base of the brine.
- 1½ cups water — Balances the acidity of the vinegar so the brine isn’t overpoweringly sharp.
- 1½ tablespoons kosher salt — Enhances the overall flavor of the brine and helps preserve the vegetables.
- 1 tablespoon granulated sugar — Balances the acidity of the vinegar with a touch of sweetness.
- ½ teaspoon black peppercorns — Adds a mild, warm heat and subtle spice.
- 1 teaspoon mustard seeds — Provides a slightly tangy, sharp flavor typical of classic pickling spice blends.
- ½ teaspoon dill seeds, optional — Reinforces the classic dill flavor throughout the brine.
- 2–3 sprigs fresh dill, plus extra for the jars — Adds that classic, essential fresh dill pickle flavor.
- 1 bay leaf — Adds subtle aromatic depth throughout the pickling process.
- ¼ teaspoon red pepper flakes, optional — For those who want a gentle kick of heat.
How to Make Garlic Dill Refrigerator Pickled Vegetables
This recipe is simple and requires minimal active preparation time. Here’s exactly how to make it.
Step 1: Prepare the Vegetables
Wash all the vegetables thoroughly. Slice the cucumbers and bell pepper, cut the carrots into thin sticks, and slice the red onion. Keeping the pieces relatively uniform helps them pickle evenly.
Step 2: Prepare the Jars
Divide the garlic, fresh dill, peppercorns, mustard seeds, dill seeds, bay leaf, and optional red pepper flakes between clean glass jars.
Step 3: Pack the Vegetables
Divide the cucumbers, carrots, bell pepper, and red onion among the jars. Pack them snugly but avoid crushing the vegetables.
Step 4: Make the Brine
Add the vinegar, water, salt, and sugar to a saucepan. Bring to a gentle simmer over medium heat, stirring until the salt and sugar completely dissolve.
Step 5: Pour Over the Vegetables
Carefully pour the warm brine into the jars, making sure the vegetables are completely submerged. Leave a little space at the top of each jar.
Step 6: Cool the Jars
Let the jars cool at room temperature until no longer warm. Cover them tightly with their lids.
Step 7: Refrigerate
Transfer the jars to the refrigerator and let the vegetables pickle for at least 12 hours. For the best garlic-dill flavor, allow them to sit for 24–48 hours.
Step 8: Serve
Give the vegetables a quick stir or shake before serving. Add fresh dill on top for an extra burst of herbal flavor.
Recipe Notes
For extra crunch: Use very fresh, firm vegetables and avoid overcooking them. This recipe does not require cooking the vegetables.
Garlic flavor: Use 6 cloves for a bold garlic taste or reduce to 3–4 for a milder version.
Dill: Fresh dill gives the best flavor, but 1–2 teaspoons dried dill can be used if needed.
Heat: Add extra red pepper flakes or a sliced jalapeño for spicy pickles.
Sweetness: Increase the sugar to 2 tablespoons for a slightly sweeter pickle.
Extra tang: Replace part of the water with additional vinegar for a sharper flavor.
Vegetable options: Cauliflower florets, green beans, radishes, celery, or zucchini can also be added.
Best flavor: The vegetables become more flavorful after 24–48 hours in the refrigerator.
How to Serve Garlic Dill Refrigerator Pickled Vegetables
- Add to sandwiches and wraps
- Pile onto burgers and hot dogs
- Serve alongside grilled steak or chicken
- Add to a charcuterie board
- Toss into salads for extra crunch
- Serve with wraps and deli meats
- Enjoy straight from the jar
- Add to a grilled dinner platter
Tips for the Best Garlic Dill Pickled Vegetables
Use very fresh, firm vegetables. Starting with fresh, crisp vegetables results in the crunchiest finished pickles.
Don’t overcook the vegetables. This recipe doesn’t require cooking the vegetables directly, so simply pouring the warm brine over them helps preserve their crisp texture.
Slice everything to a similar size. Uniform slicing ensures the vegetables all pickle at a similar rate.
Be patient for the best flavor. While ready after 12 hours, letting the vegetables sit for 24–48 hours results in significantly better, more developed garlic-dill flavor.
Adjust the garlic to your taste. Use more cloves for a bold, pronounced garlic flavor, or fewer for a milder pickle.
Use clean, sterilized jars. Starting with clean glass jars helps ensure the best flavor and longest shelf life for your pickled vegetables.
Storage Information
Keep refrigerated and use within about 2 weeks, always using clean utensils. Important: this is a refrigerator pickle, not a shelf-stable canning recipe. Keep refrigerated and do not store at room temperature.
Frequently Asked Questions
How long do these pickled vegetables last? Stored in the refrigerator with the vegetables fully submerged in brine, these pickles are best enjoyed within about 2 weeks for the best quality.
How long before I can eat these pickled vegetables? These vegetables are ready to eat after at least 12 hours of refrigeration, though letting them sit for 24–48 hours results in the best, most developed garlic-dill flavor.
Can I use dried dill instead of fresh? Yes, if fresh dill isn’t available, 1–2 teaspoons of dried dill can be substituted, though fresh dill provides the best flavor.
Can I add other vegetables to this recipe? Absolutely. Cauliflower florets, green beans, radishes, celery, or zucchini can all be added based on your preferences.
Can I make this recipe shelf-stable through canning? This recipe is designed as a refrigerator pickle and has not been tested for shelf-stable canning. For long-term, room-temperature storage, a tested water-bath canning recipe with proper processing times would be required.
Why do I need to let the brine cool before covering the jars? Allowing the jars to cool to room temperature before sealing them tightly helps prevent excess condensation and pressure buildup inside the jars.
Recipe Card
Prep Time: 15 minutes Cook Time: 5 minutes Pickling Time: 12–48 hours Total Time: About 12 hours 20 minutes Servings: About 4 cups
These Garlic Dill Refrigerator Pickled Vegetables bring crunchy, tangy, garlicky flavor to your kitchen with minimal effort. Packed with cucumbers, carrots, and bell peppers, all brightened with fresh garlic and dill, this versatile pickled vegetable mix is the perfect way to add crunch and flavor to sandwiches, burgers, charcuterie boards, and so much more.
Make a batch today, and get ready for these crunchy, garlicky pickled vegetables to become a refrigerator staple!
Print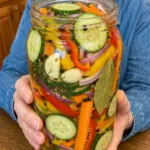
Garlic Dill Refrigerator Pickled Vegetables
Ingredients
Here’s a breakdown of what goes into this crunchy, garlicky pickled vegetable recipe and why each ingredient plays a role.
- 2 cups baby cucumbers or Persian cucumbers, sliced — Adds classic, crisp pickle flavor and texture.
- 1 cup carrots, peeled and cut into sticks — Adds natural sweetness, crisp texture, and vibrant color.
- 1 cup red or yellow bell pepper, sliced — Adds sweetness and a pop of bright color.
- ½ medium red onion, thinly sliced — Adds a sharp, slightly sweet flavor that mellows as it pickles.
- 5–6 cloves fresh garlic, lightly crushed — Infuses the brine and vegetables with bold, aromatic garlic flavor.
- 1½ cups white vinegar — Forms the tangy, acidic base of the brine.
- 1½ cups water — Balances the acidity of the vinegar so the brine isn’t overpoweringly sharp.
- 1½ tablespoons kosher salt — Enhances the overall flavor of the brine and helps preserve the vegetables.
- 1 tablespoon granulated sugar — Balances the acidity of the vinegar with a touch of sweetness.
- ½ teaspoon black peppercorns — Adds a mild, warm heat and subtle spice.
- 1 teaspoon mustard seeds — Provides a slightly tangy, sharp flavor typical of classic pickling spice blends.
- ½ teaspoon dill seeds, optional — Reinforces the classic dill flavor throughout the brine.
- 2–3 sprigs fresh dill, plus extra for the jars — Adds that classic, essential fresh dill pickle flavor.
- 1 bay leaf — Adds subtle aromatic depth throughout the pickling process.
- ¼ teaspoon red pepper flakes, optional — For those who want a gentle kick of heat.
Instructions
This recipe is simple and requires minimal active preparation time. Here’s exactly how to make it.
Wash all the vegetables thoroughly. Slice the cucumbers and bell pepper, cut the carrots into thin sticks, and slice the red onion. Keeping the pieces relatively uniform helps them pickle evenly.
Divide the garlic, fresh dill, peppercorns, mustard seeds, dill seeds, bay leaf, and optional red pepper flakes between clean glass jars.
Divide the cucumbers, carrots, bell pepper, and red onion among the jars. Pack them snugly but avoid crushing the vegetables.
Add the vinegar, water, salt, and sugar to a saucepan. Bring to a gentle simmer over medium heat, stirring until the salt and sugar completely dissolve.
Carefully pour the warm brine into the jars, making sure the vegetables are completely submerged. Leave a little space at the top of each jar.
Let the jars cool at room temperature until no longer warm. Cover them tightly with their lids.
Transfer the jars to the refrigerator and let the vegetables pickle for at least 12 hours. For the best garlic-dill flavor, allow them to sit for 24–48 hours.
Give the vegetables a quick stir or shake before serving. Add fresh dill on top for an extra burst of herbal flavor.