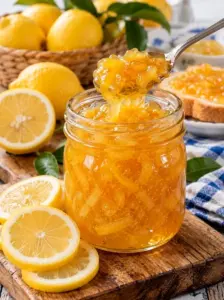
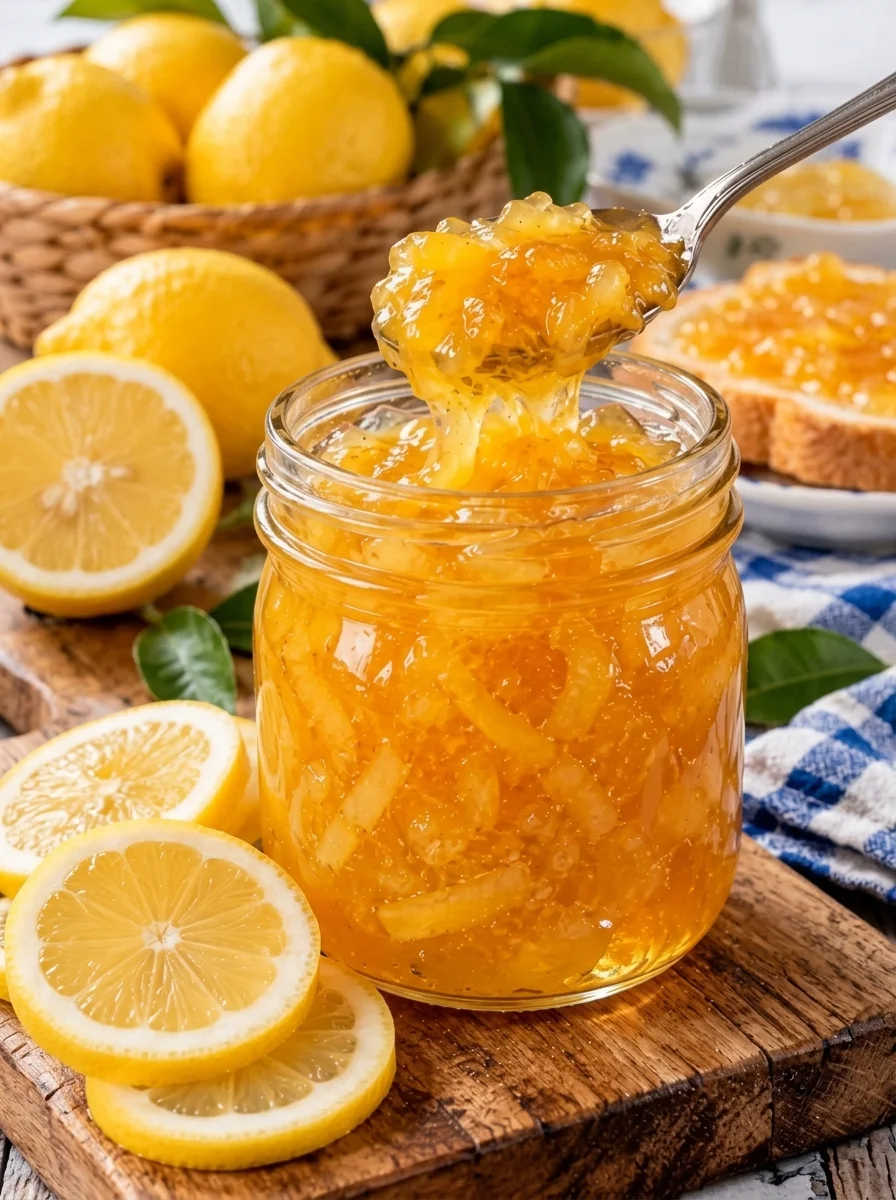
Bright, fragrant, and pleasantly bittersweet, Italian Lemon Jam turns fresh lemons into a golden citrus spread for toast, pastries, and breakfast bowls. Thin lemon slices simmer until the peel is tender, then cook with sugar until the mixture becomes glossy and spoonable. The result is a lemon-forward preserve with pieces of peel and a balance of sweetness, tartness, and gentle bitterness.
Although this recipe is called lemon jam, its use of citrus peel gives it a marmalade-like character. You can leave the peel in fine pieces for a traditional textured spread or briefly blend the finished mixture for a smoother consistency. Either way, a little spoonful brings a burst of citrus flavor to a warm biscuit or a bowl of creamy yogurt.
This is a small-batch refrigerator or freezer recipe. It does not require commercial pectin or canning equipment, but it does need time on the stove so the peel can soften and the mixture can reduce.
Recipe note: This recipe has not been independently tested. Lemons vary in size, peel thickness, juice, and natural pectin, so the yield, cooking time, bitterness, and final set will vary. Use the chilled-plate test and the visual cues below rather than relying on the clock alone.
Why You’ll Love This Recipe
- Only three ingredients: Lemons, sugar, and water make the base.
- Bright citrus flavor: Both the peel and flesh contribute lemon aroma and tang.
- Flexible texture: Leave the jam chunky or carefully blend it for a smoother spread.
- Versatile serving: Enjoy it on toast, with ricotta, or as a filling for pastries.
- No canning equipment required: Store the finished jam in the refrigerator or freezer.
Recipe at a Glance
- Prep time: About 20 minutes
- Cook time: About 1 hour 15 minutes to 1 hour 35 minutes, depending on the lemons and reduction
- Cooling time: About 30 minutes, with prompt refrigeration
- Total time: Approximately 2 hours 5 minutes to 2 hours 25 minutes
- Yield: Approximately 3–4 cups, depending on evaporation
- Serving size: 1 tablespoon
- Storage: Refrigerator or freezer
Ingredients
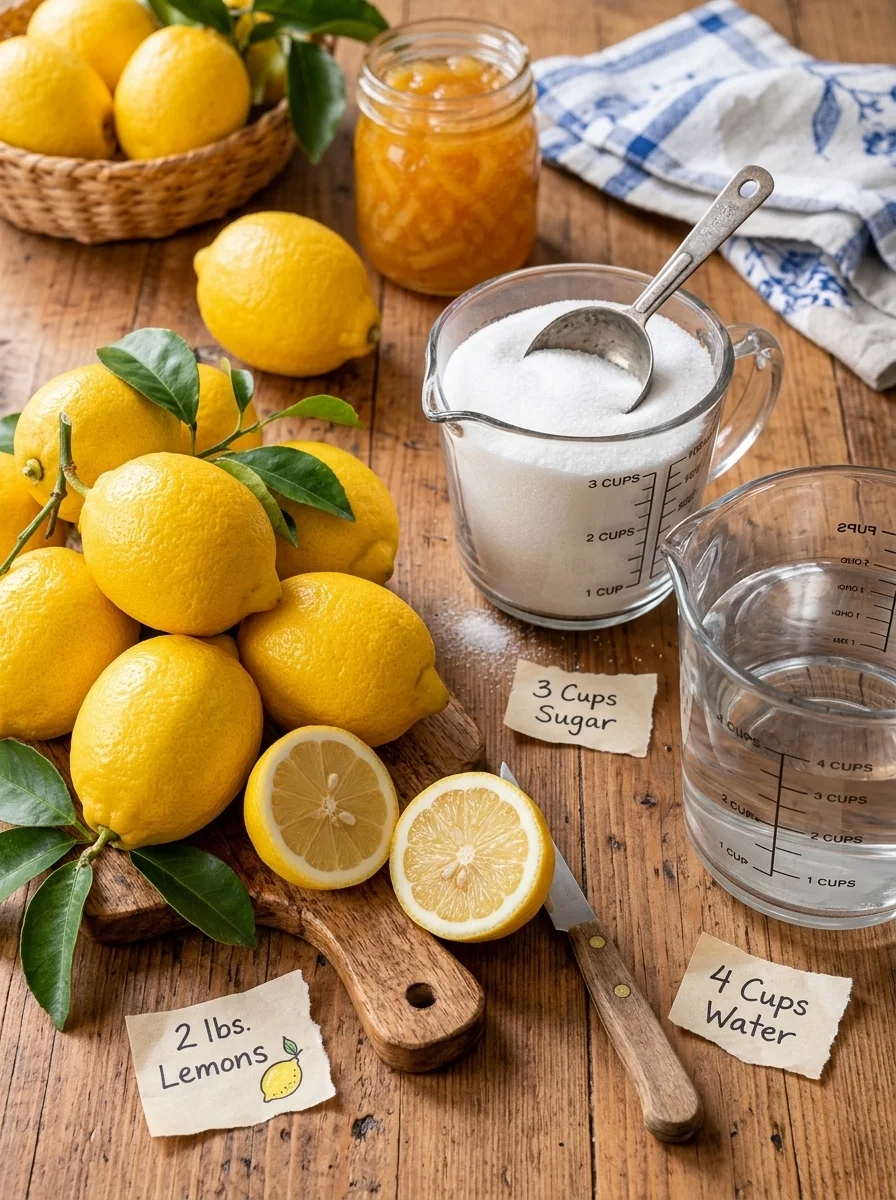
- 2 pounds fresh lemons, preferably unwaxed
- 3 cups granulated sugar
- 4 cups water, plus additional water for boiling the lemons
Ingredient Notes
Lemons
Choose fresh, fragrant lemons with sound skins. Because the peel is included in the finished jam, thin-skinned lemons generally make a more delicate spread than thick-skinned ones. Scrub the fruit well under running water, even if it is labeled unwaxed.
Both the yellow outer peel and the white pith go into this recipe. The pith contributes bitterness, so the finished spread will have more bite than a sweet lemon curd. Two brief boils help soften the peel and mellow some bitterness, but they do not eliminate it completely.
Remove the seeds as you slice. Seeds can make the texture unpleasant and may add bitterness if broken or blended. Catch any juice released on the cutting board and add it when the lemons are simmered with the measured water.
Granulated Sugar
Sugar balances the sharpness of the lemons and helps the mixture develop a jam-like consistency. The amount is part of this recipe’s flavor and set, so reducing it substantially may leave you with a much tarter, looser spread. If you change the sugar, keep the jam refrigerated or frozen and expect the texture to be different.
Stir until the sugar dissolves after adding it to the softened lemons. As the jam thickens, stir more frequently to prevent it from catching on the bottom of the pan.
Water
The water used for the two initial boils is drained away. The 4 cups listed in the ingredients are added afterward for the main simmer. This distinction matters: the repeated fresh-water boils help soften the peel, while the measured water provides liquid for cooking the lemons until tender.
Equipment You’ll Need
A large, heavy-bottomed saucepan, a sharp knife, a cutting board, a spoon or heat-resistant spatula, and clean heat-safe containers are the essentials. A wide pan encourages evaporation, while a heavy base helps reduce the chance of scorching.
You will also need a small plate for checking the set. Put it in the freezer before you start cooking so it is cold when the jam is ready to test. An optional immersion blender can make the finished jam smoother; use caution because hot jam can splash and cause burns.
How to Make Italian Lemon Jam
1. Wash and Slice the Lemons
Scrub the lemons thoroughly under running water. Trim away the stem ends and slice the lemons as thinly as you comfortably can. Remove and discard all visible seeds. Save the juice and pulp that collect on the cutting board for the main simmer.
Thin, even slices soften more evenly and give the jam a pleasant texture. If the lemons are large, you can cut each thin slice into smaller pieces after removing the seeds. A sharp knife makes the job easier; keep your fingers clear of the blade.
2. Boil and Drain Twice
Place the lemon slices in a large saucepan and cover with fresh water. Bring to a boil and simmer for 5 minutes. Drain carefully, then return the slices to the pan and repeat the process with fresh water. Drain again.
These brief boils help soften the peel and reduce some of its sharp bitterness. The slices may look softer after the second boil, but the peel will need more cooking before the sugar is added.
3. Simmer the Lemons Until Tender
Return the drained slices to the saucepan. Add the reserved lemon juice and pulp along with the measured 4 cups of water. Bring to a gentle simmer and cook uncovered for 30–40 minutes, stirring occasionally, until the peel is very tender.
Test a piece carefully after letting it cool enough to handle. It should be easy to bite through. If the peel is still tough, continue simmering and check again. Softening it before adding the sugar is important for a pleasant finished texture.
4. Add the Sugar
Stir in the 3 cups granulated sugar until dissolved. Bring the mixture to a steady, gentle boil. Continue cooking for about 25–40 minutes, stirring frequently, especially as it thickens.
The mixture should become glossier and more concentrated. Avoid leaving the pan unattended near the end: as water evaporates, the sugar can stick and scorch quickly. Lower the heat if the jam is catching or splattering excessively.
5. Check the Set
Spoon a small amount onto the chilled plate and let it sit for about a minute. Push the edge gently with a finger. If the surface wrinkles slightly and the jam moves slowly rather than running freely, it is approaching a set.
The jam thickens as it cools, so it does not need to look completely firm in the pan. If the sample remains very runny, cook the mixture a little longer and repeat the test with a clean cold plate. If you use a thermometer, account for altitude and use it alongside the plate test; the temperature reading alone may not describe the texture you prefer.
6. Choose Your Texture
For a marmalade-style spread, leave the lemon pieces as they are. For a smoother jam, allow the bubbling to subside and carefully use an immersion blender briefly, keeping the blade submerged to limit splashing. A deep pan helps, but hot jam can still splash and burn. Do not blend any remaining seeds.
The finished texture will depend on how finely the lemons were sliced and how long the jam was blended. It may remain slightly textured because it contains peel.
7. Cool, Portion, and Refrigerate
Remove from the heat and let the jam cool briefly. Carefully transfer it to clean, heat-safe containers. Divide it into smaller containers to help it cool, leaving room for expansion in freezer-safe containers. Refrigerate promptly; do not leave the jam at room temperature for extended cooling. Cover once the containers can be handled safely, following your container manufacturer’s guidance.
After chilling, stir and taste. The jam may be firmer and its flavor more rounded the next day.
How to Tell When Lemon Jam Is Ready
The cooking time is a guide, not a guarantee. Lemons differ in water content, and a wide saucepan evaporates liquid faster than a narrow one. Look for several signs together:
- The peel is very tender.
- The mixture looks glossy and noticeably thicker than when the sugar was first added.
- A chilled spoonful moves slowly and wrinkles lightly when pushed.
- The jam is spoonable rather than watery once the sample cools.
If you prefer a softer spread for yogurt or pancakes, stop cooking slightly earlier. For a firmer spread, continue in short increments and repeat the plate test. Avoid overcooking; a very concentrated jam can become stiff and difficult to spread after chilling.
Tips for the Best Lemon Jam
Choose Thin-Skinned Fruit
Thin-skinned lemons generally soften more readily and contribute less white pith. Since the entire slice is cooked, thick pith can make the finished jam more bitter. The lemon flavor and bitterness will still vary with the fruit.
Remove the Seeds Before Cooking
Work over a cutting board or bowl to catch juice, and remove seeds as you go. Check each slice on both sides. This is especially helpful if you plan to blend the jam later, because crushed seeds are difficult to remove.
Give the Peel Enough Time
The 30–40 minute simmer is an estimate. Cook the peel until tender before adding the sugar, even if it takes a little longer. A chewy peel can be unpleasant in an otherwise glossy jam.
Stir Often Near the End
Jam gets hotter and thicker as it reduces. Scrape the bottom and corners of the saucepan with a heat-resistant utensil to help prevent scorching. If the mixture catches, lower the heat rather than stirring a burnt layer into the rest of the pot.
Let It Cool Before Judging the Texture
Hot jam looks looser than cold jam. Use the chilled-plate test and allow the jars to cool and chill before deciding whether the finished batch is too thin. It may thicken considerably in the refrigerator.
Ways to Enjoy Italian Lemon Jam
Spread a thin layer over buttered toast, sourdough, or a warm biscuit. The jam’s tartness also works well with creamy dairy: spoon it over plain Greek yogurt, swirl it into ricotta, or serve it with mascarpone on a breakfast board.
For dessert, add a small spoonful to a bowl of vanilla ice cream or serve it alongside pound cake. You can also layer a little into a pastry or use it as a topping for pancakes and waffles. Because the jam is concentrated, start with a small amount and add more to taste.
On a cheese board, pair the jam with mild goat cheese, soft ricotta, or a buttery cheese. The lemon provides a bright contrast to richer flavors. Keep perishable accompaniments refrigerated until serving.
Flavor and Texture Variations
Smooth Lemon Spread
Briefly blend the jam after cooking for smaller pieces of peel. Keep the immersion blender submerged and work carefully to avoid splashing. The result will still have some texture and is not the same as lemon curd, which typically contains eggs and butter.
Chunky Marmalade-Style Jam
Leave the lemon pieces intact and slice them as evenly as possible. This version has a more pronounced peel texture and a classic bittersweet citrus character.
Meyer Lemon Addition
If Meyer lemons are available, substitute one for one of the regular lemons while keeping the overall fruit quantity approximately the same. Their flavor and acidity differ, so expect the set and flavor to vary. Keep the finished jam refrigerated or frozen as directed.
Ginger and Lemon
For a subtle warming note, add a small piece of peeled fresh ginger to the main simmer and remove it before portioning. Start with a little; the lemon should remain the main flavor.
Vanilla Lemon
Stir a small splash of vanilla extract into the jam after removing it from the heat. Vanilla can soften the impression of sharp citrus, but too much may overwhelm the fresh lemon aroma.
Pair With Fresh Herbs
Rather than changing the whole batch, add a tiny amount of finely chopped fresh thyme to an individual serving. This is useful on a cheese board or with savory toast. Refrigerate the prepared serving promptly.
Storage and Food Safety
Refrigerator: Transfer the cooked jam into clean, heat-safe containers, cool briefly, and refrigerate promptly at 40°F or below. The supplied recipe suggests up to 3 weeks. Because this particular recipe has not been tested for a validated shelf life, a shorter period is a conservative choice; for best confidence, use within 1–2 weeks or freeze portions you won’t use soon. Use a clean utensil each time.
Freezer: Freeze in freezer-safe containers for up to 3 months for best quality. Leave room at the top for expansion and thaw in the refrigerator. Use small containers if you want to thaw only a little at a time.
Make ahead: The jam may taste more rounded after a day in the refrigerator, and the texture can firm as it chills. Stir before serving if needed.
Canning: This recipe is intended for refrigerator or freezer storage. It has not been tested for shelf-stable canning. Filling a hot jar and closing the lid does not establish a safe pantry preserve. Use a tested canning recipe and its processing instructions if shelf-stable jars are your goal.
Troubleshooting
Why Is My Lemon Jam Bitter?
The peel and white pith naturally contribute bitterness. Thick-skinned lemons can make it more noticeable, as can seeds left in the mixture. For a future batch, use thin-skinned fruit, remove every visible seed, and do not skip the two brief fresh-water boils. This style of spread will still have some pleasant citrus bitterness.
Why Is the Peel Tough?
The peel may not have simmered long enough before the sugar was added, or the lemon skins may be particularly thick. Test a cooled piece before adding sugar and continue the initial simmer until it is tender. Slice the lemons thinly and evenly for more consistent cooking.
Why Is the Jam Runny?
It may need more reduction, or it may not have cooled fully. Try the chilled-plate test first. If the sample remains watery, simmer the batch a little longer and test again. Lemons and pans vary, so a softer set is possible even after the suggested time.
What If the Jam Is Too Thick?
Warm a small portion gently with a little water and stir until it reaches the consistency you like. Use the diluted portion promptly and keep it refrigerated. For the next batch, stop cooking a little earlier; the jam will continue to thicken as it cools.
What If the Jam Scorches?
Do not scrape the burnt layer from the bottom into the rest of the mixture. Carefully transfer the unscorched portion to a clean pan and taste once it has cooled enough. If the burnt flavor has spread, it may be best to start over. Stir more often and lower the heat as the next batch thickens.
Frequently Asked Questions
Is lemon jam the same as lemon marmalade?
The names are often used loosely, but marmalade generally includes citrus peel. Because this recipe uses whole lemon slices, it has a marmalade-like texture and flavor. You can call it a jam or a marmalade-style lemon spread.
Do I need added pectin?
The recipe does not call for commercial pectin. Lemons contain natural pectin, but fruit and cooking conditions vary, so the set is not guaranteed. Use the chilled-plate test and expect a spoonable spread rather than a specific firmness.
Can I use bottled lemon juice?
Not as a direct replacement. This recipe relies on the peel, flesh, and juice of whole lemons for its texture and flavor. Bottled juice would need a different recipe and may not set the same way.
Can I reduce the sugar?
You can experiment, but the jam may be much tarter, set more loosely, and keep differently. The supplied ingredient quantities are designed to balance the whole lemon peel and flesh. Refrigerate or freeze the result and do not use this recipe as a basis for pantry canning.
Do I have to blend the jam?
No. Blending is optional. Leave it chunky for visible pieces of peel, or briefly blend for a finer texture. Be cautious with hot jam and remove any seeds before blending.
Can I give this as a gift?
Yes, if it is kept refrigerated or frozen and the recipient knows it is not shelf-stable. Label the container with the preparation date and storage instructions, and transport it chilled.
How many calories are in a tablespoon?
The original estimate is approximately 45–55 calories per tablespoon, but the actual amount depends on how much the mixture reduces and the final yield. For a more useful estimate, calculate from the ingredients you use and divide by the measured number of tablespoons in your batch.
Print
Italian Lemon Jam
Description
Prep time: 20 minutes
Cook time: Approximately 1 hour 15 minutes to 1 hour 35 minutes
Yield: About 3–4 cups
Ingredients
- 2 pounds fresh lemons, preferably unwaxed
- 3 cups granulated sugar
- 4 cups water, plus additional water for the initial boils
Instructions
- Scrub the lemons under running water. Trim the stem ends, slice thinly, and remove all visible seeds. Reserve the juice and pulp released while slicing.
- Cover the slices with fresh water in a large saucepan. Bring to a boil and simmer for 5 minutes. Drain, then repeat with fresh water and drain again.
- Return the slices to the pan. Add the reserved juice and pulp and 4 cups water. Simmer uncovered for 30–40 minutes, or until the peel is very tender.
- Stir in the sugar until dissolved. Maintain a gentle boil for 25–40 minutes, stirring frequently as the mixture thickens.
- Test a spoonful on a chilled plate. If it wrinkles lightly when pushed and moves slowly, remove the jam from the heat. If it remains watery, cook a little longer and test again.
- Leave the jam chunky or briefly blend with an immersion blender, taking care to avoid splashing hot jam.
- Cool briefly, transfer to clean, heat-safe containers, and refrigerate promptly. Serve chilled or at room temperature in small portions.
Storage: Keep refrigerated at 40°F or below. Because the recipe has not been tested for a validated shelf life, use within 1–2 weeks or freeze for up to 3 months for best quality. This is not a shelf-stable canning recipe.