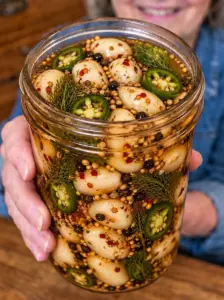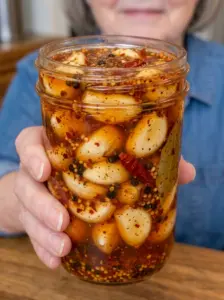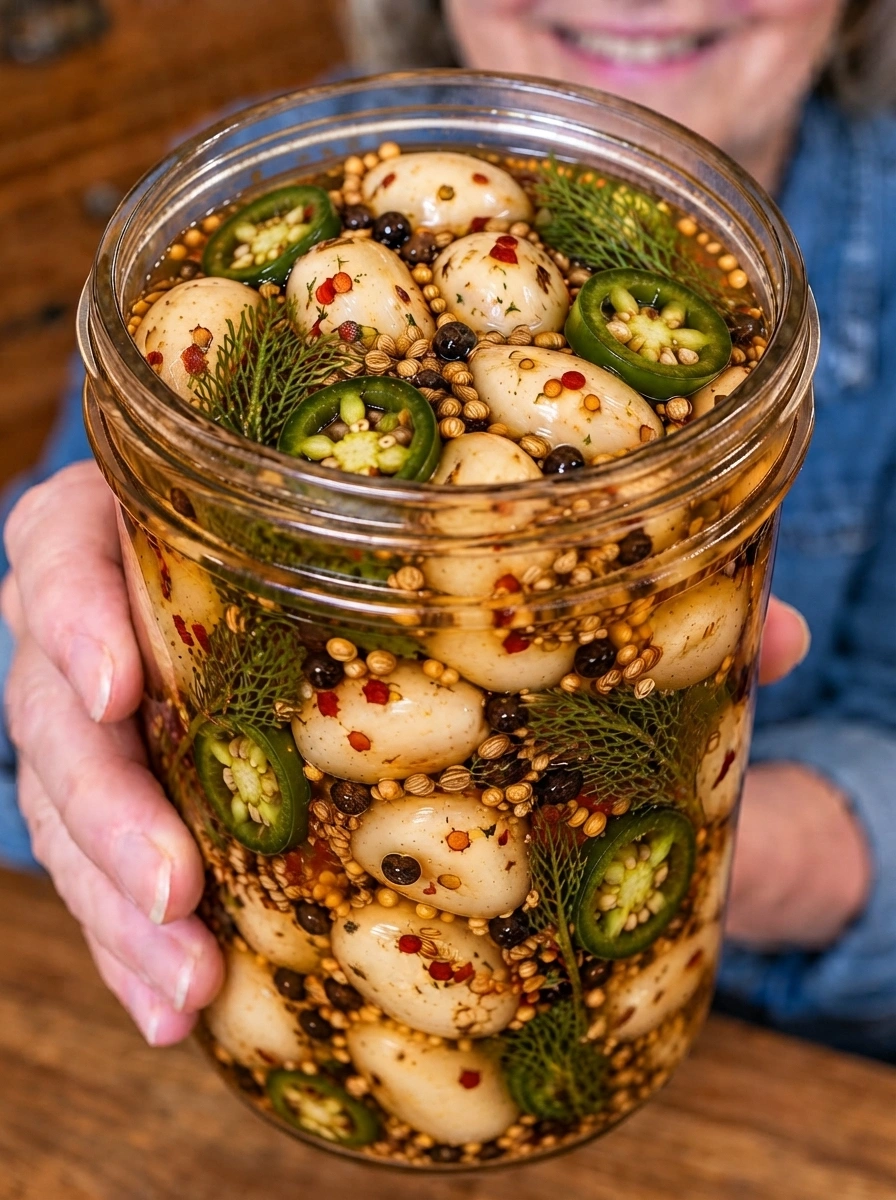
This Spicy Dill Pickled Garlic is crunchy, tangy, garlicky, and packed with fresh dill and jalapeño heat. Whole garlic cloves are refrigerated in a simple vinegar brine with fresh dill, jalapeños, red pepper flakes, mustard seeds, and black peppercorns for a bold refrigerator pickle that’s perfect for sandwiches, salads, snack boards, burgers, and savory dishes.
If you love classic dill pickles and pickled garlic, this recipe brings those flavors together in one easy jar. Fresh dill gives the garlic its unmistakable herbal character, while jalapeños and red pepper flakes provide a spicy kick that develops as the jar rests.
The preparation takes only about 15 minutes. After that, the refrigerator does the work. Give the garlic at least three days to develop flavor, or wait 5–7 days for a stronger combination of tangy vinegar, fresh dill, garlic, and chile.
This recipe is intended specifically as a refrigerator pickle, not as a shelf-stable canned product. Keep the finished garlic refrigerated and the cloves submerged in their brine.
Why You’ll Love Spicy Dill Pickled Garlic
Bold dill flavor. Both chopped fresh dill and whole dill sprigs infuse the brine with fresh herbal flavor.
Spicy but adjustable. Jalapeños and red pepper flakes bring the heat, and both can easily be adjusted to your preference.
Crunchy and tangy. Whole garlic cloves develop a pleasantly pickled character while retaining plenty of texture.
Easy refrigerator-pickle method. There’s no complicated canning process involved.
Only 15 minutes of active preparation. Most of the recipe time is simply waiting for the flavors to develop.
Versatile condiment. Eat the cloves whole or chop them into sandwiches, salads, spreads, dressings, and more.
Great for snack boards. The combination of garlic, dill, acidity, and chile works beautifully alongside cheese, crackers, vegetables, and other pickled foods.
Ingredients You’ll Need
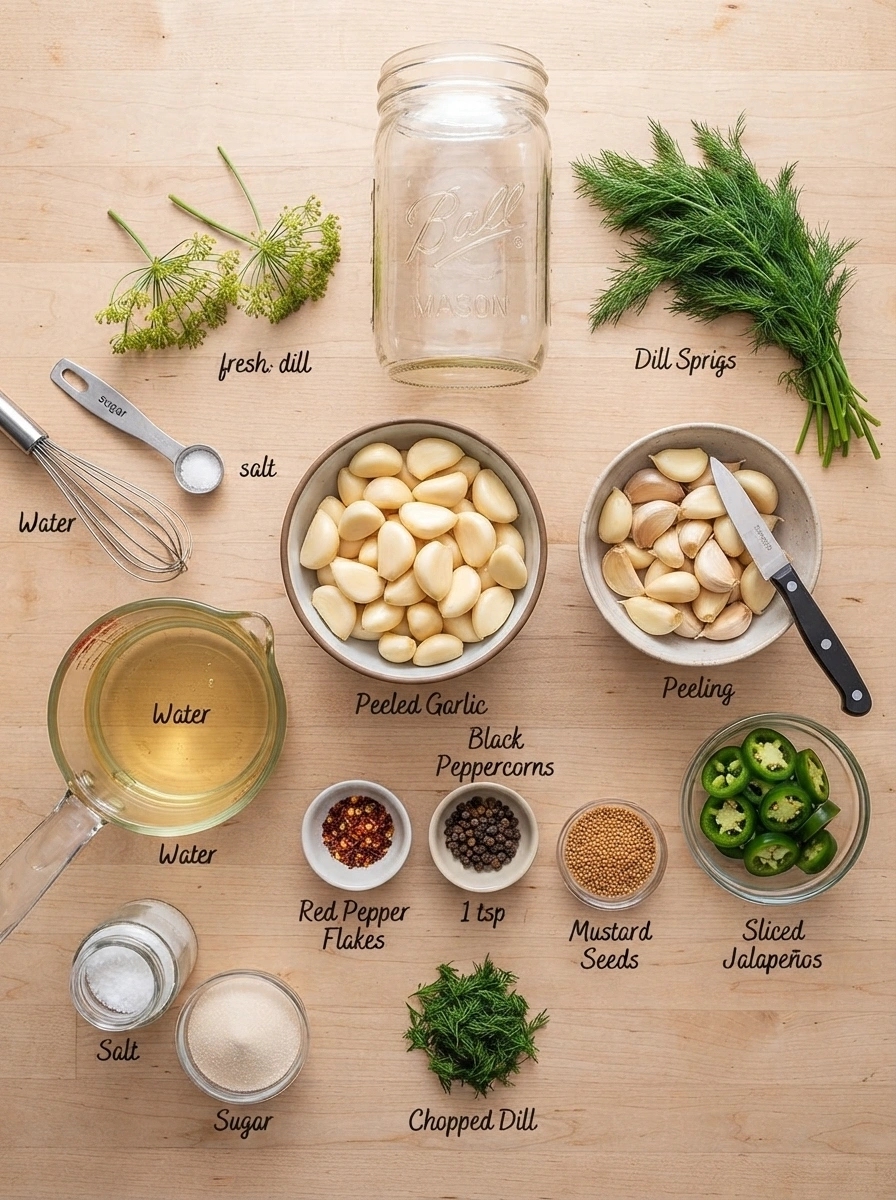
- 2 cups fresh garlic cloves, peeled — The star of the recipe. Choose firm, fresh cloves without soft or damaged areas.
- 1 cup white vinegar — Provides the sharp, tangy foundation of the refrigerator-pickling brine.
- 1 cup water — Dilutes the vinegar and balances its acidity.
- 1 tablespoon kosher salt or pickling salt — Seasons the garlic and brine.
- 1 tablespoon sugar — Softens the sharp acidity without making the garlic noticeably sweet.
- 1 teaspoon red pepper flakes — Adds chile heat throughout the jar.
- 1–2 small fresh jalapeños, thinly sliced — Bring fresh pepper flavor and additional heat.
- 1 teaspoon black peppercorns — Add peppery warmth and classic pickling character.
- 1 teaspoon mustard seeds — Provide another layer of savory pickling-spice flavor.
- 2 tablespoons fresh dill, chopped — Distributes fresh dill flavor throughout the brine.
- 2 small sprigs fresh dill — Continue infusing the garlic as it rests in the refrigerator.
How to Make Spicy Dill Pickled Garlic
Step 1: Prepare the Garlic
Peel enough fresh garlic cloves to measure approximately 2 cups.
Inspect the cloves and use firm, fresh garlic without spoiled or damaged areas.
Place the garlic into a clean glass jar.
Step 2: Add the Dill and Spices
Add the chopped fresh dill and dill sprigs to the jar.
Then add the thinly sliced jalapeños, red pepper flakes, black peppercorns, and mustard seeds.
Distribute the ingredients throughout the jar rather than placing everything only at the top.
Step 3: Make the Pickling Brine
In a small saucepan, combine:
- 1 cup white vinegar
- 1 cup water
- 1 tablespoon kosher or pickling salt
- 1 tablespoon sugar
Place the saucepan over medium heat.
Stir until the salt and sugar have completely dissolved.
Step 4: Gently Simmer
Bring the brine just to a gentle simmer.
Once it reaches a simmer and everything has dissolved, remove the saucepan from the heat.
There’s no need to aggressively boil the mixture.
Step 5: Pour the Brine Over the Garlic
Carefully pour the warm brine into the jar.
Continue until the garlic cloves are completely covered.
The dill, jalapeños, and spices should also be surrounded by the brine.
Step 6: Cool
Allow the jar to cool before refrigerating.
Once cooled, close it securely with a clean lid and transfer it to the refrigerator.
Step 7: Let the Garlic Pickle
For initial flavor development, refrigerate for at least 3 days before eating.
For a stronger spicy dill flavor, allow the garlic to pickle for approximately 5–7 days.
The flavor will gradually become more developed as the garlic, dill, jalapeño, and spices infuse the brine.
Step 8: Serve
Use a clean fork or spoon to remove the desired number of cloves.
Enjoy them whole or chop, slice, or mince them before adding them to other dishes.
Recipe Notes
This is a refrigerator pickle: Keep this garlic refrigerated. This recipe isn’t designed or validated for shelf-stable canning.
Use fresh garlic: Firm, fresh cloves will give you the best texture.
Keep everything submerged: The garlic should remain covered by the pickling liquid while refrigerated.
Adjust the jalapeño: Use one small jalapeño for moderate chile flavor or two for a spicier batch.
Control the heat further: Removing the jalapeño seeds and membranes can reduce some of the heat, while leaving more membrane intact produces a hotter result.
Use fresh dill: Fresh dill gives this recipe its distinctive flavor and is preferable to dried dill here.
Pickling salt or kosher salt: Either works well. Avoid making volume-for-volume substitutions among salts with dramatically different crystal sizes without accounting for the difference.
Give it time: Three days provides initial pickling, but the dill and spice flavors become more noticeable after several additional days.
How to Serve Spicy Dill Pickled Garlic
These bold little garlic cloves can be used in far more ways than simply eating them from the jar.
- Add to sandwiches and wraps
- Slice over burgers
- Chop into potato salad
- Add to pasta salad
- Toss into green salads
- Serve on cheese and snack boards
- Chop into tuna salad
- Add to egg salad
- Mince into cream cheese
- Stir into hummus
- Add to savory yogurt dips
- Chop over roasted potatoes
- Serve alongside grilled meats
- Add to grain bowls
- Chop into tacos
- Serve alongside olives and other refrigerator pickles
You can also experiment with small amounts of the spicy dill brine in salad dressings and savory sauces while the batch remains fresh and properly refrigerated.
Flavor Variations
Extra-Spicy Dill Garlic
Use two jalapeños and increase the red pepper flakes slightly.
Mild Dill Pickled Garlic
Use one jalapeño with the seeds and membranes removed and reduce the red pepper flakes.
Garlic-Dill Pepper Pickles
Add additional sliced fresh peppers alongside the garlic.
Herb-Garlic Pickles
Add a small amount of another fresh herb, such as thyme, alongside the dill.
Mustard Dill Garlic
Increase the mustard seeds slightly for a more pronounced pickling-spice character.
Tips for the Best Spicy Dill Pickled Garlic
Start with high-quality garlic. Avoid cloves that are soft, moldy, damaged, or beginning to spoil.
Use a clean jar. Thoroughly clean the jar and lid before filling.
Slice the jalapeños evenly. Thin, consistent slices distribute their flavor throughout the jar.
Don’t overcook the brine. You only need enough heat to dissolve the salt and sugar and bring the liquid to a gentle simmer.
Keep the garlic covered. Choose an appropriately sized jar so there’s enough brine to keep the cloves submerged.
Wait before judging the flavor. The garlic will taste different after several days than it does immediately after preparation.
Use clean utensils. Avoid reaching into the jar with your fingers.
Keep it refrigerated. This recipe depends on continuous refrigeration rather than a shelf-stable canning process.
Storage Information
Store Spicy Dill Pickled Garlic in a tightly covered glass jar in the refrigerator.
For this recipe, use the stated conservative storage window of up to 2 weeks, provided it has been handled properly and kept continuously refrigerated at 40°F (4°C) or below.
Keep the garlic submerged in its brine and use a clean utensil every time you remove cloves.
Discard the batch if you notice mold, an unusual unpleasant odor, unexpected sliminess, or other signs of spoilage.
Because this is a homemade refrigerator-pickle formula rather than a tested canning recipe, do not store the jars at room temperature or attempt to make them shelf-stable using this recipe. If you want canned pickled garlic for longer storage, use a laboratory-tested preservation recipe from a recognized food-preservation authority.
Frequently Asked Questions
How long should Spicy Dill Pickled Garlic sit before eating?
Give the garlic at least 3 days in the refrigerator. For a more developed dill and chile flavor, wait approximately 5–7 days.
Does this pickled garlic need refrigeration?
Yes. This recipe is specifically intended as a refrigerator pickle and should remain refrigerated.
Can I make it less spicy?
Yes. Use one jalapeño, remove its seeds and membranes, and reduce the red pepper flakes.
How can I make it hotter?
Use two jalapeños, retain more of their membranes, or slightly increase the red pepper flakes.
Can I use dried dill instead of fresh dill?
Fresh dill is strongly preferred for this particular recipe because its bright herbal character is an important part of the finished flavor.
Can I use black beans—
No beans here! This recipe is all about garlic, dill, jalapeño, and a tangy vinegar brine.
Why should the garlic stay submerged?
Keeping the cloves covered helps maintain consistent contact with the acidic brine and promotes more even pickling.
Can I use the spicy dill brine?
Small amounts can be incorporated into salad dressings, dips, potato salad, or sauces while the batch is fresh and properly refrigerated.
Can I keep this pickled garlic in the pantry?
No. Keep it refrigerated. The recipe has not been formulated as a validated shelf-stable canning process.
Can I water-bath can this recipe?
Don’t convert this refrigerator recipe to water-bath canning by simply increasing the processing time. Safe shelf-stable preservation requires a tested recipe with validated ingredient proportions, jar sizes, and processing instructions.
Recipe Card
Recipe: Spicy Dill Pickled Garlic 🌶️🧄🌿
Prep Time: 10 minutes
Cook Time: 5 minutes
Active Time: 15 minutes
Pickling Time: At least 3 days; 5–7 days for more developed flavor
Servings: Approximately 12
Calories: Approximately 20 per serving, depending on serving size
Method: Refrigerator pickling
Main Ingredients: Garlic, white vinegar, fresh dill, jalapeños, red pepper flakes, mustard seeds, and black peppercorns
Storage: Refrigerate for up to 2 weeks as specified in the recipe; keep the cloves submerged and use clean utensils
Shelf-Stable: No
This Spicy Dill Pickled Garlic combines crunchy whole garlic cloves with tangy vinegar, fragrant fresh dill, spicy jalapeño, red pepper flakes, mustard seeds, and black peppercorns for a bold condiment that’s incredibly easy to prepare.
Give the garlic at least three days in the refrigerator, or wait 5–7 days for the dill, chile, and pickling spices to develop more fully. Then enjoy the cloves whole or chop them into sandwiches, salads, burgers, dips, snack boards, and savory dishes.
With only about 15 minutes of active preparation, it’s a simple way to keep a jar of tangy, spicy, dill-packed garlic ready for adding a punch of flavor to everyday meals.
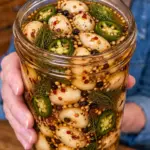
Spicy Dill Pickled Garlic
- Author: Sophie
Ingredients
- 2 cups fresh garlic cloves, peeled — The star of the recipe. Choose firm, fresh cloves without soft or damaged areas.
- 1 cup white vinegar — Provides the sharp, tangy foundation of the refrigerator-pickling brine.
- 1 cup water — Dilutes the vinegar and balances its acidity.
- 1 tablespoon kosher salt or pickling salt — Seasons the garlic and brine.
- 1 tablespoon sugar — Softens the sharp acidity without making the garlic noticeably sweet.
- 1 teaspoon red pepper flakes — Adds chile heat throughout the jar.
- 1–2 small fresh jalapeños, thinly sliced — Bring fresh pepper flavor and additional heat.
- 1 teaspoon black peppercorns — Add peppery warmth and classic pickling character.
- 1 teaspoon mustard seeds — Provide another layer of savory pickling-spice flavor.
- 2 tablespoons fresh dill, chopped — Distributes fresh dill flavor throughout the brine.
- 2 small sprigs fresh dill — Continue infusing the garlic as it rests in the refrigerator.
Instructions
Step 1: Prepare the Garlic
Peel enough fresh garlic cloves to measure approximately 2 cups.
Inspect the cloves and use firm, fresh garlic without spoiled or damaged areas.
Place the garlic into a clean glass jar.
Step 2: Add the Dill and Spices
Add the chopped fresh dill and dill sprigs to the jar.
Then add the thinly sliced jalapeños, red pepper flakes, black peppercorns, and mustard seeds.
Distribute the ingredients throughout the jar rather than placing everything only at the top.
Step 3: Make the Pickling Brine
In a small saucepan, combine:
- 1 cup white vinegar
- 1 cup water
- 1 tablespoon kosher or pickling salt
- 1 tablespoon sugar
Place the saucepan over medium heat.
Stir until the salt and sugar have completely dissolved.
Step 4: Gently Simmer
Bring the brine just to a gentle simmer.
Once it reaches a simmer and everything has dissolved, remove the saucepan from the heat.
There’s no need to aggressively boil the mixture.
Step 5: Pour the Brine Over the Garlic
Carefully pour the warm brine into the jar.
Continue until the garlic cloves are completely covered.
The dill, jalapeños, and spices should also be surrounded by the brine.
Step 6: Cool
Allow the jar to cool before refrigerating.
Once cooled, close it securely with a clean lid and transfer it to the refrigerator.
Step 7: Let the Garlic Pickle
For initial flavor development, refrigerate for at least 3 days before eating.
For a stronger spicy dill flavor, allow the garlic to pickle for approximately 5–7 days.
The flavor will gradually become more developed as the garlic, dill, jalapeño, and spices infuse the brine.
Step 8: Serve
Use a clean fork or spoon to remove the desired number of cloves.
Enjoy them whole or chop, slice, or mince them before adding them to other dishes.