Nashville Hot Pickled Eggs: The Fiery, Tangy Snack You Won’t Be Able to Stop Eating
If you’ve been searching for a snack that delivers big, bold, unforgettable flavor in every single bite, your search is officially over. Nashville Hot Pickled Eggs are the spicy, tangy, garlicky obsession taking over kitchens, potlucks, and pantry shelves everywhere. They combine two beloved food trends — classic pickled eggs and the iconic heat of Nashville hot chicken — into one irresistible, protein-packed bite.
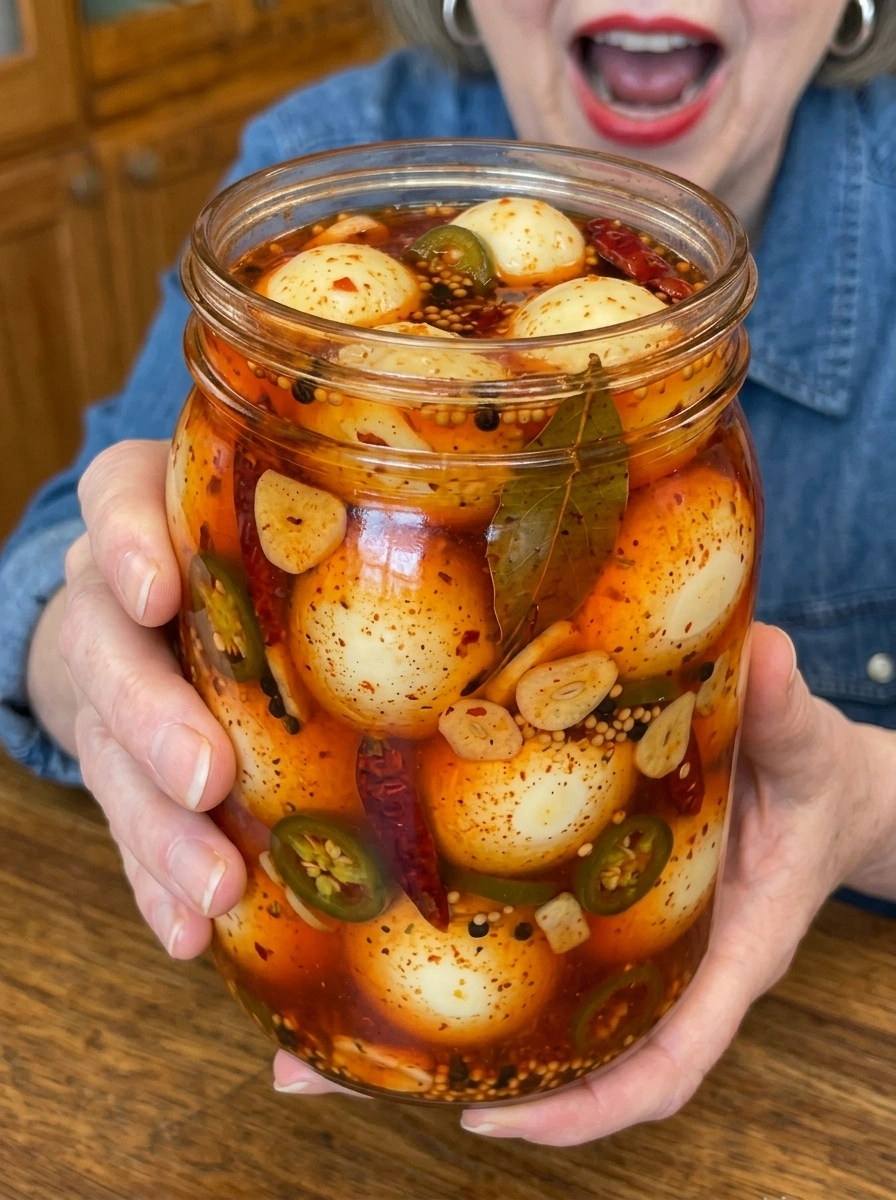
Fiery. Tangy. Garlicky. Loaded with bold, smoky heat. These aren’t your grandmother’s pickled eggs sitting quietly in a jar at the back of the fridge. This is a full-flavor flavor bomb, and once you crack one open, you’ll understand exactly why people can’t stop making them.
In this complete guide, you’ll learn everything you need to know to make perfect Nashville Hot Pickled Eggs at home, including the full ingredient breakdown, step-by-step instructions, expert tips for getting the flavor and texture just right, storage guidelines, frequently asked questions, and creative ways to serve them. Whether you’re a pickling beginner or a seasoned home cook looking for your next viral recipe, this article has you covered.
What Are Nashville Hot Pickled Eggs?
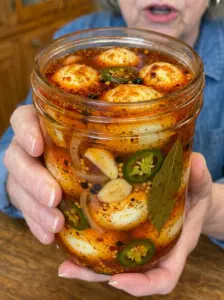
Nashville Hot Pickled Eggs are hard-boiled eggs that have been submerged in a spicy, tangy brine inspired by the flavors of Nashville hot chicken — think cayenne pepper, smoked paprika, garlic, and a splash of hot sauce, all balanced with vinegar and a touch of brown sugar. The eggs soak in this brine for several days, allowing the heat and tang to fully penetrate the egg white and even reach into the yolk.
The result is a snack that’s smoky, spicy, tangy, slightly sweet, and deeply savory all at once. Unlike plain pickled eggs, which can sometimes taste one-dimensional, Nashville Hot Pickled Eggs bring layers of complexity thanks to the combination of mustard seeds, black peppercorns, crushed red pepper flakes, and fresh jalapeño slices.
They’re the kind of recipe that starts as a curiosity and ends as a full-blown kitchen obsession. Once you make your first jar, you’ll likely find yourself making a double batch the next time.
Why This Recipe Works So Well
There are a few reasons Nashville Hot Pickled Eggs have become such a sensation, and understanding them will help you appreciate — and perfect — this recipe.
The brine is beautifully balanced. Vinegar and water form the acidic base, while brown sugar softens the sharpness and pickling salt enhances every other flavor in the jar. Hot sauce brings tang and heat right up front, while the blend of dried spices builds a deeper, smokier heat that develops the longer the eggs sit.
The spice blend mimics real Nashville hot chicken. Cayenne pepper and smoked paprika are the backbone of authentic Nashville hot seasoning, and using both here gives the eggs that same signature reddish hue and slow-building warmth that fans of the original dish will instantly recognize.
Time does the heavy lifting. Unlike many quick-pickle recipes that are ready in an hour, this one rewards patience. The longer the eggs sit in the brine — ideally five to seven days — the more intensely the flavor develops, both on the surface and toward the yolk.
It’s endlessly customizable. Once you understand the base ratios, you can adjust the heat level, swap in different peppers, or add extra aromatics to make the recipe your own.
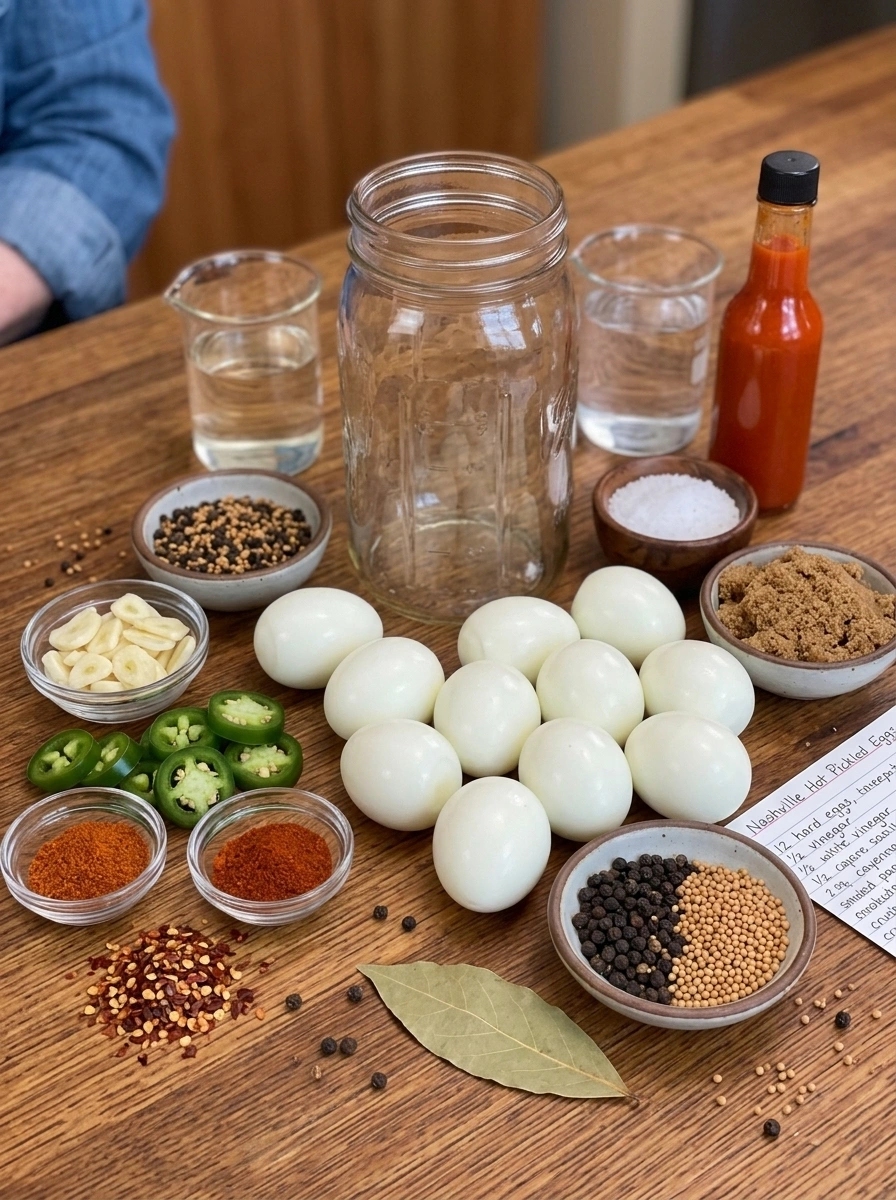
Ingredients You’ll Need
Here’s everything required to make a full batch of 12 Nashville Hot Pickled Eggs.
For the eggs:
- 12 hard-boiled eggs, peeled
For the brine:
- 1 cup white vinegar
- 1 cup water
- 2 tablespoons hot sauce
- 1 tablespoon pickling salt
- 1 tablespoon brown sugar
Aromatics and spices:
- 5 garlic cloves, sliced
- 1 jalapeño, sliced
- 1 teaspoon cayenne pepper
- 1 teaspoon smoked paprika
- 1 teaspoon crushed red pepper flakes
- 1 teaspoon black peppercorns
- 1 teaspoon mustard seeds
- 1 bay leaf
A Closer Look at the Key Ingredients
White vinegar is the pickling workhorse here. Its high acidity preserves the eggs safely while delivering that unmistakable pickled tang. Some cooks like to swap in apple cider vinegar for a slightly fruitier, mellower backdrop, though white vinegar keeps the flavor cleaner and more traditional.
Hot sauce is what ties this recipe directly to Nashville hot chicken’s DNA. A classic cayenne-based hot sauce works beautifully, but you can experiment with different styles to shift the flavor profile — more on that in the variations section below.
Pickling salt is important because it’s pure and free of the anti-caking agents found in table salt, which can cloud your brine. If you can’t find pickling salt, kosher salt is the best substitute.
Brown sugar rounds out the sharp acidity of the vinegar and hot sauce, giving the brine a subtle caramel-like sweetness that keeps the heat from becoming one-note.
Garlic and jalapeño add fresh, aromatic heat and a punch of flavor that dried spices alone can’t replicate. As they sit in the brine, they soften and mellow while infusing the liquid with their essence.
Cayenne pepper and smoked paprika are the heart of the Nashville hot flavor profile, delivering that signature red-orange color and deep, smoky warmth.
Crushed red pepper flakes add textural heat and visual appeal, while mustard seeds and black peppercorns bring a subtle earthiness and gentle pop of flavor with every bite.
Step-by-Step Instructions
Making Nashville Hot Pickled Eggs is simple, but a few small details make a big difference in the final result. Follow these steps closely for the best outcome.
Step 1: Prep Your Eggs and Jar
Start with 12 hard-boiled eggs that have been fully cooled and peeled. Using a clean, sterilized glass jar (a wide-mouth quart jar works perfectly), place the peeled eggs inside. Try to nestle them in as snugly as possible without crushing them, since this helps ensure they stay fully submerged later.
Step 2: Add the Aromatics
Tuck the sliced garlic cloves and jalapeño slices in and around the eggs. Distributing them throughout the jar, rather than dumping them all in one spot, helps the flavor infuse more evenly.
Step 3: Build the Brine
In a medium saucepan, combine the white vinegar, water, hot sauce, pickling salt, brown sugar, cayenne pepper, smoked paprika, crushed red pepper flakes, black peppercorns, mustard seeds, and bay leaf. Whisk everything together so the salt and sugar begin to break down.
Step 4: Heat Gently
Place the saucepan over medium heat and warm the mixture just until the salt and brown sugar have fully dissolved. This usually only takes a few minutes. It’s important not to let the brine come to a full boil — you simply want enough heat to dissolve the solids and lightly bloom the spices, releasing their aromatic oils without cooking off the hot sauce’s bright flavor.
Step 5: Pour Over the Eggs
Carefully pour the hot brine over the eggs in the jar, making sure the liquid completely covers them. If needed, gently press the eggs down or add a small amount of extra water to ensure everything is fully submerged. Any egg left exposed to air won’t pickle evenly and could spoil faster.
Step 6: Cool to Room Temperature
Let the jar sit on the counter, uncovered or loosely covered, until it reaches room temperature. Pouring a hot lid onto a hot jar and sealing it immediately can create pressure buildup, so allowing it to cool first is a simple but important safety step.
Step 7: Seal and Refrigerate
Once cooled, seal the jar tightly with its lid and transfer it to the refrigerator.
Step 8: Be Patient
This is the hardest part. Let the eggs pickle for at least 3 days before tasting. For the boldest, most fully developed Nashville hot flavor, wait 5 to 7 days. The extra time allows the brine to penetrate deep into the egg, including the yolk, which is where a lot of the magic happens.
Tips for the Best Nashville Hot Pickled Eggs
Use eggs that are a few days old before boiling. Fresh-from-the-coop eggs are notoriously difficult to peel cleanly. Eggs that are five to ten days old peel much more easily, giving you smoother, more attractive finished eggs.
Don’t skip the cooling step. Pouring hot brine over eggs and sealing the jar immediately without cooling can trap steam and create pressure inside the jar. Letting it cool naturally is safer and also helps preserve the brightness of the hot sauce’s flavor.
Keep everything submerged. Any part of an egg exposed to air above the brine line can develop discoloration or spoil more quickly. If your eggs tend to float, you can place a small clean weight, like a fermentation weight or a small food-safe glass disc, on top to keep them under the liquid.
Adjust the heat to your taste. If you love serious spice, add an extra jalapeño or a spoonful more cayenne. If you’re feeding a heat-sensitive crowd, cut the cayenne and red pepper flakes in half and remove the jalapeño seeds before slicing.
Slice before serving for maximum flavor impact. While these eggs are delicious whole, slicing them in half right before serving exposes more surface area and lets people appreciate the vivid color the brine creates around the edges of the egg white.
Reuse the brine wisely. Once you’ve eaten all the eggs, don’t toss that flavorful brine. It works wonderfully as a marinade base for chicken thighs, a spicy addition to deviled egg filling, or a zesty splash in a Bloody Mary.
Flavor Variations to Try
One of the best things about this recipe is how easily it adapts. Here are a few popular variations to consider once you’ve mastered the original.
Extra Hot Version: Double the cayenne pepper, add a second sliced jalapeño (seeds included), and use a hotter style of hot sauce, such as one made with habanero or ghost pepper, for a version that truly earns the “Nashville hot” name.
Sweet Heat Version: Increase the brown sugar slightly and add a few thin slices of red bell pepper to the jar for a touch of natural sweetness that plays beautifully against the heat.
Smoky Chipotle Twist: Swap the hot sauce for a chipotle-based hot sauce and add a small spoonful of adobo sauce to the brine for a deep, smoky, slightly earthy variation.
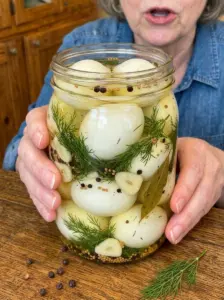
Herb-Infused Version: Add a few sprigs of fresh dill or thyme to the jar along with the garlic and jalapeño for an herbal note that rounds out the spice.
How to Serve Nashville Hot Pickled Eggs
These eggs are just as versatile as they are flavorful. Here are some of the best ways to enjoy them.
- As a standalone snack: Straight out of the jar, these eggs are satisfying, protein-rich, and endlessly craveable.
- On a charcuterie or snack board: Sliced in half and arranged alongside cheese, crackers, and cured meats, they add a bold pop of color and flavor.
- Chopped into salads: Diced and tossed into a green salad or grain bowl, they bring instant heat and tang.
- As a topping: Sliced thin and layered onto burgers, sandwiches, or avocado toast for a spicy kick.
- Turned into deviled eggs: Use the pickled eggs as the base for a next-level spicy deviled egg appetizer, mixing the yolks with mayonnaise, a touch of mustard, and a dash of the leftover brine.
- Paired with cold beer: These eggs make an excellent bar snack, especially alongside a cold beer or a crisp cocktail that can stand up to the heat.
Storage Information
Proper storage is essential for both food safety and flavor quality. Follow these guidelines closely.
- Refrigerate at all times. Store the jar in the refrigerator, not on the counter or in the pantry. Never store pickled eggs at room temperature, as this can allow harmful bacteria to grow.
- Keep eggs fully submerged. The brine acts as a preservative, so any egg poking above the liquid line is more vulnerable to spoilage.
- Use within two weeks. For the best quality, flavor, and food safety, plan to enjoy your Nashville Hot Pickled Eggs within 2 weeks of making them.
- Always use clean utensils. When removing eggs from the jar, use a clean fork or spoon rather than your fingers to help prevent contamination and extend freshness.
- Watch for signs of spoilage. If you notice an off smell, sliminess, unusual discoloration, or a bulging lid, discard the eggs immediately.
Recipe Overview
- Prep Time: 15 minutes
- Cook Time: 5 minutes
- Total Time: 20 minutes (plus 3–7 days pickling time)
- Servings: 12 eggs
- Calories: Approximately 80 calories per egg
Frequently Asked Questions
How long do Nashville Hot Pickled Eggs need to sit before eating them? At minimum, let the eggs pickle for 3 days so the brine has time to penetrate the egg white. For the deepest, boldest Nashville hot flavor, wait 5 to 7 days before serving.
Can I make these less spicy? Absolutely. Reduce or omit the cayenne pepper and crushed red pepper flakes, remove the jalapeño seeds, and use a milder hot sauce. The garlic, smoked paprika, and vinegar will still deliver plenty of flavor without the intense heat.
Do I need to boil the brine? No. You only need to heat the brine gently, just until the salt and brown sugar dissolve. Boiling isn’t necessary and can slightly dull the fresh, bright flavor of the hot sauce.
Why is it important to let the jar cool before sealing? Sealing a jar while the brine is still hot can trap steam and pressure inside, which isn’t ideal for food safety or jar integrity. Letting the jar cool to room temperature first is a simple precaution that also helps preserve flavor.
Can I reuse the jar and brine for a second batch of eggs? It’s best to make a fresh batch of brine for each new batch of eggs. Reusing brine can dilute its acidity and flavor over time, which affects both taste and safety.
How long do these eggs last in the fridge? When stored properly, fully submerged in brine and refrigerated at all times, Nashville Hot Pickled Eggs will keep for up to 2 weeks.
Can I freeze pickled eggs? Freezing is not recommended. The texture of hard-boiled egg whites becomes rubbery and unpleasant once frozen and thawed, so refrigeration is the only recommended storage method.
What’s the best way to peel the eggs cleanly? Using eggs that are at least a few days old (rather than very fresh) makes a big difference. After boiling, plunge the eggs into an ice bath immediately, then peel them under cool running water to help the shells release more easily.
Final Thoughts
Nashville Hot Pickled Eggs are proof that a few simple pantry staples — vinegar, spices, garlic, and a good hot sauce — can transform an ordinary hard-boiled egg into something truly extraordinary. The combination of tangy brine, smoky heat, and slow-building spice makes these eggs completely addictive, and the fact that they only get better with time means they’re the perfect make-ahead snack for parties, road trips, meal prep, or simply keeping in the fridge for whenever a craving hits.
Once you make your first batch, don’t be surprised if it becomes a regular fixture in your kitchen. Grab your ingredients, get that brine simmering, and get ready to discover your new favorite spicy snack.
Print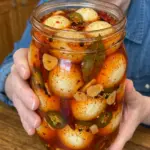
Nashville Hot Pickled Eggs
- Total Time: 20 minutes (plus 3–7 days pickling time)
Ingredients
Here’s everything required to make a full batch of 12 Nashville Hot Pickled Eggs.
For the eggs:
- 12 hard-boiled eggs, peeled
For the brine:
-
- 1 cup white vinegar
- 1 cup water
- 2 tablespoons hot sauce
- 1 tablespoon pickling salt
- 1 tablespoon brown sugar
Aromatics and spices:
-
- 5 garlic cloves, sliced
- 1 jalapeño, sliced
- 1 teaspoon cayenne pepper
-
- 1 teaspoon smoked paprika
- 1 teaspoon crushed red pepper flakes
- 1 teaspoon black peppercorns
- 1 teaspoon mustard seeds
- 1 bay leaf
Instructions
Making Nashville Hot Pickled Eggs is simple, but a few small details make a big difference in the final result. Follow these steps closely for the best outcome.
Step 1: Prep Your Eggs and Jar
Start with 12 hard-boiled eggs that have been fully cooled and peeled. Using a clean, sterilized glass jar (a wide-mouth quart jar works perfectly), place the peeled eggs inside. Try to nestle them in as snugly as possible without crushing them, since this helps ensure they stay fully submerged later.
Step 2: Add the Aromatics
Tuck the sliced garlic cloves and jalapeño slices in and around the eggs. Distributing them throughout the jar, rather than dumping them all in one spot, helps the flavor infuse more evenly.
Step 3: Build the Brine
In a medium saucepan, combine the white vinegar, water, hot sauce, pickling salt, brown sugar, cayenne pepper, smoked paprika, crushed red pepper flakes, black peppercorns, mustard seeds, and bay leaf. Whisk everything together so the salt and sugar begin to break down.
Step 4: Heat Gently
Place the saucepan over medium heat and warm the mixture just until the salt and brown sugar have fully dissolved. This usually only takes a few minutes. It’s important not to let the brine come to a full boil — you simply want enough heat to dissolve the solids and lightly bloom the spices, releasing their aromatic oils without cooking off the hot sauce’s bright flavor.
Step 5: Pour Over the Eggs
Carefully pour the hot brine over the eggs in the jar, making sure the liquid completely covers them. If needed, gently press the eggs down or add a small amount of extra water to ensure everything is fully submerged. Any egg left exposed to air won’t pickle evenly and could spoil faster.
Step 6: Cool to Room Temperature
Let the jar sit on the counter, uncovered or loosely covered, until it reaches room temperature. Pouring a hot lid onto a hot jar and sealing it immediately can create pressure buildup, so allowing it to cool first is a simple but important safety step.
Step 7: Seal and Refrigerate
Once cooled, seal the jar tightly with its lid and transfer it to the refrigerator.
Step 8: Be Patient
This is the hardest part. Let the eggs pickle for at least 3 days before tasting. For the boldest, most fully developed Nashville hot flavor, wait 5 to 7 days. The extra time allows the brine to penetrate deep into the egg, including the yolk, which is where a lot of the magic happens.
- Prep Time: 15 minutes
- Cook Time: 5 minutes
Nutrition
- Serving Size: 12 eggs
- Calories: Approximately 80 calories per egg