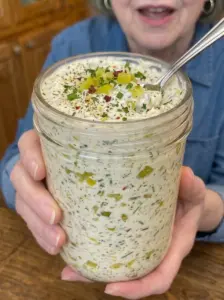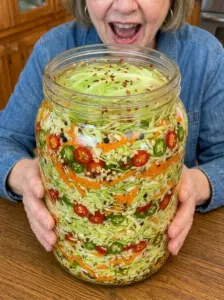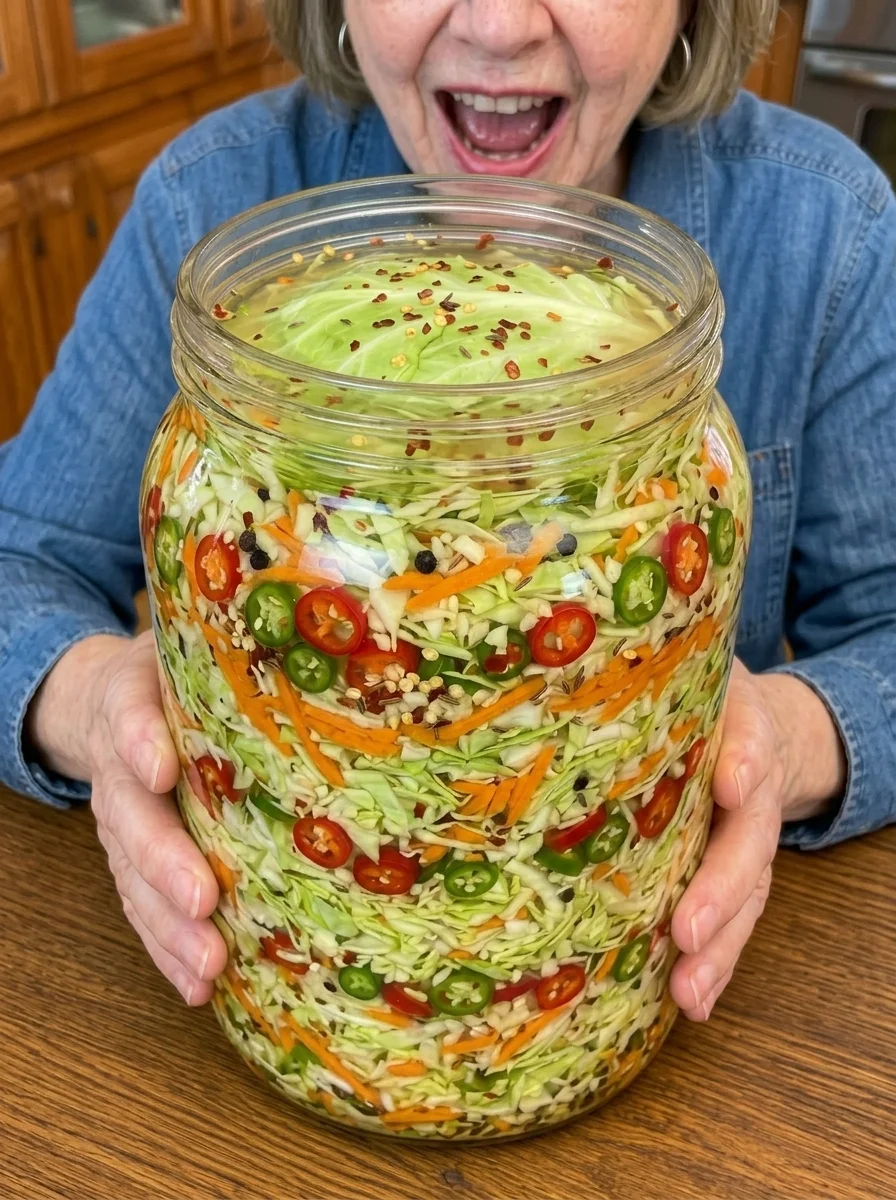
Crunchy, tangy, garlicky, and loaded with chile heat, this Hot Pepper Fermented Cabbage Slaw is an easy naturally fermented cabbage recipe with bold flavor in every bite.
Fresh green cabbage is massaged with salt until it releases its own natural brine, then combined with carrots, hot peppers, garlic, red pepper flakes, and optional caraway and ginger. Over several days at room temperature, the vegetables gradually transform into a pleasantly sour, spicy fermented slaw.
Once it reaches the tanginess you like, move it to the refrigerator and enjoy it alongside grilled meats, burgers, sausages, tacos, sandwiches, grain bowls, or salads.
Why You’ll Love This Fermented Cabbage Slaw
Naturally fermented. No vinegar is needed to create the characteristic sour flavor.
Crunchy and fresh. Proper fermentation keeps the cabbage pleasantly crisp.
Bold and spicy. Fresh hot peppers and red pepper flakes provide two layers of heat.
Garlicky. Fresh garlic gives the slaw a savory punch.
Simple ingredients. The base is mostly cabbage, vegetables, salt, and spices.
Adjustable fermentation. Stop earlier for a fresher, milder tang or ferment longer for stronger acidity.
Versatile. Serve it as a condiment, side dish, taco topping, sandwich addition, or bowl garnish.
Easy to customize. Adjust the peppers, ginger, caraway, and other seasonings to your taste.
What Is Hot Pepper Fermented Cabbage Slaw?
This recipe is essentially a spicy naturally fermented cabbage slaw.
Unlike vinegar-based coleslaw or quick-pickled cabbage, the sourness develops through lactic acid fermentation.
Salt draws moisture from the shredded cabbage.
Massaging the salted cabbage helps release enough liquid to form a natural brine.
The vegetables are then packed tightly into a fermentation jar and kept submerged beneath that brine.
Over time, naturally occurring lactic-acid bacteria ferment sugars in the vegetables and create the characteristic tart flavor.
The finished slaw lands somewhere between spicy sauerkraut and a simple chile-forward fermented cabbage.
Ingredients
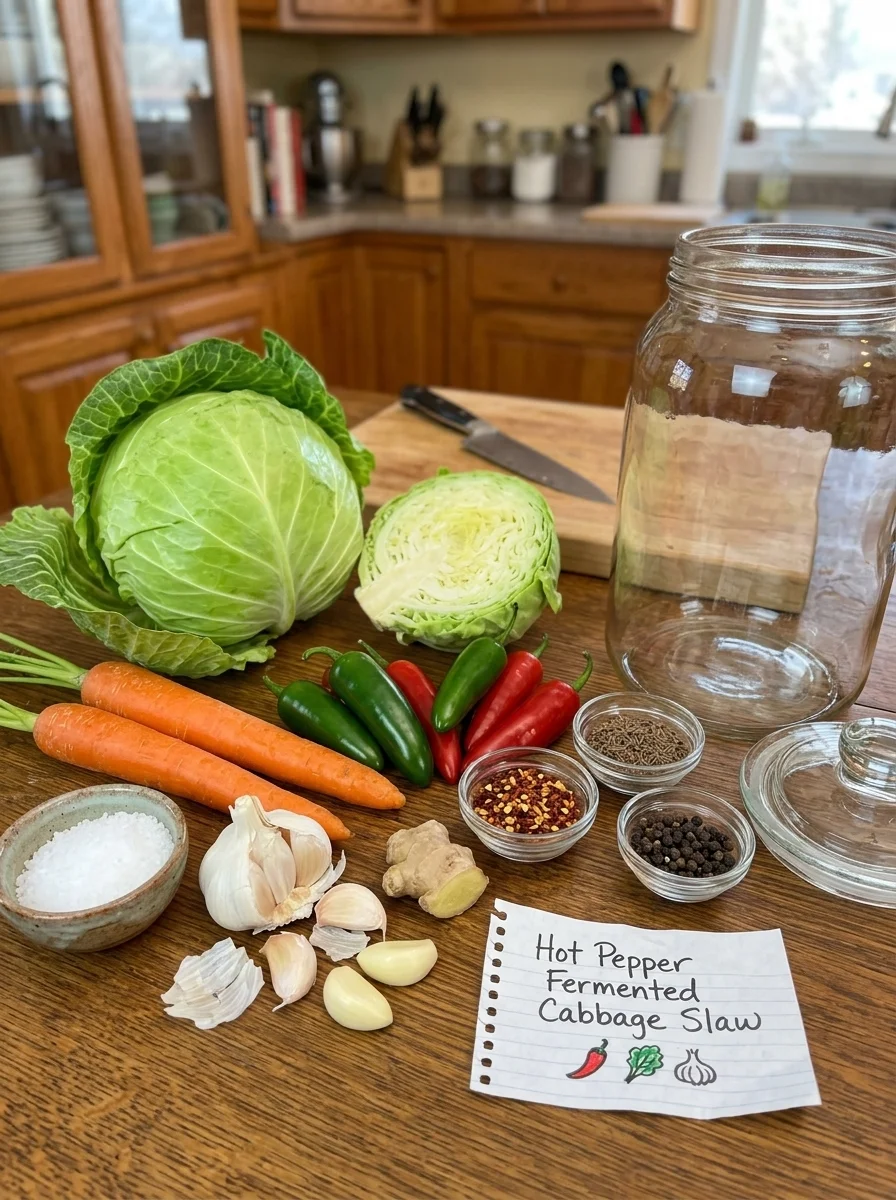
- 1 medium green cabbage, about 2 1/2 lbs, finely shredded
- 1 medium carrot, grated
- 2–3 fresh hot peppers, thinly sliced
- 4 garlic cloves, finely minced
- 1 1/2 tbsp kosher salt
- 1 tsp crushed red pepper flakes
- 1 tsp caraway seeds, optional
- 1/2 tsp black pepper
- 1 tbsp grated fresh ginger, optional
Ingredient Notes
Green Cabbage 🥬
Green cabbage forms the foundation of the recipe.
Choose a firm, fresh head with tightly packed leaves.
You’ll want approximately 2 1/2 pounds before trimming.
Remove damaged or dirty outer leaves before shredding.
Save one clean cabbage leaf because you’ll use it later as a barrier over the shredded vegetables.
Carrot 🥕
Carrot adds natural sweetness, crunch, and color.
Grating it allows it to distribute evenly throughout the cabbage.
Fresh Hot Peppers 🌶️
Use 2–3 fresh peppers depending on their size and how spicy you want the slaw.
Jalapeños are a convenient choice for moderate heat.
Serranos will generally create a hotter slaw.
You can also use a mixture.
Pepper heat naturally varies, so adjust according to your particular peppers and tolerance.
Garlic 🧄
Four cloves give the slaw noticeable garlic flavor.
Finely mincing the garlic helps distribute it throughout the cabbage.
Kosher Salt
Salt is particularly important in fermented vegetables.
It draws moisture from the cabbage, helps create the brine, and influences the fermentation environment.
Because crystal size varies among salt brands, weighing salt is more precise than measuring by tablespoons when fermenting.
For future batches, a salt amount around 2% of the prepared vegetable weight by weight is a useful fermentation target.
Crushed Red Pepper Flakes
Red pepper flakes add another layer of chile heat in addition to the fresh peppers.
Reduce or omit them for a milder batch.
Caraway Seeds
Caraway gives the slaw a traditional sauerkraut-like aromatic note.
It’s optional.
Black Pepper
Black pepper contributes gentle warmth and savory depth.
Fresh Ginger
Ginger isn’t necessary for fermentation, but it works particularly well with garlic and chile.
It adds a fresh, aromatic warmth.
Equipment You’ll Need
You’ll need:
- Large mixing bowl
- Clean cutting board
- Sharp knife or cabbage slicer
- Box grater
- Clean glass fermentation jar
- Clean spoon or fermentation tamper
- Fermentation weight, if available
- Fermentation lid or suitable lid system
- Plate or tray for catching overflow
A fermentation weight is particularly useful because keeping the vegetables submerged is one of the most important parts of vegetable fermentation.
How to Make Hot Pepper Fermented Cabbage Slaw
Step 1: Prepare the Cabbage
Remove any damaged outer leaves.
Reserve one clean cabbage leaf.
Cut the remaining cabbage into quarters.
Remove the hard core.
Finely shred the cabbage.
Try to keep the pieces relatively uniform so they ferment at a similar rate.
Step 2: Salt the Cabbage
Place the shredded cabbage in a large clean mixing bowl.
Sprinkle 1 1/2 tablespoons kosher salt evenly over the cabbage.
Toss briefly to distribute the salt.
Step 3: Massage the Cabbage
Using thoroughly clean hands, massage and squeeze the cabbage for approximately 5–8 minutes.
At first, the cabbage will feel dry and bulky.
As you continue working it, the salt draws moisture from the leaves.
The cabbage will gradually:
- Soften
- Reduce in volume
- Become glossy
- Release liquid
That liquid becomes the natural fermentation brine.
How Do You Know When You’ve Massaged It Enough?
Grab a handful of cabbage and squeeze firmly.
You should see liquid dripping from it.
You should also have visible liquid collecting in the bottom of the bowl.
Don’t discard that liquid.
It’s your brine.
Step 4: Add the Vegetables and Seasonings
Add:
- 1 grated carrot
- 2–3 thinly sliced hot peppers
- 4 minced garlic cloves
- 1 teaspoon crushed red pepper flakes
- 1/2 teaspoon black pepper
- 1 teaspoon caraway seeds, if using
- 1 tablespoon grated ginger, if using
Toss thoroughly.
The carrot, peppers, garlic, and spices should be distributed evenly throughout the cabbage.
Step 5: Pack the Jar
Transfer a handful of the cabbage mixture into a clean fermentation jar.
Press it down firmly with a clean spoon, tamper, or your clean hand.
Add another handful.
Press again.
Continue until all the cabbage has been packed tightly.
Firm packing helps eliminate large trapped air pockets and encourages the brine to rise above the vegetables.
Step 6: Add All the Natural Brine
Pour any liquid remaining in the mixing bowl into the jar.
Press the cabbage down again.
The liquid should rise above the packed vegetables.
Step 7: Add the Reserved Cabbage Leaf
Trim the reserved cabbage leaf so it fits inside the jar.
Place it over the shredded vegetables.
Push the leaf below the brine.
This helps keep small cabbage pieces from floating to the surface.
Step 8: Add a Fermentation Weight
If you have a fermentation weight, place it over the cabbage leaf.
Press gently until the vegetables remain submerged beneath the brine.
This is preferable to repeatedly pushing floating vegetables down with a utensil.
Keep the Vegetables Under the Brine
This is one of the most important principles in this recipe.
The cabbage and other vegetable pieces should remain submerged beneath the brine during fermentation.
Small pieces floating at the surface are more exposed to oxygen and are more susceptible to undesirable surface growth.
A fermentation weight makes this much easier.
Step 9: Leave Headspace
Leave approximately 1–2 inches of headspace between the contents and the top of the jar.
Fermentation creates carbon dioxide.
The contents may expand and brine may rise, particularly during the most active stage.
Don’t pack the jar completely to the rim.
Step 10: Cover the Jar
Attach a fermentation lid or airlock according to its instructions.
If you’re using a different lid system, make sure fermentation gases can be safely released rather than allowing excessive pressure to accumulate.
Place the jar on a plate or shallow tray.
Active fermentation can push some brine out of the jar.
Step 11: Ferment Away from Direct Sunlight
Keep the jar at a moderate room temperature away from direct sunlight.
Ferment for approximately 5–14 days, depending on temperature and your preferred flavor.
Fermentation is not controlled by the calendar alone.
Warmer conditions generally accelerate fermentation, while cooler conditions slow it.
Step 12: Observe the Fermentation
During the first several days, you may notice signs of active fermentation such as:
- Small bubbles
- Brine movement
- A gently sour aroma
- Increasing acidity
- Some pressure inside the fermentation system
Those can be normal signs that fermentation is progressing.
Continue making sure the vegetables remain below the brine.
Step 13: Start Tasting Around Day 5
Using a clean utensil, taste a small amount.
At this point, the cabbage may still taste relatively fresh with only moderate sourness.
If you like it, you can refrigerate it.
If you want a more pronounced fermented flavor, allow it to continue.
Taste periodically until it reaches the balance of sourness, spice, and crunch you prefer.
Step 14: Refrigerate
Once you’re happy with the flavor, remove the fermentation setup as appropriate, close the jar, and transfer it to the refrigerator.
Cold temperatures dramatically slow fermentation, although they don’t necessarily stop it completely.
The flavor can continue developing gradually during refrigerated storage.
Recipe Information ⏱️
Prep Time: 20 minutes
Fermentation Time: approximately 5–14 days
Total Time: approximately 5–14 days
Servings: approximately 12
Estimated Calories: approximately 22 calories per serving
Calories are an estimate and will vary depending on the exact cabbage size, vegetables, peppers, and serving size.
What Does Fermented Cabbage Slaw Taste Like?
The flavor changes over time.
At the beginning, it tastes mostly like salted fresh cabbage with garlic and peppers.
As fermentation progresses, it becomes:
Tangier + more complex + more distinctly fermented.
The carrot contributes subtle sweetness.
Fresh peppers bring chile flavor.
Red pepper flakes add lingering heat.
Garlic provides savory intensity.
Optional ginger adds aromatic warmth.
Optional caraway pushes the flavor closer to traditional sauerkraut.
The result should taste pleasantly sour and fermented—not rotten or putrid.
How Long Should You Ferment Cabbage?
There isn’t one perfect number of days.
Your ideal fermentation time depends on:
- Room temperature
- Salt concentration
- Vegetable size
- Fermentation activity
- Desired sourness
- Desired crunch
For this recipe, 5–14 days provides a practical tasting window.
Start tasting around day 5 rather than automatically waiting the full 14 days.
When you love the flavor, refrigerate it.
How Temperature Affects Fermentation
Temperature can noticeably affect both speed and flavor.
A warmer environment generally means faster fermentation.
A cooler environment generally means slower fermentation.
Avoid placing the jar:
- In direct sunlight
- Beside a hot stove
- Directly above heating equipment
- In unusually hot areas
A relatively stable, moderate room temperature is preferable.
What If There Isn’t Enough Brine?
First, continue massaging and squeezing the salted cabbage.
Fresh cabbage usually releases a substantial amount of liquid once properly salted and worked.
After packing the cabbage tightly into the jar, wait briefly and press again.
The liquid may continue rising.
If the vegetables still cannot be kept submerged, don’t simply fill the jar with plain water, because that dilutes the salt concentration.
A properly prepared salt brine is preferable if supplemental liquid is genuinely necessary.
Why Weighing Salt Is Better for Fermentation
Tablespoon measurements are convenient for casual recipes, but salt crystals vary dramatically in size.
A tablespoon of one brand of kosher salt can weigh considerably more or less than a tablespoon of another.
For repeatable fermentation, weighing your prepared vegetables and calculating the salt by weight is more precise.
A common starting point for cabbage fermentation is approximately 2% salt by vegetable weight.
For example:
1,000 grams vegetables × 0.02 = 20 grams salt.
This approach makes future batches easier to reproduce.
Fresh Hot Pepper Options 🌶️
Different peppers can completely change the personality of the slaw.
Jalapeño
A good starting point for moderate heat and familiar green chile flavor.
Serrano
Sharper and generally hotter than jalapeño.
Fresno Pepper
Provides a bright red color with fruity chile flavor.
Mixed Peppers
Using two varieties gives the slaw more complex chile flavor.
Always remember that actual heat varies naturally from pepper to pepper.
How to Make It Milder
For less heat:
- Use fewer fresh hot peppers.
- Remove pepper membranes and seeds.
- Reduce or omit the red pepper flakes.
- Choose milder chile varieties.
You’ll still have the garlic and fermented tang without overwhelming heat.
How to Make It Extra Spicy 🔥
For a hotter version:
- Use serrano peppers.
- Leave more membranes in the peppers.
- Increase the red pepper flakes slightly.
- Combine two chile varieties.
Increase the heat gradually.
Fermentation won’t necessarily make an extremely spicy batch mild.
Tips for Successful Fermented Cabbage
Use fresh cabbage. Fresher cabbage generally releases liquid more readily and gives you better crunch.
Keep everything clean. Wash your hands and equipment thoroughly before starting.
Consider weighing the salt. It’s more reliable than volume measurement.
Massage thoroughly. You need the cabbage to release its natural liquid.
Pack firmly. Compressing the vegetables helps bring the brine above them.
Keep vegetables submerged. A fermentation weight is extremely useful.
Leave headspace. Active fermentation can cause brine to rise.
Protect the jar from direct sunlight.
Use an appropriate fermentation lid. It makes gas management easier.
Start tasting early. Your preferred fermentation level may be different from someone else’s.
Refrigerate when you like the flavor.
Use clean utensils when serving. This reduces contamination during storage.
What Is Normal During Fermentation?
Fermented vegetables change noticeably.
Depending on the batch and stage of fermentation, you may observe:
- Bubbles
- Carbon dioxide activity
- Increasing sourness
- Changes in aroma
- Brine becoming somewhat cloudy
- Cabbage becoming softer while remaining pleasantly crunchy
Cloudiness alone is not automatically a sign that the ferment has failed.
The most important things are proper preparation, appropriate salt, keeping the vegetables submerged, and watching for genuine signs of spoilage.
When Should You Discard a Ferment?
Fermented food naturally develops unusual aromas and appearances compared with fresh vegetables, so determining spoilage isn’t simply about whether it smells “different.”
However, fuzzy or hairy mold is a reason to discard the batch rather than tasting it.
Also discard a batch if you observe clear signs of spoilage such as an unmistakably rotten or putrid odor or other seriously concerning changes.
When you’re uncertain whether a ferment is safe, don’t taste it to test it.
Why Does the Brine Become Cloudy?
Cloudy brine can occur during normal lactic fermentation.
The microorganisms involved in fermentation and suspended vegetable material can alter the appearance of the liquid.
A change from crystal-clear liquid to cloudy brine isn’t, by itself, proof of spoilage.
Why Are Bubbles Forming?
Carbon dioxide is produced during fermentation.
That gas can appear as tiny bubbles throughout the cabbage or brine.
You may notice more bubbling during the most active phase and less as fermentation slows.
Why Did Brine Leak Out of the Jar?
Fermentation produces gas and can cause the cabbage and liquid to expand upward.
That’s why the recipe recommends:
- Leaving headspace
- Using an appropriate fermentation lid
- Placing the jar on a plate or tray
If overflow occurs, keep the exterior of the jar and fermentation equipment clean while maintaining the vegetables beneath the brine.
Why Did My Cabbage Rise?
Carbon dioxide bubbles can become trapped between shredded pieces and push the cabbage upward.
A fermentation weight helps hold everything down.
Check that the vegetable matter remains safely below the brine.
What to Serve with Hot Pepper Fermented Cabbage Slaw
Tacos 🌮
Add a small pile to beef, chicken, pork, or bean tacos.
The acidity cuts through rich fillings particularly well.
Burgers 🍔
Use it instead of ordinary coleslaw or pickles.
Sausages 🌭
Spicy fermented cabbage is a natural match for grilled sausages.
Pulled Pork
Its acidity and crunch contrast beautifully with rich shredded pork.
Grilled Chicken 🍗
Serve it alongside grilled chicken as a sharp, crunchy condiment.
Sandwiches 🥪
Layer it into turkey, roast beef, pulled pork, or grilled vegetable sandwiches.
Grain Bowls
Add a small serving to rice or grain bowls for acidity and crunch.
Salads 🥗
Use it as a strongly flavored topping rather than treating it like an ordinary large-volume salad.
Eggs 🍳
A little fermented slaw alongside eggs adds heat and acidity to breakfast.
Easy Variations
Jalapeño Garlic Fermented Slaw
Use jalapeños as your only fresh chile and keep the garlic prominent.
Serrano Cabbage Slaw 🔥
Replace the milder peppers with serranos for additional heat.
Ginger Chile Fermented Cabbage
Use the full tablespoon of fresh ginger and omit the caraway.
This creates a brighter, more aromatic flavor.
Caraway Garlic Slaw
Increase the caraway slightly and use milder peppers.
The result moves closer to spicy sauerkraut.
Red Cabbage Version 💜
Replace some or all of the green cabbage with red cabbage.
Expect the brine and other vegetables to take on a vibrant purple-pink color.
Extra-Carrot Slaw 🥕
Increase the carrot for additional sweetness and color.
Keep in mind that changing the total vegetable weight should also be considered when calculating salt by weight.
Is This the Same as Sauerkraut?
It’s related, but not exactly the same.
Traditional sauerkraut is generally centered on cabbage and salt, sometimes with caraway or other simple seasonings.
This slaw adds:
- Carrot
- Fresh hot peppers
- Garlic
- Red pepper flakes
- Black pepper
- Optional ginger
So it has a more complex, spicy profile.
The underlying fermentation principle, however, is similar.
Is This Kimchi?
No.
It shares some characteristics with kimchi—cabbage, chile, garlic, ginger, and fermentation—but this isn’t intended to reproduce a traditional Korean kimchi recipe.
It’s better described as a spicy fermented cabbage slaw.
Is Vinegar Needed?
No.
This recipe develops acidity through fermentation rather than by adding vinegar.
Adding vinegar would move it toward a quick-pickled cabbage rather than the fermentation method intended here.
Can I Add Vinegar After Fermentation?
If you want a sharper flavor when serving, it’s better to add a tiny splash to an individual portion rather than altering the entire ferment.
A properly fermented batch should already have natural acidity.
Refrigerator Storage 🧊
Once the slaw reaches your preferred flavor, seal the jar appropriately and refrigerate it.
Keep the vegetables covered by brine as much as practical.
Always use a clean utensil when removing portions from the jar.
Cold storage slows fermentation considerably, but the flavor and texture can continue changing gradually.
Properly fermented and carefully handled cabbage can remain usable for an extended period under refrigeration, but quality varies from batch to batch.
Rather than relying only on a calendar date, continue monitoring the ferment for quality and signs of spoilage.
For best texture and flavor, many home batches are enjoyed within several weeks to a few months.
Does Fermentation Stop in the Refrigerator?
Not completely.
Refrigeration slows microbial activity significantly, which is why the flavor develops much more slowly once the jar is cold.
The slaw may gradually become more sour over time.
Can You Freeze Fermented Cabbage Slaw?
Freezing isn’t the preferred storage method.
The cabbage’s texture can become much softer after freezing and thawing.
Refrigeration is better if you want to preserve the characteristic crunch.
Frequently Asked Questions
How long does this cabbage slaw ferment?
Approximately 5–14 days, depending on temperature and desired flavor.
When should I start tasting it?
Around day 5 is a useful starting point.
Does it need vinegar?
No. Its sourness develops naturally during fermentation.
Should the cabbage stay under the brine?
Yes. Keep the vegetable matter submerged as consistently as possible.
Do I need a fermentation weight?
It’s highly recommended because it makes keeping the vegetables submerged much easier.
What if my cabbage doesn’t release enough liquid?
Massage it thoroughly, pack it firmly, and allow it a little time to release additional moisture. If supplemental brine is truly necessary, use appropriately salted brine rather than plain water.
Why is the brine cloudy?
Cloudiness can occur during normal fermentation and isn’t automatically a sign of spoilage.
Are bubbles normal?
Yes. Carbon dioxide production can create visible bubbles during active fermentation.
Why is liquid coming out of the jar?
Active fermentation can push the brine upward. Leave 1–2 inches of headspace and keep the jar on a plate or tray.
Can I make it less spicy?
Yes. Use fewer peppers, remove the membranes and seeds, and reduce the red pepper flakes.
Can I make it hotter?
Yes. Serranos, additional chile flakes, or retaining more pepper membranes will increase the heat.
Can I use red cabbage?
Yes. You can replace some or all of the green cabbage with red cabbage.
Is this sauerkraut?
It’s similar in fermentation method but includes considerably more vegetables and seasonings.
Is it kimchi?
No. This recipe isn’t intended as a traditional kimchi preparation.
How do I know when it’s ready?
Taste it with a clean utensil. When the sourness, spice, and texture are where you want them, refrigerate it.
Does refrigeration stop fermentation?
It slows it dramatically, but fermentation and flavor development can continue gradually.
How long does it keep?
A properly fermented batch kept refrigerated and handled with clean utensils can maintain quality for several weeks and sometimes a few months. Continue monitoring it rather than relying only on time.
What should make me discard it?
Discard it if you see fuzzy or hairy mold, detect an unmistakably rotten or putrid odor, or notice other clear signs of spoilage. If you’re genuinely uncertain about its safety, don’t taste it to find out.
Final Thoughts
This Hot Pepper Fermented Cabbage Slaw transforms a handful of simple vegetables into something intensely flavorful. 🌶️🥬🧄
Cabbage provides the crisp base, carrots add sweetness and color, fresh peppers and red pepper flakes bring heat, garlic gives it savory punch, and optional ginger and caraway let you steer the flavor in different directions.
The most important parts of the process are straightforward: use the right amount of salt, massage the cabbage until it releases liquid, pack it firmly, keep the vegetables submerged beneath the brine, allow fermentation gases to escape safely, and refrigerate the slaw once it tastes right to you.
Start tasting around day 5. Keep fermenting if you want more sourness, or move it to the refrigerator when you’ve reached your ideal balance of crunchy, tangy, garlicky, and spicy.
Serve it with tacos, burgers, sausages, grilled meats, sandwiches, or bowls whenever you want a punch of fermented chile flavor.
Print
Hot Pepper Fermented Cabbage Slaw
- Total Time: approximately 5–14 days
Ingredients
- 1 medium green cabbage, about 2 1/2 lbs, finely shredded
- 1 medium carrot, grated
- 2–3 fresh hot peppers, thinly sliced
- 4 garlic cloves, finely minced
- 1 1/2 tbsp kosher salt
- 1 tsp crushed red pepper flakes
- 1 tsp caraway seeds, optional
- 1/2 tsp black pepper
- 1 tbsp grated fresh ginger, optional
Instructions
Step 1: Prepare the Cabbage
Remove any damaged outer leaves.
Reserve one clean cabbage leaf.
Cut the remaining cabbage into quarters.
Remove the hard core.
Finely shred the cabbage.
Try to keep the pieces relatively uniform so they ferment at a similar rate.
Step 2: Salt the Cabbage
Place the shredded cabbage in a large clean mixing bowl.
Sprinkle 1 1/2 tablespoons kosher salt evenly over the cabbage.
Toss briefly to distribute the salt.
Step 3: Massage the Cabbage
Using thoroughly clean hands, massage and squeeze the cabbage for approximately 5–8 minutes.
At first, the cabbage will feel dry and bulky.
As you continue working it, the salt draws moisture from the leaves.
The cabbage will gradually:
- Soften
- Reduce in volume
- Become glossy
- Release liquid
That liquid becomes the natural fermentation brine.
How Do You Know When You’ve Massaged It Enough?
Grab a handful of cabbage and squeeze firmly.
You should see liquid dripping from it.
You should also have visible liquid collecting in the bottom of the bowl.
Don’t discard that liquid.
It’s your brine.
Step 4: Add the Vegetables and Seasonings
Add:
- 1 grated carrot
- 2–3 thinly sliced hot peppers
- 4 minced garlic cloves
- 1 teaspoon crushed red pepper flakes
- 1/2 teaspoon black pepper
- 1 teaspoon caraway seeds, if using
- 1 tablespoon grated ginger, if using
Toss thoroughly.
The carrot, peppers, garlic, and spices should be distributed evenly throughout the cabbage.
Step 5: Pack the Jar
Transfer a handful of the cabbage mixture into a clean fermentation jar.
Press it down firmly with a clean spoon, tamper, or your clean hand.
Add another handful.
Press again.
Continue until all the cabbage has been packed tightly.
Firm packing helps eliminate large trapped air pockets and encourages the brine to rise above the vegetables.
Step 6: Add All the Natural Brine
Pour any liquid remaining in the mixing bowl into the jar.
Press the cabbage down again.
The liquid should rise above the packed vegetables.
Step 7: Add the Reserved Cabbage Leaf
Trim the reserved cabbage leaf so it fits inside the jar.
Place it over the shredded vegetables.
Push the leaf below the brine.
This helps keep small cabbage pieces from floating to the surface.
Step 8: Add a Fermentation Weight
If you have a fermentation weight, place it over the cabbage leaf.
Press gently until the vegetables remain submerged beneath the brine.
This is preferable to repeatedly pushing floating vegetables down with a utensil.
Keep the Vegetables Under the Brine
This is one of the most important principles in this recipe.
The cabbage and other vegetable pieces should remain submerged beneath the brine during fermentation.
Small pieces floating at the surface are more exposed to oxygen and are more susceptible to undesirable surface growth.
A fermentation weight makes this much easier.
Step 9: Leave Headspace
Leave approximately 1–2 inches of headspace between the contents and the top of the jar.
Fermentation creates carbon dioxide.
The contents may expand and brine may rise, particularly during the most active stage.
Don’t pack the jar completely to the rim.
Step 10: Cover the Jar
Attach a fermentation lid or airlock according to its instructions.
If you’re using a different lid system, make sure fermentation gases can be safely released rather than allowing excessive pressure to accumulate.
Place the jar on a plate or shallow tray.
Active fermentation can push some brine out of the jar.
Step 11: Ferment Away from Direct Sunlight
Keep the jar at a moderate room temperature away from direct sunlight.
Ferment for approximately 5–14 days, depending on temperature and your preferred flavor.
Fermentation is not controlled by the calendar alone.
Warmer conditions generally accelerate fermentation, while cooler conditions slow it.
Step 12: Observe the Fermentation
During the first several days, you may notice signs of active fermentation such as:
- Small bubbles
- Brine movement
- A gently sour aroma
- Increasing acidity
- Some pressure inside the fermentation system
Those can be normal signs that fermentation is progressing.
Continue making sure the vegetables remain below the brine.
Step 13: Start Tasting Around Day 5
Using a clean utensil, taste a small amount.
At this point, the cabbage may still taste relatively fresh with only moderate sourness.
If you like it, you can refrigerate it.
If you want a more pronounced fermented flavor, allow it to continue.
Taste periodically until it reaches the balance of sourness, spice, and crunch you prefer.
Step 14: Refrigerate
Once you’re happy with the flavor, remove the fermentation setup as appropriate, close the jar, and transfer it to the refrigerator.
Cold temperatures dramatically slow fermentation, although they don’t necessarily stop it completely.
The flavor can continue developing gradually during refrigerated storage.
- Prep Time: 20 minutes
- Cook Time: approximately 5–14 days
Nutrition
- Serving Size: approximately 12
- Calories: approximately 22 calories per serving