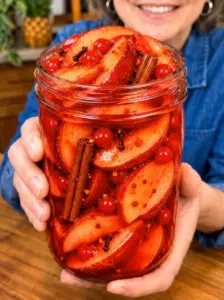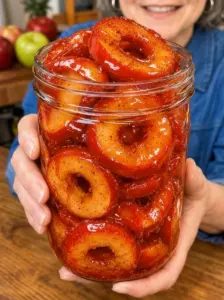
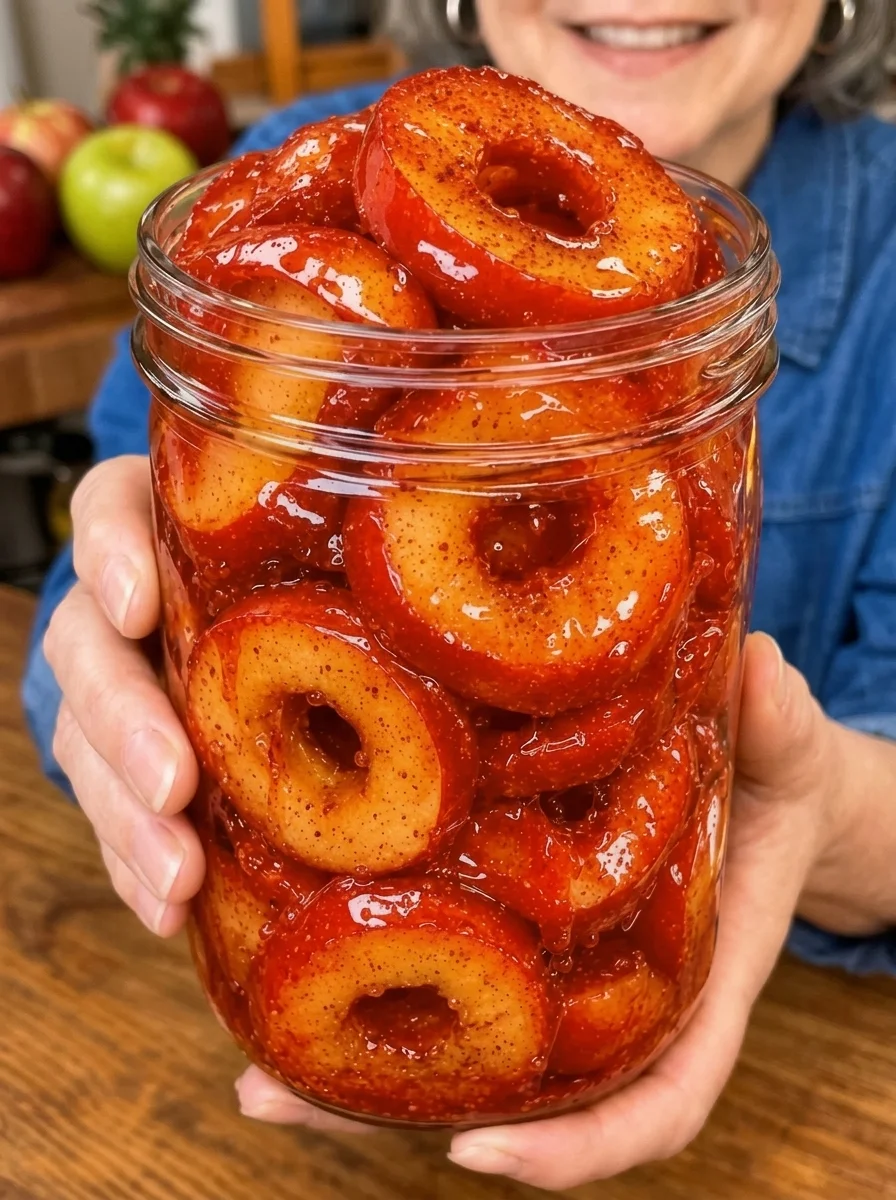
Firecracker Cinnamon Candy Apple Rings pair tart fresh apple with a red cinnamon candy shell. A thin coating gives the first bite a brittle snap before the crisp fruit underneath, while optional cayenne adds a little lingering heat. They are colorful enough for a party platter and especially appealing when served soon after the coating sets.
This is a hard-candy dipping recipe. The apples are not simmered or soaked in cinnamon syrup, despite the syrup-soaked description in the supplied introduction. They are briefly held in lemon water to limit browning, dried thoroughly, and dipped in cooked candy syrup.
That distinction matters. Hard candy needs concentrated syrup and a dry surface. Freshly cut apples continuously release moisture, so their coating is temporary: it can soften, slip, or become sticky during storage. These are a same-day treat with refrigerated leftovers, rather than a stable candy to package weeks ahead.
This article expands the supplied recipe with handling and texture guidance. It has not been independently kitchen-tested. Thin apple rings are more challenging to coat than intact apples, and the amount of coating that adheres will vary. Make a small trial before preparing them for an important event.
What to Expect
Expect crisp apple slices with a thin red shell, a cinnamon aroma, and optional chile heat. The candy coating may not be perfectly smooth because the cut fruit releases juice and the ground cinnamon remains suspended in the syrup.
The shell is intended to be brittle once cool. Serving sooner does not turn hard-crack candy into a soft glaze; it simply reduces the time during which apple moisture can affect the coating. If you want tender syrup-poached cinnamon rings, use a separate recipe designed for that texture.
A thin coating is easier to eat than a thick candy layer. Let excess syrup drip away and avoid repeatedly dipping the same ring to build up a heavy shell.
The apple itself remains fresh-cut rather than cooked through. A quick dip in hot syrup is not a preservation process and should not be treated as one.
Ingredients
Apple Rings
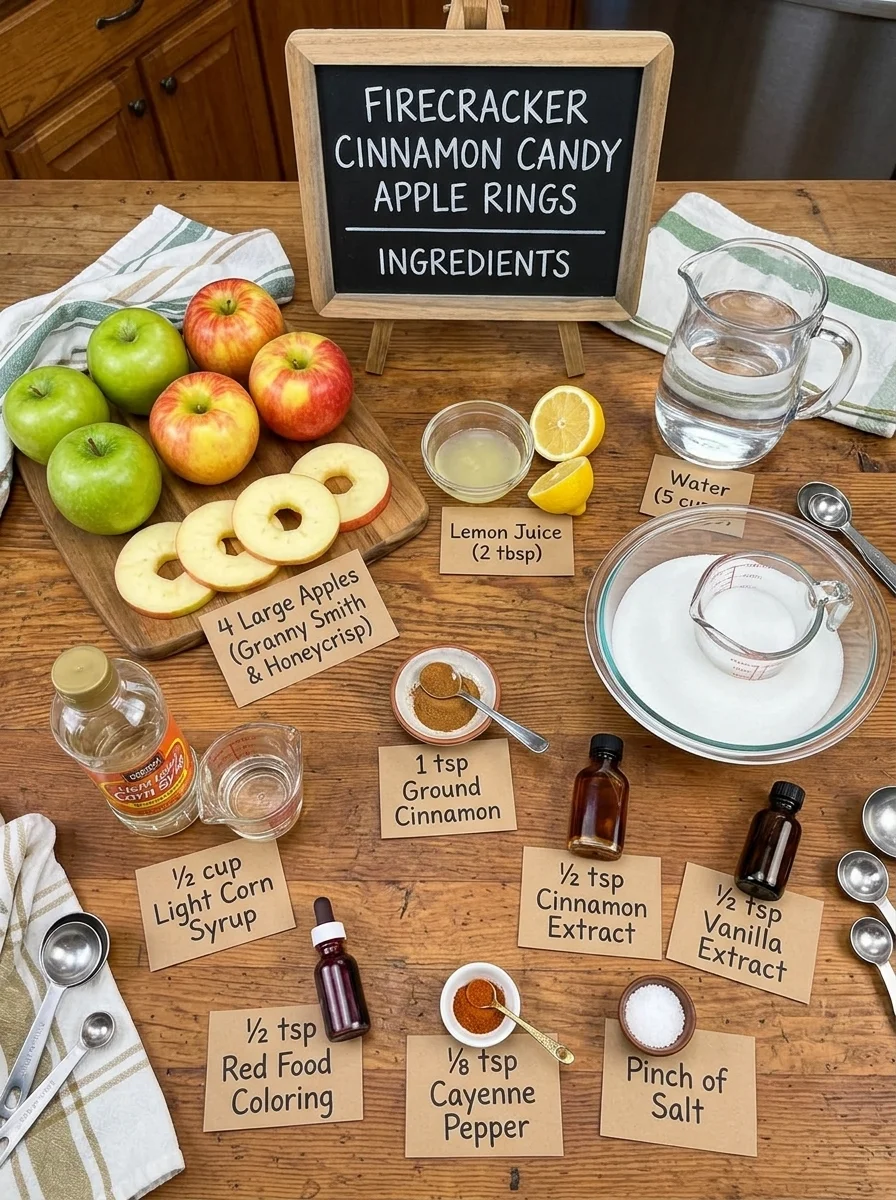
- 4 large firm apples, such as Granny Smith or Honeycrisp
- 4 cups cold water
- 2 tablespoons lemon juice
Cinnamon Candy Coating
- 2 cups granulated sugar
- 1 cup water
- 1/2 cup light corn syrup
- 1 teaspoon ground cinnamon
- 1/2 teaspoon food-grade cinnamon extract suitable for candy making
- 1/2 teaspoon vanilla extract
- Up to 1/2 teaspoon red food coloring, adjusted for product strength
- 1/8 teaspoon cayenne pepper, optional
- A small pinch of salt
For the Tray
- A little neutral oil or cooking spray if lightly greasing parchment
Servings: Approximately eight portions, with the number of rings depending on apple size and how many intact slices remain after coring.
Not all the cooked syrup will necessarily adhere to the apples. The recipe needs enough depth for dipping, so leftover coating is normal. This makes a precise nutrition estimate difficult without measuring the amount actually used.
Ingredient Notes
Firm apples are easier to handle
Choose apples without bruises or soft spots. Granny Smith offers a tart contrast to the sweet shell, while Honeycrisp brings a sweeter flavor and firm texture.
Wash under running water before coring and slicing. Dry the exterior as well as the cut surfaces. There is no need to use soap or household cleaning products on the fruit.
Keep the peel on if you like its color and structure. Thin rings without peel may be more delicate, especially around the central hole.
Lemon water is a brief anti-browning step
The lemon-water bath helps limit browning during preparation. It is not a cinnamon marinade, a sterilizing solution, or a way to make cut fruit shelf-stable.
The rings must be drained and carefully blotted before they touch the candy. Water droplets can cause hot syrup to bubble and splatter, and excess surface moisture interferes with adhesion.
For a small trial batch, you can slice and dry a manageable number of rings shortly before dipping rather than keeping a large quantity soaking for a long time.
Sugar and corn syrup form the shell
Granulated sugar provides the main candy structure. Light corn syrup helps limit unwanted crystallization and keeps the syrup workable, but it does not eliminate the need for careful cooking.
The cup of water dissolves the sugar and then largely boils away as the syrup concentrates. Do not judge readiness by the original volume or the number of minutes on the stove.
Honey, maple syrup, and sugar substitutes are not automatic replacements. They change flavor, moisture, browning, and setting behavior.
Use food-grade cinnamon flavoring
Choose an extract intended for food and follow its label, particularly any candy-making instructions. Cinnamon oil and concentrated candy flavorings are not necessarily equivalent to cinnamon extract by volume.
Do not substitute household essential oil or assume that a strongly concentrated product uses the same half teaspoon. The strength can differ considerably.
Vanilla adds a small background note. Extracts can cause bubbling when added to very hot syrup, especially if alcohol-based, so measure them before cooking and add carefully off the heat according to their product guidance.
Food coloring strength varies
Liquid coloring, gel coloring, and candy-specific coloring differ in concentration. Start with an amount appropriate to the product instead of automatically using half a teaspoon of a strong gel.
A red shell can mask some visual signs of sugar browning. Use a thermometer rather than relying on color to decide when to stop cooking.
Equipment and Setup
Use a sturdy, deep saucepan with ample room above the syrup, a candy thermometer, dry heatproof dipping tools, a silicone spatula suitable for hot sugar, and a silicone baking mat or lightly greased parchment on a rimmed tray.
The thermometer must be rated for candy temperatures. Position its tip in the syrup without touching the bottom of the pan, following the manufacturer’s directions.
Arrange the drying area, dipping station, and cooling tray before heating the sugar. Hot candy does not wait while you search for a tool or clear a space.
Keep children and pets away from the cooking area. Use dry oven mitts when handling the pan. Hot syrup clings to skin and can cause serious burns; never touch or taste it until completely cool.
How to Make the Candy Apple Rings
1. Prepare the cooling tray
Set a silicone baking mat on a sturdy rimmed baking sheet, or line the tray with parchment and grease it very lightly. Place it on a heat-safe surface near the dipping station.
Leave enough room for the rings to cool in a single layer without touching. Do not use wax paper, which is unsuitable for this hot candy coating.
2. Core and slice the apples
Wash and dry the apples. Remove the cores with an apple corer, then slice crosswise into rings approximately 1/4 inch thick.
Keep the thickness consistent. Very thin rings can break under the weight of hot syrup; thick rings are harder to coat and eat neatly.
Place the rings in the lemon water briefly while completing the slicing. Remove any broken pieces for another use rather than trying to dip fragile fragments.
3. Drain and dry thoroughly
Drain the rings and lay them between clean towels or sturdy paper towels. Blot both sides, the peel, and the inside of the core opening.
Move them to a dry surface and check again for visible moisture. Do this before the syrup reaches its final temperature, so you are not rushing with a pan of hot candy waiting.
Drying improves handling but does not stop the fruit from releasing juice later. Plan to coat and serve promptly rather than expecting long-term crispness.
4. Dissolve the sugar
Combine the sugar, one cup water, corn syrup, ground cinnamon, salt, and optional cayenne in the saucepan.
Heat over medium heat, stirring gently until the sugar dissolves. Avoid splashing syrup high onto the sides of the pan, where crystals can remain.
Once the syrup is boiling steadily, stop stirring. Keep the thermometer positioned correctly and watch the temperature rise.
5. Cook to hard crack
Cook until the thermometer reaches approximately 300°F at sea level. Hard-crack candy is generally associated with about 300–310°F, as described in the Exploratorium’s candy science guidance.
Do not deliberately push toward the upper end simply to make a harder shell. Carryover heat can continue cooking the syrup after the pan leaves the burner.
At higher elevations, candy endpoints need an altitude-appropriate adjustment. Use reliable local candy-making guidance and a checked thermometer rather than applying the sea-level number without adjustment.
Cooking time varies with pan width, burner output, and batch size. The supplied twenty-minute estimate is a planning guide, not the endpoint.
6. Add flavoring carefully
Remove the saucepan from the heat and let vigorous bubbling subside briefly. Add the premeasured cinnamon extract, vanilla, and coloring carefully, following any specific directions for your chosen flavoring.
Stand back from the pan opening because extracts can bubble or release a strong burst of aroma. Stir gently with a dry, heatproof utensil just enough to distribute the additions.
This differs from boiling the extracts through the entire cooking period. Prolonged heating can reduce aroma, and product instructions should guide when concentrated candy flavoring is added.
7. Dip a test ring
Use a dry heatproof dipping tool or a secure long-handled fork to support one ring. Make sure it will not slip into the syrup before lowering it.
Dip briefly, lift carefully, and allow excess syrup to drip back into the pan. Place on the prepared mat without touching the coating.
Let that ring set while you assess the process. If the coating immediately slides off or the apple breaks, pause rather than rushing through the remaining fruit. Surface moisture, syrup temperature, or tool support may need attention.
8. Coat the remaining rings
Work steadily, coating one ring at a time and spacing them on the tray. Do not dip with your fingers or use a short utensil that brings your hand close to the syrup.
Avoid bringing the lemon-water bowl into the dipping area. Dry tools and dry surfaces reduce the chance of water entering the hot candy.
If the syrup becomes too thick to coat smoothly, warm it gently over low heat just until workable. Do not add water to a pan of very hot concentrated syrup. Stop if it smells burnt or has become excessively dark; reheating cannot reverse scorching.
9. Cool completely
Allow the rings to stand in a single layer until the coating is hard and fully cool. About thirty minutes is a useful planning estimate, but room conditions and coating thickness affect the time.
Do not touch the shell to test it while it may still be hot. A glossy surface does not indicate a safe temperature.
Once completely cool, release gently from the mat. If the rings are very brittle, support the apple rather than pulling upward on one edge of the candy.
10. Serve or refrigerate promptly
Serve soon after cooling for the best chance of a crisp shell. Keep the rings separate rather than piling them into a bowl.
Refrigerate leftovers promptly. Do not leave cut fruit out all day in an attempt to preserve the candy texture. Food safety takes priority over maintaining the brittle coating.
Why the Coating Can Become Sticky
Hard candy readily responds to moisture. In this recipe, moisture comes both from the air and from the cut apples themselves.
A juicy slice has a much larger exposed surface than a whole apple with intact skin. Even careful towel-drying cannot remove the water inside the fruit. Over time, that water can soften the candy or create a damp layer between shell and apple.
Refrigeration is necessary for leftovers but can bring condensation, especially when cold rings are moved into a warm room. That is why same-day serving is the most realistic texture goal.
A thicker shell is not a dependable fix. It can make the candy difficult to bite while still failing to stop moisture at the apple surface.
Tips for a More Manageable Batch
Make the first trial small enough that you can dip without rushing. A large number of thin rings creates more handling work than a few whole candy apples.
Choose intact slices with sturdy edges. Save broken rings for a snack or another dessert.
Keep the coating thin. Let excess syrup drip away rather than depositing a thick puddle under each ring.
Work on a dry day when possible, recognizing that humidity is outside your control. Do not promise a perfectly glassy result under every condition.
Avoid making a new batch while the pan and utensils still contain hardened sugar crystals. Let equipment cool safely, then clean thoroughly before starting again.
Serving Ideas
Arrange the rings in a single layer on a platter shortly before serving. Their red color is decorative enough without a heavy garnish.
They can accompany a dessert board, but place them where moisture will not soak cookies or crackers. Keep dairy dips and other perishable accompaniments chilled separately.
For easier portions, offer small intact rings rather than very large slices with a thick coating. Hard candy requires careful eating and may not suit young children or people who have difficulty biting brittle foods.
The optional cayenne adds heat without changing the overall presentation. Label a spicy batch clearly so guests do not mistake it for a mild cinnamon treat.
Storage
The best texture is on the day of preparation. Once cool, refrigerate any leftovers in a single layer in a covered container at 40°F or below. Use within one to two days for best quality, understanding that the candy may soften much sooner.
Keep rings from touching if possible. Stacking can make sticky shells adhere and pull apart when separated.
Cut fruit should be refrigerated within two hours, or within one hour when exposed to temperatures above 90°F. This timing includes preparation and serving exposure, not just the time after plating. See CDC food-safety guidance.
The sugar shell is not a preservative process for the apple slices. Do not store the finished rings as shelf-stable candy or assume a hard shell makes the centers safe for extended room-temperature storage.
Freezing is not recommended. Thawing can soften the apple and introduce more moisture into the coating.
Make-Ahead Planning
Measure the syrup ingredients and prepare the dry equipment ahead. The fruit and coating are best handled close to serving time.
You can wash and dry the whole apples earlier, but slicing well in advance creates more time for juice release and browning. If you do cut ahead, refrigerate promptly and dry thoroughly before dipping.
Do not plan a large event around a full batch without testing the exact apples, coloring, flavoring, and equipment first. The supplied formula does not establish how long a shell will remain crisp on your particular apple slices.
Troubleshooting
The coating does not harden
The syrup may not have reached the correct candy endpoint, the thermometer may have been incorrectly positioned, or moisture may be affecting the shell. Check equipment and temperature rather than adding more coloring or cinnamon.
The syrup is grainy
Undissolved sugar or crystals introduced during cooking can encourage crystallization. Dissolve the sugar before boiling and avoid stirring once it boils steadily. Do not scrape crusty sugar from the pan sides into the finished coating.
The shell slips off
The apple may be wet, or juice may be accumulating beneath the candy. Blot carefully and coat shortly before serving. Fresh-cut fruit remains a challenging surface even when prepared carefully.
The syrup smells burnt
Stop using it. Strong coloring can conceal darkening, so temperature control is important. A scorched batch cannot be repaired by adding extract.
The rings stick together
They may have been touching before setting or may have softened during storage. Keep in one layer with space between pieces. Pulling stuck rings apart can break both the fruit and shell.
Frequently Asked Questions
Is this the same as cinnamon pickled apple rings?
No. This is fresh fruit dipped in hard candy. It contains no vinegar brine and no tested pickling or canning process.
Can I skip the corn syrup?
Not as an automatic substitution. The recipe relies on it to help manage crystallization. A corn-syrup-free candy formula should be developed and tested separately.
Can I use cinnamon oil?
Only a food-grade product intended for candy, at its own labeled quantity. It can be much stronger than extract. Never substitute household essential oil by the same spoon measure.
Will serving sooner make the candy tender?
No. Correctly cooked hard-crack syrup sets brittle. Earlier serving mainly reduces the time available for fruit moisture to soften it unpredictably.
How accurate are the calories?
The supplied 260-calorie estimate depends on coating uptake. The full syrup contains substantial sugar, but some remains in the saucepan and on the tray. Dividing every ingredient by eight assumes all coating is eaten; assigning a lower number assumes some is discarded. Without measuring that difference, a precise per-serving figure is not reliable.
Print
Firecracker Cinnamon Candy Apple Rings
Description
- Prep: About 20 minutes, including drying the fruit
- Candy cooking: About 20 minutes, varying by equipment
- Cooling: About 30 minutes, until fully cool
- Total: Approximately 1 hour 10 minutes
- Servings: About 8
- Method: Hard-candy dipping
- Best served: The day of preparation
Ingredients
Apple Rings
- 4 large firm apples, such as Granny Smith or Honeycrisp
- 4 cups cold water
- 2 tablespoons lemon juice
Cinnamon Candy Coating
- 2 cups granulated sugar
- 1 cup water
- 1/2 cup light corn syrup
- 1 teaspoon ground cinnamon
- 1/2 teaspoon food-grade cinnamon extract suitable for candy making
- 1/2 teaspoon vanilla extract
- Up to 1/2 teaspoon red food coloring, adjusted for product strength
- 1/8 teaspoon cayenne pepper, optional
- A small pinch of salt
For the Tray
- A little neutral oil or cooking spray if lightly greasing parchment
Servings: Approximately eight portions, with the number of rings depending on apple size and how many intact slices remain after coring.
Not all the cooked syrup will necessarily adhere to the apples. The recipe needs enough depth for dipping, so leftover coating is normal. This makes a precise nutrition estimate difficult without measuring the amount actually used.
Instructions
1. Prepare the cooling tray
Set a silicone baking mat on a sturdy rimmed baking sheet, or line the tray with parchment and grease it very lightly. Place it on a heat-safe surface near the dipping station.
Leave enough room for the rings to cool in a single layer without touching. Do not use wax paper, which is unsuitable for this hot candy coating.
2. Core and slice the apples
Wash and dry the apples. Remove the cores with an apple corer, then slice crosswise into rings approximately 1/4 inch thick.
Keep the thickness consistent. Very thin rings can break under the weight of hot syrup; thick rings are harder to coat and eat neatly.
Place the rings in the lemon water briefly while completing the slicing. Remove any broken pieces for another use rather than trying to dip fragile fragments.
3. Drain and dry thoroughly
Drain the rings and lay them between clean towels or sturdy paper towels. Blot both sides, the peel, and the inside of the core opening.
Move them to a dry surface and check again for visible moisture. Do this before the syrup reaches its final temperature, so you are not rushing with a pan of hot candy waiting.
Drying improves handling but does not stop the fruit from releasing juice later. Plan to coat and serve promptly rather than expecting long-term crispness.
4. Dissolve the sugar
Combine the sugar, one cup water, corn syrup, ground cinnamon, salt, and optional cayenne in the saucepan.
Heat over medium heat, stirring gently until the sugar dissolves. Avoid splashing syrup high onto the sides of the pan, where crystals can remain.
Once the syrup is boiling steadily, stop stirring. Keep the thermometer positioned correctly and watch the temperature rise.
5. Cook to hard crack
Cook until the thermometer reaches approximately 300°F at sea level. Hard-crack candy is generally associated with about 300–310°F, as described in the Exploratorium’s candy science guidance.
Do not deliberately push toward the upper end simply to make a harder shell. Carryover heat can continue cooking the syrup after the pan leaves the burner.
At higher elevations, candy endpoints need an altitude-appropriate adjustment. Use reliable local candy-making guidance and a checked thermometer rather than applying the sea-level number without adjustment.
Cooking time varies with pan width, burner output, and batch size. The supplied twenty-minute estimate is a planning guide, not the endpoint.
6. Add flavoring carefully
Remove the saucepan from the heat and let vigorous bubbling subside briefly. Add the premeasured cinnamon extract, vanilla, and coloring carefully, following any specific directions for your chosen flavoring.
Stand back from the pan opening because extracts can bubble or release a strong burst of aroma. Stir gently with a dry, heatproof utensil just enough to distribute the additions.
This differs from boiling the extracts through the entire cooking period. Prolonged heating can reduce aroma, and product instructions should guide when concentrated candy flavoring is added.
7. Dip a test ring
Use a dry heatproof dipping tool or a secure long-handled fork to support one ring. Make sure it will not slip into the syrup before lowering it.
Dip briefly, lift carefully, and allow excess syrup to drip back into the pan. Place on the prepared mat without touching the coating.
Let that ring set while you assess the process. If the coating immediately slides off or the apple breaks, pause rather than rushing through the remaining fruit. Surface moisture, syrup temperature, or tool support may need attention.
8. Coat the remaining rings
Work steadily, coating one ring at a time and spacing them on the tray. Do not dip with your fingers or use a short utensil that brings your hand close to the syrup.
Avoid bringing the lemon-water bowl into the dipping area. Dry tools and dry surfaces reduce the chance of water entering the hot candy.
If the syrup becomes too thick to coat smoothly, warm it gently over low heat just until workable. Do not add water to a pan of very hot concentrated syrup. Stop if it smells burnt or has become excessively dark; reheating cannot reverse scorching.
9. Cool completely
Allow the rings to stand in a single layer until the coating is hard and fully cool. About thirty minutes is a useful planning estimate, but room conditions and coating thickness affect the time.
Do not touch the shell to test it while it may still be hot. A glossy surface does not indicate a safe temperature.
Once completely cool, release gently from the mat. If the rings are very brittle, support the apple rather than pulling upward on one edge of the candy.
10. Serve or refrigerate promptly
Serve soon after cooling for the best chance of a crisp shell. Keep the rings separate rather than piling them into a bowl.
Refrigerate leftovers promptly. Do not leave cut fruit out all day in an attempt to preserve the candy texture. Food safety takes priority over maintaining the brittle coating.