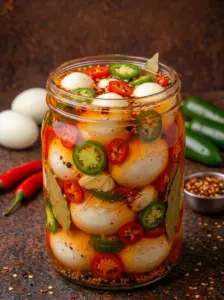
Crunchy Deli-Style Relish Recipe: One Jar, Endless Flavor
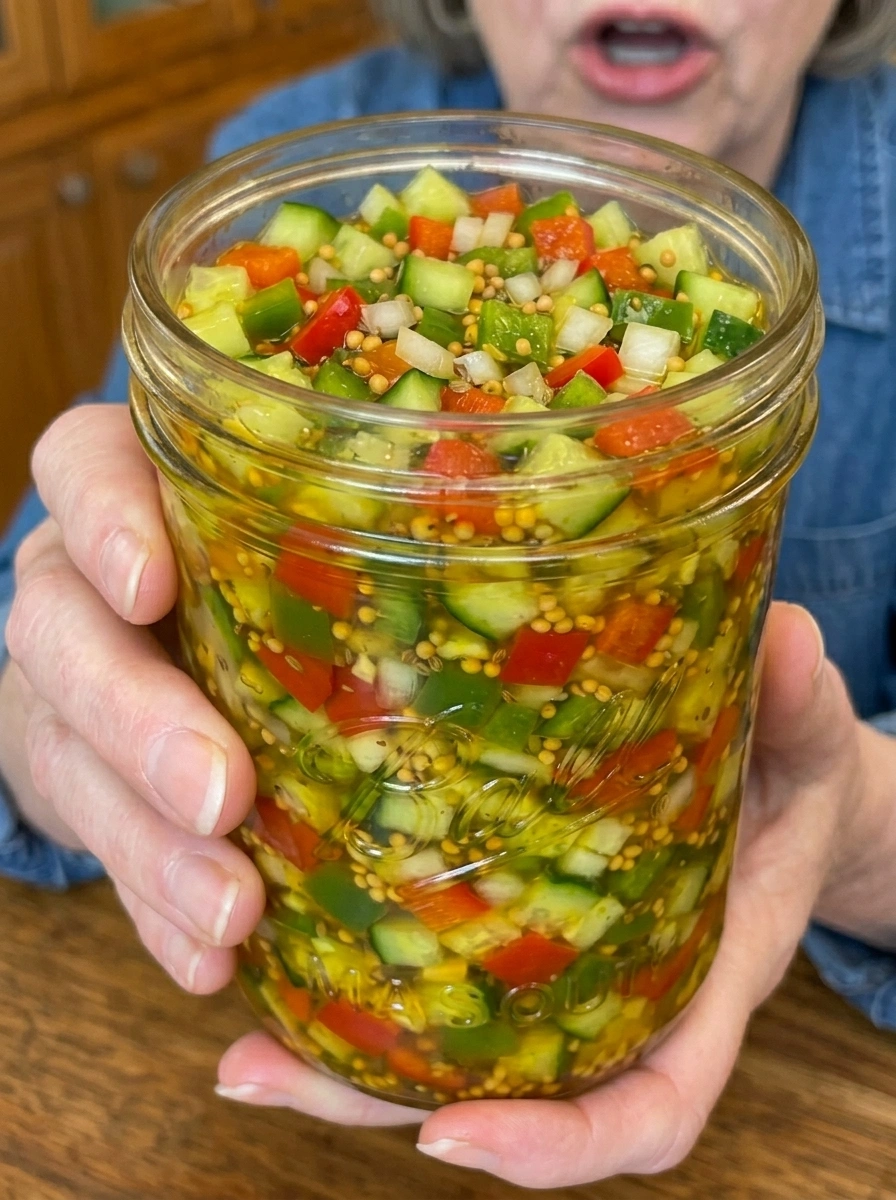
There’s something magical about a great relish. It’s the kind of condiment that quietly transforms a meal, turning a basic hot dog into a backyard classic or an ordinary sandwich into something you can’t stop eating. This crunchy deli-style relish recipe is packed with finely diced cucumbers, sweet bell peppers, and onion, all simmered in a tangy, lightly spiced brine that delivers that nostalgic, deli-counter flavor you remember, but made fresh in your own kitchen.
Unlike store-bought relish, which often relies on artificial colors and preservatives, this homemade version lets you control every ingredient, resulting in a brighter, crunchier, and more flavorful condiment. Best of all, it comes together with simple, accessible ingredients and just 30 minutes of total time, making it an easy project for anyone looking to upgrade their pantry staples.
In this article, you’ll find everything you need to make perfect deli-style relish at home: a full ingredient breakdown, step-by-step instructions, tips for getting that signature crunch, creative serving ideas, and answers to the most common questions about making and storing homemade relish.
Why You’ll Love This Relish Recipe
This recipe stands out for a few key reasons. First, the texture is unbeatable. By salting and draining the vegetables before cooking, this method preserves that satisfying crunch that’s the hallmark of great deli-style relish, rather than ending up soft or mushy. Second, the flavor is perfectly balanced between sweet, tangy, and savory, thanks to the combination of vinegar, sugar, mustard seeds, celery seeds, and turmeric. Third, this recipe is incredibly versatile, since it can be stored as a quick refrigerator relish or processed in a water bath for shelf-stable, long-term storage.
This relish is also naturally vegetarian, vegan, and gluten-free, making it a condiment that fits seamlessly into almost any diet. At roughly 30 calories per two-tablespoon serving, it’s a flavorful way to add crunch and zing to your meals without adding much in the way of calories.

Ingredients for Deli-Style Relish
This recipe uses a simple list of fresh vegetables and pantry spices to recreate that classic deli relish flavor. Here’s what you’ll need:
- 3 cups cucumbers, finely diced
- 1 cup green bell pepper, finely diced
- 1/2 cup red bell pepper, finely diced
- 1 small onion, finely diced
- 1 cup white vinegar
- 1/2 cup granulated sugar
- 1 tablespoon pickling salt or kosher salt
- 1 teaspoon mustard seeds
- 1/2 teaspoon celery seeds
- 1/2 teaspoon turmeric
- 1/2 teaspoon black pepper
- 2 cloves garlic, minced
Each component plays an important role in the final flavor and texture. The cucumbers form the base of the relish, providing that classic crunch, while the bell peppers add sweetness and a pop of color. The onion brings a savory bite, and the vinegar and sugar create the tangy-sweet brine that defines deli-style relish. The mustard seeds, celery seeds, turmeric, and black pepper round out the flavor with warm, slightly earthy spice notes, while the turmeric also gives the relish its signature golden-yellow hue.
Choosing the Best Cucumbers for Relish
For the best texture, choose cucumbers that are firm and fresh, with minimal seeds. Pickling cucumbers, sometimes labeled as Kirby cucumbers, are an excellent choice because they have thinner skin and a denser, crunchier flesh than standard slicing cucumbers. If you can only find regular cucumbers, you can still use them, just be sure to scoop out any large, watery seed cores before dicing to help keep the relish from becoming too watery.
Step-by-Step Instructions
Step 1: Salt and Drain the Vegetables
In a large bowl, combine the finely diced cucumbers, green bell pepper, red bell pepper, onion, and pickling salt. Toss everything together well and let the mixture sit for about an hour. This step draws excess moisture out of the vegetables, which is the secret to achieving that signature crunchy relish texture instead of a watery, diluted final product.
Step 2: Drain and Squeeze
After the vegetables have had time to release their liquid, drain them thoroughly in a colander. Then, gently squeeze out any remaining excess moisture using a clean kitchen towel or cheesecloth. This step is important, since any leftover water can thin out your brine and affect the final consistency of the relish.
Step 3: Make the Brine
In a saucepan, combine the white vinegar, granulated sugar, mustard seeds, celery seeds, turmeric, black pepper, and minced garlic. Bring the mixture to a gentle simmer over medium heat, stirring occasionally until the sugar has fully dissolved into the brine.
Step 4: Cook the Vegetables in the Brine
Add the drained vegetables to the saucepan with the brine and let everything simmer together for 8 to 10 minutes, stirring occasionally. This brief cooking time allows the vegetables to absorb the tangy, spiced flavor of the brine while still retaining their crunch.
Step 5: Cool Slightly
Once the relish has finished simmering, remove the saucepan from the heat and let it cool slightly before transferring it to jars. This helps prevent excess condensation from forming inside the jars once sealed.
Step 6: Jar and Cool Completely
Transfer the relish into clean glass jars and allow it to cool completely at room temperature before sealing and refrigerating.
Step 7: Chill Before Serving
For the best flavor, refrigerate the relish overnight before serving, which allows the flavors to fully meld together. If you’d prefer a shelf-stable relish for long-term storage, you can process the jars in a water bath according to safe, tested canning guidelines.
Tips for the Best Deli-Style Relish
A few small techniques make a big difference in the final result of this recipe. Keep these tips in mind for the best possible relish:
Don’t skip the salting step. Salting and draining the vegetables before cooking is what gives this relish its signature crunch, so resist the urge to skip ahead.
Dice the vegetables uniformly. Finely and evenly dicing your cucumbers, peppers, and onion ensures a consistent texture in every bite, just like classic deli relish.
Watch your simmer time closely. Simmering the vegetables for too long can lead to a softer, less crunchy relish, so stick close to the 8 to 10 minute mark.
Use fresh spices. Mustard seeds, celery seeds, and turmeric all contribute significantly to the final flavor, so using fresh, fragrant spices will give you the best results.
Let it rest overnight. While the relish is technically ready to eat once cooled, letting it rest in the fridge overnight allows the flavors to deepen and fully develop.
Storage Information
This relish can be stored in two different ways, depending on your needs. For a quick refrigerator relish, simply store it in an airtight jar in the refrigerator for up to 3 weeks. This is the easiest option and requires no special canning equipment.
If you’d like to store the relish for longer periods, you can process it in a water bath canner according to safe, tested canning guidelines. When properly water-bath canned, unopened jars can be kept in a cool, dark place for up to a year. Once a jar is opened, however, it should be refrigerated and used within 3 weeks, just like the quick refrigerator version.
If you’re new to canning, it’s important to follow tested, up-to-date canning guidelines from a trusted resource to ensure your jars are properly sealed and safe for long-term storage.
Ways to Serve Deli-Style Relish
This relish is incredibly versatile and can be used in far more ways than just as a hot dog topping. Here are some of the best ways to enjoy it:
Burgers and hot dogs. This is the classic use for deli-style relish, adding a tangy, crunchy contrast to rich, savory meat.
Sandwiches and wraps. Stir a spoonful into mayonnaise or mustard for a quick sandwich spread, or layer it directly onto deli meat sandwiches for extra flavor.
Egg salad and tuna salad. Mix a spoonful of relish into egg salad or tuna salad for a pop of sweetness, tang, and crunch.
Potato salad. Swap out plain pickles for this relish in your favorite potato salad recipe for a deli-style upgrade.
Salads and grain bowls. Spoon a bit of relish over salads or grain bowls as a quick, tangy dressing alternative.
Straight from the jar. Like any great relish, sometimes the best way to enjoy it is simply with a fork, straight out of the jar.
Frequently Asked Questions About Deli-Style Relish
Can I use a different type of vinegar?
Yes. White vinegar gives this relish its classic sharp tang, but you can substitute apple cider vinegar for a slightly different, more mellow flavor profile.
Why do I need to salt the vegetables first?
Salting draws excess water out of the cucumbers, peppers, and onion before cooking, which is essential for achieving the crisp, crunchy texture that defines deli-style relish. Skipping this step often results in a watery, less flavorful relish.
Can I make this relish less sweet?
Yes, you can reduce the sugar slightly to taste. Keep in mind that sugar plays a role in balancing the acidity of the vinegar, so significant reductions may shift the overall flavor profile.
Do I have to can this relish for long-term storage?
No, canning is optional. If you only need the relish to last a few weeks, simply store it in the refrigerator. Water bath canning is only necessary if you want to store unopened jars at room temperature for up to a year.
Can I use a food processor to dice the vegetables?
You can pulse the vegetables in a food processor for convenience, but be careful not to over-process them into a mush. Pulsing in short bursts helps maintain the small, even dice that gives this relish its classic texture.
How long does homemade relish last once opened?
Once opened, this relish should be stored in the refrigerator and used within 3 weeks for the best quality and flavor, whether it was originally stored in the fridge or shelf-stable canned.
Final Thoughts
This crunchy deli-style relish recipe proves that homemade condiments are always worth the extra effort. With its perfect balance of sweet, tangy, and savory flavors, plus that satisfying crunch in every bite, this relish is the kind of recipe that turns ordinary meals into something special. Whether you’re piling it onto burgers and hot dogs, stirring it into salads, or simply eating it straight from the jar, one batch of this relish is guaranteed to disappear fast.
Once you make this recipe and taste the difference between homemade and store-bought relish, it’s likely to become a permanent staple in your kitchen, ready to elevate cookouts, sandwiches, and weeknight meals all summer long.
Print
Crunchy Deli-Style Relish Recipe
Ingredients
This recipe uses a simple list of fresh vegetables and pantry spices to recreate that classic deli relish flavor. Here’s what you’ll need:
-
- 3 cups cucumbers, finely diced
- 1 cup green bell pepper, finely diced
- 1/2 cup red bell pepper, finely diced
-
- 1 small onion, finely diced
- 1 cup white vinegar
- 1/2 cup granulated sugar
-
- 1 tablespoon pickling salt or kosher salt
- 1 teaspoon mustard seeds
- 1/2 teaspoon celery seeds
-
- 1/2 teaspoon turmeric
- 1/2 teaspoon black pepper
- 2 cloves garlic, minced
Each component plays an important role in the final flavor and texture. The cucumbers form the base of the relish, providing that classic crunch, while the bell peppers add sweetness and a pop of color. The onion brings a savory bite, and the vinegar and sugar create the tangy-sweet brine that defines deli-style relish. The mustard seeds, celery seeds, turmeric, and black pepper round out the flavor with warm, slightly earthy spice notes, while the turmeric also gives the relish its signature golden-yellow hue.
Instructions
Step 1: Salt and Drain the Vegetables
In a large bowl, combine the finely diced cucumbers, green bell pepper, red bell pepper, onion, and pickling salt. Toss everything together well and let the mixture sit for about an hour. This step draws excess moisture out of the vegetables, which is the secret to achieving that signature crunchy relish texture instead of a watery, diluted final product.
Step 2: Drain and Squeeze
After the vegetables have had time to release their liquid, drain them thoroughly in a colander. Then, gently squeeze out any remaining excess moisture using a clean kitchen towel or cheesecloth. This step is important, since any leftover water can thin out your brine and affect the final consistency of the relish.
Step 3: Make the Brine
In a saucepan, combine the white vinegar, granulated sugar, mustard seeds, celery seeds, turmeric, black pepper, and minced garlic. Bring the mixture to a gentle simmer over medium heat, stirring occasionally until the sugar has fully dissolved into the brine.
Step 4: Cook the Vegetables in the Brine
Add the drained vegetables to the saucepan with the brine and let everything simmer together for 8 to 10 minutes, stirring occasionally. This brief cooking time allows the vegetables to absorb the tangy, spiced flavor of the brine while still retaining their crunch.
Step 5: Cool Slightly
Once the relish has finished simmering, remove the saucepan from the heat and let it cool slightly before transferring it to jars. This helps prevent excess condensation from forming inside the jars once sealed.
Step 6: Jar and Cool Completely
Transfer the relish into clean glass jars and allow it to cool completely at room temperature before sealing and refrigerating.
Step 7: Chill Before Serving
For the best flavor, refrigerate the relish overnight before serving, which allows the flavors to fully meld together. If you’d prefer a shelf-stable relish for long-term storage, you can process the jars in a water bath according to safe, tested canning guidelines.