Restaurant-Style Pickled Taco Topping: The Crunchy, Tangy Secret Weapon for Taco Night
Every great taco restaurant has a secret weapon sitting quietly on the counter—a jar of bright, tangy, crunchy pickled vegetables that somehow makes every single thing it touches taste better. You’ve seen it. You’ve spooned it onto your tacos and immediately wanted more. And then you’ve gone home and wondered why your tacos at home never quite hit the same way.
This is the recipe that changes all of that.
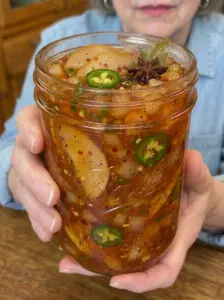
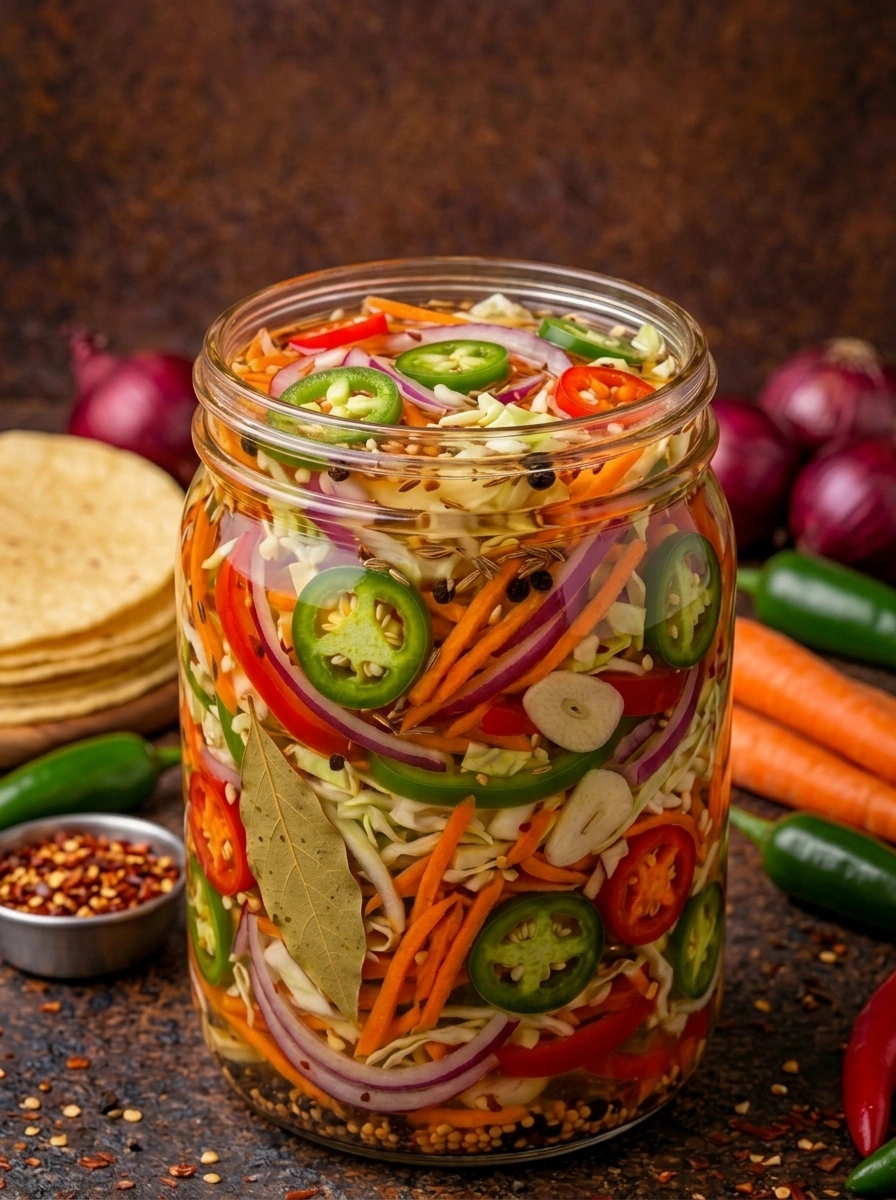
Restaurant-Style Pickled Taco Topping is the condiment you didn’t know your kitchen was missing. Made with shredded carrots, cabbage, red onion, jalapeños, bell pepper, and garlic all submerged in a cumin-spiced, lightly sweet brine, this quick refrigerator pickle comes together in just 15 minutes and keeps in the fridge for up to two weeks. The result is a vivid, flavor-packed topping that adds crunch, acidity, heat, and color to tacos, burritos, grain bowls, sandwiches, and more.
Once you make a jar of this, you’ll understand immediately why restaurant tacos taste the way they do—and you’ll start putting this on everything.
What Is Pickled Taco Topping?
Pickled taco topping is a style of quick-pickled vegetable relish that’s common in Mexican and Tex-Mex restaurants, often served as a free condiment alongside tacos, tortas, and grilled meats. Depending on the region and the restaurant, you might find it labeled as curtido, escabeche, or simply pickled vegetables—but the concept is always the same: a colorful mix of vegetables preserved in a seasoned vinegar brine that delivers acidity, crunch, and heat in every bite.
What makes this version restaurant-style is the combination of spices in the brine. Cumin seeds, dried oregano, black peppercorns, and red pepper flakes create a warm, aromatic complexity that’s miles ahead of a plain vinegar-and-salt pickle. The addition of a small amount of sugar or honey softens the sharp edges of the vinegar and pulls all the flavors into balance. Garlic and jalapeños infuse the brine as the vegetables marinate, so every jar gets better the longer it sits.
Unlike traditional canning projects, this is a straightforward refrigerator pickle—no water bath, no special equipment, no advanced technique. Just chop, brine, and wait a couple of hours.
Why This Recipe Works So Well
The magic of this topping comes down to contrast and balance. Tacos, burritos, and grilled meats are rich, savory, and often fatty. A spoonful of pickled vegetables cuts right through all of that with acidity and crunch, refreshing the palate and making every subsequent bite taste just as good as the first. It’s the same principle behind why coleslaw works on a pulled pork sandwich or why kimchi is so addictive alongside rice.
There’s also the textural element. The shredded carrots and cabbage stay pleasantly crunchy even after pickling, while the thinly sliced onion, jalapeños, and bell pepper soften slightly and absorb the brine deeply. You get a mix of textures in every spoonful—some crunch, some tenderness, all flavor.
And at just about 25 calories per serving, this is one of the most impactful, low-calorie flavor upgrades you can add to your cooking.
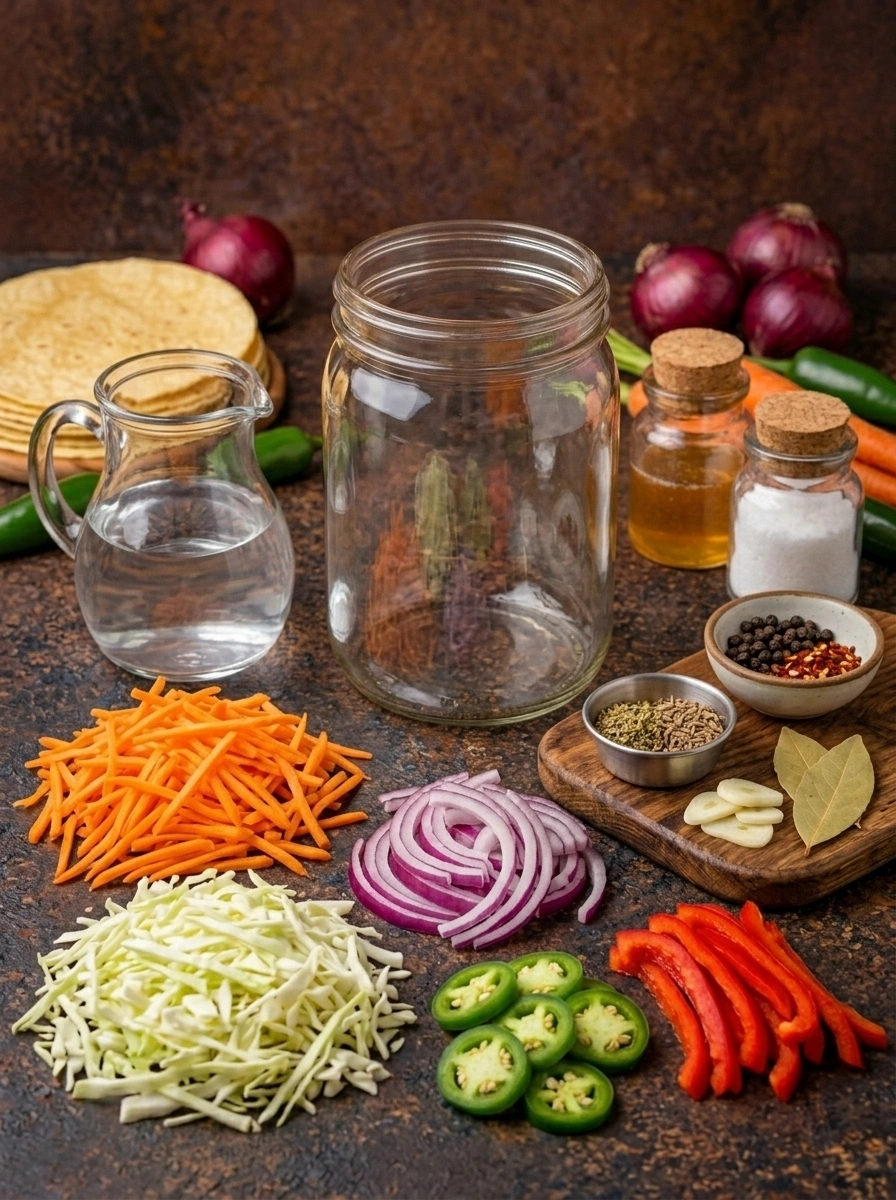
Ingredients and What Each One Brings
Every ingredient in this recipe is doing real work. Here’s a closer look at why the lineup is built the way it is:
2 cups shredded carrots Carrots are the backbone of this topping. They add natural sweetness, vibrant orange color, and—most importantly—exceptional crunch that holds up beautifully in the brine over several days. Shredding them rather than slicing ensures they absorb flavor quickly and are easy to pile onto tacos.
1 cup shredded cabbage Cabbage adds bulk, a mild peppery flavor, and a slightly different texture than the carrots. It also absorbs the brine deeply, taking on the cumin and oregano flavors especially well. Green cabbage is the standard choice, but red cabbage adds beautiful purple color if you want a more vibrant jar.
1/2 small red onion, thinly sliced Red onion brings a sharp, pungent bite that mellows beautifully in the brine over time. After a few hours in the vinegar, raw onion transforms into something softer, slightly sweet, and far more approachable. It also turns a gorgeous pink color that makes the jar look stunning.
1–2 jalapeños, thinly sliced Jalapeños are the heat source. Thinly sliced, they release their capsaicin into the brine and infuse the whole jar with a fresh, vegetal spice. One jalapeño gives you mild heat; two brings it closer to a restaurant-level kick. Leave the seeds in for more heat, or remove them for a gentler spice level.
1 bell pepper, thinly sliced Bell pepper adds sweetness, color, and a crisp texture that complements the crunch of the carrots and cabbage. Red or orange bell pepper brings extra sweetness, while green bell pepper adds a slightly more vegetal, bitter note.
2 cloves garlic, sliced Sliced garlic infuses the brine with savory depth over the marinating period. The longer the jar sits in the fridge, the more pronounced the garlic flavor becomes—in the best possible way.
1 cup white vinegar White vinegar provides the clean, sharp acidity that preserves the vegetables and gives the topping its classic tang.
1 cup water Water dilutes the brine to a balanced pickling strength—enough to preserve and flavor the vegetables without being overwhelmingly sharp.
2 tbsp sugar or honey This small amount of sweetness makes a big difference. It softens the acidity of the vinegar and creates the slightly sweet-tangy balance that defines great pickled vegetables. Honey adds a mild floral note that works especially well with the cumin and oregano.
1 tbsp pickling salt or kosher salt Salt seasons the brine, draws moisture from the vegetables, and helps maintain crunch throughout the refrigerator life of the jar.
1 tsp dried oregano Oregano is a classic companion to cumin in Mexican cooking. It adds an herbal, slightly floral depth that grounds the brine and gives it that unmistakably restaurant-style character.
1 tsp cumin seeds Cumin is the signature spice that sets this topping apart from a plain pickle. Earthy, warm, and aromatic, cumin seeds infuse the brine slowly and give it that distinctly Tex-Mex personality. Using whole seeds rather than ground cumin keeps the brine clear and provides bursts of flavor when you bite into one.
1 tsp black peppercorns Whole peppercorns add mild heat and gentle spice that builds over the marinating period without overpowering the other flavors.
1/2 tsp red pepper flakes Red pepper flakes amplify the heat from the jalapeños and add a different kind of lingering warmth that keeps things interesting.
1 bay leaf Bay leaf adds a subtle herbal complexity that rounds out the brine. It’s one of those ingredients that you’d miss if it weren’t there, even if you couldn’t identify it by name.
Step-by-Step Directions
Step 1: Prep the Vegetables
Shred the carrots and cabbage, thinly slice the red onion, jalapeños, bell pepper, and garlic. Uniform, thin cuts ensure even flavor absorption and make the topping easy to spoon.
Step 2: Pack the Jar
Add all the prepared vegetables into a clean glass jar or a heatproof bowl. Pack them in firmly but not so tightly that the brine can’t circulate.
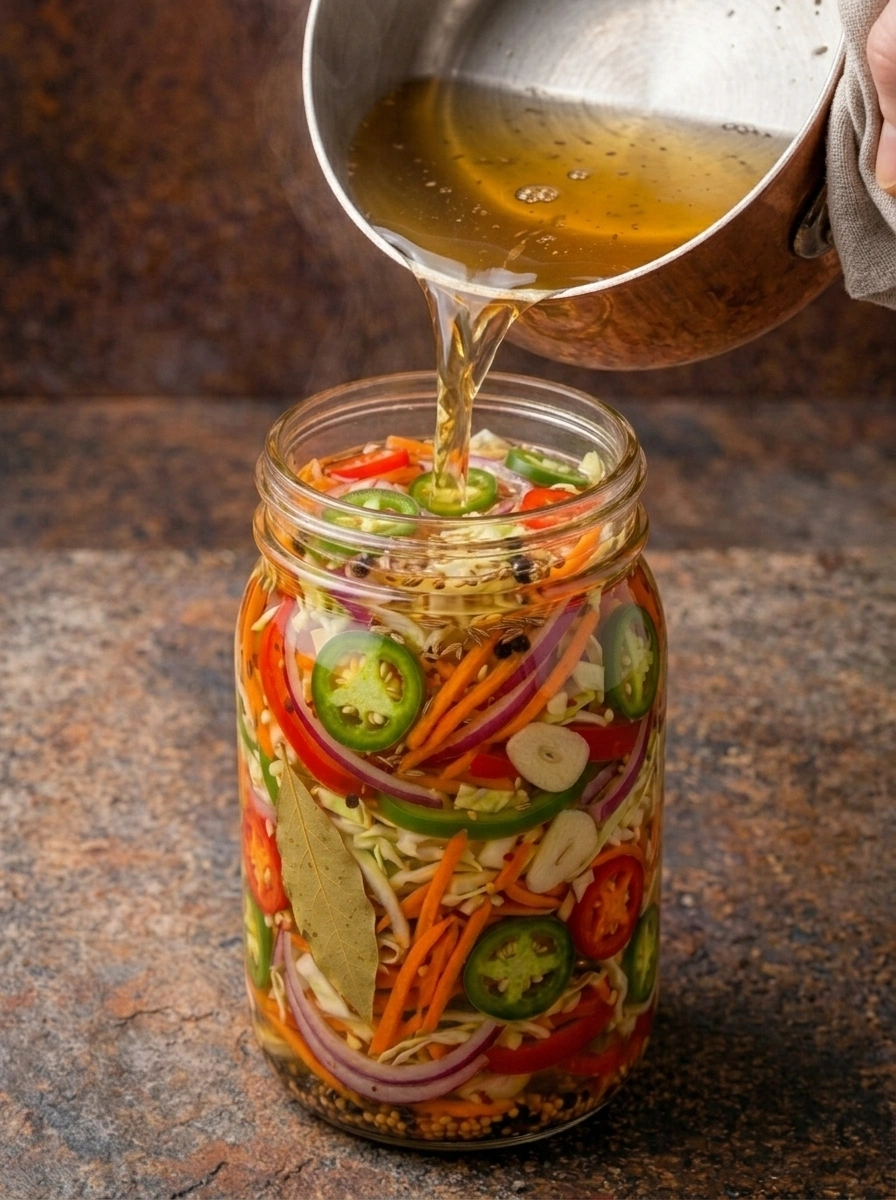
Step 3: Make the Brine
Combine the white vinegar, water, sugar (or honey), salt, oregano, cumin seeds, black peppercorns, red pepper flakes, and bay leaf in a small saucepan. Heat over medium heat, stirring until the sugar and salt are fully dissolved. You don’t need to bring it to a rolling boil—just heat it enough to dissolve everything completely.
Step 4: Pour Over the Vegetables
Carefully pour the hot brine over the packed vegetables, making sure everything is fully submerged. The heat from the brine slightly softens the vegetables and jump-starts the pickling process.
Step 5: Cool to Room Temperature
Let the jar sit uncovered until it reaches room temperature. This usually takes 20 to 30 minutes.
Step 6: Seal and Refrigerate
Once cool, seal the jar tightly and refrigerate for at least 2 hours before serving. For the best flavor and crunch, refrigerate overnight or up to 24 hours before serving.
How Long Does It Need to Marinate?
You can technically eat this topping after just 2 hours in the fridge, and it will already be good. But “good” becomes “exceptional” after an overnight rest, and truly outstanding after 24 to 48 hours. Here’s how the flavor evolves:
After 2 hours: Bright, tangy, and lightly spiced. The vegetables still taste fairly fresh with a light brine flavor.
After 8–12 hours (overnight): The brine has penetrated deeper, the cumin and oregano are more pronounced, and the garlic has started to make its presence felt. This is the sweet spot for most people.
After 24–48 hours: Maximum flavor. The jalapeños have fully infused the brine with heat, the garlic is savory and rich, and the vegetables have taken on a deeply complex, restaurant-quality flavor that’s hard to stop eating.
How to Use This Pickled Taco Topping
The name says “taco topping,” but don’t let that limit you. This pickled vegetable mix is one of the most versatile condiments you can keep in your fridge. Here are the best ways to use it:
On tacos: The obvious choice and the perfect one. Spoon generously over beef, chicken, pork, or fish tacos for instant restaurant-quality flavor.
On burritos and burrito bowls: Layer it on top of your favorite burrito bowl alongside rice, beans, and guacamole for crunch and acidity.
On grilled meats: Serve alongside grilled chicken, carne asada, or pork chops as a bright, tangy condiment that cuts through the richness of the meat.
On sandwiches and tortas: Layer it into a Mexican torta or a pulled pork sandwich for a flavor upgrade that regular condiments can’t compete with.
On hot dogs and sausages: A spoonful of pickled vegetable topping on a grilled hot dog is one of those unexpected combinations that becomes an instant favorite.
In grain bowls: Add a scoop to quinoa, farro, or rice bowls for color, crunch, and brightness.
On eggs: Try a small spoonful on top of scrambled eggs, fried eggs, or a breakfast burrito for a morning kick.
As a side salad: Serve it as a tangy, crunchy side dish alongside any Mexican or Tex-Mex meal.
Tips for the Best Pickled Taco Topping
Shred the carrots fresh. Pre-shredded carrots from the grocery store work in a pinch, but freshly shredded carrots have better texture and stay crunchier longer in the brine.
Slice everything thin and even. Uniformly thin cuts mean every piece of vegetable absorbs the brine at the same rate and is easy to pile onto tacos without pieces falling off.
Use a wide-mouth jar. Wide-mouth mason jars make it much easier to pack in all the vegetables and to spoon out the topping once it’s pickled.
Don’t rush the cooling step. Sealing the jar while the brine is still very hot can trap steam inside and affect the texture and flavor. Let it cool to room temperature first.
Keep everything submerged. Vegetables that poke above the brine level won’t pickle properly and can deteriorate faster. Press everything down before sealing.
Flavor Variations to Try
Once you’ve mastered the base recipe, here are some ways to put your own spin on it:
Extra spicy version: Add a serrano pepper alongside the jalapeños, double the red pepper flakes, or include a few thin slices of habanero for serious heat.
Citrus-forward version: Add the zest of one lime and a splash of fresh lime juice to the brine for a brighter, more citrusy flavor that pairs beautifully with fish tacos.
Herb-forward version: Add a few sprigs of fresh cilantro or a small handful of fresh oregano to the jar before pouring the brine for a greener, more herbal result.
Sweet and mild version: Reduce the jalapeños to one (or skip them entirely) and increase the sugar to three tablespoons for a sweeter, gentler pickle suited to kids or spice-sensitive eaters.
Red cabbage version: Swap the green cabbage for red cabbage. It turns a stunning purple-pink color in the brine and adds a slightly different, earthier flavor.
Storage Information
Store your pickled taco topping in an airtight glass jar in the refrigerator for up to 2 weeks. Always keep the vegetables fully submerged in the brine to maintain their freshness and crunch. If the brine level drops over time, you can add a small splash of white vinegar to top it back up.
This is a refrigerator pickle and is not shelf-stable without proper canning processing. Do not store at room temperature after adding the brine.
Frequently Asked Questions
Can I make this without heating the brine? You can make a cold brine by stirring the vinegar, water, sugar, and salt together until dissolved, then adding the spices. The flavor will be similar, but the marinating time will need to be longer—at least 12 to 24 hours—since a cold brine works more slowly than a hot one.
Is this the same as curtido? Curtido is a specific Central American pickled cabbage slaw, most common in El Salvador. This recipe is inspired by similar flavors but uses a broader mix of vegetables and a more complex spice blend. Think of it as a Tex-Mex-inspired cousin of curtido.
Can I use apple cider vinegar instead of white vinegar? Yes. Apple cider vinegar adds a slightly fruity, more complex tang to the brine. The color of the finished topping may be slightly more golden, but the flavor will still be delicious.
How do I know when it’s ready to eat? Taste it. After 2 hours, it should already taste tangy and lightly spiced. If the brine flavor hasn’t fully penetrated the vegetables yet, give it a few more hours. The overnight rest is almost always worth the wait.
Can I add other vegetables to this recipe? Absolutely. Thinly sliced radishes, zucchini, or green onions all work beautifully in this brine. Radishes in particular turn a gorgeous pink and add a pleasant peppery bite.
Final Thoughts
This Restaurant-Style Pickled Taco Topping is one of those recipes that seems almost too simple for how transformative it is. Fifteen minutes of prep, a few hours in the fridge, and suddenly your tacos taste like they came from your favorite restaurant. The bright acidity, the satisfying crunch, the layered spice from jalapeños, cumin, and red pepper flakes—it all comes together in a jar that you’ll find yourself reaching for again and again.
Make a batch this week, keep it in your fridge, and start putting it on everything. You’ve been warned.
Recipe at a Glance Prep Time: 10 minutes Cook Time: 5 minutes Total Time: 15 minutes Servings: 10 Calories: ~25 per serving Storage: Up to 2 weeks in the refrigerator.
Print
Restaurant-Style Pickled Taco Topping
Ingredients
Every ingredient in this recipe is doing real work. Here’s a closer look at why the lineup is built the way it is:
2 cups shredded carrots Carrots are the backbone of this topping. They add natural sweetness, vibrant orange color, and—most importantly—exceptional crunch that holds up beautifully in the brine over several days. Shredding them rather than slicing ensures they absorb flavor quickly and are easy to pile onto tacos.
1 cup shredded cabbage Cabbage adds bulk, a mild peppery flavor, and a slightly different texture than the carrots. It also absorbs the brine deeply, taking on the cumin and oregano flavors especially well. Green cabbage is the standard choice, but red cabbage adds beautiful purple color if you want a more vibrant jar.
1/2 small red onion, thinly sliced Red onion brings a sharp, pungent bite that mellows beautifully in the brine over time. After a few hours in the vinegar, raw onion transforms into something softer, slightly sweet, and far more approachable. It also turns a gorgeous pink color that makes the jar look stunning.
1–2 jalapeños, thinly sliced Jalapeños are the heat source. Thinly sliced, they release their capsaicin into the brine and infuse the whole jar with a fresh, vegetal spice. One jalapeño gives you mild heat; two brings it closer to a restaurant-level kick. Leave the seeds in for more heat, or remove them for a gentler spice level.
1 bell pepper, thinly sliced Bell pepper adds sweetness, color, and a crisp texture that complements the crunch of the carrots and cabbage. Red or orange bell pepper brings extra sweetness, while green bell pepper adds a slightly more vegetal, bitter note.
2 cloves garlic, sliced Sliced garlic infuses the brine with savory depth over the marinating period. The longer the jar sits in the fridge, the more pronounced the garlic flavor becomes—in the best possible way.
1 cup white vinegar White vinegar provides the clean, sharp acidity that preserves the vegetables and gives the topping its classic tang.
1 cup water Water dilutes the brine to a balanced pickling strength—enough to preserve and flavor the vegetables without being overwhelmingly sharp.
2 tbsp sugar or honey This small amount of sweetness makes a big difference. It softens the acidity of the vinegar and creates the slightly sweet-tangy balance that defines great pickled vegetables. Honey adds a mild floral note that works especially well with the cumin and oregano.
1 tbsp pickling salt or kosher salt Salt seasons the brine, draws moisture from the vegetables, and helps maintain crunch throughout the refrigerator life of the jar.
1 tsp dried oregano Oregano is a classic companion to cumin in Mexican cooking. It adds an herbal, slightly floral depth that grounds the brine and gives it that unmistakably restaurant-style character.
1 tsp cumin seeds Cumin is the signature spice that sets this topping apart from a plain pickle. Earthy, warm, and aromatic, cumin seeds infuse the brine slowly and give it that distinctly Tex-Mex personality. Using whole seeds rather than ground cumin keeps the brine clear and provides bursts of flavor when you bite into one.
1 tsp black peppercorns Whole peppercorns add mild heat and gentle spice that builds over the marinating period without overpowering the other flavors.
1/2 tsp red pepper flakes Red pepper flakes amplify the heat from the jalapeños and add a different kind of lingering warmth that keeps things interesting.
1 bay leaf Bay leaf adds a subtle herbal complexity that rounds out the brine. It’s one of those ingredients that you’d miss if it weren’t there, even if you couldn’t identify it by name.
Instructions
Step 1: Prep the Vegetables
Shred the carrots and cabbage, thinly slice the red onion, jalapeños, bell pepper, and garlic. Uniform, thin cuts ensure even flavor absorption and make the topping easy to spoon.
Step 2: Pack the Jar
Add all the prepared vegetables into a clean glass jar or a heatproof bowl. Pack them in firmly but not so tightly that the brine can’t circulate.
Step 3: Make the Brine
Combine the white vinegar, water, sugar (or honey), salt, oregano, cumin seeds, black peppercorns, red pepper flakes, and bay leaf in a small saucepan. Heat over medium heat, stirring until the sugar and salt are fully dissolved. You don’t need to bring it to a rolling boil—just heat it enough to dissolve everything completely.
Step 4: Pour Over the Vegetables
Carefully pour the hot brine over the packed vegetables, making sure everything is fully submerged. The heat from the brine slightly softens the vegetables and jump-starts the pickling process.
Step 5: Cool to Room Temperature
Let the jar sit uncovered until it reaches room temperature. This usually takes 20 to 30 minutes.
Step 6: Seal and Refrigerate
Once cool, seal the jar tightly and refrigerate for at least 2 hours before serving. For the best flavor and crunch, refrigerate overnight or up to 24 hours before serving.