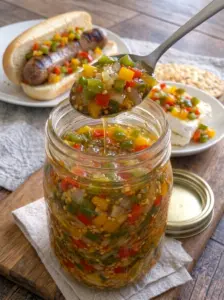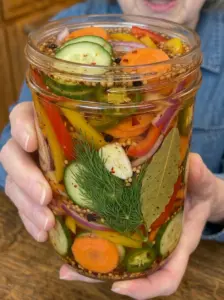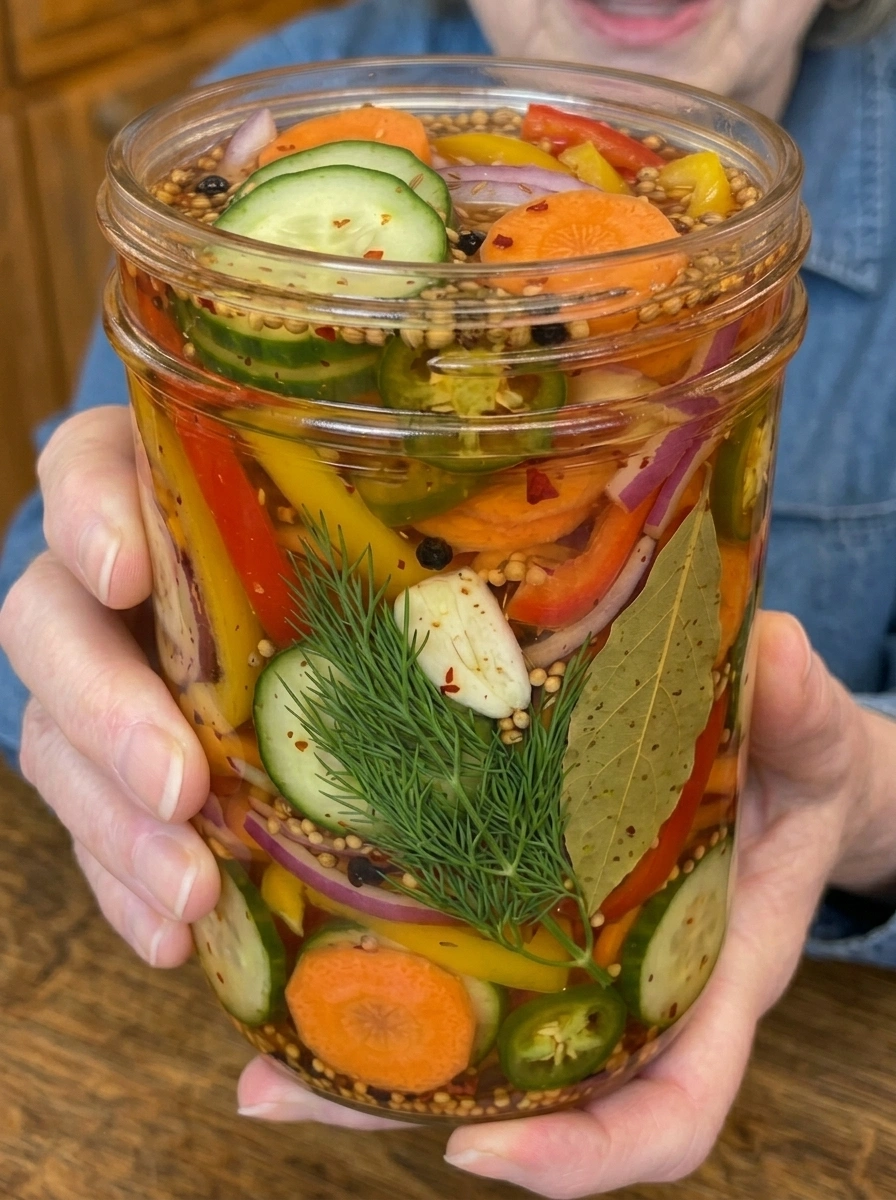
These Sweet & Tangy Refrigerator Garden Pickles are crisp, colorful, and packed with cucumbers, carrots, and bell peppers. An easy homemade refrigerator pickle recipe ready in as little as 24 hours!
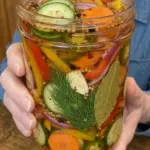
If you love the idea of a colorful jar of homemade pickles but don’t want to fuss with a long, involved process, these Sweet & Tangy Refrigerator Garden Pickles are exactly what you need. A vibrant mix of cucumbers, carrots, and bell peppers is packed into jars with garlic, fresh dill, and red onion, then covered in a sweet-and-tangy vinegar brine infused with mustard seed, coriander, and celery seed. In as little as 24 hours, you’ll have a jar of crisp, flavorful pickles ready to enjoy.
This recipe is a wonderful way to use up whatever fresh vegetables you have on hand, whether from your garden or the farmers market. The combination of sweet and tangy flavors, along with that classic pickled crunch, makes this an endlessly versatile condiment for burgers, sandwiches, charcuterie boards, and so much more.
Let’s dive into everything you need to know to make these crisp, colorful, sweet-and-tangy garden pickles at home.
What Are Refrigerator Pickles?
Refrigerator pickles, sometimes called quick pickles, are made by pouring a hot or warm vinegar brine over raw or lightly prepared vegetables, then refrigerating them until they absorb the tangy, flavorful brine. Unlike traditional fermented pickles, which rely on natural bacteria and take days or weeks to develop their signature tang, refrigerator pickles achieve their flavor purely through the vinegar brine, making them ready to eat in as little as a day. This method is faster, simpler, and doesn’t require any canning equipment or extended waiting periods.
Why You’ll Love These Sweet & Tangy Refrigerator Garden Pickles
There are so many reasons to keep a jar of these vibrant pickles on hand:
Ready in as little as 24 hours. Unlike traditional pickling or fermenting methods, this recipe delivers tangy, flavorful pickles in just about a day.
Beautiful, colorful presentation. The mix of cucumbers, carrots, and bell peppers creates a stunning garden-pickle appearance that’s as pretty as it is delicious.
No canning equipment required. As a refrigerator pickle, this recipe skips the need for a water bath canner or specialized canning knowledge.
A great way to use up garden vegetables. This recipe is endlessly adaptable based on what vegetables you have on hand.
Perfectly balanced sweet-tangy flavor. The brine strikes a lovely balance between sweetness and tang, making these pickles appealing to a wide range of tastes.
Crisp, satisfying crunch. Following the tips for keeping vegetables crunchy ensures every bite has that satisfying pickle crunch.
Ingredients You’ll Need
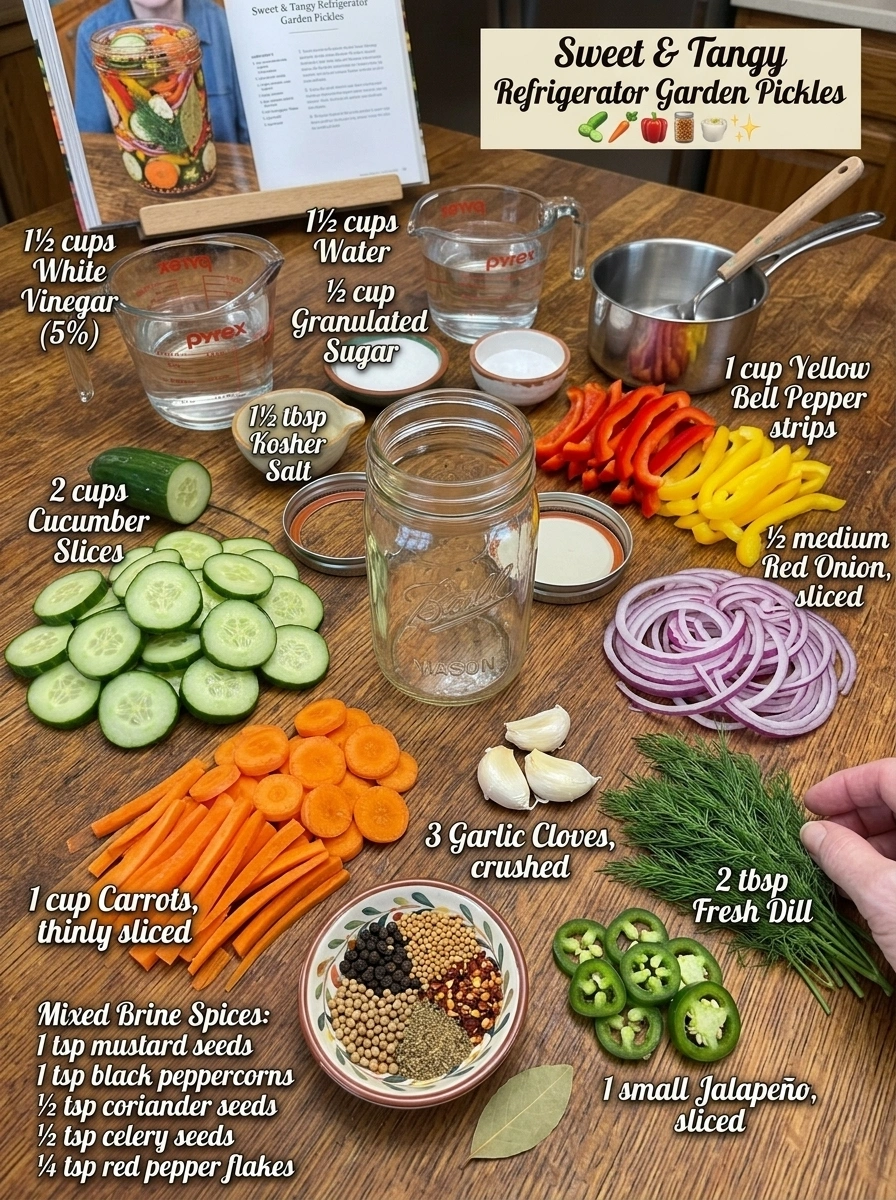
Here’s a breakdown of what goes into this vibrant, sweet-and-tangy pickled vegetable mix and why each ingredient plays a role.
For the Garden Vegetables
- 2 cups cucumber slices — Adds classic, crisp pickle flavor and texture.
- 1 cup carrots, thinly sliced — Contributes natural sweetness and vibrant orange color.
- 1 cup red bell pepper, sliced into strips — Adds sweetness and vibrant red color.
- 1 cup yellow bell pepper, sliced into strips — Contributes additional sweetness and a bright pop of yellow.
- ½ medium red onion, thinly sliced — Adds a sharp, slightly sweet flavor that mellows as it pickles.
- 3 garlic cloves, lightly crushed — Infuses the brine and vegetables with bold, aromatic garlic flavor.
- 2 tbsp fresh dill — Adds that classic, essential dill pickle flavor.
- 1 small jalapeño, thinly sliced, optional — For those who want a subtle kick of heat.
For the Sweet & Tangy Brine
- 1½ cups white vinegar (5% acidity) — Forms the tangy, acidic base of the brine.
- 1½ cups water — Balances the sharpness of the vinegar so the brine isn’t overpoweringly sharp.
- ½ cup granulated sugar — Balances the acidity with a generous touch of sweetness, giving these pickles their signature sweet-tangy flavor.
- 1½ tbsp kosher or pickling salt — Enhances the overall flavor of the brine and helps preserve the vegetables.
- 1 tsp mustard seeds — Provides a slightly tangy, sharp flavor typical of classic pickling spice blends.
- 1 tsp black peppercorns — Adds a mild, warm heat and subtle spice.
- ½ tsp coriander seeds — Adds a warm, citrusy note to the brine.
- ½ tsp celery seeds — Contributes a subtle, savory, slightly bitter flavor that rounds out the spice blend.
- ¼ tsp red pepper flakes, optional — For those who want a gentle kick of heat.
- 1 small bay leaf, optional — Adds subtle aromatic depth throughout the pickling process.
How to Make Sweet & Tangy Refrigerator Garden Pickles
This recipe comes together with minimal effort and a short waiting period. Here’s exactly how to make it.
Step 1: Prepare the Vegetables
Wash and dry all the vegetables thoroughly. Slice the cucumbers into approximately ¼-inch rounds. Cut the carrots into thin rounds or sticks so they pickle quickly while retaining plenty of crunch. Slice the bell peppers and red onion into thin strips.
Step 2: Pack the Jars
Divide the cucumber, carrots, bell peppers, red onion, garlic, dill, and optional jalapeño between clean glass jars. Alternate the vegetables as you fill the jars for a colorful garden-pickle appearance. Pack them snugly without crushing them.
Step 3: Make the Brine
Combine the vinegar, water, sugar, salt, mustard seeds, peppercorns, coriander seeds, celery seeds, optional red pepper flakes, and bay leaf in a saucepan. Bring to a gentle simmer over medium heat. Stir until the sugar and salt are completely dissolved. Remove from the heat.
Step 4: Add the Brine
Carefully pour the warm brine over the vegetables until they’re completely submerged. Gently tap each jar against the counter or run a clean utensil around the inside edge to release trapped air bubbles. Add additional brine if necessary.
Step 5: Cool
Allow the jars to cool until they’re no longer hot. Once cooled, cover tightly with lids.
Step 6: Refrigerate
Transfer the jars to the refrigerator. The pickles will begin developing flavor after several hours, but they’re best after at least 24 hours. For a deeper sweet-and-tangy flavor, wait 48–72 hours before serving.
Keep Them Extra Crisp
For the crunchiest refrigerator pickles, keep these tips in mind:
- Start with very fresh, firm vegetables.
- Don’t cook the vegetables before pickling.
- Slice carrots thinly but keep cucumbers slightly thicker.
- Don’t continuously boil the vegetables in the brine.
- Keep everything submerged.
- Refrigerate after cooling.
Flavor Variations
Sweet & Spicy: Add jalapeño slices and extra red pepper flakes for a spicier version.
Garlic Dill: Increase the fresh dill and add 1–2 extra garlic cloves for a bolder, more classic dill pickle flavor.
Bread-and-Butter Inspired: Increase the sugar slightly and add ¼ teaspoon turmeric for a flavor reminiscent of classic bread-and-butter pickles.
Pepper Lover’s: Add green, red, yellow, and orange bell peppers for an even more colorful, pepper-forward jar.
Crunchy Garden Mix: Add cauliflower florets and sliced radishes for even more variety and crunch.
How to Serve Sweet & Tangy Refrigerator Garden Pickles
These crisp, colorful pickles are wonderfully versatile and pair well with a wide range of dishes:
- Burgers and hot dogs — A classic pairing that adds tangy crunch to any cookout plate.
- Sandwiches and wraps — Adds a tangy, crisp contrast to any sandwich filling.
- BBQ chicken — The tangy, sweet flavor pairs perfectly with rich, smoky barbecue.
- Pulled pork — A refreshing counterpart to smoky, saucy pulled pork.
- Tacos — Scatter over tacos for a bright, colorful pop of acidity.
- Rice bowls — A great way to add color, crunch, and acidity to a hearty grain or rice bowl.
- Potato salad — Chop and stir into potato salad for extra flavor and crunch.
- Charcuterie boards — Adds vibrant color and crunch to balance rich meats and cheeses.
- Crackers and cheese — A simple, easy way to enjoy these pickles as a snack.
- Grilled meats — A refreshing, crunchy counterpart to savory grilled proteins.
- Straight from the refrigerator — Simply enjoy these colorful pickles as a cold, crunchy sweet-and-tangy snack.
Storage Information
Keep the vegetables refrigerated and submerged in the brine. For the best quality and crunch, enjoy them within approximately 3–4 weeks. Important: these are refrigerator pickles, not a shelf-stable canned product. They should remain refrigerated at all times.
Tip: Give the jars at least 24–48 hours before judging the flavor. The vegetables need time to absorb the sweet vinegar brine and pickling spices while developing that crisp, punchy garden-pickle taste.
Frequently Asked Questions
How long do these refrigerator pickles last? Stored in the refrigerator with the vegetables fully submerged in brine, these pickles are best enjoyed within about 3–4 weeks for optimal texture and quality.
How is this different from traditional canning or fermenting? Refrigerator pickling relies solely on a vinegar brine to flavor the vegetables and is ready in about a day, while traditional canning requires specific processing for shelf-stable storage, and fermenting relies on natural bacteria over a longer period.
Can I use different vegetables? Absolutely. This recipe is easy to customize with vegetables like cauliflower, radishes, or whatever you have on hand or is in season.
Why do I need to keep the vegetables submerged? Keeping the vegetables submerged in the brine ensures even pickling and helps maintain the best flavor and food safety throughout storage.
Can I make this recipe shelf-stable through canning? This recipe is designed as a refrigerator pickle and has not been tested for shelf-stable canning. For long-term, room-temperature storage, a tested water-bath canning recipe with proper processing times would be required.
How do I keep my pickled vegetables extra crunchy? Using very fresh, firm vegetables, avoiding cooking the vegetables before pickling, and not continuously boiling them in the brine are the best ways to maximize crunch.
Recipe Card
Prep Time: 20 minutes Brine Cook Time: 5–10 minutes Refrigeration Time: 24 hours minimum (48–72 hours recommended) Servings: 12 Calories: ~35 per serving
These Sweet & Tangy Refrigerator Garden Pickles bring crisp, colorful, sweet-and-tangy flavor to your kitchen in as little as a day. Packed with cucumbers, carrots, and bell peppers, all brightened with garlic and fresh dill, this vibrant pickled vegetable mix is the perfect way to add crunch and flavor to burgers, sandwiches, charcuterie boards, and so much more.
Make a batch today, and get ready for these crisp, colorful garden pickles to become a refrigerator staple!
Sweet & Tangy Refrigerator Garden Pickles
Ingredients
Here’s a breakdown of what goes into this vibrant, sweet-and-tangy pickled vegetable mix and why each ingredient plays a role.
For the Garden Vegetables
- 2 cups cucumber slices — Adds classic, crisp pickle flavor and texture.
- 1 cup carrots, thinly sliced — Contributes natural sweetness and vibrant orange color.
- 1 cup red bell pepper, sliced into strips — Adds sweetness and vibrant red color.
- 1 cup yellow bell pepper, sliced into strips — Contributes additional sweetness and a bright pop of yellow.
- ½ medium red onion, thinly sliced — Adds a sharp, slightly sweet flavor that mellows as it pickles.
- 3 garlic cloves, lightly crushed — Infuses the brine and vegetables with bold, aromatic garlic flavor.
- 2 tbsp fresh dill — Adds that classic, essential dill pickle flavor.
- 1 small jalapeño, thinly sliced, optional — For those who want a subtle kick of heat.
For the Sweet & Tangy Brine
- 1½ cups white vinegar (5% acidity) — Forms the tangy, acidic base of the brine.
- 1½ cups water — Balances the sharpness of the vinegar so the brine isn’t overpoweringly sharp.
- ½ cup granulated sugar — Balances the acidity with a generous touch of sweetness, giving these pickles their signature sweet-tangy flavor.
- 1½ tbsp kosher or pickling salt — Enhances the overall flavor of the brine and helps preserve the vegetables.
- 1 tsp mustard seeds — Provides a slightly tangy, sharp flavor typical of classic pickling spice blends.
- 1 tsp black peppercorns — Adds a mild, warm heat and subtle spice.
- ½ tsp coriander seeds — Adds a warm, citrusy note to the brine.
- ½ tsp celery seeds — Contributes a subtle, savory, slightly bitter flavor that rounds out the spice blend.
- ¼ tsp red pepper flakes, optional — For those who want a gentle kick of heat.
- 1 small bay leaf, optional — Adds subtle aromatic depth throughout the pickling process.
Instructions
This recipe comes together with minimal effort and a short waiting period. Here’s exactly how to make it.
Wash and dry all the vegetables thoroughly. Slice the cucumbers into approximately ¼-inch rounds. Cut the carrots into thin rounds or sticks so they pickle quickly while retaining plenty of crunch. Slice the bell peppers and red onion into thin strips.
Divide the cucumber, carrots, bell peppers, red onion, garlic, dill, and optional jalapeño between clean glass jars. Alternate the vegetables as you fill the jars for a colorful garden-pickle appearance. Pack them snugly without crushing them.
Combine the vinegar, water, sugar, salt, mustard seeds, peppercorns, coriander seeds, celery seeds, optional red pepper flakes, and bay leaf in a saucepan. Bring to a gentle simmer over medium heat. Stir until the sugar and salt are completely dissolved. Remove from the heat.
Carefully pour the warm brine over the vegetables until they’re completely submerged. Gently tap each jar against the counter or run a clean utensil around the inside edge to release trapped air bubbles. Add additional brine if necessary.
Allow the jars to cool until they’re no longer hot. Once cooled, cover tightly with lids.
Transfer the jars to the refrigerator. The pickles will begin developing flavor after several hours, but they’re best after at least 24 hours. For a deeper sweet-and-tangy flavor, wait 48–72 hours before serving.