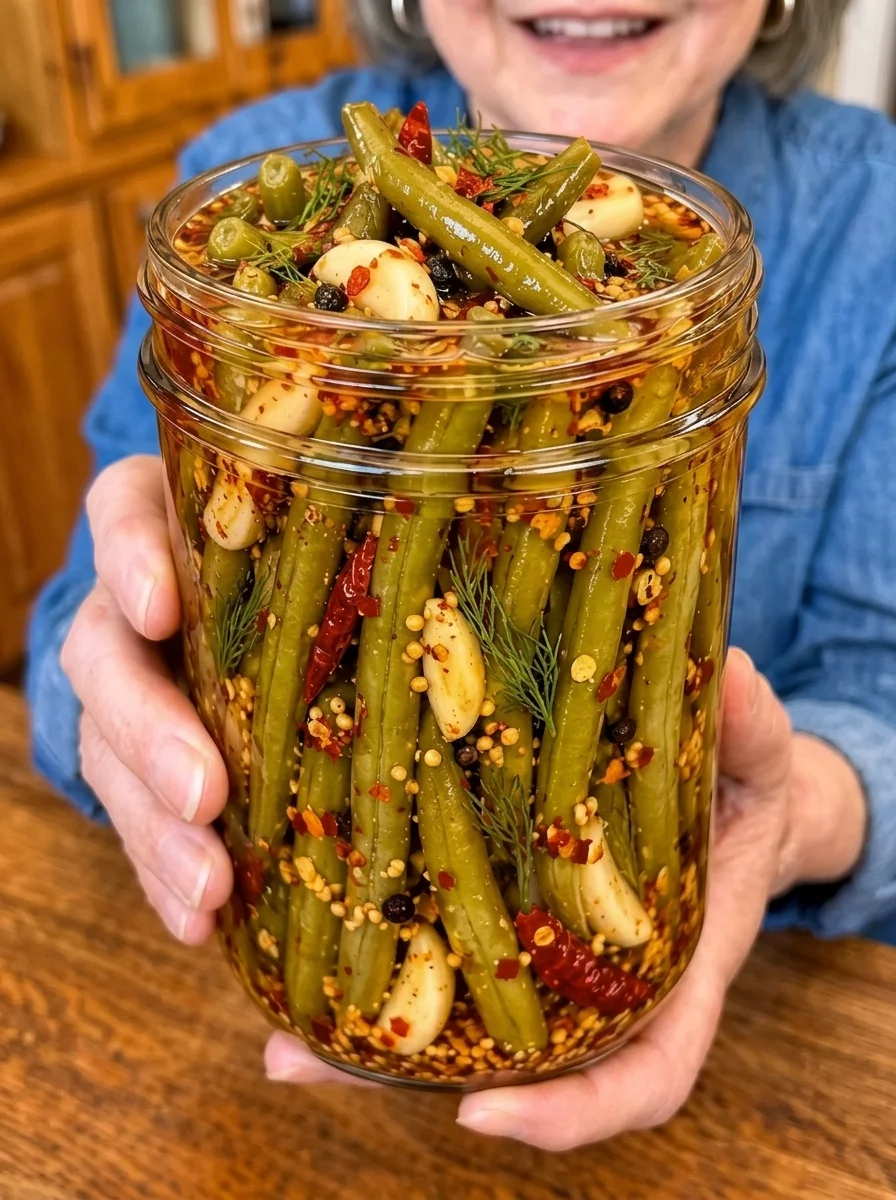
Fresh green beans, fragrant garlic, honey, and a little chile heat make a bright refrigerator pickle with plenty of personality. The beans stay firm, the vinegar brings a clean tang, and honey rounds out the sharper flavors without turning the jar into a sugary relish. Mustard seeds and peppercorns add a savory background that works beautifully with sandwiches, grilled food, and simple cheese plates.
This is a small-batch recipe for everyday snacking rather than a pantry preservation project. You heat a quick brine, pour it over prepared beans and seasonings, and let the refrigerator do the rest. After a day, the beans begin tasting tangy; after two or three days, the garlic and pepper flavors become more noticeable.
The recipe below retains the supplied honey-and-garlic flavor combination while clarifying the cooling instructions, jar capacity, and serving estimates. This particular variation has not been kitchen-tested or laboratory-validated. It is intended only for refrigerated storage and must not be used as a shelf-stable canning recipe.
What to Expect
These beans have a lively vinegar flavor with gentle sweetness and a lingering pepper warmth. Two tablespoons of honey soften the acidity, but the finished pickle will still taste distinctly tangy. The garlic contributes a pungent, savory note; it does not become roasted, caramelized, or mellow in the same way it would in a cooked dish.
Texture depends on the beans you start with and whether you blanch them. Raw beans produce a firmer, more fresh-vegetable bite. Briefly blanched beans are easier to bite through while retaining some snap. Neither version should be expected to have the texture of a commercially processed pickle.
The hot brine starts flavoring the beans, but time in the refrigerator matters more than an extra minute on the stove. Serve them cold, let the brine drain away, and enjoy them as a condiment or small side dish.
Ingredients
For the Green Beans
- 1 pound fresh green beans, washed and trimmed
- 4 garlic cloves, peeled and lightly crushed
- 1 teaspoon mustard seeds
- 1/2 teaspoon whole black peppercorns
- 1/2 teaspoon crushed red pepper flakes, or less for mild heat
- 1 small dried chile pepper, optional
- 2 sprigs fresh dill, optional
For the Brine
- 1 cup distilled white vinegar labeled 5% acidity
- 1 cup water
- 2 tablespoons honey
- 1 tablespoon kosher salt, measured according to the brand note below
- 1 teaspoon granulated sugar, optional
Have an additional clean jar available in case the beans and liquid do not all fit comfortably into one quart jar. The finished yield depends on bean length, thickness, trimming, and packing.
Ingredient Notes
Choose Young, Firm Green Beans
Look for beans that feel firm and snap cleanly when bent. Slender beans with small seeds usually give a more pleasant pickled texture than large, bulging pods. Avoid limp beans, dried stem ends, and beans with damaged or slimy patches.
Freshness sets the limit for the finished crunch. Vinegar cannot restore crispness to old beans, and extra seasoning will not hide a stringy pod. If the beans have tough strings, remove them while trimming.
Wash the beans under running water before cutting them. Trim enough from the stem end to remove the tough attachment, then shorten them as needed to fit below the brine. Cut pieces are just as useful as long spears if you plan to add the beans to salads.
Use Vinegar With a Known Acidity
Distilled white vinegar gives a clean, sharp flavor and allows the honey, garlic, and chile to stand out. Check the label for 5% acidity. Do not substitute homemade vinegar, cleaning vinegar, or a product with an unknown strength.
Keep the listed vinegar-to-water proportions. If the finished beans taste too tart for your preference, serve a smaller amount with creamy or rich foods rather than diluting the jar with additional water.
Honey Adds Flavor and Sweetness
A mild honey works well because it supports the vegetables without dominating them. Strongly flavored honey will make a more distinctive pickle. Stir it into the warming brine so it disperses evenly.
Honey is a flavor ingredient here; once diluted in the brine, it is not a substitute for refrigeration or an established preservation process. The optional teaspoon of sugar adds a little more sweetness but is not necessary for dissolving or distributing the honey.
Kosher Salt Brands Differ
A tablespoon of one kosher salt brand can contain substantially more salt than a tablespoon of another. Use the same brand consistently and record it if you want to repeat the result. This is a flavor consideration for this refrigerator recipe, not permission to convert it into a canning formula.
For a less salty first batch, choose a light, flaky kosher salt and measure without packing. Avoid automatically replacing the listed tablespoon with a tablespoon of fine table salt, which can make the brine taste much saltier.
Garlic and Spices
Lightly crushing the garlic exposes more surface area while keeping the cloves easy to recognize. Finely minced garlic distributes more intensely and leaves small bits clinging to the beans, so whole crushed cloves are a cleaner choice for snacking.
Red pepper flakes supply most of the heat. Their strength varies with age and brand, and a dried whole chile can add considerably more heat depending on the variety. Start modestly if you are serving guests with different spice preferences.
Mustard seeds and peppercorns provide texture and aroma. Dill is optional, but it adds a familiar pickle flavor that is especially good with sandwiches and cold lunch plates.
Equipment
You will need a small saucepan, a cutting board, a knife, measuring spoons, and a clean heat-safe quart jar or two pint jars with suitable lids. A wide-mouth container makes vertical packing easier. A clean food-safe pickling weight is useful if the beans float.
For blanching, have a separate pot, a bowl of ice water, and a colander ready before starting. Use a container rated for warm liquids, and avoid pouring hot brine into cold ordinary glass. Follow the container manufacturer’s instructions to prevent thermal shock.
No water-bath canner or pressure canner is used. A lid that happens to draw down as the contents cool does not make the recipe shelf-stable.
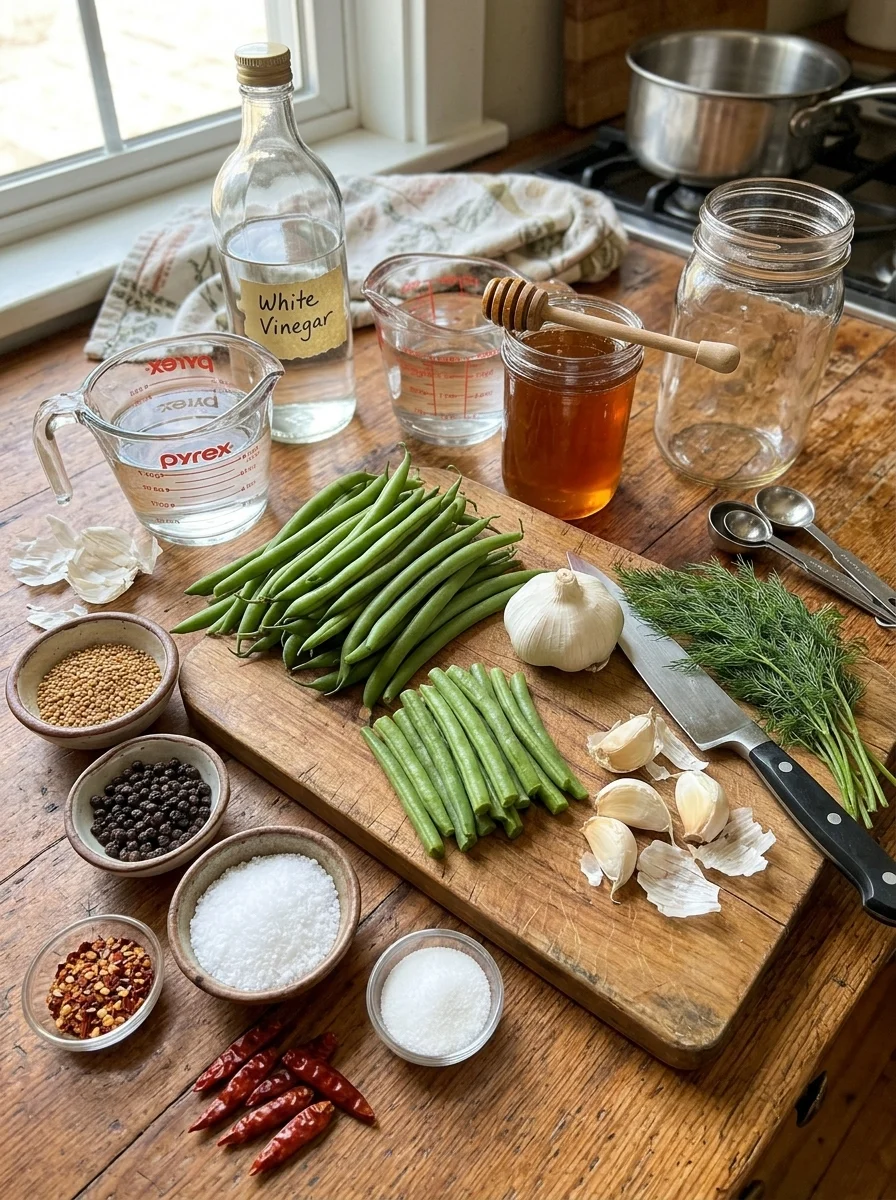
How to Make Honey Garlic Pickled Green Beans
1. Prepare the Workspace and Beans
Wash your hands and clean the work surface. Wash the jars and lids thoroughly, rinse well, and inspect the glass for cracks or chips. Set the clean containers where they will not be exposed to sudden temperature changes.
Rinse the beans, remove the stems, and trim them to fit with about 1/2 inch of headspace. Allow room for brine above the beans as well. Save suitable short trimmings for another meal rather than forcing overly long beans into the jar.
Sort the beans by thickness if the batch is uneven. This makes it easier to blanch similar pieces together and helps you recognize which beans may need a little more time to absorb flavor.
2. Choose Raw or Briefly Blanched Beans
For a very firm pickle, leave the beans raw. They will retain more of their fresh green bean character and may need the full two to three days for a more rounded pickled flavor.
For a somewhat more tender result, bring a pot of water to a boil. Add the beans and blanch for one to two minutes, then immediately transfer them to ice water. Drain thoroughly once cool.
The purpose is to soften the beans slightly, not cook them until tender. Overcooked beans will not regain their snap in the jar. Oregon State University Extension includes brief blanching and rapid ice-water cooling as an option for green beans in its refrigerator-pickled vegetable guidance.
3. Pack the Jar
Place the crushed garlic, mustard seeds, peppercorns, pepper flakes, optional dried chile, and dill in the container. Stand the beans upright, adding them in small groups so they sit snugly together.
A snug pack helps keep the beans in place, but leave paths for liquid to circulate. Do not crush the beans or wedge them so tightly that the brine cannot reach the spaces between them.
If using two pint jars, divide the beans and seasonings between them. Distribute the garlic rather than placing all of it in one jar.
4. Heat the Brine
Combine the vinegar, water, honey, salt, and optional sugar in the saucepan. Heat over medium heat, stirring until the honey disperses and the salt dissolves. Bring just to a gentle simmer, then remove from the heat.
You do not need to reduce the liquid into a syrup. Prolonged boiling changes the amount available to cover the beans and can concentrate the seasoning unnecessarily.
The garlic in this recipe sits in the jar rather than browning in the saucepan. The finished flavor is pickled garlic, not garlic butter or roasted garlic.
5. Cover the Beans
Carefully pour the warm brine into the heat-safe container. Cover the beans completely while leaving approximately 1/2 inch at the top. Gently tap the container or move a clean nonmetallic utensil between the beans to release trapped air.
If the jar is crowded, move some beans into the extra container. If you need more liquid, make additional brine using the same ingredient proportions; do not top up with plain water.
Keep floating beans below the liquid with a suitable clean pickling weight. Avoid improvised objects that are not intended for food contact.
6. Refrigerate Promptly
Fit the container with its clean lid according to its heat-safety instructions and refrigerate promptly. Do not leave the jar on the counter waiting for the contents to become completely room temperature. A brief pause for safe handling is different from prolonged counter cooling.
The original instruction warning against immediate refrigeration was too broad. Small quantities of food can be refrigerated while warm in suitable containers. Protect glass from thermal shock, use smaller containers if necessary, and keep the refrigerator at 40°F or below.
Label the jar with the preparation date. Place it where it will remain cold rather than leaving it on the refrigerator door during repeated openings.
7. Let the Flavor Develop
Wait at least 24 hours before tasting. For a more pronounced garlic and chile flavor, allow two to three days. Taste with a clean utensil, and return the jar to the refrigerator immediately afterward.
Beans can change from bright green toward an olive shade as they sit in acidic brine. That color change alone does not mean they have spoiled. Texture and flavor will continue changing during storage.
Serve chilled and drain the portion you plan to eat. The whole spices are primarily there to season the brine; there is no need to serve a spoonful of peppercorns with every portion.
Tips for a Better Batch
Start with beans of similar thickness. Thin beans and thick mature pods will not develop identical texture, even when packed in the same jar.
Keep blanching short. If you prefer a more tender bean, use the blanching option rather than expecting raw beans to soften substantially overnight.
Measure before adjusting. It is easy to add too many pepper flakes when working directly over a jar. Put the measured amount in first and record any additions for next time.
Let time develop the garlic flavor. Adding many extra cloves on the first day can produce a harsh result by the third day.
Keep every bean covered. A tall bean protruding above the liquid is a packing problem to fix, not a decorative feature to leave in place.
Make a small batch first. This gives you a chance to choose your preferred blanching method and spice level before preparing several jars.
Flavor Variations
Mild Honey Dill
Omit the dried chile and reduce the pepper flakes to a small pinch. Include the dill for an aromatic pickle with a gentle sweet finish. The vinegar proportions remain unchanged.
Extra Garlic
Add one additional lightly crushed clove if you enjoy a stronger garlic note. Allow the original batch to develop for a couple of days before deciding that four cloves are insufficient.
Hot Pepper
Use a few thin slices of jalapeño in place of the optional dried chile. Wear gloves if needed when handling peppers, and wash your hands and tools afterward. This variation changes the flavor and is still intended only for refrigeration.
Peppery and Herbaceous
Add a small sprig of thyme instead of dill. Its earthy flavor suits roast chicken and potato dishes. Keep additions modest so the jar does not become crowded and the beans remain covered.
None of these flavor options establishes a shelf-stable preservation method or extends the storage guidance.
Serving Ideas
Serve a small bundle beside a burger, grilled chicken, or a pulled pork sandwich. The acidity cuts through rich food, while the honey and garlic complement smoky flavors.
For a cheese board, drain the beans well and place them in a small bowl so their brine does not soak crackers or bread. Pair with mild cheddar, cream cheese, or a simple soft cheese spread.
Cut the beans into short pieces for potato salad, pasta salad, or a grain bowl. Add them shortly before serving to keep the texture distinct. Begin with a small quantity because the salt and acidity can quickly become the dominant flavor.
They also work as a garnish for a tomato-based mocktail or Bloody Mary. Keep the serving jar chilled and use clean tongs to remove portions rather than letting guests reach into the storage container.
For a quick lunch, combine a few drained beans with a sandwich, sliced apple, and cheese. You do not need a large serving to add crunch and contrast to the plate.
Storage and Make-Ahead Guidance
Keep the beans refrigerated at 40°F or below, submerged in brine, in a clean covered container. This article uses a conservative two-week best-quality target for the supplied variation; that is not a laboratory-validated shelf life or a guarantee of safety under poor handling.
Oregon State’s published refrigerator vegetable recipe provides storage instructions for its own formula. Its longer stated storage period should not be treated as validation of every honey, garlic, or vegetable variation. For a standardized preservation recipe, follow an Extension recipe directly.
Always use clean utensils, and avoid returning served beans to the jar. Do not add a new batch of raw beans to used brine. Start with fresh brine and a clean container for each batch.
Discard the contents if there is mold, unexpected gas or bubbling, a swollen lid, slime, or an unusual odor. Do not taste a questionable pickle to decide whether it is safe. Normal appearance and smell cannot guarantee safety either.
Freezing is not recommended for this recipe because the beans may lose their crisp texture. For a party, prepare the jar two or three days ahead and keep it refrigerated during transport. Serve a small portion at a time and replenish from the refrigerator.
Troubleshooting
The Beans Are Too Tough
They may be mature, stringy, or very thick, or you may prefer the blanched version. More chilling can deepen flavor but will not reliably fix fibrous beans. Choose younger beans next time and blanch briefly.
The Beans Are Too Soft
The blanching time may have been too long, or the starting beans may have been past their best. Use firmer beans and shorten the blanching step in the next batch.
The Pickles Taste Too Sharp
That is partly the character of a vinegar pickle. Allow the flavor to settle for two or three days, then serve the beans with something creamy. Do not weaken the storage brine by adding water.
The Garlic Seems Weak
Whole cloves take time to release their flavor. Lightly crush them before packing and give the jar the full chilling period. Old or dried-out garlic can also be less flavorful.
There Is Not Enough Brine
Jar packing varies. Transfer beans to a better-fitting container or prepare more brine at the original proportions. Some leftover brine is normal when beans pack tightly; extra space can create the opposite problem.
Frequently Asked Questions
Can I Use Frozen Green Beans?
Fresh beans are the better choice for a crisp refrigerator pickle. Frozen beans have already undergone processing and may soften considerably. This recipe has not been developed around frozen beans.
Do I Have to Blanch Them?
No. Use raw beans for a firmer bite or briefly blanched beans for a slightly more tender texture. Neither option makes the jar safe for room-temperature storage.
Can I Replace the Honey With Sugar?
That would change the flavor and sweetness balance. If you prefer a sugar-based version with published proportions, follow the Extension refrigerator vegetable recipe linked below rather than assuming an exact one-for-one sweetness match.
Does This Recipe Ferment?
It is a vinegar-based refrigerator pickle, not a fermentation recipe. Unexpected bubbling should not be interpreted as a desirable stage of the process.
Can I Can These Jars?
No. Use a tested pickled green bean canning recipe and follow its ingredients, jar size, processing time, and altitude adjustments. This honey garlic version does not supply those instructions.
Can I Give a Jar as a Gift?
Yes, as a refrigerated food. Keep it cold during delivery, label the preparation date, and clearly tell the recipient to refrigerate it. A decorative lid or ribbon does not make it pantry-stable.
Print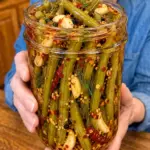
Sweet & Spicy Honey Garlic Pickled Green Beans
Description
Yield: Approximately 1 quart, depending on packing
Servings: About 8 small side portions
Prep time: 15 minutes
Brine heating time: About 5 minutes
Optional blanching: 1–2 minutes, plus cooling and draining
Chilling: 24–72 hours
Minimum total time: About 24 hours 20 minutes, excluding optional blanching
Method: Refrigerator pickling
Ingredients
For the Green Beans
- 1 pound fresh green beans, washed and trimmed
- 4 garlic cloves, peeled and lightly crushed
- 1 teaspoon mustard seeds
- 1/2 teaspoon whole black peppercorns
- 1/2 teaspoon crushed red pepper flakes, or less for mild heat
- 1 small dried chile pepper, optional
- 2 sprigs fresh dill, optional
For the Brine
- 1 cup distilled white vinegar labeled 5% acidity
- 1 cup water
- 2 tablespoons honey
- 1 tablespoon kosher salt, measured according to the brand note below
- 1 teaspoon granulated sugar, optional
Have an additional clean jar available in case the beans and liquid do not all fit comfortably into one quart jar. The finished yield depends on bean length, thickness, trimming, and packing.
Instructions
- Wash and trim 1 pound green beans to fit clean heat-safe jars.
- Optionally blanch for 1–2 minutes, ice-cool immediately, and drain thoroughly.
- Pack with 4 crushed garlic cloves, 1 teaspoon mustard seeds, 1/2 teaspoon peppercorns, 1/2 teaspoon pepper flakes, and optional dill and dried chile.
- Simmer 1 cup 5%-acidity white vinegar, 1 cup water, 2 tablespoons honey, 1 tablespoon kosher salt, and optional 1 teaspoon sugar, stirring until dissolved.
- Pour warm brine over the beans, covering completely and leaving about 1/2 inch headspace.
- Cover using suitable lids and refrigerate promptly. Do not wait for complete room-temperature cooling.
- Chill at least 24 hours, preferably 2–3 days. Serve cold with clean utensils.
Storage: Refrigerate at 40°F or below. Aim to use within two weeks for best quality. This untested variation is not intended for canning or room-temperature storage.
Nutrition: A serving is approximately one-eighth of the bean solids, with brine drained away. Calories depend strongly on how much honey-containing brine is consumed, so the supplied 35–50 calorie range should be treated as a rough estimate rather than a verified calculation.