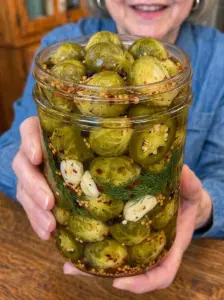
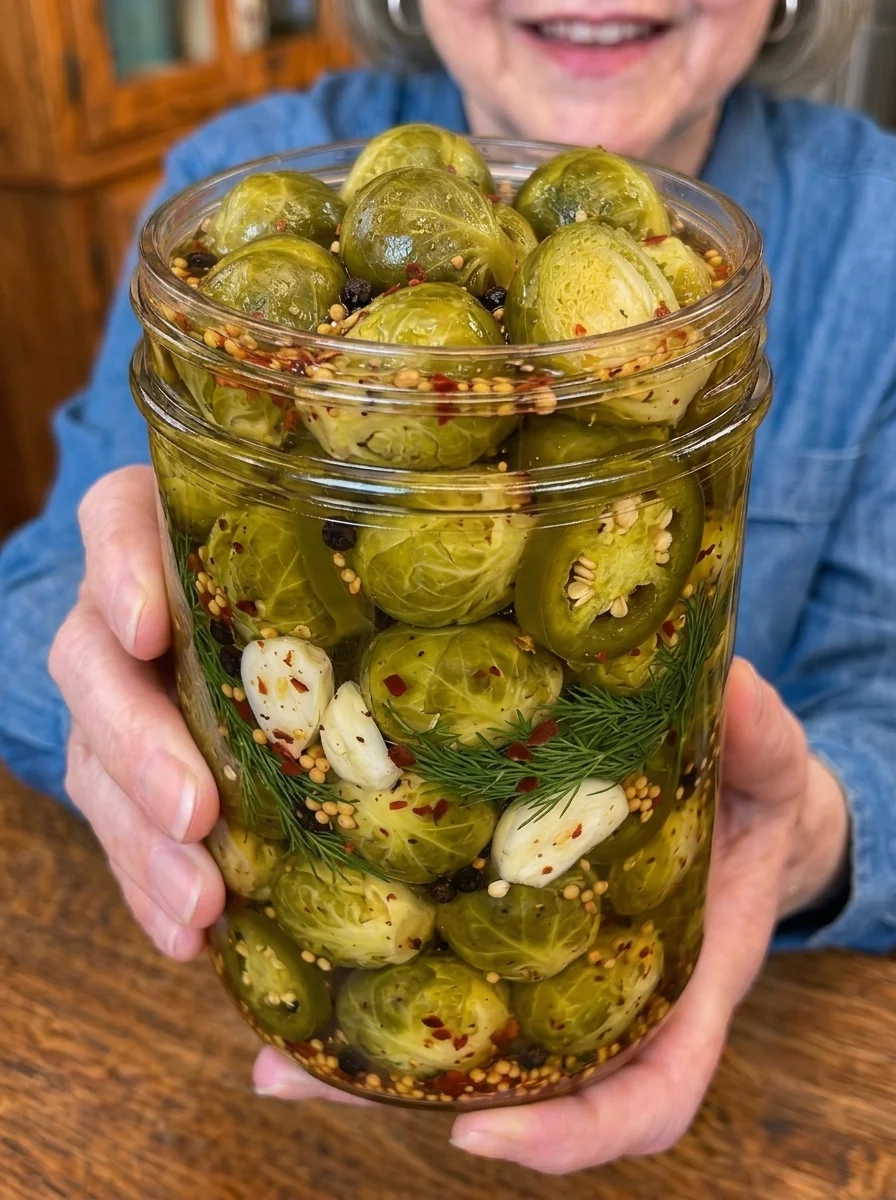
Brussels sprouts make a surprisingly satisfying refrigerator pickle. Their tightly layered leaves catch the garlicky brine, their earthy flavor stands up to dill and mustard seeds, and a little chile heat gives each bite a lively finish. Served cold beside a sandwich or a plate of barbecue, they bring the same welcome tang as a classic dill pickle with a heartier texture.
This version combines fresh sprouts with crushed garlic, fresh dill, peppercorns, and red pepper flakes in a simple vinegar brine. A short blanch takes away some of the raw toughness without cooking the sprouts until soft. After a couple of days in the refrigerator, the cut surfaces become tangy and the garlic and dill begin to settle into the vegetables.
The result should be firm and pleasantly tender rather than cucumber-crisp. Brussels sprouts have dense centers and layered leaves, so their texture will always be different from a crunchy cucumber spear. Starting with small, fresh sprouts and avoiding overcooking gives you the best chance of retaining a satisfying bite.
Recipe note: This is an untested refrigerator-pickle variation based on the supplied recipe. It has not been kitchen-tested or validated for shelf-stable preservation. Keep it refrigerated throughout storage; do not use these instructions for canning.
What Makes This Recipe Work
White vinegar supplies a clean, sharp tang that suits the earthy sprouts. Garlic adds pungency, dill provides the familiar pickle aroma, and mustard seeds contribute a subtle savory background. Pepper flakes bring adjustable heat without requiring a large quantity of fresh peppers.
The small amount of optional sugar rounds out the acidity but does not make a sweet pickle. Leave it out if you prefer a straightforward garlic dill flavor. The important texture decisions are choosing good sprouts, cutting them consistently, and stopping the blanch while they are still firm.
Most of the preparation happens in about 25 minutes, depending on how quickly the water heats. The refrigerator time is part of the recipe, not an optional finishing step. Give the sprouts at least a day before tasting and preferably two or three days before serving to guests.
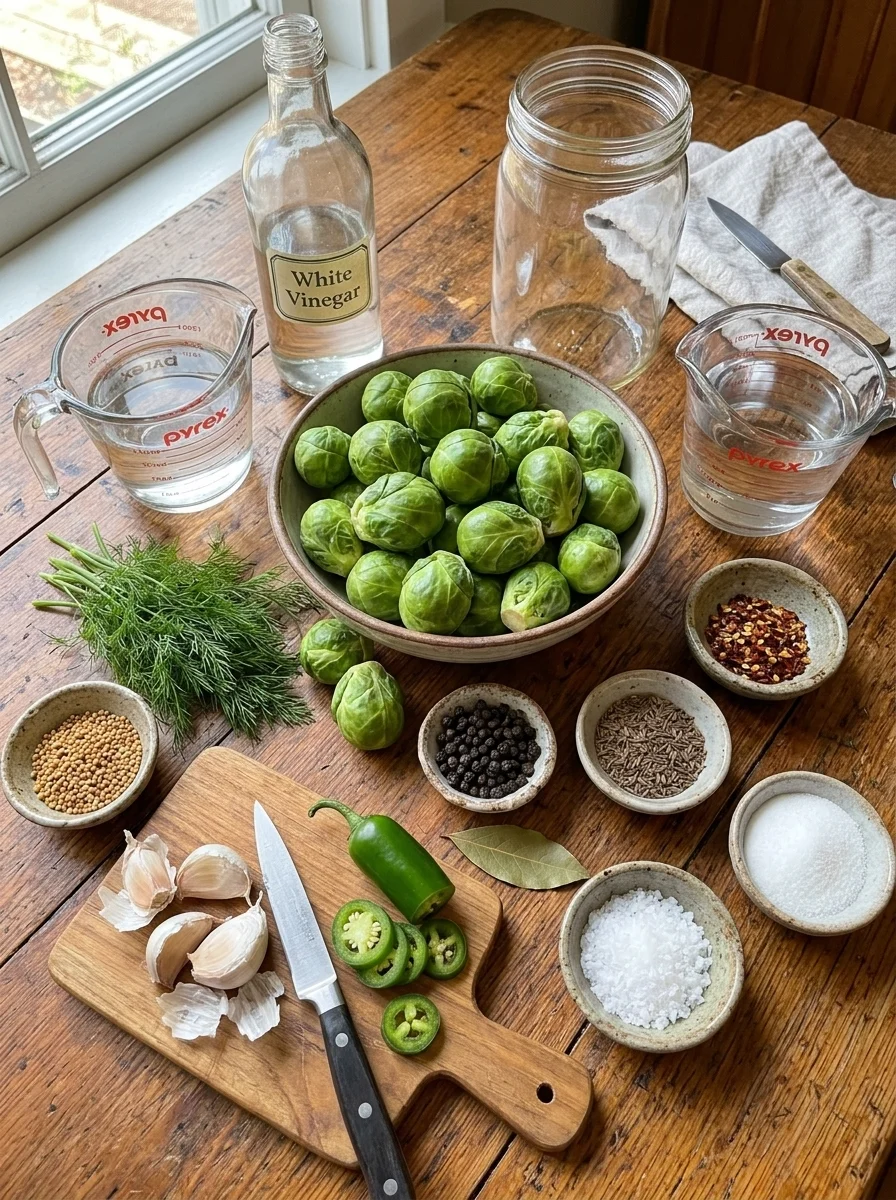
Ingredients
For the Brussels Sprouts
- 1 pound fresh Brussels sprouts
- 5 garlic cloves, peeled and lightly crushed
- 3 sprigs fresh dill, rinsed
- 1 teaspoon dill seeds, optional
- 1 teaspoon mustard seeds
- 1/2 teaspoon whole black peppercorns
- 1/2 to 1 teaspoon crushed red pepper flakes
- 1 small fresh jalapeño, thinly sliced, optional
- 1 bay leaf, optional
For the Brine
- 1 cup distilled white vinegar labeled 5% acidity
- 1 cup water
- 1 tablespoon kosher salt, with brand considerations below
- 1 teaspoon granulated sugar, optional
Have one clean, heat-safe quart jar or two pint jars ready, plus an extra small container if needed. A pound of sprouts and the full batch of brine may not fit into a single quart jar, depending on sprout size and packing. Do not force everything into an overcrowded container.
Choosing and Preparing the Ingredients
Brussels Sprouts
Choose firm sprouts with tightly closed leaves. Small to medium sprouts are generally easier to pack, blanch, and serve than very large ones. Avoid sprouts with soft spots, slimy surfaces, or extensive yellowing.
Trim only the tough, dry portion of the stem. Cutting deeply into the base can make the leaves fall away during blanching and packing. Remove loose or damaged outer leaves, then rinse the sprouts under running water.
For a more consistent batch, halve medium and large sprouts lengthwise. Small sprouts can remain whole, but their centers will take longer to develop a pickled flavor. If the batch contains dramatically different sizes, sort them before blanching rather than expecting them all to soften at the same rate.
Garlic
Lightly crush the cloves with the flat side of a knife. This exposes their flesh while keeping them large enough to recognize in the jar. Finely chopped garlic gives a stronger immediate impression but can leave small pieces scattered through the brine.
Fresh, firm cloves give a cleaner flavor than shriveled or heavily sprouted garlic. Five cloves create a noticeable garlic presence without turning the pickle into a jar of garlic alone. The flavor will develop as the sprouts chill, so wait before deciding the jar needs more.
Fresh Dill and Dill Seeds
Fresh dill brings a grassy, aromatic note, while dill seeds add a more concentrated pickle flavor. They are complementary ingredients rather than exact substitutes. You can omit the seeds and still have a dill-forward pickle.
Use sprigs that smell fresh and look lively. Remove wilted sections and rinse away any grit. Distribute the dill through the container instead of pushing all of it beneath a tightly packed bottom layer.
Vinegar
Use food-grade distilled white vinegar marked 5% acidity. Do not use cleaning vinegar or homemade vinegar of uncertain strength. The neutral flavor of white vinegar allows the garlic and herbs to remain clear.
Keep the listed proportions of vinegar and water. If the finished pickle seems sharp, serve it with something rich or creamy rather than weakening the jar with additional water. This recipe is intended to taste tangy.
Kosher Salt
Kosher salt varies substantially by brand: a tablespoon of dense crystals can contain much more salt than a tablespoon of light flakes. Use the same brand consistently and note your choice when you make the recipe.
Do not automatically replace the tablespoon of kosher salt with a tablespoon of fine table salt. That substitution can make the result much saltier. The amount listed is part of this refrigerator recipe’s flavor profile; it does not turn the mixture into a fermentation formula or a canning recipe.
Peppers and Spices
Start with 1/2 teaspoon red pepper flakes for moderate warmth. Use the full teaspoon and optional jalapeño if you enjoy a stronger kick. Pepper heat varies, so those amounts cannot guarantee a particular spice level.
Most of a jalapeño’s heat comes from the pale inner tissue where the seeds attach. Removing that tissue reduces heat, although the pepper may still be spicy. Use gloves if needed and wash your hands and tools after handling it.
Equipment
You will need a knife, cutting board, saucepan for the brine, pot for blanching, colander, bowl of ice water, measuring tools, and clean food-safe containers with suitable lids. A wide-mouth jar makes packing and removing the sprouts easier.
Use glass designed to handle warm liquid, inspect it for cracks, and follow its manufacturer’s temperature guidance. Do not pour hot brine into cold ordinary glass. Container safety and prompt food cooling are separate concerns; neither requires leaving the food on the counter until completely cold.
A clean food-safe pickling weight can help keep floating sprouts submerged. Avoid decorative stones or other objects that have not been made for food contact.
Step-by-Step Instructions
1. Clean and Trim the Sprouts
Wash your hands and clean the preparation surface. Wash the jars and lids thoroughly, rinse well, and set them aside. Rinse the sprouts and remove damaged outer leaves.
Trim the stem ends without cutting away the entire base. Halve larger sprouts lengthwise so the brine can reach their inner layers more readily. Keep similar sizes together for the blanching step.
If a sprout has damage that extends into the center, discard it instead of trying to hide the problem beneath the brine. Pickling begins with sound vegetables.
2. Blanch Briefly
Bring a pot of water to a boil and have a bowl of ice water ready. Add the sprouts and blanch for approximately 3 to 4 minutes, checking earlier for small halves.
The goal is to soften the outside slightly while keeping the center firm. The sprouts should not collapse, fall apart, or become fully tender like a cooked side dish. Size matters more than an exact stopwatch reading.
Transfer immediately to ice water to stop the cooking. Once cool, drain thoroughly. Avoid leaving them soaking for a long time, and shake away trapped water before packing.
3. Add the Seasonings
Divide the garlic, fresh dill, optional dill seeds, mustard seeds, peppercorns, pepper flakes, optional jalapeño, and bay leaf among the containers.
If you are using two pint jars, split the seasonings roughly evenly. Set aside a little dill and a garlic clove or two to tuck between layers of sprouts as you pack.
Whole spices will remain visible in the brine. They are there to flavor the pickle; you do not need to eat the peppercorns or bay leaf when serving.
4. Pack the Sprouts
Arrange the cooled sprouts snugly in the container without crushing them. Place a few halves cut-side outward if you like the appearance, but prioritize an even pack over decoration.
Leave enough room for brine to surround the vegetables and for about 1/2 inch of headspace at the top. If the container is crowded, use the extra jar rather than squeezing in the last few sprouts.
Tuck the remaining garlic and dill between the sprouts. This makes it easier to distribute them than trying to push all the seasonings through a fully packed jar.
5. Make the Brine
Combine the vinegar, water, kosher salt, and optional sugar in the saucepan. Heat over medium heat, stirring until the salt and sugar dissolve. Bring to a gentle simmer and remove from the heat.
There is no need to boil the brine for an extended period. You are dissolving seasoning and warming the liquid, not reducing it into a concentrate.
Avoid leaning directly over the saucepan, since hot vinegar vapor can be irritating. Pour carefully and use a stable surface when filling the containers.
6. Cover With Brine
Pour the warm brine over the sprouts, covering them completely and retaining approximately 1/2 inch headspace. Gently tap the container or slide a clean nonmetallic utensil between the vegetables to release trapped air.
If the sprouts float, use a suitable clean weight. If you need additional brine, prepare more with the same vinegar-to-water proportions and seasoning ratio. Do not top the jar up with plain water.
You may have leftover liquid if the vegetables pack tightly. That is preferable to leaving part of the batch uncovered or forcing an overfilled lid into place.
7. Refrigerate Promptly
Cover using lids appropriate for the containers and refrigerate promptly. Do not wait for the contents to become completely room temperature. Small amounts of warm food can go into the refrigerator in suitable containers; divide the batch if necessary to help it cool.
Protect the glass from sudden temperature changes according to its manufacturer’s instructions. If your container cannot safely accept warm brine, choose an appropriate heat-safe food container rather than delaying refrigeration for hours.
Label the batch with the preparation date and keep the refrigerator at 40°F or below. Leave enough room around the containers for cold air to circulate.
8. Chill and Taste
Allow at least 24 hours before tasting. Two to three days generally gives the garlic, dill, and pepper more time to flavor the sprouts, although whole large sprouts may still have a milder center.
Use clean utensils to remove a sample. Taste a halved piece so you can judge both the outside and center. Serve cold and return the storage jar to the refrigerator promptly.
Acidic brine may turn the sprouts from bright green toward olive green. That expected color shift is different from mold, sliminess, or other spoilage signs.
Tips for Firm, Flavorful Pickled Sprouts
Choose a consistent size. A batch of similarly sized halves will be easier to prepare than a mixture of tiny whole sprouts and very large quarters.
Blanch for texture rather than tenderness. These are meant to be pickles, so stop before they feel ready to serve as boiled vegetables.
Drain after the ice bath. Water caught between the leaves can carry into the jar. A brief, thorough drain keeps unnecessary liquid out of the pack.
Give the garlic time. The jar may smell strongly of garlic before the sprouts taste equally garlicky. Additional refrigerator time helps the flavors develop.
Keep the sprouts submerged. Check the top layer after packing and after the first day, when the vegetables may settle into a different arrangement.
Make a smaller first batch if you are unsure about the heat. It is easier to change the pepper level in the next jar than to remove heat once it has infused into this one.
Flavor Variations
Milder Garlic Dill
Use a small pinch of red pepper flakes and omit the jalapeño. Retain the fresh dill, mustard seeds, and garlic for a savory pickle with much less heat.
Extra Dill
Include the optional dill seeds along with the fresh sprigs. This gives a more pronounced classic pickle aroma without needing a large bunch of fresh herbs.
Jalapeño Garlic
Use the sliced jalapeño and begin with the lower amount of pepper flakes. Taste the finished batch before deciding that future jars need both peppers at full strength.
Peppercorn and Bay
Omit the jalapeño and use the optional bay leaf for a more aromatic, less chile-focused version. Remove the bay leaf when serving.
These are flavor changes for refrigerated preparation. They do not validate the recipe for canning or establish a longer storage period.
Ways to Serve Them
Serve a few chilled halves beside a burger, grilled chicken, pulled pork, or a hot sandwich. Their acidity provides contrast to rich meat, melted cheese, and smoky barbecue sauces.
For an appetizer board, put drained sprouts in a small separate bowl. This keeps brine away from crackers and bread while making the pickles easy to serve with a clean fork.
Quarter the sprouts and add a small amount to potato salad or a cold grain salad shortly before serving. Their strong flavor works best as an accent rather than the main vegetable.
For a simple lunch plate, pair them with cheddar, sliced turkey, bread, and fresh fruit. The pickle’s garlic and dill provide plenty of seasoning without an additional sauce.
Avoid pouring the storage jar directly over a finished dish. Remove only the portion you need, drain it, and keep the rest cold. This also prevents stray food from falling back into the brine.
Storage and Make-Ahead Guidance
Keep the sprouts in their brine in clean, covered containers at 40°F or below. Plan to serve them after two or three days and use within two weeks as a conservative best-quality target for this supplied variation. That target is not a laboratory-validated shelf life, and it does not compensate for poor handling or inadequate refrigeration.
Do not treat a sealed lid as evidence that the jar is shelf-stable. There is no canning process in this recipe. Keep it cold during storage, transport, and gifting.
Use clean utensils every time. Never return sprouts from a serving platter to the storage jar, and do not add fresh vegetables to used brine. Prepare a clean jar and fresh brine for each new batch.
Discard the contents if you see mold, unexpected bubbling, a swollen lid, slime, or an unusual odor. Do not taste questionable food to decide whether it is safe. A normal smell and appearance cannot prove safety either.
Freezing is not recommended because it can soften the sprouts and damage the texture you worked to preserve. Make the amount you expect to use while it is at its best.
Troubleshooting
The Centers Are Too Firm
The sprouts may be too large or may have been left whole. More time can improve flavor, but it will not reliably correct a woody center. Use smaller sprouts or consistent halves for the next batch.
The Sprouts Are Mushy
They may have been blanched too long or started out soft. The brine cannot restore their structure. Shorten the blanch and transfer to ice water immediately next time.
The Pickles Taste Too Salty
Kosher salt brand differences are a common cause. Serve a smaller drained portion with unsalted foods and record the brand used. Do not dilute the storage jar to correct the seasoning.
The Garlic Tastes Harsh
Fresh crushed garlic can be assertive, especially in the first day. Allow the flavors to settle for another day or two. Use one fewer clove in a future batch if five cloves are too strong for your preference.
The Sprouts Float
Their layered structure can trap air. Release bubbles gently during packing and use a food-safe weight if needed. Keep the uppermost leaves beneath the brine.
The Smell Is Strong
Brussels sprouts naturally have a cabbage-like aroma, which can be noticeable in a closed jar. However, do not dismiss a new unpleasant odor or other spoilage changes as normal. When in doubt about the handling or condition of the food, discard it.
Frequently Asked Questions
Can I Skip Blanching?
Raw sprouts are substantially firmer, especially at the center. This recipe includes a short blanch for a more approachable bite. Skipping it would change the texture and has not been tested for this variation.
Can I Use Frozen Brussels Sprouts?
Fresh sprouts are preferred. Frozen sprouts have already undergone processing and may become much softer. This recipe has not been developed for frozen vegetables.
Can I Use Only Dried Dill?
Dried dill weed has a different strength and texture from fresh sprigs, and dill seeds have a different flavor again. For the recipe as written, use fresh dill and treat the seeds as an optional addition.
Is This a Fermented Pickle?
No. It is a vinegar-based refrigerator pickle. Do not leave it at room temperature to ferment, and do not interpret unexpected gas as a desirable stage.
Can I Make It Shelf-Stable?
Use a separately tested canning recipe for pickled Brussels sprouts and follow it exactly. Adding more vinegar, boiling the filled jar, or tightening the lid does not create a validated canning process for this formula.
Can I Double It?
Prepare additional small jars with the same proportions rather than one large, slow-cooling container. Allow extra preparation time and keep each batch refrigerated promptly.
Print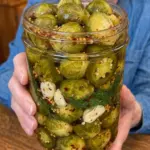
Spicy Garlic Dill Pickled Brussels Sprouts
Description
Yield: Approximately one quart, with additional container space as needed
Servings: About 8 small side portions
Prep time: 15 minutes
Cook time: Approximately 10 minutes, including brine heating
Chill time: 24–72 hours
Minimum total time: About 24 hours 25 minutes
Method: Refrigerator pickling
Ingredients
For the Brussels Sprouts
- 1 pound fresh Brussels sprouts
- 5 garlic cloves, peeled and lightly crushed
- 3 sprigs fresh dill, rinsed
- 1 teaspoon dill seeds, optional
- 1 teaspoon mustard seeds
- 1/2 teaspoon whole black peppercorns
- 1/2 to 1 teaspoon crushed red pepper flakes
- 1 small fresh jalapeño, thinly sliced, optional
- 1 bay leaf, optional
For the Brine
- 1 cup distilled white vinegar labeled 5% acidity
- 1 cup water
- 1 tablespoon kosher salt, with brand considerations below
- 1 teaspoon granulated sugar, optional
Have one clean, heat-safe quart jar or two pint jars ready, plus an extra small container if needed. A pound of sprouts and the full batch of brine may not fit into a single quart jar, depending on sprout size and packing. Do not force everything into an overcrowded container.
Instructions
- Wash and trim 1 pound Brussels sprouts. Halve larger sprouts lengthwise.
- Blanch for about 3–4 minutes, checking small halves earlier. Ice-cool immediately and drain thoroughly.
- Pack clean heat-safe containers with the sprouts, 5 crushed garlic cloves, 3 dill sprigs, 1 teaspoon mustard seeds, 1/2 teaspoon peppercorns, and 1/2–1 teaspoon pepper flakes. Add optional dill seeds, jalapeño, and bay leaf.
- Heat 1 cup 5%-acidity white vinegar, 1 cup water, 1 tablespoon kosher salt, and optional 1 teaspoon sugar until dissolved and gently simmering.
- Pour warm brine over the sprouts, covering completely and leaving about 1/2 inch headspace.
- Cover appropriately and refrigerate promptly in suitable containers. Keep at 40°F or below.
- Chill at least 24 hours, preferably 2–3 days. Serve cold using clean utensils.
Storage: Use within two weeks as a best-quality target for this untested variation. Keep refrigerated; do not can or store in the pantry.
Nutrition: Approximately 25–40 calories per small serving is a rough estimate, assuming about eight servings of drained vegetables. Actual calories and sodium depend on portion size, salt brand, and brine consumed. This is not a verified nutrition calculation.