Spicy Italian Giardiniera: The Ultimate Homemade Recipe for Crunchy, Fiery Pickled Vegetables
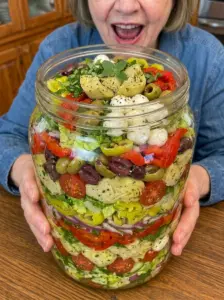
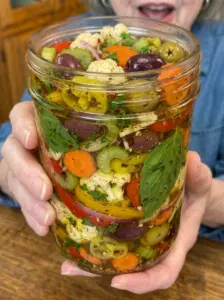
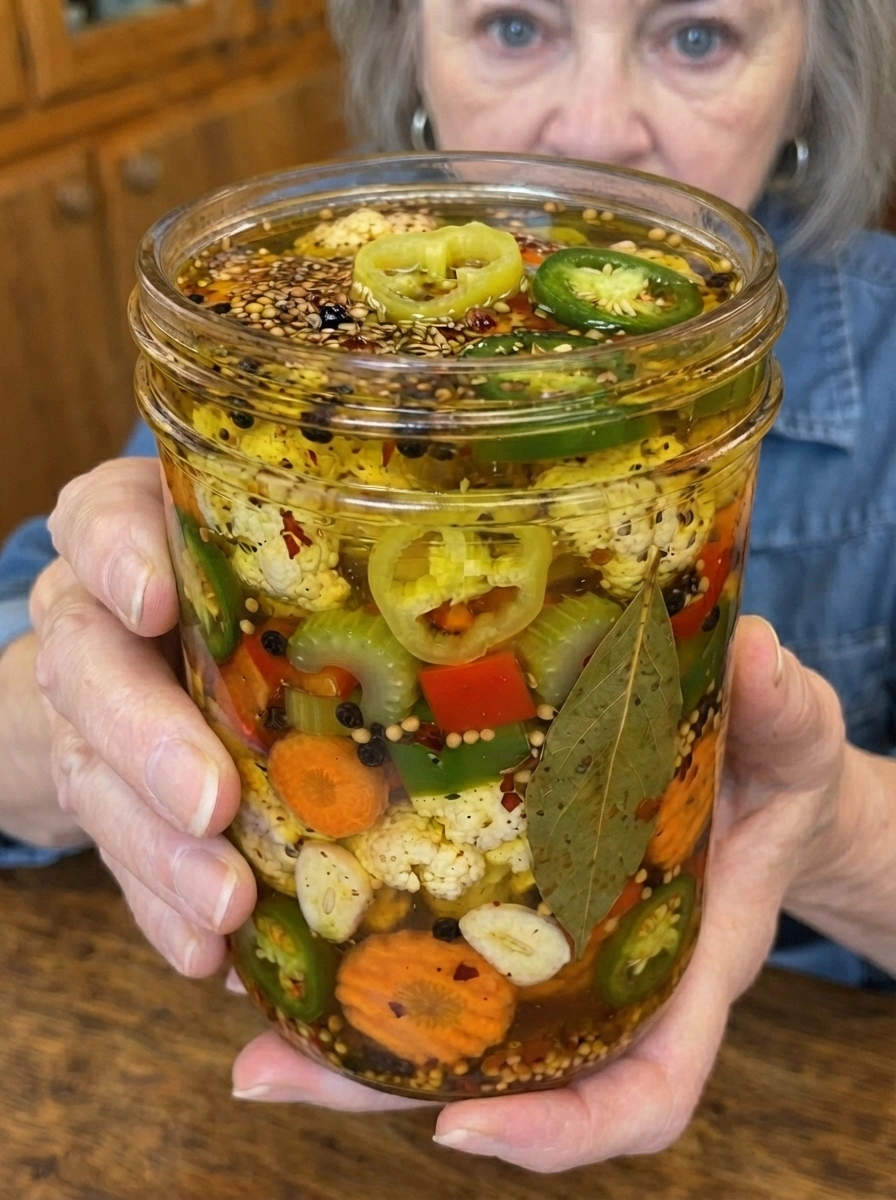
If you’ve ever wondered how Chicago Italian beef sandwiches get that irresistible tangy, spicy crunch, the answer is giardiniera. This vibrant, garlicky, vinegar-packed condiment has been a staple of Italian-American kitchens for generations, and once you learn how easy it is to make at home, you’ll never go back to store-bought jars again. This Spicy Italian Giardiniera recipe delivers everything you want in a pickled vegetable medley: crisp cauliflower, sweet carrots, crunchy celery, colorful bell peppers, and a serious kick of heat from jalapeños and pepperoncini, all swimming in a zesty vinegar brine finished with rich olive oil.
Whether you’re piling it onto sandwiches, scattering it over pizza, topping a Chicago-style hot dog, or eating it straight from the jar as a snack, homemade giardiniera is one of those recipes that pays off far beyond the 25 minutes of active work it takes to prepare. Let’s dive into everything you need to know to make the best spicy Italian giardiniera of your life.
What Is Giardiniera?
Giardiniera (pronounced jar-din-YAIR-ah) is an Italian word that simply means “from the garden.” Traditionally, it refers to a mix of pickled vegetables preserved in vinegar or oil, often seasoned with garlic, herbs, and chili peppers. While giardiniera has roots in northern Italy, it became a beloved American staple thanks to Chicago’s Italian-American community, where it’s practically a required topping for Italian beef sandwiches, Italian sausages, and even pizza.
There are two main styles of giardiniera you’ll encounter: the milder, vinegar-only versions found in many grocery stores, and the bold, oil-packed “hot” versions that pack serious heat. This recipe leans into the latter, combining a tangy vinegar brine with a luxurious layer of olive oil on top, giving you the best of both textures and flavors in one jar.
Why You’ll Love This Spicy Italian Giardiniera Recipe
This isn’t just another pickled vegetable recipe. Here’s what sets it apart:
It’s genuinely crunchy. The quick blanch-and-ice-bath method used for the cauliflower, carrots, and celery locks in that satisfying crispness, so your giardiniera never turns mushy or limp, even after weeks in the fridge.
The heat is customizable. Between the jalapeños, pepperoncini, and crushed red pepper flakes, you control exactly how fiery your batch turns out. Add more chilies for extra heat, or dial it back if you prefer a milder version.
It’s incredibly versatile. This condiment isn’t limited to one dish. It’s a topping, a snack, a sandwich builder, and a flavor bomb all in one jar.
It’s made with pantry staples. Vinegar, garlic, salt, sugar, and a handful of spices are all you need for the brine. No specialty ingredients, no complicated equipment.
It keeps for weeks. Once prepared, this giardiniera stores beautifully in the refrigerator for up to three weeks, meaning you can make a big batch and enjoy it all month long.
Ingredients You’ll Need
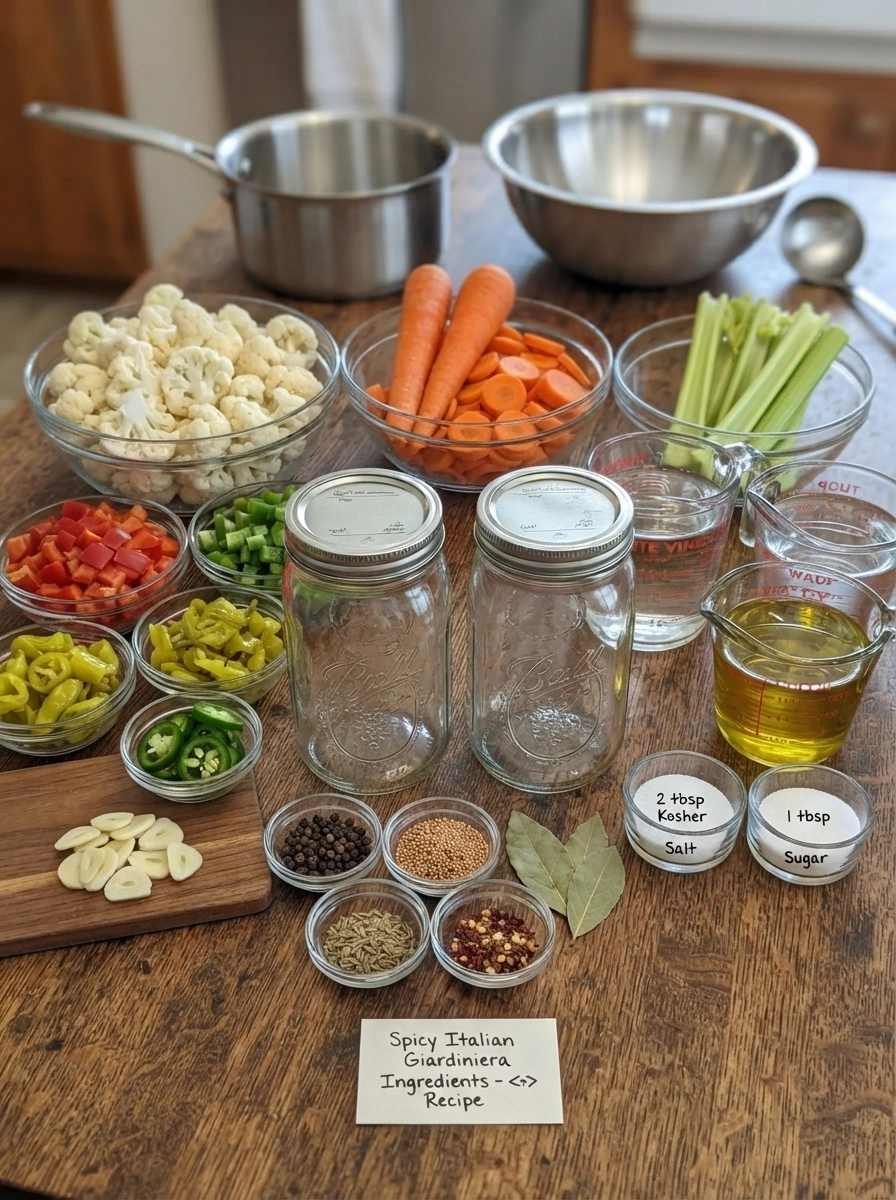
The beauty of this recipe lies in its balance of textures, colors, and flavors. Here’s what goes into the mix:
The Vegetables
- 2 cups cauliflower florets
- 2 large carrots, peeled and sliced into thin rounds
- 2 celery stalks, sliced
- 1 red bell pepper, diced
- 1 green bell pepper, diced
- 4–5 pepperoncini peppers, sliced
- 2 jalapeños, thinly sliced
- 6 cloves garlic, thinly sliced
The Brine
- 2 cups white vinegar
- 1 cup water
- 2 tablespoons kosher salt or pickling salt
- 1 tablespoon sugar
- 1 teaspoon whole black peppercorns
- 1 teaspoon mustard seeds
- 1 teaspoon celery seeds
- 1 teaspoon oregano
- 1/2 teaspoon crushed red pepper flakes
- 2 bay leaves
The Finishing Touch
- 1 cup extra virgin olive oil
Each ingredient plays a specific role. The cauliflower and carrots provide sturdy crunch that holds up beautifully in brine. The bell peppers add sweetness and color, while the pepperoncini and jalapeños bring layered heat. Garlic infuses the whole jar with its signature punch, and the blend of mustard seeds, celery seeds, and oregano gives the brine that classic Italian deli flavor. Finally, the olive oil on top isn’t just for show. It mellows the sharpness of the vinegar and adds richness that makes this giardiniera taste like it came straight from an Italian market.
How to Make Spicy Italian Giardiniera
Making giardiniera at home is far simpler than most people expect. Here’s the step-by-step process broken down for success.
Step 1: Prep the Vegetables
Start by washing all your produce thoroughly. Cut the cauliflower into bite-sized florets, peel and slice the carrots into thin rounds, and slice the celery stalks. Dice both bell peppers, slice the pepperoncini and jalapeños, and thinly slice the garlic cloves. Having everything prepped and ready before you start blanching will make the process move quickly and smoothly.
Step 2: Blanch for the Perfect Crunch
This step is the secret to giardiniera that stays crisp for weeks instead of turning soft and soggy. Bring a large pot of water to a rolling boil, then add the cauliflower, carrots, and celery. Blanch for just 2 minutes. This brief cooking time softens the vegetables just slightly while preserving their crunch.
Immediately transfer the blanched vegetables to an ice bath to stop the cooking process. This rapid temperature change is what locks in that satisfying bite. Drain the vegetables thoroughly once they’ve cooled, since excess water can dilute your brine.
Step 3: Combine the Vegetable Mix
In a large mixing bowl, combine the blanched cauliflower, carrots, and celery with the raw diced bell peppers, sliced pepperoncini, jalapeños, and garlic. Toss everything together so the flavors and colors are evenly distributed throughout the mix.
Step 4: Pack the Jars
Pack the vegetable mixture tightly into a large clean glass jar, or divide it evenly between two quart-sized jars. Packing the vegetables snugly (without crushing them) helps ensure they stay submerged in the brine later, which is key for both flavor absorption and food safety.
Step 5: Make the Brine
In a saucepan, combine the white vinegar, water, kosher salt, sugar, black peppercorns, mustard seeds, celery seeds, oregano, crushed red pepper flakes, and bay leaves. Heat the mixture over medium heat, stirring occasionally, just until the salt and sugar fully dissolve.
Important: do not let the brine boil. You simply want it warm enough to dissolve the salt and sugar and release the aromatics from the spices, not cooked down or reduced.
Step 6: Pour and Cool
Pour the warm brine over the packed vegetables until they are completely covered. Use a spoon or spatula to press down gently and release any trapped air bubbles. Let the jars cool to room temperature on the counter before moving to the next step, this usually takes about 30 to 45 minutes.
Step 7: Add the Olive Oil
Once the jars have cooled, pour the extra virgin olive oil over the top of each jar. This creates a flavorful seal and gives the giardiniera that signature richness found in traditional Italian deli versions. The oil will settle on top, and that’s exactly what you want.
Step 8: Seal and Refrigerate
Seal the jars tightly with their lids and transfer them to the refrigerator. Let them sit for at least 48 hours before tasting. For the best, most developed flavor, resist the urge to dig in early and let the giardiniera marinate for 5 to 7 days. The longer it sits, the more the garlic, herbs, and spices infuse into every vegetable.
Tips for the Best Homemade Giardiniera
Cut vegetables uniformly. Slicing your carrots, celery, and peppers to a similar size ensures even pickling and a more consistent texture throughout the jar.
Don’t skip the ice bath. It’s tempting to rush this step, but shocking the vegetables in ice water is essential for that signature crunch that separates homemade giardiniera from the mushy versions found in some jars.
Use fresh garlic. Thinly sliced fresh garlic cloves infuse the brine with far more flavor than pre-minced or jarred garlic.
Sterilize your jars. For the best shelf life and food safety, wash your glass jars in hot, soapy water and let them air dry completely, or run them through a dishwasher cycle before packing.
Adjust the heat to your taste. If you love serious spice, add an extra jalapeño or a few slices of a hotter chili like serrano. For a milder batch, reduce the jalapeños and pepperoncini, or remove the seeds and ribs before slicing.
Keep everything submerged. Make sure the vegetables stay fully covered by the brine and oil while stored. Any exposed pieces can spoil faster or lose their crunch.
Be patient. The flavor difference between a 48-hour giardiniera and a 7-day giardiniera is significant. If you can wait, the extra days are worth it.
How to Use Spicy Italian Giardiniera
One of the best things about this condiment is its versatility. Here are some of the most popular ways to enjoy it:
Italian beef sandwiches. This is the classic Chicago pairing. Pile giardiniera onto a hot Italian beef sandwich for that authentic tangy, spicy crunch.
Sausages and hot dogs. Spoon it over grilled Italian sausage or a Chicago-style hot dog for an instant flavor and texture upgrade.
Pizza topping. Scatter giardiniera over a finished pizza, especially one with rich, savory toppings like sausage or pepperoni, for a bright, acidic contrast.
Antipasto platters. Add a bowl of giardiniera to your next charcuterie or antipasto spread alongside cured meats, cheeses, and olives.
Sandwiches and wraps. Use it in place of standard pickles or relish on deli sandwiches, subs, and wraps for a bolder flavor.
Straight from the jar. Don’t underestimate how satisfying this is as a low-calorie, crunchy snack all on its own.
Salads and grain bowls. Chop it up and toss it into salads, pasta salads, or grain bowls for a punch of acidity and heat.
Burgers. Swap out traditional pickles for a spoonful of giardiniera for a spicy, garlicky twist on your favorite burger.
Storage Information
Proper storage is key to keeping your giardiniera fresh, crisp, and safe to eat for weeks. Store the jars in an airtight container in the refrigerator, where the giardiniera will keep for up to 3 weeks. Always make sure the vegetables remain fully submerged in the brine and oil mixture, as this keeps them fresh and prevents spoilage.
It’s normal for the olive oil to solidify slightly when chilled, since olive oil naturally thickens in cold temperatures. Simply give the jar a gentle stir before serving, or let it sit at room temperature for a few minutes to loosen up again.
Recipe Quick Facts
- Prep Time: 20 minutes
- Cook Time: 5 minutes
- Total Time: 25 minutes
- Servings: 10
- Calories: Approximately 95 per serving
Frequently Asked Questions
Can I make giardiniera less spicy? Yes. Reduce the number of jalapeños and pepperoncini, remove the seeds and membranes before slicing, or cut the crushed red pepper flakes from the brine entirely.
Do I need to can these jars for long-term storage? No. This is a refrigerator pickle, not a shelf-stable canned product. It’s designed to be stored in the fridge and enjoyed within about 3 weeks, not processed for pantry storage.
Can I use apple cider vinegar instead of white vinegar? White vinegar is recommended for its clean, sharp flavor and higher acidity, which helps preserve the vegetables and their bright colors. Apple cider vinegar will work in a pinch, but it will add a slightly different, sweeter flavor and a darker color to the brine.
Why did my vegetables turn soft? This usually happens if the blanching time is too long or if the vegetables aren’t shocked in an ice bath immediately after boiling. Stick to the 2-minute blanch and an immediate ice bath for the crispest results.
Can I customize the vegetable mix? Absolutely. This recipe is very forgiving. Try adding green beans, sliced radishes, or baby corn, or swap in different pepper varieties depending on the heat level you want.
Final Thoughts
This Spicy Italian Giardiniera recipe proves that some of the best condiments are also the simplest to make at home. With a short list of pantry ingredients, a quick blanching step, and a little patience while it marinates, you’ll end up with jars of crisp, garlicky, fiery pickled vegetables that outshine anything you’ll find at the store. Once you experience the difference homemade giardiniera makes on a sandwich, pizza, or hot dog, it’s likely to become a permanent fixture in your refrigerator. Make a batch this weekend, let it marinate through the week, and get ready for a condiment you’ll want to put on absolutely everything.
Print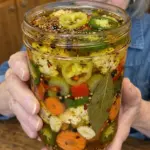
Spicy Italian Giardiniera
- Total Time: 25 minutes
Ingredients
The beauty of this recipe lies in its balance of textures, colors, and flavors. Here’s what goes into the mix:
The Vegetables
- 2 cups cauliflower florets
- 2 large carrots, peeled and sliced into thin rounds
- 2 celery stalks, sliced
- 1 red bell pepper, diced
- 1 green bell pepper, diced
- 4–5 pepperoncini peppers, sliced
- 2 jalapeños, thinly sliced
- 6 cloves garlic, thinly sliced
The Brine
- 2 cups white vinegar
- 1 cup water
- 2 tablespoons kosher salt or pickling salt
- 1 tablespoon sugar
- 1 teaspoon whole black peppercorns
- 1 teaspoon mustard seeds
- 1 teaspoon celery seeds
- 1 teaspoon oregano
- 1/2 teaspoon crushed red pepper flakes
- 2 bay leaves
The Finishing Touch
- 1 cup extra virgin olive oil
Instructions
Making giardiniera at home is far simpler than most people expect. Here’s the step-by-step process broken down for success.
Start by washing all your produce thoroughly. Cut the cauliflower into bite-sized florets, peel and slice the carrots into thin rounds, and slice the celery stalks. Dice both bell peppers, slice the pepperoncini and jalapeños, and thinly slice the garlic cloves. Having everything prepped and ready before you start blanching will make the process move quickly and smoothly.
This step is the secret to giardiniera that stays crisp for weeks instead of turning soft and soggy. Bring a large pot of water to a rolling boil, then add the cauliflower, carrots, and celery. Blanch for just 2 minutes. This brief cooking time softens the vegetables just slightly while preserving their crunch.
Immediately transfer the blanched vegetables to an ice bath to stop the cooking process. This rapid temperature change is what locks in that satisfying bite. Drain the vegetables thoroughly once they’ve cooled, since excess water can dilute your brine.
In a large mixing bowl, combine the blanched cauliflower, carrots, and celery with the raw diced bell peppers, sliced pepperoncini, jalapeños, and garlic. Toss everything together so the flavors and colors are evenly distributed throughout the mix.
Pack the vegetable mixture tightly into a large clean glass jar, or divide it evenly between two quart-sized jars. Packing the vegetables snugly (without crushing them) helps ensure they stay submerged in the brine later, which is key for both flavor absorption and food safety.
In a saucepan, combine the white vinegar, water, kosher salt, sugar, black peppercorns, mustard seeds, celery seeds, oregano, crushed red pepper flakes, and bay leaves. Heat the mixture over medium heat, stirring occasionally, just until the salt and sugar fully dissolve.
Important: do not let the brine boil. You simply want it warm enough to dissolve the salt and sugar and release the aromatics from the spices, not cooked down or reduced.
Pour the warm brine over the packed vegetables until they are completely covered. Use a spoon or spatula to press down gently and release any trapped air bubbles. Let the jars cool to room temperature on the counter before moving to the next step, this usually takes about 30 to 45 minutes.
Once the jars have cooled, pour the extra virgin olive oil over the top of each jar. This creates a flavorful seal and gives the giardiniera that signature richness found in traditional Italian deli versions. The oil will settle on top, and that’s exactly what you want.
Seal the jars tightly with their lids and transfer them to the refrigerator. Let them sit for at least 48 hours before tasting. For the best, most developed flavor, resist the urge to dig in early and let the giardiniera marinate for 5 to 7 days. The longer it sits, the more the garlic, herbs, and spices infuse into every vegetable.
- Prep Time: 20 minutes
- Cook Time: 5 minutes
Nutrition
- Serving Size: 10
- Calories: Approximately 95 per serving