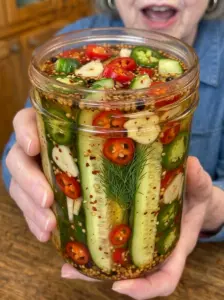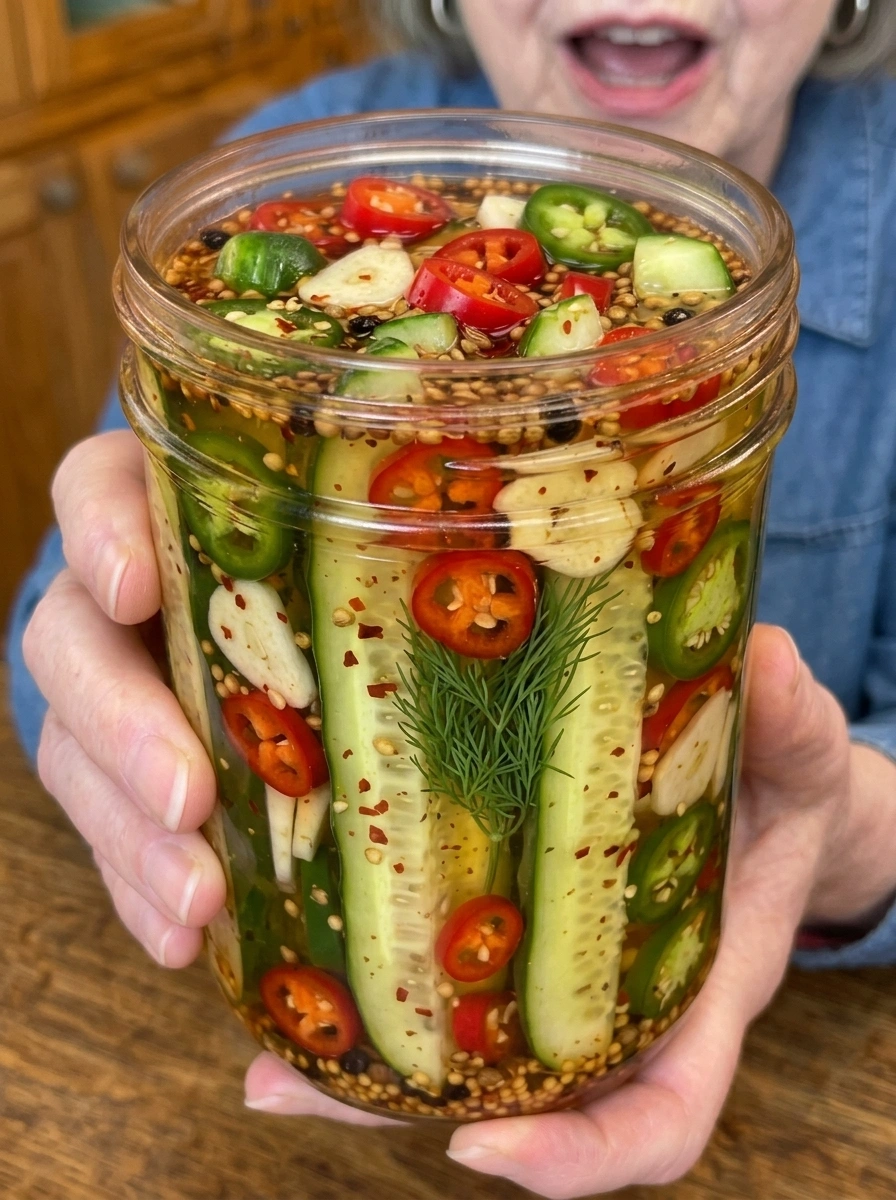
These Spicy Chili Garlic Pickles are crunchy, tangy, and loaded with bold garlic and chili heat. An easy refrigerator pickle recipe perfect for burgers, sandwiches, and snacking!
If you love a pickle with real bite—both in flavor and heat—these Spicy Chili Garlic Pickles are exactly what your refrigerator needs. Crisp pickling cucumbers are packed into jars with thinly sliced garlic, fresh red chilies, jalapeños, and dill, then submerged in a punchy vinegar brine seasoned with mustard seed and red pepper flakes. The result is a batch of salty, sour, spicy, seriously addictive pickles that deliver bold flavor in every crunchy bite.
This recipe is a simple refrigerator pickle, meaning there’s no complicated canning process involved. Just prep, pack, brine, and chill. In as little as 24 hours (though 3–5 days delivers even bolder garlic and chili flavor), you’ll have a jar of homemade spicy pickles ready to elevate burgers, sandwiches, tacos, and so much more.
Let’s dive into everything you need to know to make these bold, garlicky, spicy pickles at home.
Why You’ll Love These Spicy Chili Garlic Pickles
There are so many reasons to keep a jar of these in your refrigerator at all times:
Bold, deli-style flavor. The combination of fresh garlic, red chilies, mustard seed, and dill creates that classic, punchy deli pickle flavor with a serious kick of heat.
Fully customizable heat level. From mild jalapeño heat to serious habanero fire, this recipe is easy to adjust based on your spice tolerance.
No canning required. As a refrigerator pickle, this recipe skips the need for a water bath canner or specialized canning knowledge.
Incredibly crunchy. Following the tips for extra-crisp pickles ensures every bite has that satisfying, deli-style crunch.
Long shelf life. Stored properly in the refrigerator, these pickles keep well for several weeks.
Endlessly versatile. These spicy pickles work as a snack, a burger topping, a sandwich addition, and even a mix-in for salads and dips.
Ingredients You’ll Need
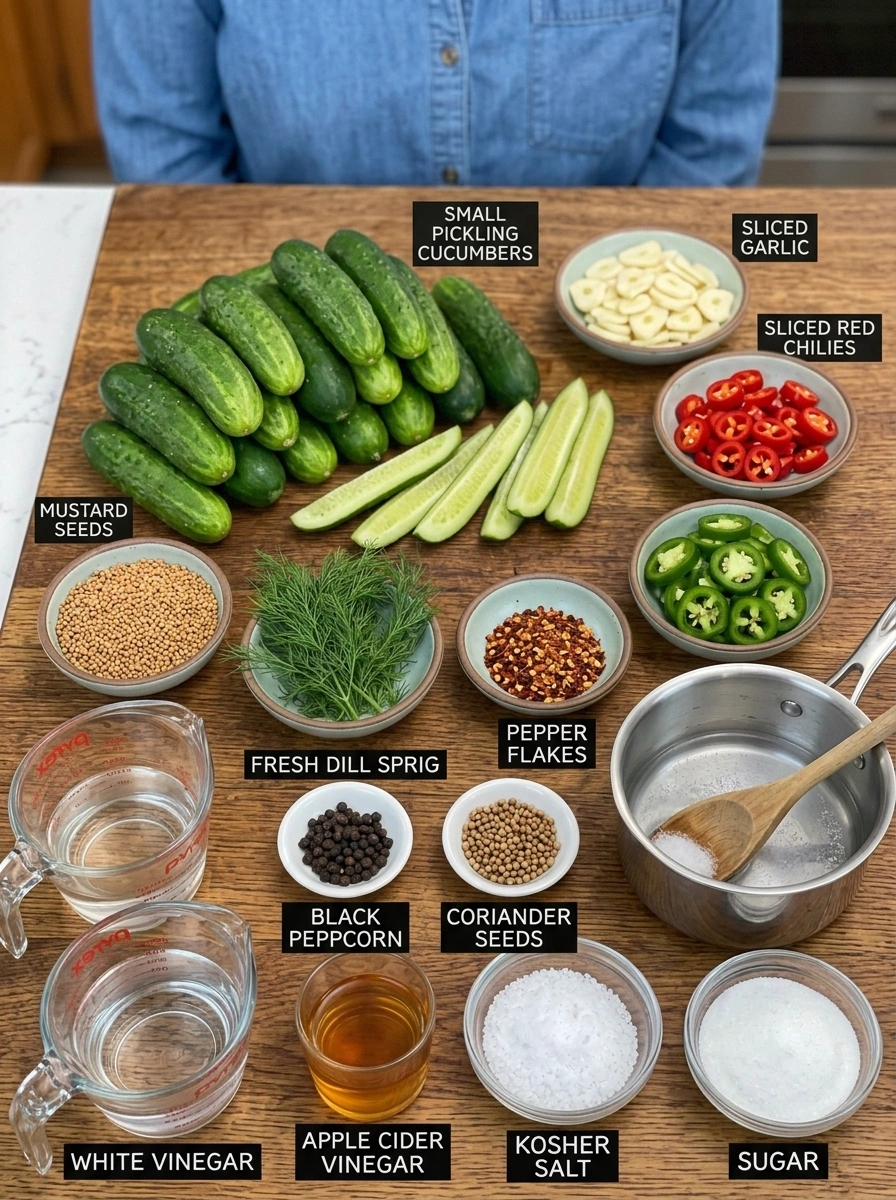
Here’s a breakdown of what goes into this bold, spicy pickle recipe and why each ingredient plays a role.
For the Pickles
- 1½ lb small pickling cucumbers — The star of the recipe; small, firm pickling cucumbers hold up best to the pickling process and maintain the crispest texture.
- 6–8 garlic cloves, thinly sliced — Infuses the brine with bold, aromatic garlic flavor throughout the pickling process.
- 2–4 fresh red chili peppers, sliced — Brings vibrant color and fiery heat throughout the jar.
- 1–2 jalapeños, sliced — Adds fresh, bright heat alongside the red chilies.
- 2 tbsp fresh dill — Adds that classic, essential dill pickle flavor.
- 1 tsp red pepper flakes — Reinforces the heat throughout the brine.
- 1 tsp mustard seeds — Provides a slightly tangy, sharp flavor typical of classic pickling spice blends.
- 1 tsp black peppercorns — Adds a mild, warm heat and subtle spice.
- ½ tsp coriander seeds, optional — Adds a warm, citrusy note to the brine.
For the Brine
- 1½ cups white vinegar — Forms the tangy, acidic base of the brine.
- 1½ cups water — Balances the acidity of the vinegar so the brine isn’t overpoweringly sharp.
- 2 tbsp kosher salt — Helps draw out moisture from the cucumbers and enhances the overall flavor of the brine.
- 1 tbsp granulated sugar — Balances the acidity of the vinegar with a touch of sweetness.
- 1 tbsp apple cider vinegar — Adds a subtle, slightly fruity depth alongside the white vinegar.
How to Make Spicy Chili Garlic Pickles
This recipe is simple and requires minimal active preparation time. Here’s exactly how to make it.
Step 1: Prepare the Cucumbers
Wash the cucumbers thoroughly. Trim a thin slice from both ends. Leave them whole for classic pickles, or cut them into spears or chips depending on how you’d like to serve them. For extra-crunchy pickles, chill the cucumbers in ice water for 30–60 minutes, then drain and pat completely dry.
Step 2: Prepare the Jars
Place the sliced garlic, fresh chili peppers, jalapeños, dill, red pepper flakes, mustard seeds, black peppercorns, and coriander seeds into clean jars. Pack the cucumbers firmly into the jars without crushing them.
Step 3: Make the Spicy Brine
Add the white vinegar, water, kosher salt, sugar, and apple cider vinegar to a saucepan. Bring to a gentle boil. Stir until the salt and sugar completely dissolve.
Step 4: Pour Over the Cucumbers
Carefully pour the hot brine into the jars. Make sure the cucumbers are completely submerged. Leave a little space at the top of each jar. Remove any visible air bubbles.
Step 5: Cool
Allow the jars to cool uncovered until they reach room temperature. Seal tightly.
Step 6: Refrigerate
Place the jars in the refrigerator. For lightly pickled cucumbers, wait at least 24 hours. For stronger garlic and chili flavor, let them sit for 3–5 days. The flavor becomes more intense as they rest.
Make Them Extra Spicy
For serious heat, add:
- Serrano peppers
- Thai red chilies
- Habanero slices
- Extra red pepper flakes
- Cayenne pepper
For a more balanced heat, combine jalapeños with one or two hotter peppers.
Flavor Variations
Hot Honey Chili Pickles: Add 1–2 tbsp honey to the brine for sweet heat.
Garlic Dill Pickles: Increase the fresh dill and garlic for a classic herb-forward flavor.
Asian Chili Pickles: Add fresh ginger, a little sesame oil after pickling, and crushed Sichuan peppercorns.
Smoky Chili Pickles: Add smoked paprika or chipotle flakes for a deeper, smokier flavor.
Extra-Garlic Pickles: Double the garlic and use thinly sliced cloves so the flavor spreads throughout the brine.
Jalapeño Lime Pickles: Add fresh jalapeños and strips of lime zest for a bright, citrusy twist.
How to Serve Spicy Chili Garlic Pickles
Serve these spicy pickles with:
- Burgers
- Hot dogs
- Chili cheese dogs
- Fried chicken
- Pulled pork
- BBQ
- Sandwiches
- Tacos
- Nachos
- Grilled steak
- Fried potatoes
- Cheese boards
- Charcuterie
- Chicken salad
- Tuna salad
They’re also fantastic chopped into potato salad, coleslaw, tuna salad, or creamy dips.
Tips for the Crunchiest Chili Garlic Pickles
Use fresh, small cucumbers. Small pickling cucumbers hold up best to the pickling process and result in the crispest finished pickles.
Keep the cucumbers cold before pickling. Chilling the cucumbers in ice water before packing them into jars helps maximize crunch.
Don’t overcook the brine. Bringing the brine just to a gentle boil is enough to dissolve the salt and sugar without overly cooking the mixture.
Be patient for bold flavor. While these pickles are ready after 24 hours, letting them sit for 3–5 days results in significantly more intense garlic and chili flavor.
Use clean, sterilized jars. Starting with clean glass jars helps ensure the best flavor and longest shelf life for your pickles.
Adjust the heat gradually. Start with the recommended amount of jalapeños and red chilies, then work your way up to hotter peppers like habanero or Thai chilies if you want more fire.
Storage Information
Keep these pickles refrigerated at all times. Use clean jars and utensils, and keep the cucumbers submerged beneath the brine. Because this is a refrigerator-pickle recipe rather than a tested shelf-stable canning recipe, do not store the jars at room temperature. Discard them if you notice mold, unusual odors, unexpected fermentation, or other signs of spoilage.
Tip: For the crunchiest Spicy Chili Garlic Pickles, use fresh small cucumbers, keep them cold before pickling, and don’t overcook them. The combination of fresh garlic, red chilies, mustard seeds, dill, and vinegar creates that bold deli-style flavor, while a short refrigerator rest keeps the cucumbers wonderfully crisp.
Frequently Asked Questions
How long do these pickles last in the refrigerator? When stored properly in the refrigerator with the cucumbers fully submerged in brine, these pickles typically keep well for several weeks. Always check for signs of spoilage before eating.
How spicy are these pickles? As written, this recipe has a noticeable, adjustable heat from the fresh chilies, jalapeños, and red pepper flakes. The heat level can easily be increased with hotter peppers or decreased by using fewer chilies.
Can I can these pickles for shelf-stable storage? This recipe is designed as a refrigerator pickle and has not been tested for shelf-stable canning. For long-term, room-temperature storage, you would need to follow a tested water-bath canning recipe with proper processing times.
Why do I need to trim the ends of the cucumbers? Trimming a thin slice from both ends of the cucumber removes enzymes that can contribute to softening, helping the pickles stay crisp.
Can I use regular cucumbers instead of pickling cucumbers? Small pickling cucumbers, such as Kirby cucumbers, are strongly recommended for the best crunch and flavor, as standard slicing cucumbers have more water content and can result in softer pickles.
What should I do if I notice mold or an unusual smell? Discard the jar immediately if you notice mold, an unusual odor, unexpected fermentation, or any other signs of spoilage, since this recipe is intended for refrigerator storage only and is not a tested shelf-stable canning method.
Recipe Card
Prep Time: 15 minutes Cook Time: 5 minutes Refrigeration Time: 24 hours minimum (3–5 days recommended) Servings: 10–12
These Spicy Chili Garlic Pickles bring bold, garlicky, fiery flavor to a classic crunchy snack in the easiest way possible. Packed with fresh garlic, red chilies, and warm pickling spices, these deli-style pickles are guaranteed to become your new favorite way to add heat and crunch to burgers, sandwiches, tacos, and so much more.
Make a batch today, and get ready for these bold, spicy pickles to become a refrigerator staple!
Print
Spicy Chili Garlic Pickles
Ingredients
Here’s a breakdown of what goes into this bold, spicy pickle recipe and why each ingredient plays a role.
For the Pickles
- 1½ lb small pickling cucumbers — The star of the recipe; small, firm pickling cucumbers hold up best to the pickling process and maintain the crispest texture.
- 6–8 garlic cloves, thinly sliced — Infuses the brine with bold, aromatic garlic flavor throughout the pickling process.
- 2–4 fresh red chili peppers, sliced — Brings vibrant color and fiery heat throughout the jar.
- 1–2 jalapeños, sliced — Adds fresh, bright heat alongside the red chilies.
- 2 tbsp fresh dill — Adds that classic, essential dill pickle flavor.
- 1 tsp red pepper flakes — Reinforces the heat throughout the brine.
- 1 tsp mustard seeds — Provides a slightly tangy, sharp flavor typical of classic pickling spice blends.
- 1 tsp black peppercorns — Adds a mild, warm heat and subtle spice.
- ½ tsp coriander seeds, optional — Adds a warm, citrusy note to the brine.
For the Brine
- 1½ cups white vinegar — Forms the tangy, acidic base of the brine.
- 1½ cups water — Balances the acidity of the vinegar so the brine isn’t overpoweringly sharp.
- 2 tbsp kosher salt — Helps draw out moisture from the cucumbers and enhances the overall flavor of the brine.
- 1 tbsp granulated sugar — Balances the acidity of the vinegar with a touch of sweetness.
- 1 tbsp apple cider vinegar — Adds a subtle, slightly fruity depth alongside the white vinegar.
Instructions
This recipe is simple and requires minimal active preparation time. Here’s exactly how to make it.
Wash the cucumbers thoroughly. Trim a thin slice from both ends. Leave them whole for classic pickles, or cut them into spears or chips depending on how you’d like to serve them. For extra-crunchy pickles, chill the cucumbers in ice water for 30–60 minutes, then drain and pat completely dry.
Place the sliced garlic, fresh chili peppers, jalapeños, dill, red pepper flakes, mustard seeds, black peppercorns, and coriander seeds into clean jars. Pack the cucumbers firmly into the jars without crushing them.
Add the white vinegar, water, kosher salt, sugar, and apple cider vinegar to a saucepan. Bring to a gentle boil. Stir until the salt and sugar completely dissolve.
Carefully pour the hot brine into the jars. Make sure the cucumbers are completely submerged. Leave a little space at the top of each jar. Remove any visible air bubbles.
Allow the jars to cool uncovered until they reach room temperature. Seal tightly.
Place the jars in the refrigerator. For lightly pickled cucumbers, wait at least 24 hours. For stronger garlic and chili flavor, let them sit for 3–5 days. The flavor becomes more intense as they rest.