Italian Pickled Vegetables (Giardiniera): The Crunchy, Tangy Condiment You’ll Want on Everything
Meta Description: This Italian Pickled Vegetables (Giardiniera) recipe is crisp, tangy, and bursting with cauliflower, carrots, peppers, and bold Italian herbs and spices. The ultimate homemade condiment for sandwiches, pizzas, and more!
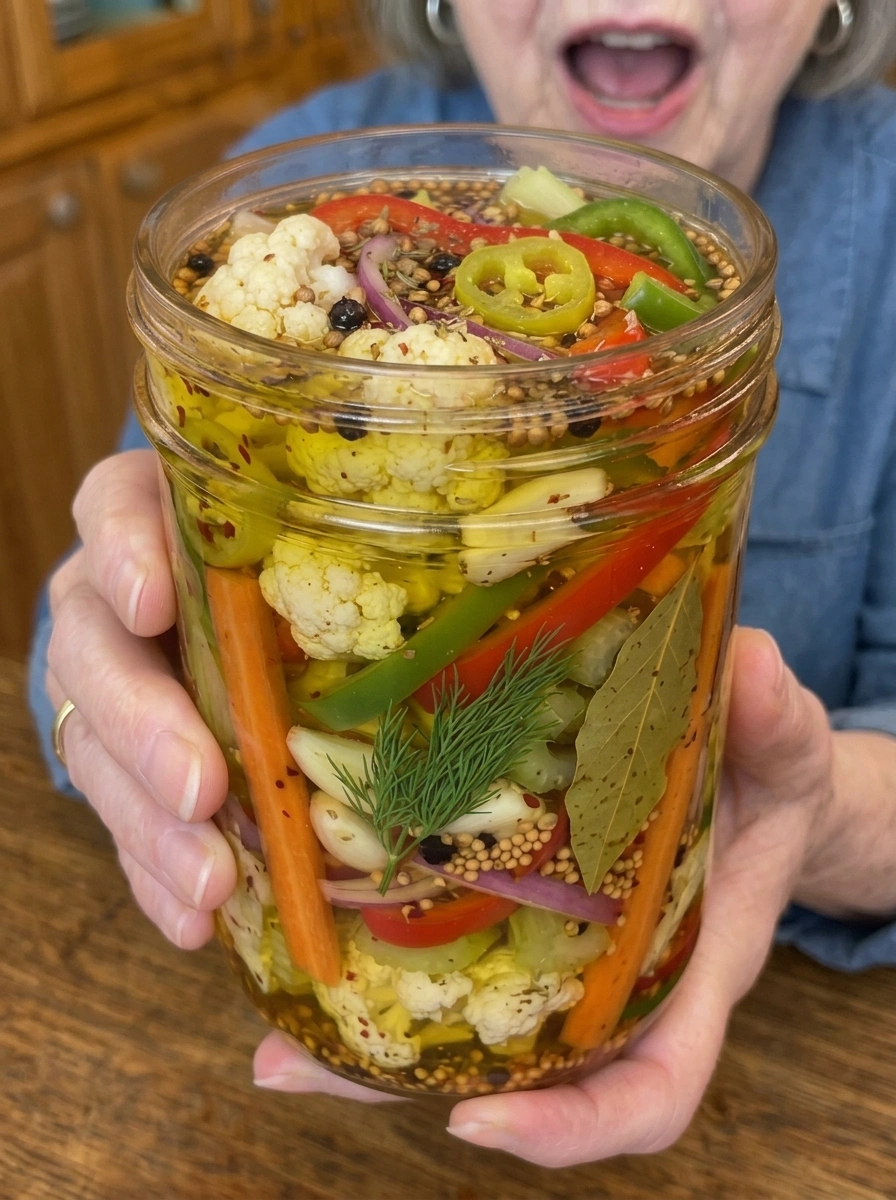
If you’ve ever enjoyed the spicy, tangy crunch of giardiniera piled on top of an Italian beef sandwich or scattered over a slice of pizza, you know exactly why this condiment has such a devoted following. This homemade Italian Pickled Vegetables (Giardiniera) recipe brings together crisp cauliflower, carrots, celery, bell peppers, and pepperoncini in a bold, herb-infused vinegar brine, creating a vibrant, crunchy condiment that’s far fresher and more flavorful than anything you’ll find in a jar at the store.
Giardiniera, which translates to “from the garden” in Italian, is a classic pickled vegetable mix that’s a staple in Italian-American cuisine, especially in Chicago, where it’s practically a required topping for Italian beef sandwiches. This homemade version lets you control the exact mix of vegetables, the level of spice, and the depth of flavor, making it a fantastic addition to your regular pickling rotation.
Let’s walk through everything you need to know to make this crisp, tangy, herb-packed pickled vegetable mix at home.
What Is Giardiniera?
Giardiniera is a traditional Italian pickled vegetable relish made from a mix of chopped vegetables like cauliflower, carrots, celery, and peppers, pickled in a vinegar-based brine along with herbs and spices. While recipes vary by region and family tradition, the defining characteristic is always the same: crisp, tangy, herb-infused vegetables with a satisfying crunch and a bit of heat.
This particular version leans into classic Italian flavors with Italian seasoning, oregano, and a touch of olive oil in the brine, along with pepperoncini for a signature tangy, mild heat throughout the mix.
Why You’ll Love This Italian Pickled Vegetables Recipe
There are countless reasons to make a batch of this vibrant, crunchy condiment:
Incredibly versatile. Giardiniera works as a sandwich topping, a pizza garnish, a salad addition, a charcuterie board component, and a stand-alone snack.
Crisp, satisfying texture. The quick blanching process helps the vegetables maintain their crunch even after pickling, giving every bite a satisfying bite.
Bold Italian flavor. Between the Italian seasoning, oregano, garlic, and olive oil, this pickled vegetable mix delivers authentic, herb-forward flavor in every bite.
A great way to use up vegetables. This recipe is endlessly adaptable based on what vegetables you have on hand or prefer.
Long shelf life. Stored properly, this giardiniera keeps well in the refrigerator for up to a month, or can be processed for shelf-stable storage.
A fantastic homemade gift. Packed into pretty jars, this pickled vegetable mix makes a wonderful homemade gift for anyone who loves bold, tangy flavors.
Ingredients You’ll Need
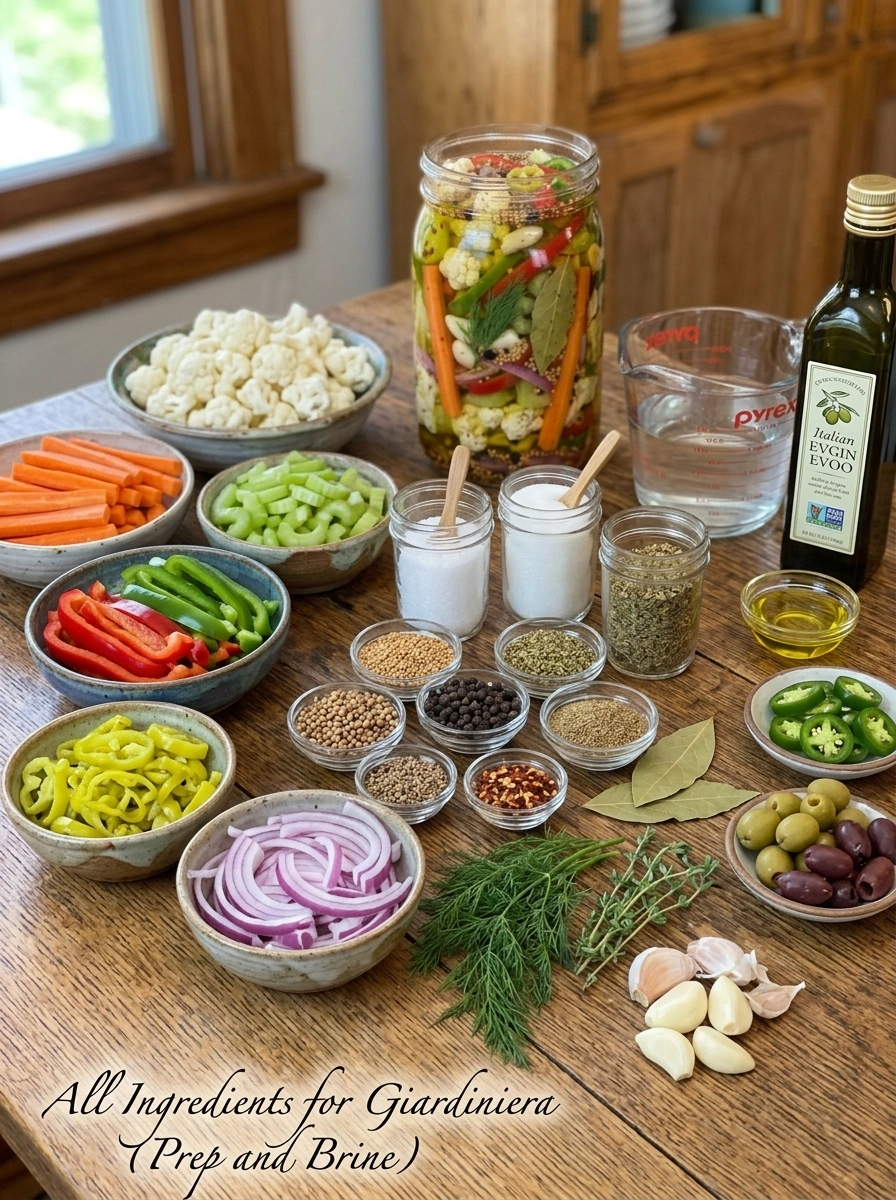
Here’s a breakdown of what goes into this classic Italian pickled vegetable mix and why each ingredient plays a role.
For the Vegetables
- 2 cups cauliflower florets — A classic giardiniera vegetable that provides a hearty, crunchy base.
- 1½ cups carrot sticks — Adds natural sweetness and vibrant color throughout the mix.
- 1½ cups celery slices — Contributes a mild, savory crunch typical of traditional giardiniera.
- 1 cup red bell pepper strips — Adds sweetness and a pop of bright color.
- 1 cup green bell pepper strips — Provides a slightly more bitter, grassy contrast to the sweeter red peppers.
- 1 cup sliced pepperoncini peppers — Brings the classic tangy, mildly spicy flavor essential to giardiniera.
- ½ medium red onion, thinly sliced — Adds a sharp, slightly sweet bite that mellows as it pickles.
- 4 cloves garlic, peeled — Infuses the brine and vegetables with bold, aromatic flavor.
- 2 fresh dill sprigs — Adds a classic pickle flavor and fresh herbal aroma.
For the Italian Pickling Brine
- 2 cups white vinegar — Forms the tangy, acidic base of the brine.
- 2 cups water — Balances the sharpness of the vinegar.
- ¼ cup extra virgin olive oil — A distinctive addition that gives this brine its classic Italian character and adds richness.
- 2 tbsp kosher salt — Enhances the overall flavor and helps preserve the vegetables.
- 2 tbsp granulated sugar — Balances the acidity with a touch of sweetness.
- 2 tsp Italian seasoning — A classic herb blend that reinforces the Italian flavor profile.
- 1 tsp dried oregano — Adds earthy, aromatic depth typical of Italian cooking.
- 1 tsp mustard seeds — Contributes a classic pickling spice flavor.
- 1 tsp coriander seeds — Adds a warm, citrusy undertone.
- 1 tsp whole black peppercorns — Adds mild heat and classic pickling flavor.
- ½ tsp celery seed — Adds a subtle, savory note that complements the fresh celery.
- ½ tsp crushed red pepper flakes — Adds a gentle kick of heat throughout the brine.
- 2 bay leaves — Infuses the brine with subtle aromatic depth.
Optional Add-Ins
This recipe is easy to customize based on your preferences. Consider adding:
- Sliced jalapeños (for extra heat)
- Green olives (for briny depth)
- Kalamata olives (for a richer, more robust olive flavor)
- Fresh thyme sprigs (for additional herbal complexity)
- Artichoke hearts (for a classic antipasto-style addition)
- Fennel slices (for a subtle anise flavor and extra crunch)
- Zucchini rounds (for added variety and texture)
- Cherry tomatoes, added after pickling (for fresh, juicy bursts of flavor)
How to Make Italian Pickled Vegetables (Giardiniera)
This recipe involves a quick blanching step followed by a simple pickling process. Here’s exactly how to make it.
Step 1: Prep the Vegetables
Wash and prepare all the vegetables, cutting them into uniform bite-sized pieces so everything pickles evenly and looks great in the jar.
Step 2: Blanch the Vegetables
Bring a large pot of water to a boil. Blanch the cauliflower, carrots, and celery for 2 minutes, then immediately transfer them to an ice bath. This quick blanching step helps preserve their crisp texture while still allowing them to properly absorb the brine.
Step 3: Drain and Dry
Drain the blanched vegetables thoroughly and pat them dry to remove excess moisture before packing them into jars.
Step 4: Add Garlic and Dill
Place the garlic cloves and dill sprigs into clean glass jars, distributing them evenly.
Step 5: Layer the Vegetables
Layer the cauliflower, carrots, celery, bell peppers, pepperoncini, and red onion tightly into the jars, packing them in as snugly as possible.
Step 6: Make the Brine
In a medium saucepan, combine the white vinegar, water, olive oil, kosher salt, granulated sugar, Italian seasoning, oregano, mustard seeds, coriander seeds, black peppercorns, celery seed, crushed red pepper flakes, and bay leaves.
Step 7: Bring to a Boil
Bring the mixture to a gentle boil, stirring until the sugar and salt have completely dissolved.
Step 8: Simmer to Infuse
Reduce the heat and simmer for 3–5 minutes to allow the herbs and spices to fully infuse into the brine.
Step 9: Pour Over the Vegetables
Carefully pour the hot brine over the vegetables in the jars, leaving about ½ inch of headspace at the top of each jar.
Step 10: Remove Air Bubbles
Use a clean utensil to gently remove any trapped air bubbles from within the jars, which helps ensure even pickling.
Step 11: Cool and Seal
Seal the jars and allow them to cool completely at room temperature before refrigerating.
Step 12: Pickle
Refrigerate for at least 24 hours, although the giardiniera develops its best, most well-rounded flavor after 3–5 days.
How to Serve Italian Pickled Vegetables
This crisp, tangy condiment is incredibly versatile. Here are some of the best ways to enjoy it:
- On Italian beef sandwiches — A classic Chicago-style pairing that adds crunch and tang to every bite.
- On burgers — Adds a bright, tangy crunch that cuts through rich, savory beef.
- On hot dogs — Use in place of traditional relish for a bolder, more complex flavor.
- On pizzas — Scatter a small handful over pizza for a tangy, crunchy topping.
- In pasta salads — Chop and toss into pasta salads for extra flavor and texture.
- On charcuterie boards — Adds color, crunch, and acidity to balance rich meats and cheeses.
- On antipasto platters — A natural fit alongside olives, cured meats, and marinated cheeses.
- Straight from the jar — Simply enjoy as a crunchy, tangy snack on its own.
Tips for the Best Giardiniera
Don’t skip the blanching step. Briefly blanching the sturdier vegetables like cauliflower, carrots, and celery helps them stay crisp rather than becoming mushy after pickling.
Cut vegetables uniformly. Similarly sized pieces ensure even pickling and a more visually appealing finished product.
Pack the jars tightly. Packing the vegetables snugly into the jars helps them stay submerged in the brine and results in a more concentrated flavor.
Leave proper headspace. Leaving about ½ inch of headspace when pouring the brine helps prevent overflow and allows the vegetables room to settle.
Be patient. While ready after 24 hours, this giardiniera tastes noticeably better after resting for 3–5 days, as the flavors have more time to fully develop.
Use clean, sterilized jars. Starting with clean glass jars helps ensure the best flavor and longest shelf life for your pickled vegetables.
Recipe Variations and Substitutions
This classic pickled vegetable recipe is a fantastic base that’s easy to customize:
- Make it spicier: Add sliced jalapeños or extra crushed red pepper flakes for more heat throughout the mix.
- Add briny depth: Include green olives or Kalamata olives for a more classic antipasto-style flavor.
- Add more herbs: Fresh thyme sprigs can be added alongside the dill for additional herbal complexity.
- Add artichokes: Marinated artichoke hearts make a wonderful addition to the vegetable mix.
- Add fennel: Sliced fennel contributes a subtle anise flavor and extra crunch to the finished giardiniera.
- Add fresh tomatoes after pickling: Cherry tomatoes can be added just before serving for a fresh, juicy contrast to the tangy pickled vegetables.
Storage Information
Store the giardiniera in airtight jars in the refrigerator for up to 1 month. Always use a clean utensil when serving to help extend its freshness. For those interested in shelf-stable storage, the filled jars can be processed in a boiling water bath according to safe home canning guidelines, allowing for longer-term, room-temperature storage.
Frequently Asked Questions
How long does homemade giardiniera last? Stored in an airtight jar in the refrigerator, this pickled vegetable mix will stay fresh for up to 1 month.
Can I make this shelf-stable for long-term storage? Yes, for shelf-stable storage, the filled jars can be processed in a boiling water bath following safe, tested home canning guidelines and processing times.
Why do I need to blanch the vegetables first? Briefly blanching sturdier vegetables like cauliflower, carrots, and celery helps them maintain a satisfying crunch after pickling, rather than becoming overly soft.
Can I use different vegetables? Absolutely. This recipe is easy to customize with vegetables like zucchini, fennel, or artichoke hearts based on your preferences and what’s in season.
How spicy is this recipe? As written, this recipe has a mild to moderate heat level from the pepperoncini and crushed red pepper flakes. You can easily increase the heat with sliced jalapeños or reduce it by omitting the red pepper flakes.
What’s the difference between hot and mild giardiniera? The heat level of giardiniera typically comes down to the type and amount of peppers used. This recipe uses pepperoncini for a mild, tangy heat, but hotter peppers like jalapeños can be added for a spicier version.
Recipe Card
Prep Time: 20 minutes Cook Time: 10 minutes Pickling Time: 24 hours (best after 3–5 days) Total Time: 24 hours 30 minutes Servings: 12 Calories: ~50 per serving
This Italian Pickled Vegetables (Giardiniera) recipe brings together everything you love about this classic Italian-American condiment: crisp cauliflower, sweet carrots, tangy pepperoncini, and a bold, herb-infused vinegar brine. Whether you’re topping an Italian beef sandwich, adding crunch to a charcuterie board, or simply enjoying it straight from the jar, this homemade giardiniera delivers fresh, vibrant flavor in every bite.
Make a batch today, and get ready for this crisp, tangy pickled vegetable mix to become a staple in your refrigerator!
Print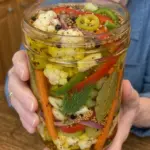
Italian Pickled Vegetables (Giardiniera)
Ingredients
Here’s a breakdown of what goes into this classic Italian pickled vegetable mix and why each ingredient plays a role.
For the Vegetables
- 2 cups cauliflower florets — A classic giardiniera vegetable that provides a hearty, crunchy base.
- 1½ cups carrot sticks — Adds natural sweetness and vibrant color throughout the mix.
- 1½ cups celery slices — Contributes a mild, savory crunch typical of traditional giardiniera.
- 1 cup red bell pepper strips — Adds sweetness and a pop of bright color.
- 1 cup green bell pepper strips — Provides a slightly more bitter, grassy contrast to the sweeter red peppers.
- 1 cup sliced pepperoncini peppers — Brings the classic tangy, mildly spicy flavor essential to giardiniera.
- ½ medium red onion, thinly sliced — Adds a sharp, slightly sweet bite that mellows as it pickles.
- 4 cloves garlic, peeled — Infuses the brine and vegetables with bold, aromatic flavor.
- 2 fresh dill sprigs — Adds a classic pickle flavor and fresh herbal aroma.
For the Italian Pickling Brine
- 2 cups white vinegar — Forms the tangy, acidic base of the brine.
- 2 cups water — Balances the sharpness of the vinegar.
- ¼ cup extra virgin olive oil — A distinctive addition that gives this brine its classic Italian character and adds richness.
- 2 tbsp kosher salt — Enhances the overall flavor and helps preserve the vegetables.
- 2 tbsp granulated sugar — Balances the acidity with a touch of sweetness.
- 2 tsp Italian seasoning — A classic herb blend that reinforces the Italian flavor profile.
- 1 tsp dried oregano — Adds earthy, aromatic depth typical of Italian cooking.
- 1 tsp mustard seeds — Contributes a classic pickling spice flavor.
- 1 tsp coriander seeds — Adds a warm, citrusy undertone.
- 1 tsp whole black peppercorns — Adds mild heat and classic pickling flavor.
- ½ tsp celery seed — Adds a subtle, savory note that complements the fresh celery.
- ½ tsp crushed red pepper flakes — Adds a gentle kick of heat throughout the brine.
- 2 bay leaves — Infuses the brine with subtle aromatic depth.
Optional Add-Ins
This recipe is easy to customize based on your preferences. Consider adding:
- Sliced jalapeños (for extra heat)
- Green olives (for briny depth)
- Kalamata olives (for a richer, more robust olive flavor)
- Fresh thyme sprigs (for additional herbal complexity)
- Artichoke hearts (for a classic antipasto-style addition)
- Fennel slices (for a subtle anise flavor and extra crunch)
- Zucchini rounds (for added variety and texture)
- Cherry tomatoes, added after pickling (for fresh, juicy bursts of flavor)
Instructions
This recipe involves a quick blanching step followed by a simple pickling process. Here’s exactly how to make it.
Wash and prepare all the vegetables, cutting them into uniform bite-sized pieces so everything pickles evenly and looks great in the jar.
Bring a large pot of water to a boil. Blanch the cauliflower, carrots, and celery for 2 minutes, then immediately transfer them to an ice bath. This quick blanching step helps preserve their crisp texture while still allowing them to properly absorb the brine.
Drain the blanched vegetables thoroughly and pat them dry to remove excess moisture before packing them into jars.
Place the garlic cloves and dill sprigs into clean glass jars, distributing them evenly.
Layer the cauliflower, carrots, celery, bell peppers, pepperoncini, and red onion tightly into the jars, packing them in as snugly as possible.
In a medium saucepan, combine the white vinegar, water, olive oil, kosher salt, granulated sugar, Italian seasoning, oregano, mustard seeds, coriander seeds, black peppercorns, celery seed, crushed red pepper flakes, and bay leaves.
Bring the mixture to a gentle boil, stirring until the sugar and salt have completely dissolved.
Reduce the heat and simmer for 3–5 minutes to allow the herbs and spices to fully infuse into the brine.
Carefully pour the hot brine over the vegetables in the jars, leaving about ½ inch of headspace at the top of each jar.
Use a clean utensil to gently remove any trapped air bubbles from within the jars, which helps ensure even pickling.
Seal the jars and allow them to cool completely at room temperature before refrigerating.
Refrigerate for at least 24 hours, although the giardiniera develops its best, most well-rounded flavor after 3–5 days.