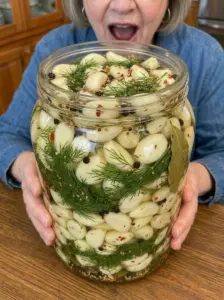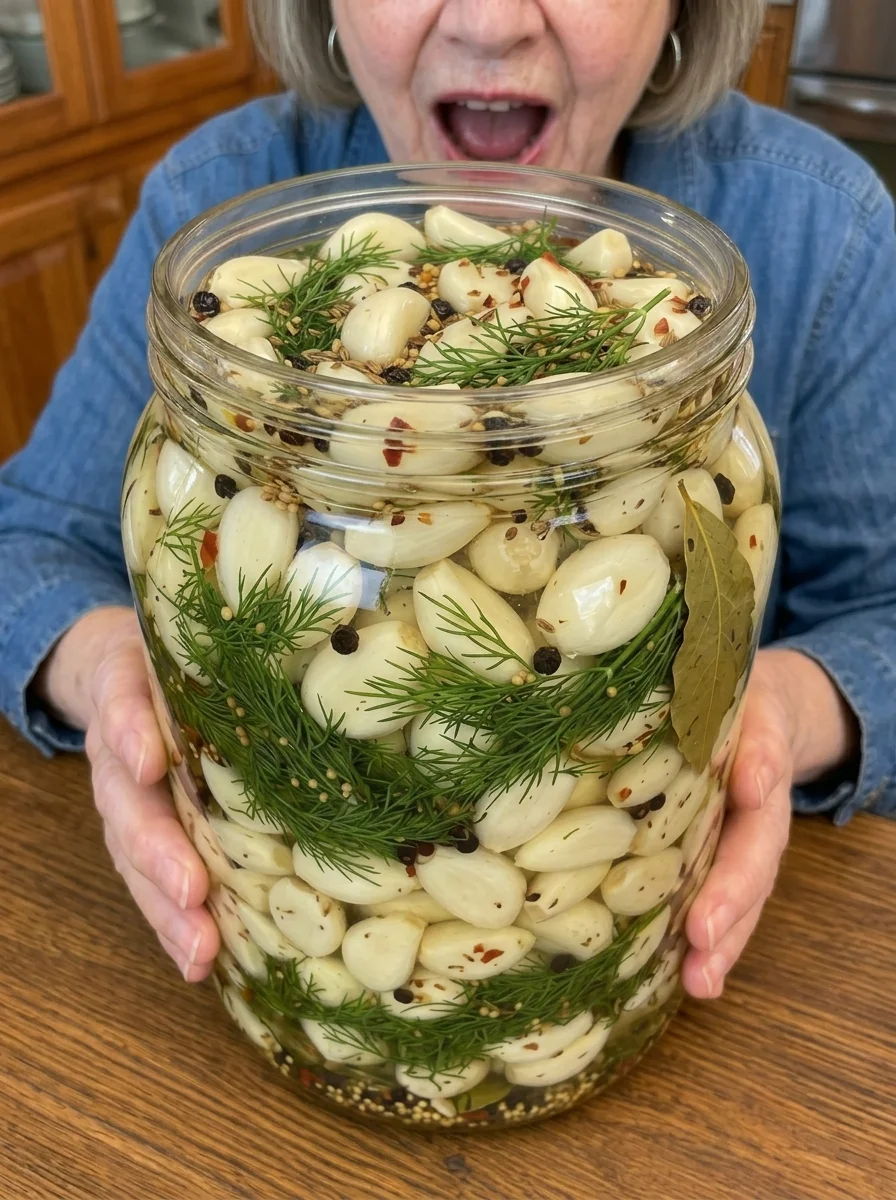
These Garlic Dill Pickle Cloves are crunchy, tangy, intensely garlicky, and packed with classic dill-pickle flavor. Whole garlic cloves are refrigerated in a bright vinegar brine with fresh dill, dill seeds, black peppercorns, mustard seeds, celery seeds, red pepper flakes, and bay leaf.
If you love the combination of garlic and dill pickles, this recipe turns that familiar flavor into a bold little refrigerator condiment. Fresh dill provides bright herbal notes while dill seeds deepen the pickle flavor. Peppercorns, mustard seeds, and celery seeds add complexity, and a touch of red pepper flakes provides gentle warmth.
The recipe requires only about 20 minutes of active preparation. After that, the refrigerator does the work. You can begin tasting the garlic after three days, but allowing it to pickle for 5–7 days develops a stronger dill flavor.
These are refrigerator pickles rather than shelf-stable canned garlic, so keep the jar continuously refrigerated and the cloves submerged in the brine.
Why You’ll Love Garlic Dill Pickle Cloves
Classic dill-pickle flavor. Fresh dill and dill seeds create a bold herbal pickle profile.
Crunchy and tangy. Whole garlic cloves soak in a sharp vinegar brine while retaining plenty of texture.
Loaded with garlic. Instead of garlic simply seasoning pickles, it’s the star of the recipe.
Easy refrigerator method. There’s no traditional canning process involved.
Only 20 minutes of active preparation. Most of the recipe is hands-off pickling time.
A little spicy. Red pepper flakes add gentle heat without overpowering the dill.
Versatile condiment. Eat the cloves whole or chop them into sandwiches, burgers, salads, spreads, and snack boards.
Ingredients You’ll Need
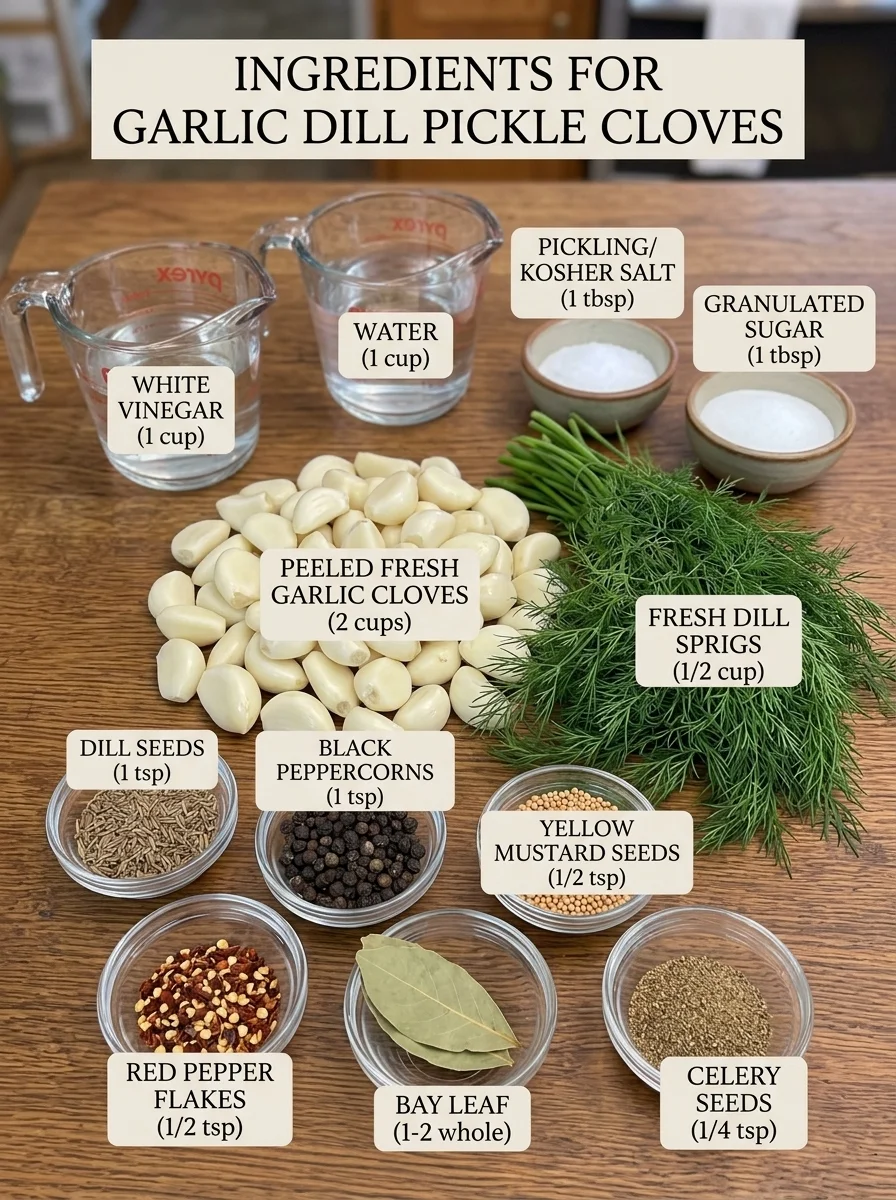
- 2 cups fresh garlic cloves, peeled — The main ingredient. Choose fresh, firm cloves without soft or spoiled areas.
- 1 cup white vinegar — Provides the bright acidity and tangy backbone of the refrigerator brine.
- 1 cup water — Balances the vinegar.
- 1 tablespoon pickling salt or kosher salt — Seasons the garlic and brine.
- 1 tablespoon sugar — Rounds out the sharp acidity without making the garlic noticeably sweet.
- ½ cup fresh dill sprigs — Gives the cloves their fresh, unmistakable dill flavor.
- 1 teaspoon dill seeds — Reinforces the dill flavor and adds classic pickle character.
- 1 teaspoon black peppercorns — Provide subtle peppery warmth.
- ½ teaspoon mustard seeds — Add another traditional pickling-spice note.
- ½ teaspoon red pepper flakes — Bring gentle chile heat.
- 1 bay leaf — Adds subtle aromatic depth.
- ¼ teaspoon celery seeds — Give the brine an additional savory, slightly earthy pickle flavor.
How to Make Garlic Dill Pickle Cloves
Step 1: Prepare the Garlic
Peel enough fresh garlic to measure approximately 2 cups of cloves.
Inspect the garlic as you work and discard any cloves that are soft, moldy, badly damaged, or otherwise spoiled.
Place the prepared cloves into a clean glass jar.
Step 2: Add the Dill and Pickling Spices
Arrange the fresh dill sprigs around the garlic.
Add:
- 1 teaspoon dill seeds
- 1 teaspoon black peppercorns
- ½ teaspoon mustard seeds
- ½ teaspoon red pepper flakes
- 1 bay leaf
- ¼ teaspoon celery seeds
Distributing the dill and spices throughout the jar helps flavor the garlic more evenly.
Step 3: Prepare the Pickling Brine
Add 1 cup white vinegar, 1 cup water, 1 tablespoon salt, and 1 tablespoon sugar to a saucepan.
Place over medium heat.
Step 4: Dissolve the Salt and Sugar
Warm the brine while stirring until the salt and sugar have completely dissolved.
There’s no need to aggressively boil or reduce the mixture.
Step 5: Fill the Jar
Carefully pour the warm brine over the garlic, dill, and spices.
Make sure the garlic cloves are completely covered by the liquid.
Using an appropriately sized jar will make keeping everything submerged much easier.
Step 6: Cool and Refrigerate
Allow the jar to cool before sealing it with a clean lid.
Once cooled, close the jar securely and transfer it to the refrigerator.
Step 7: Let the Garlic Pickle
Allow the garlic to pickle for at least 3 days before tasting.
For a stronger dill-pickle flavor, give it approximately 5–7 days.
The dill and spices will continue infusing the brine as the jar rests.
Step 8: Serve
Remove the desired number of cloves using a clean fork or spoon.
Serve chilled straight from the refrigerator or chop the garlic into your favorite savory dishes.
Recipe Notes
This is a refrigerator pickle. The recipe should remain refrigerated and isn’t intended as a shelf-stable canning formula.
Use fresh garlic. Firm, fresh cloves provide the best texture.
Fresh dill plus dill seed matters. Fresh dill provides bright herbal flavor while dill seeds give the brine a deeper classic pickle character.
Keep the cloves submerged. The garlic should remain covered by the acidic brine throughout storage.
Expect the flavor to change. Three-day garlic will taste different from cloves that have been marinating for a week.
Red pepper flakes are optional for heat control. Reduce them if you prefer a milder dill pickle flavor.
Use clean utensils. Always remove cloves with a clean fork or spoon.
How to Serve Garlic Dill Pickle Cloves
These cloves work anywhere you’d enjoy garlic, pickles, or both.
- Eat chilled as a tangy snack
- Chop into deli sandwiches
- Add to burgers
- Mix into tuna salad
- Chop into chicken salad
- Add to egg salad
- Toss into potato salad
- Add to pasta salad
- Chop into pickle-style salads
- Serve with cheese and crackers
- Add to snack or appetizer boards
- Chop into creamy dips
- Mix into savory cream cheese
- Add to homemade tartar-style sauces
- Serve alongside grilled meats
- Chop over roasted potatoes
- Add to grain bowls
For serious dill-pickle fans, finely chop a few cloves with some of the pickled dill and stir them into cream cheese for a quick savory spread.
Flavor Variations
Extra-Dill Pickled Garlic
Add additional fresh dill for an even more herb-forward result.
Spicy Dill Pickled Garlic
Increase the red pepper flakes or add a sliced fresh jalapeño for additional heat.
Peppercorn Dill Garlic
Add a little more black peppercorn for stronger peppery flavor.
Mustard Dill Garlic
Increase the mustard-seed character slightly for a sharper traditional pickle profile.
Jalapeño Dill Garlic
Add thinly sliced jalapeño to create a fresh, spicy variation.
Dill & Onion Pickled Garlic
Add a small amount of thinly sliced onion for another savory layer.
Tips for the Best Garlic Dill Pickle Cloves
Start with high-quality garlic. Firm cloves give you the best final texture.
Use clean jars and lids. Clean equipment is important for refrigerator pickling.
Don’t dilute the brine accidentally. Drain washed ingredients before putting them into the jar.
Distribute the dill throughout the jar. This helps flavor the garlic more evenly.
Heat the brine gently. You only need enough heat to dissolve the salt and sugar.
Don’t judge the flavor immediately. Freshly assembled garlic hasn’t had enough time to absorb the dill and spices.
Give it 5–7 days when possible. This produces a much more developed pickle flavor.
Keep everything cold. This recipe is designed for refrigeration.
Make-Ahead Instructions
Garlic Dill Pickle Cloves are naturally a make-ahead recipe.
Prepare the jar at least 3 days before serving. For a stronger dill-pickle character, prepare it 5–7 days ahead.
Keep the jar continuously refrigerated during the pickling period and make sure the cloves stay submerged in the brine.
When ready to serve, simply remove the desired amount with a clean utensil.
Storage Information 🧊
Store Garlic Dill Pickle Cloves in a tightly covered glass jar in the refrigerator at 40°F (4°C) or below.
Your original recipe specifies storage for up to one month. Because this is a homemade refrigerator-pickle formula rather than a validated preservation recipe, I would not present one month as a verified food-safety limit. For extended or specifically validated storage, use a tested pickled-garlic recipe from a recognized food-preservation authority.
Keep the cloves submerged in the brine and always use a clean utensil when removing them.
Discard the batch if you notice mold, an unusual unpleasant odor, unexpected sliminess, or other signs of spoilage.
Do not store this recipe at room temperature or assume this exact formula can be made shelf-stable simply by processing the jar in a water bath.
Frequently Asked Questions
How long should Garlic Dill Pickle Cloves pickle before eating?
Wait at least 3 days. For a stronger dill flavor and a more developed pickle character, approximately 5–7 days is preferable.
Why use both fresh dill and dill seeds?
They contribute different qualities. Fresh dill provides a bright herbal flavor, while dill seeds bring a deeper, more traditional pickling-spice character.
Can I make the garlic less spicy?
Yes. Reduce or omit the red pepper flakes. The remaining ingredients will still provide plenty of dill-pickle flavor.
Can I make it hotter?
Yes. Add additional red pepper flakes or sliced fresh jalapeño for a spicy refrigerator variation.
Can I eat the dill from the jar?
The dill is primarily there to flavor the brine and garlic, but it can also be chopped into dressings, spreads, or salads while the batch remains properly refrigerated and in good condition.
Can I use the brine?
Small amounts can add tangy dill flavor to dressings, dips, sauces, or pickle-style salads while the batch is properly refrigerated and in good condition.
Why should the garlic stay submerged?
Keeping the cloves covered ensures consistent contact with the acidic pickling liquid.
Does this garlic need to stay refrigerated?
Yes. Treat it strictly as a refrigerator pickle.
Can I store the jars in my pantry?
No. This recipe isn’t a validated shelf-stable canning formula.
Can I water-bath can this exact recipe?
Don’t convert it directly into a shelf-stable canning recipe. Safe canning requires a tested formulation with validated acidity, ingredient proportions, jar sizes, processing methods, and processing times.
Recipe Card
Recipe: Garlic Dill Pickle Cloves 🧄🌿🥒
Prep Time: 15 minutes
Cook Time: 5 minutes
Active Time: 20 minutes
Pickling Time: 3–7 days
Best Flavor: Approximately 5–7 days
Servings: Approximately 12
Calories: Approximately 20 per serving, depending on serving size and the amount of brine consumed
Method: Refrigerator pickling
Main Ingredients: Garlic, white vinegar, fresh dill, dill seeds, peppercorns, mustard seeds, and celery seeds
Storage: Keep continuously refrigerated at 40°F (4°C) or below with the garlic submerged
Shelf-Stable: No
These Garlic Dill Pickle Cloves turn fresh garlic into a bold refrigerator condiment packed with the familiar flavors of a classic dill pickle. Fresh dill, dill seeds, mustard seeds, peppercorns, celery seeds, and a touch of red pepper create a flavorful brine around every clove.
Give the garlic at least three days to pickle, or wait 5–7 days for the dill and spices to become more pronounced. Then enjoy the cloves straight from the refrigerator or chop them into sandwiches, burgers, salads, creamy spreads, and appetizer boards.
With just 20 minutes of active preparation, they’re an easy way to keep a punchy, crunchy, dill-packed condiment ready for your favorite savory meals.
Print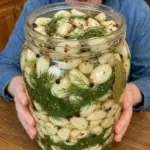
Garlic Dill Pickle Cloves
- Author: Sophie
Ingredients
- 2 cups fresh garlic cloves, peeled — The main ingredient. Choose fresh, firm cloves without soft or spoiled areas.
- 1 cup white vinegar — Provides the bright acidity and tangy backbone of the refrigerator brine.
- 1 cup water — Balances the vinegar.
- 1 tablespoon pickling salt or kosher salt — Seasons the garlic and brine.
- 1 tablespoon sugar — Rounds out the sharp acidity without making the garlic noticeably sweet.
- ½ cup fresh dill sprigs — Gives the cloves their fresh, unmistakable dill flavor.
- 1 teaspoon dill seeds — Reinforces the dill flavor and adds classic pickle character.
- 1 teaspoon black peppercorns — Provide subtle peppery warmth.
- ½ teaspoon mustard seeds — Add another traditional pickling-spice note.
- ½ teaspoon red pepper flakes — Bring gentle chile heat.
- 1 bay leaf — Adds subtle aromatic depth.
- ¼ teaspoon celery seeds — Give the brine an additional savory, slightly earthy pickle flavor.
Instructions
Step 1: Prepare the Garlic
Peel enough fresh garlic to measure approximately 2 cups of cloves.
Inspect the garlic as you work and discard any cloves that are soft, moldy, badly damaged, or otherwise spoiled.
Place the prepared cloves into a clean glass jar.
Step 2: Add the Dill and Pickling Spices
Arrange the fresh dill sprigs around the garlic.
Add:
- 1 teaspoon dill seeds
- 1 teaspoon black peppercorns
- ½ teaspoon mustard seeds
- ½ teaspoon red pepper flakes
- 1 bay leaf
- ¼ teaspoon celery seeds
Distributing the dill and spices throughout the jar helps flavor the garlic more evenly.
Step 3: Prepare the Pickling Brine
Add 1 cup white vinegar, 1 cup water, 1 tablespoon salt, and 1 tablespoon sugar to a saucepan.
Place over medium heat.
Step 4: Dissolve the Salt and Sugar
Warm the brine while stirring until the salt and sugar have completely dissolved.
There’s no need to aggressively boil or reduce the mixture.
Step 5: Fill the Jar
Carefully pour the warm brine over the garlic, dill, and spices.
Make sure the garlic cloves are completely covered by the liquid.
Using an appropriately sized jar will make keeping everything submerged much easier.
Step 6: Cool and Refrigerate
Allow the jar to cool before sealing it with a clean lid.
Once cooled, close the jar securely and transfer it to the refrigerator.
Step 7: Let the Garlic Pickle
Allow the garlic to pickle for at least 3 days before tasting.
For a stronger dill-pickle flavor, give it approximately 5–7 days.
The dill and spices will continue infusing the brine as the jar rests.
Step 8: Serve
Remove the desired number of cloves using a clean fork or spoon.
Serve chilled straight from the refrigerator or chop the garlic into your favorite savory dishes.