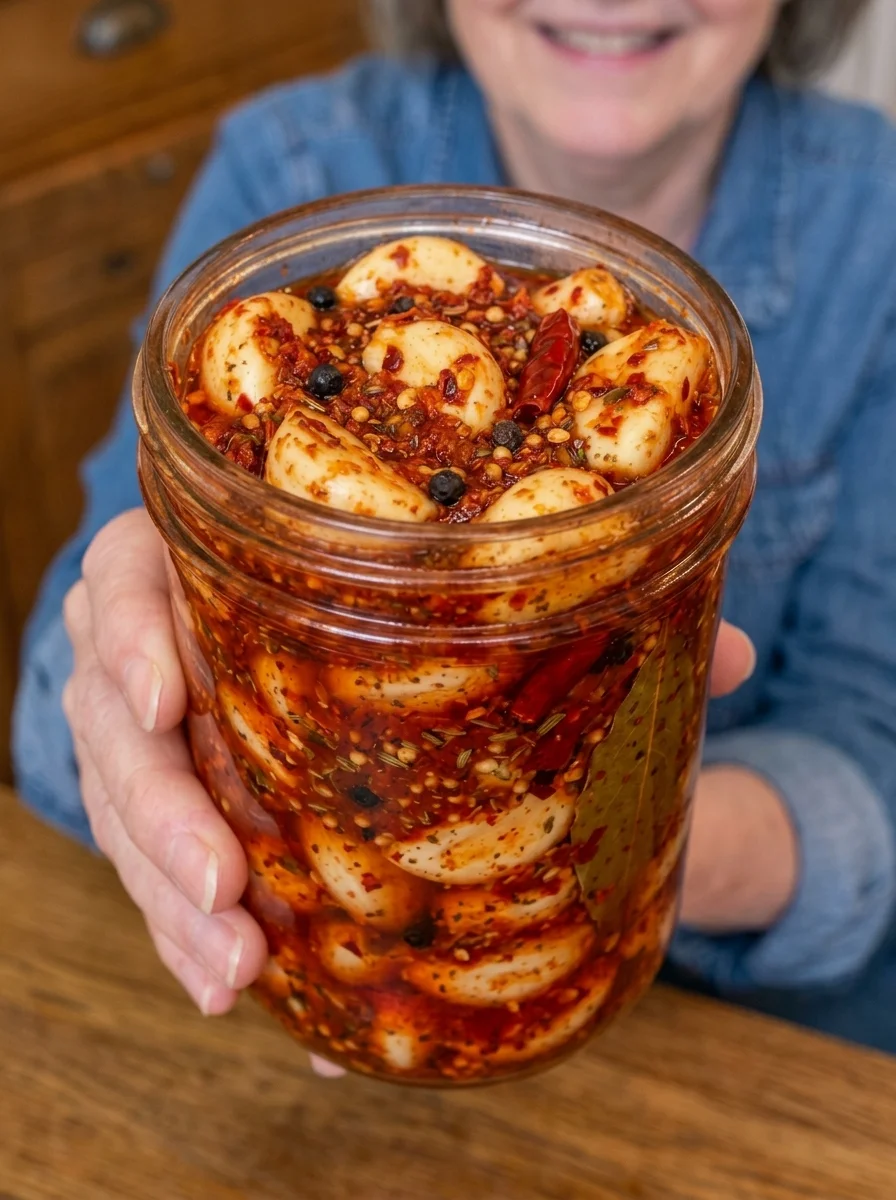
This Fiery Cayenne Pickled Garlic is tangy, crunchy, intensely spicy, and packed with bold cayenne heat. Fresh garlic cloves soak in a punchy vinegar brine loaded with cayenne pepper, hot sauce, red pepper flakes, smoky paprika, and dried chilies, creating a fiery refrigerator pickle made especially for serious spice lovers.
If regular pickled garlic doesn’t bring enough heat for you, this Fiery Cayenne Pickled Garlic turns up the temperature. Whole garlic cloves are packed into a jar with multiple layers of spice, from sharp cayenne and crushed red pepper to dried chilies and hot sauce. Black peppercorns and mustard seeds add extra complexity, while smoked paprika contributes a warm, smoky background flavor.
The vinegar brine gradually mellows the sharp raw-garlic bite while allowing the cloves to absorb all those spicy, tangy flavors. After just a few days in the refrigerator, you’ll have crunchy garlic cloves with plenty of heat. Give them 5–7 days and the flavor becomes even deeper and more intense.
Best of all, this is a simple refrigerator pickle requiring only about 15 minutes of hands-on preparation. No complicated canning process is necessary.
Let’s dive into everything you need to know to make this seriously spicy cayenne pickled garlic at home.
Why You’ll Love This Fiery Cayenne Pickled Garlic
If you’re a fan of bold, spicy flavors, there’s plenty to love about this recipe:
Made for serious spice lovers. Cayenne pepper, hot sauce, red pepper flakes, and dried red chilies combine to deliver plenty of heat.
Crunchy and tangy. The garlic absorbs the seasoned vinegar brine while retaining a satisfying bite.
Multiple layers of spice. Rather than relying on just one source of heat, this recipe combines several peppers and seasonings for a more complex spicy flavor.
Smoky undertones. Smoked paprika adds warmth and subtle smokiness that complements the cayenne and dried chilies.
Easy refrigerator pickle. There’s no complicated water-bath canning process required.
Quick preparation. The jar takes only about 15 minutes to assemble before the refrigerator handles the rest.
Extremely versatile. Enjoy the garlic as a fiery snack or add it to sandwiches, burgers, pizza, salads, and cheese boards.
Ingredients You’ll Need
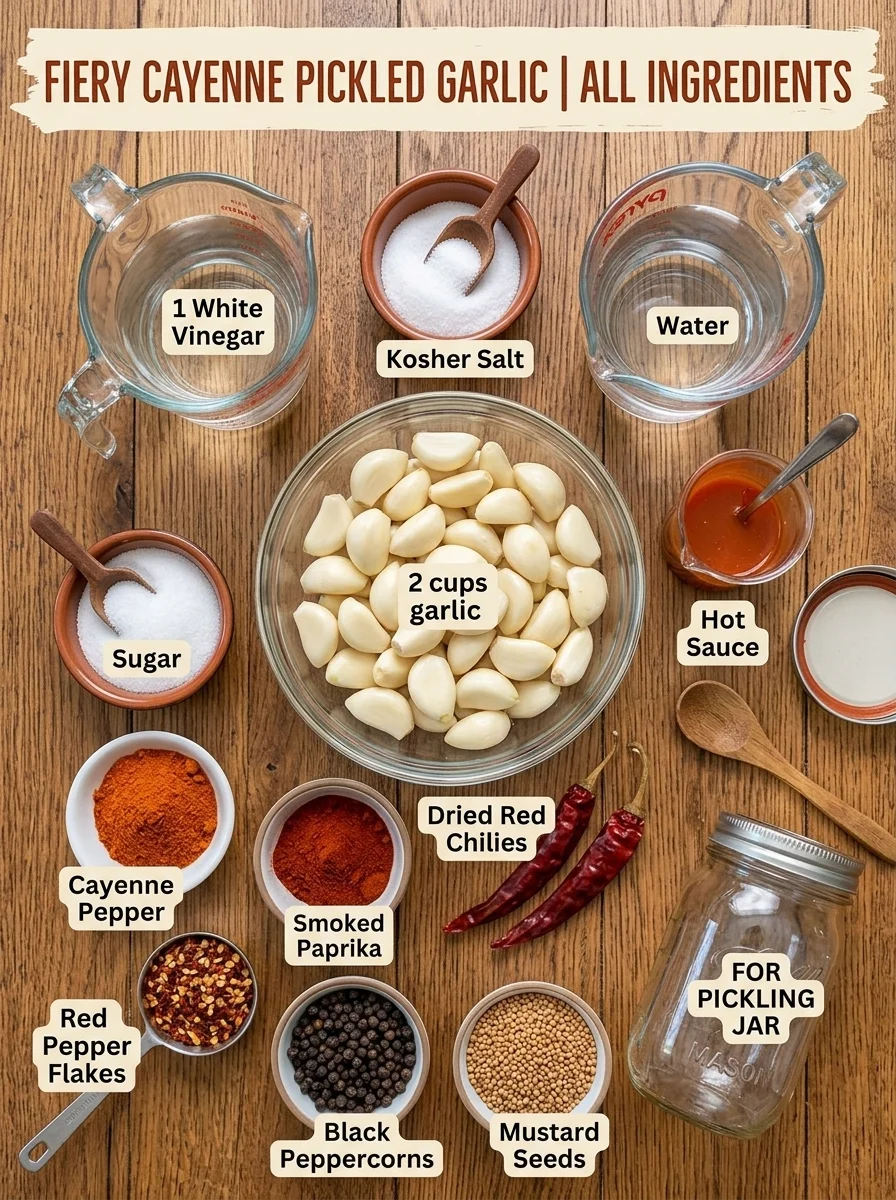
Here’s everything you’ll need to make this bold and fiery pickled garlic and what each ingredient contributes.
- 2 cups fresh garlic cloves, peeled — The star of the recipe. The cloves absorb the spicy vinegar brine while developing a tangy, less sharply raw garlic flavor.
- 1 cup white vinegar — Creates the acidic, tangy foundation of the pickling brine.
- 1 cup water — Balances the acidity of the vinegar and creates a smoother brine.
- 1 tbsp kosher salt or pickling salt — Seasons the garlic and enhances the other flavors in the jar.
- 1 tbsp sugar — Adds a small amount of sweetness to balance the vinegar and intense chili heat.
- 1 ½ tsp cayenne pepper — The primary source of fiery heat and the defining spice in this recipe.
- 1 tbsp hot sauce — Adds another layer of tangy chili flavor throughout the brine.
- 1 tsp red pepper flakes — Provides additional heat and visible flecks of chili throughout the jar.
- 1 tsp black peppercorns — Adds subtle peppery warmth and classic pickling flavor.
- 1 tsp mustard seeds — Contributes a lightly sharp, earthy flavor that complements the garlic and vinegar.
- ½ tsp smoked paprika — Adds warm, smoky depth without overpowering the cayenne.
- 2 dried red chili peppers — Intensify the chili flavor and give the jar an extra fiery finish.
How to Make Fiery Cayenne Pickled Garlic
This spicy refrigerator pickle takes only a few simple steps to prepare.
Step 1: Prepare the Garlic
Peel the fresh garlic cloves and inspect them, removing any damaged pieces.
Place the cloves into a clean glass jar.
Step 2: Add the Spices
Add the cayenne pepper, red pepper flakes, black peppercorns, mustard seeds, smoked paprika, and dried red chili peppers to the jar.
Distribute the seasonings around the garlic so their flavors can infuse throughout the brine.
Step 3: Prepare the Spicy Brine
In a small saucepan, combine the white vinegar, water, kosher or pickling salt, sugar, and hot sauce.
Heat over medium heat, stirring until the salt and sugar have completely dissolved.
Bring the mixture to a gentle simmer.
Step 4: Pour the Brine Over the Garlic
Carefully pour the warm pickling liquid into the jar.
Continue pouring until the garlic cloves are completely covered with brine.
Step 5: Cool and Refrigerate
Allow the jar to cool completely to room temperature.
Once cooled, seal it tightly and place it in the refrigerator.
Step 6: Let the Garlic Pickle
Allow the garlic to pickle for at least 3 days before eating.
For a deeper cayenne flavor and stronger overall heat, leave it in the refrigerator for 5–7 days before serving.
How to Serve Fiery Cayenne Pickled Garlic
These fiery garlic cloves can bring heat and tangy flavor to all kinds of foods. Try them:
- Straight from the refrigerator — Perfect for spice lovers looking for a bold, crunchy snack.
- On sandwiches — Slice or chop the cloves and add them to sandwiches for instant heat and acidity.
- With burgers — Serve alongside burgers or chop them into your favorite burger toppings.
- On pizza — Thinly slice the pickled cloves and scatter them over pizza for a fiery garlic kick.
- In salads — Chop the garlic and toss it into salads for spicy, tangy flavor.
- On cheese boards — The acidity and heat provide a bold contrast to rich and creamy cheeses.
- Alongside grilled foods — Serve the garlic with grilled meats or vegetables for an intensely flavored accompaniment.
Tips for the Best Fiery Cayenne Pickled Garlic
Start with fresh, firm garlic. Fresh cloves provide the best texture and flavor after pickling.
Expect serious heat. This recipe combines cayenne, hot sauce, red pepper flakes, and dried chilies, so it’s intentionally much hotter than ordinary pickled garlic.
Don’t eliminate the sugar just because you want it spicy. The small amount of sugar helps balance the acidity and heat rather than making the garlic noticeably sweet.
Give the spices time to develop. Three days provides a good starting point, but 5–7 days creates a more developed spicy flavor.
Keep the cloves submerged. Make sure the garlic remains completely covered by the brine while refrigerated.
Use a clean utensil every time. Avoid reaching into the jar with your fingers or a used utensil.
Expect the brine to become intensely seasoned. As the cayenne, paprika, chili flakes, and dried peppers hydrate and disperse, the brine will develop a stronger color and flavor.
Adjust future batches carefully. If the first batch is hotter than you prefer, reduce the cayenne or red pepper flakes the next time you make it.
Storage Information
Store the Fiery Cayenne Pickled Garlic in an airtight glass jar in the refrigerator for up to 2 weeks.
Keep all the garlic cloves fully submerged beneath the brine and always use a clean utensil when serving.
This recipe is specifically intended as a refrigerator pickle. It has not been designed for shelf-stable storage and should remain refrigerated.
Frequently Asked Questions
How spicy is Fiery Cayenne Pickled Garlic?
This is intentionally a hot recipe. It contains cayenne pepper, hot sauce, red pepper flakes, and dried red chili peppers, creating several layers of chili heat.
How long should the garlic pickle before eating?
Wait at least 3 days before tasting it. For a deeper cayenne flavor and stronger heat, allow the garlic to pickle for 5–7 days.
Does pickling make raw garlic less harsh?
Pickling changes the flavor of fresh garlic by surrounding it with an acidic, seasoned brine. After several days, the cloves develop a tangier, more seasoned character than plain raw garlic.
Can I make this recipe less spicy?
Yes. For your next batch, reducing the cayenne pepper or red pepper flakes will lower the heat while keeping the basic pickled-garlic flavor.
Can I use pre-peeled garlic?
Yes. Pre-peeled fresh garlic can make preparation faster. Choose cloves that look fresh and firm for the best texture.
Can I eat the dried chili peppers?
They primarily serve to infuse the brine with additional chili flavor and heat. The garlic itself is the main component intended for serving.
What does the smoked paprika add?
Smoked paprika adds subtle smoky depth that complements the sharper heat of the cayenne, hot sauce, and chili peppers.
Why is there sugar in a spicy garlic recipe?
The tablespoon of sugar helps balance the sharp vinegar and intense chili heat. It isn’t enough to turn this into a sweet pickle.
Can I use this recipe for canning?
No. This recipe is designed specifically for refrigerated storage and should not be treated as a tested shelf-stable canning recipe.
How long does Fiery Cayenne Pickled Garlic last?
Store it refrigerated in an airtight glass jar for up to 2 weeks, keeping the garlic completely submerged in the brine.
Recipe Card
Prep Time: 10 minutes
Cook Time: 5 minutes
Total Time: 15 minutes, plus pickling time
Servings: 12
Calories: ~20 per serving
This Fiery Cayenne Pickled Garlic takes classic refrigerator pickled garlic into serious spice-lover territory. Cayenne pepper, hot sauce, crushed red pepper, smoked paprika, and dried chilies create an intensely flavored brine that transforms fresh garlic cloves into crunchy, tangy, fiery bites.
Make a jar, give those cloves several days to absorb all that cayenne heat, and you’ll have a bold refrigerator pickle ready for snacking, sandwiches, burgers, salads, pizza, cheese boards, and anywhere else you want an extra kick of garlic and spice.
Print
Fiery Cayenne Pickled Garlic
- Total Time: 15 minutes, plus pickling time
Ingredients
Here’s everything you’ll need to make this bold and fiery pickled garlic and what each ingredient contributes.
- 2 cups fresh garlic cloves, peeled — The star of the recipe. The cloves absorb the spicy vinegar brine while developing a tangy, less sharply raw garlic flavor.
- 1 cup white vinegar — Creates the acidic, tangy foundation of the pickling brine.
- 1 cup water — Balances the acidity of the vinegar and creates a smoother brine.
- 1 tbsp kosher salt or pickling salt — Seasons the garlic and enhances the other flavors in the jar.
- 1 tbsp sugar — Adds a small amount of sweetness to balance the vinegar and intense chili heat.
- 1 ½ tsp cayenne pepper — The primary source of fiery heat and the defining spice in this recipe.
- 1 tbsp hot sauce — Adds another layer of tangy chili flavor throughout the brine.
- 1 tsp red pepper flakes — Provides additional heat and visible flecks of chili throughout the jar.
- 1 tsp black peppercorns — Adds subtle peppery warmth and classic pickling flavor.
- 1 tsp mustard seeds — Contributes a lightly sharp, earthy flavor that complements the garlic and vinegar.
- ½ tsp smoked paprika — Adds warm, smoky depth without overpowering the cayenne.
- 2 dried red chili peppers — Intensify the chili flavor and give the jar an extra fiery finish.
Instructions
This spicy refrigerator pickle takes only a few simple steps to prepare.
Step 1: Prepare the Garlic
Peel the fresh garlic cloves and inspect them, removing any damaged pieces.
Place the cloves into a clean glass jar.
Step 2: Add the Spices
Add the cayenne pepper, red pepper flakes, black peppercorns, mustard seeds, smoked paprika, and dried red chili peppers to the jar.
Distribute the seasonings around the garlic so their flavors can infuse throughout the brine.
Step 3: Prepare the Spicy Brine
In a small saucepan, combine the white vinegar, water, kosher or pickling salt, sugar, and hot sauce.
Heat over medium heat, stirring until the salt and sugar have completely dissolved.
Bring the mixture to a gentle simmer.
Step 4: Pour the Brine Over the Garlic
Carefully pour the warm pickling liquid into the jar.
Continue pouring until the garlic cloves are completely covered with brine.
Step 5: Cool and Refrigerate
Allow the jar to cool completely to room temperature.
Once cooled, seal it tightly and place it in the refrigerator.
Step 6: Let the Garlic Pickle
Allow the garlic to pickle for at least 3 days before eating.
For a deeper cayenne flavor and stronger overall heat, leave it in the refrigerator for 5–7 days before serving.
- Prep Time: 10 minutes
- Cook Time: 5 minutes
Nutrition
- Serving Size: 12
- Calories: 20 per serving