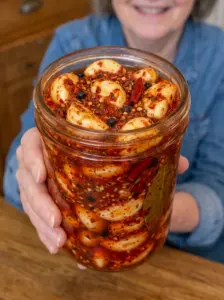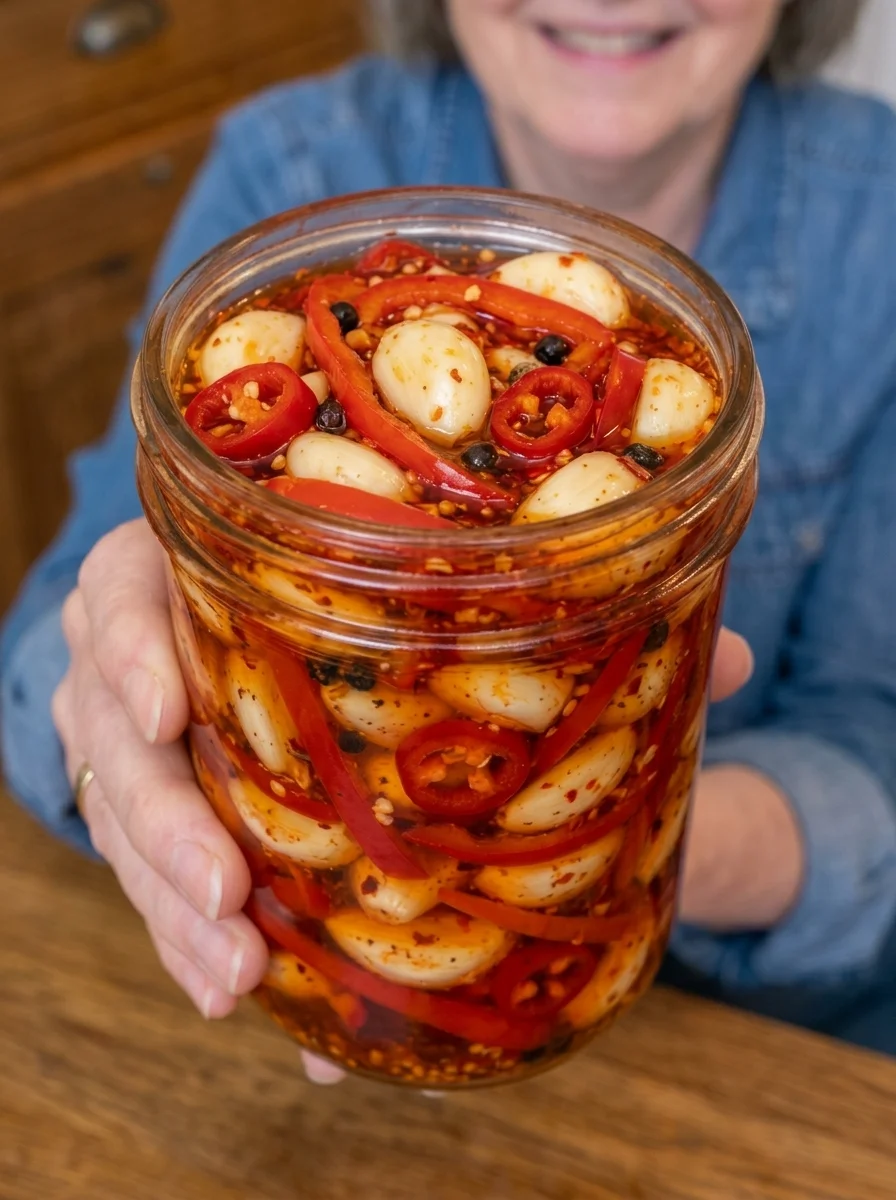
This Sweet & Spicy Red Pepper Pickled Garlic is crunchy, tangy, and packed with sweet red bell pepper and fiery chili flavor. An easy refrigerator pickle perfect for sandwiches and snacking!
If you love the perfect balance of sweet and heat, this Sweet & Spicy Red Pepper Pickled Garlic is exactly what your refrigerator has been missing. Whole peeled garlic cloves are packed into a jar with sweet sliced red bell pepper, fresh red chili, and warm pickling spices, then submerged in a tangy vinegar brine sweetened with honey and sugar and kicked up with hot sauce. The result is a beautiful, ruby-flecked jar of crunchy, juicy garlic cloves with a sweet-and-spicy flavor that’s seriously addictive.
This recipe is a simple refrigerator pickle, meaning there’s no complicated canning process involved. Once the garlic and peppers are packed into a jar and covered with the warm brine, all that’s left to do is wait. In as little as 3 days (though 5–7 days delivers the best sweet-and-spicy balance), you’ll have a jar of colorful pickled garlic ready to elevate sandwiches, salads, and cheese boards.
Let’s dive into everything you need to know to make this crunchy, sweet, and spicy red pepper pickled garlic at home.
Why You’ll Love This Sweet & Spicy Red Pepper Pickled Garlic
There’s a lot to love about this colorful, addictive snack recipe:
Perfect balance of sweet and heat. The combination of honey, sugar, sweet red bell pepper, and fiery hot sauce and chili creates an irresistible sweet-and-spicy flavor profile.
Beautiful, colorful presentation. Sliced red bell pepper and fresh red chili add gorgeous color to the jar, making it as pretty as it is delicious.
Incredibly easy to make. With just a handful of ingredients and one simple pickling process, this recipe requires very little hands-on effort.
Mellowed, less harsh garlic flavor. Pickling tames the raw sharpness of garlic while infusing every clove with bold, sweet-spicy flavor.
No canning required. As a refrigerator pickle, this recipe skips the need for a water bath canner or specialized canning knowledge.
Perfect for cheese boards and grilled meats. The sweet-heat flavor pairs beautifully with rich cheeses and grilled dishes.
Ingredients You’ll Need
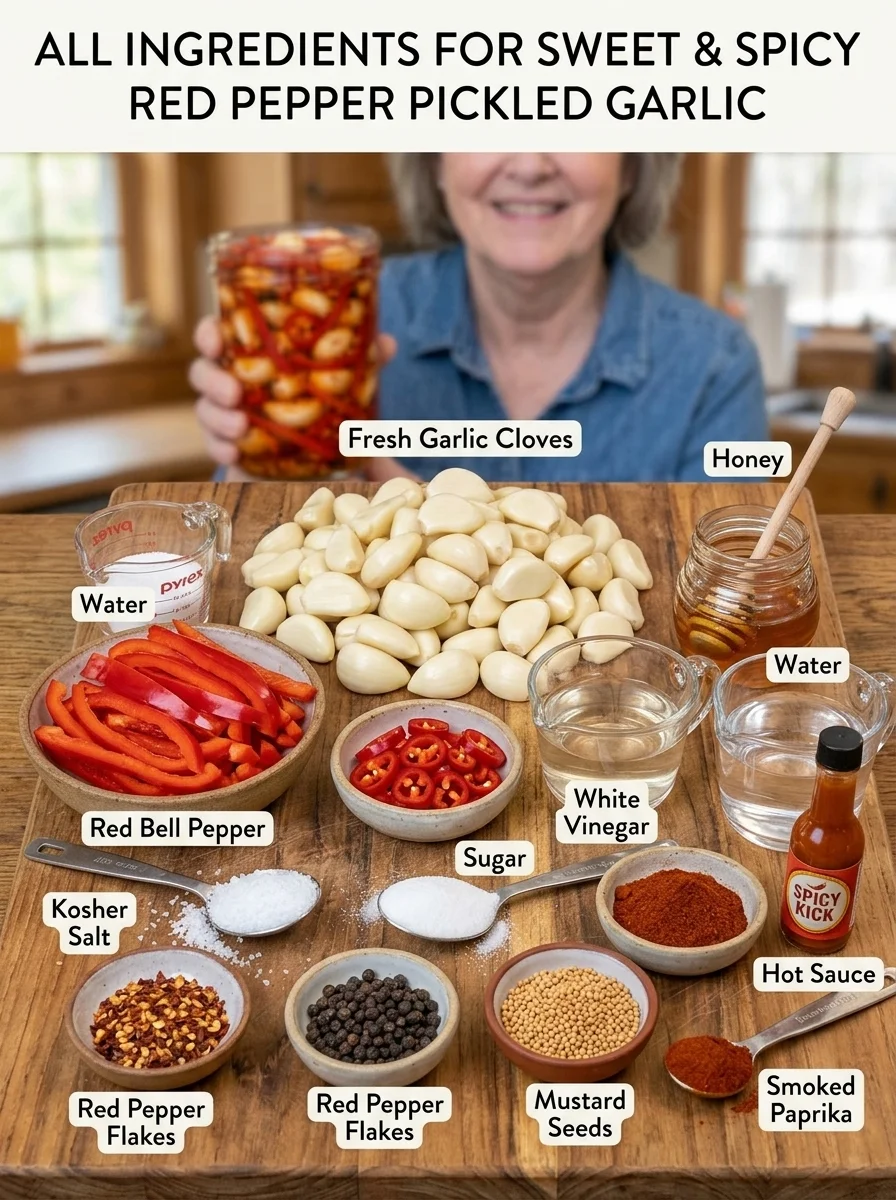
Here’s a breakdown of what goes into this sweet, spicy, colorful pickled garlic recipe and why each ingredient plays a role.
- 2 cups fresh garlic cloves, peeled — The star of the recipe, providing a crunchy, flavorful base that soaks up the sweet-spicy brine.
- 1 cup white vinegar — Forms the tangy, acidic base of the brine.
- 1 cup water — Balances the acidity of the vinegar so the brine isn’t overpoweringly sharp.
- 1 tbsp kosher salt or pickling salt — Enhances the overall flavor of the brine and helps preserve the garlic.
- 2 tbsp sugar — Adds sweetness to balance the tangy vinegar and spicy heat.
- 1 tbsp honey — Adds a deeper, more floral sweetness alongside the sugar.
- 1 tbsp hot sauce — Adds a punch of tangy heat throughout the brine.
- 1 tsp red pepper flakes — Reinforces the heat throughout the pickled garlic.
- ½ cup thinly sliced red bell pepper — Adds natural sweetness, vibrant color, and a pleasant crunch.
- 1 small red chili pepper, thinly sliced — Brings fresh, fiery heat and additional color.
- 1 tsp black peppercorns — Adds a mild, warm heat and subtle spice.
- 1 tsp mustard seeds — Provides a slightly tangy, sharp flavor typical of classic pickling spice blends.
- ½ tsp smoked paprika — Adds a warm, smoky undertone that complements the sweet and spicy flavors.
How to Make Sweet & Spicy Red Pepper Pickled Garlic
This recipe is simple and mostly hands-off once the brine is prepared. Here’s exactly how to make it.
Step 1: Pack the Jar
Peel the garlic cloves and place them into a clean glass jar along with the sliced red bell pepper, red chili pepper, red pepper flakes, black peppercorns, mustard seeds, and smoked paprika.
Step 2: Prepare the Brine
In a small saucepan, combine the white vinegar, water, salt, sugar, honey, and hot sauce. Heat over medium heat until the salt and sugar dissolve and the mixture reaches a gentle simmer.
Step 3: Pour the Brine Over the Garlic and Peppers
Carefully pour the warm pickling liquid over the garlic and peppers until everything is completely covered.
Step 4: Cool and Seal
Let the jar cool to room temperature, then seal tightly and refrigerate.
Step 5: Let the Flavor Develop
Allow the garlic to pickle for at least 3 days before enjoying. For the best sweet-and-spicy flavor, let it pickle for 5–7 days.
How to Serve Sweet & Spicy Red Pepper Pickled Garlic
These crunchy, sweet-heat garlic cloves are perfect for:
- Straight from the fridge — Enjoy as a bold, crunchy snack any time.
- Piled onto sandwiches — A bold, flavorful addition that adds crunch and sweet heat.
- Chopped into salads — Toss into salads for a punch of flavor and texture.
- Alongside cheese — Serve with sharp cheeses and crackers for a sweet-spicy contrast.
- With grilled meats — Pair with grilled chicken, steak, or sausages for a bright, tangy side.
- On charcuterie boards — Adds color, crunch, and bold flavor to balance rich meats and cheeses.
Tips for the Best Sweet & Spicy Red Pepper Pickled Garlic
Use fresh, firm garlic cloves. Starting with fresh, high-quality garlic results in the crunchiest, most flavorful finished pickle.
Slice the bell pepper thinly. Thin slices of red bell pepper absorb the brine more quickly and pack neatly among the garlic cloves in the jar.
Don’t skip the resting time. While technically ready after 3 days, letting the garlic pickle for a full 5–7 days results in the best, most balanced sweet-and-spicy flavor.
Keep everything fully submerged. Make sure the garlic and peppers stay below the surface of the brine throughout the pickling process for the best flavor and food safety.
Adjust the heat to your taste. Start with the recommended amount of hot sauce, red pepper flakes, and red chili pepper, then adjust in future batches based on your spice preference.
Use clean, sterilized jars. Starting with clean glass jars helps ensure the best flavor and longest shelf life for your pickled garlic.
Storage Information
Store in an airtight glass jar in the refrigerator for up to 2 weeks. Keep the garlic and peppers fully submerged in the brine and always use a clean utensil. This is a refrigerator pickle and is not intended for shelf-stable storage.
Frequently Asked Questions
How long does this pickled garlic last? Stored in an airtight glass jar in the refrigerator with the garlic and peppers fully submerged in brine, it will stay fresh for up to 2 weeks.
How spicy is this recipe? As written, this recipe has a moderate, balanced heat from the hot sauce, red pepper flakes, and red chili pepper, tempered by the sweetness of the honey, sugar, and red bell pepper. The spice level can easily be adjusted based on your preference.
Can I use pre-peeled garlic cloves? Yes, pre-peeled garlic cloves work well in this recipe and can save time on prep, though fresh garlic that you peel yourself often has the best flavor and texture.
Does pickling make the garlic less pungent? Yes, pickling mellows the raw, sharp bite of garlic while infusing it with the sweet, spicy, tangy flavors of the brine, resulting in a milder, more balanced flavor.
Can I can this garlic for shelf-stable storage? This recipe is designed as a refrigerator pickle and should be stored in the refrigerator only. For shelf-stable, room-temperature storage, a specifically tested canning recipe for garlic would be required due to food safety considerations.
Can I eat the pickled red peppers too? Yes, the pickled red bell pepper and chili slices are delicious and can be enjoyed alongside the garlic or on their own in any of the same ways.
Print
Sweet & Spicy Red Pepper Pickled Garlic
- Total Time: 15 minutes, plus pickling time
Instructions
Here’s a breakdown of what goes into this sweet, spicy, colorful pickled garlic recipe and why each ingredient plays a role.
- 2 cups fresh garlic cloves, peeled — The star of the recipe, providing a crunchy, flavorful base that soaks up the sweet-spicy brine.
- 1 cup white vinegar — Forms the tangy, acidic base of the brine.
- 1 cup water — Balances the acidity of the vinegar so the brine isn’t overpoweringly sharp.
- 1 tbsp kosher salt or pickling salt — Enhances the overall flavor of the brine and helps preserve the garlic.
- 2 tbsp sugar — Adds sweetness to balance the tangy vinegar and spicy heat.
- 1 tbsp honey — Adds a deeper, more floral sweetness alongside the sugar.
- 1 tbsp hot sauce — Adds a punch of tangy heat throughout the brine.
- 1 tsp red pepper flakes — Reinforces the heat throughout the pickled garlic.
- ½ cup thinly sliced red bell pepper — Adds natural sweetness, vibrant color, and a pleasant crunch.
- 1 small red chili pepper, thinly sliced — Brings fresh, fiery heat and additional color.
- 1 tsp black peppercorns — Adds a mild, warm heat and subtle spice.
- 1 tsp mustard seeds — Provides a slightly tangy, sharp flavor typical of classic pickling spice blends.
- ½ tsp smoked paprika — Adds a warm, smoky undertone that complements the sweet and spicy flavors.
Notes
This recipe is simple and mostly hands-off once the brine is prepared. Here’s exactly how to make it.
Step 1: Pack the Jar
Peel the garlic cloves and place them into a clean glass jar along with the sliced red bell pepper, red chili pepper, red pepper flakes, black peppercorns, mustard seeds, and smoked paprika.
Step 2: Prepare the Brine
In a small saucepan, combine the white vinegar, water, salt, sugar, honey, and hot sauce. Heat over medium heat until the salt and sugar dissolve and the mixture reaches a gentle simmer.
Step 3: Pour the Brine Over the Garlic and Peppers
Carefully pour the warm pickling liquid over the garlic and peppers until everything is completely covered.
Step 4: Cool and Seal
Let the jar cool to room temperature, then seal tightly and refrigerate.
Step 5: Let the Flavor Develop
Allow the garlic to pickle for at least 3 days before enjoying. For the best sweet-and-spicy flavor, let it pickle for 5–7 days.
- Prep Time: 10 minutes
- Cook Time: 5 minutes
Nutrition
- Serving Size: 12
- Calories: 25 per serving