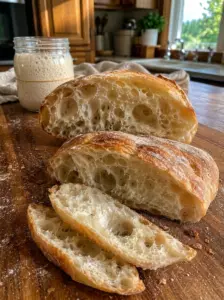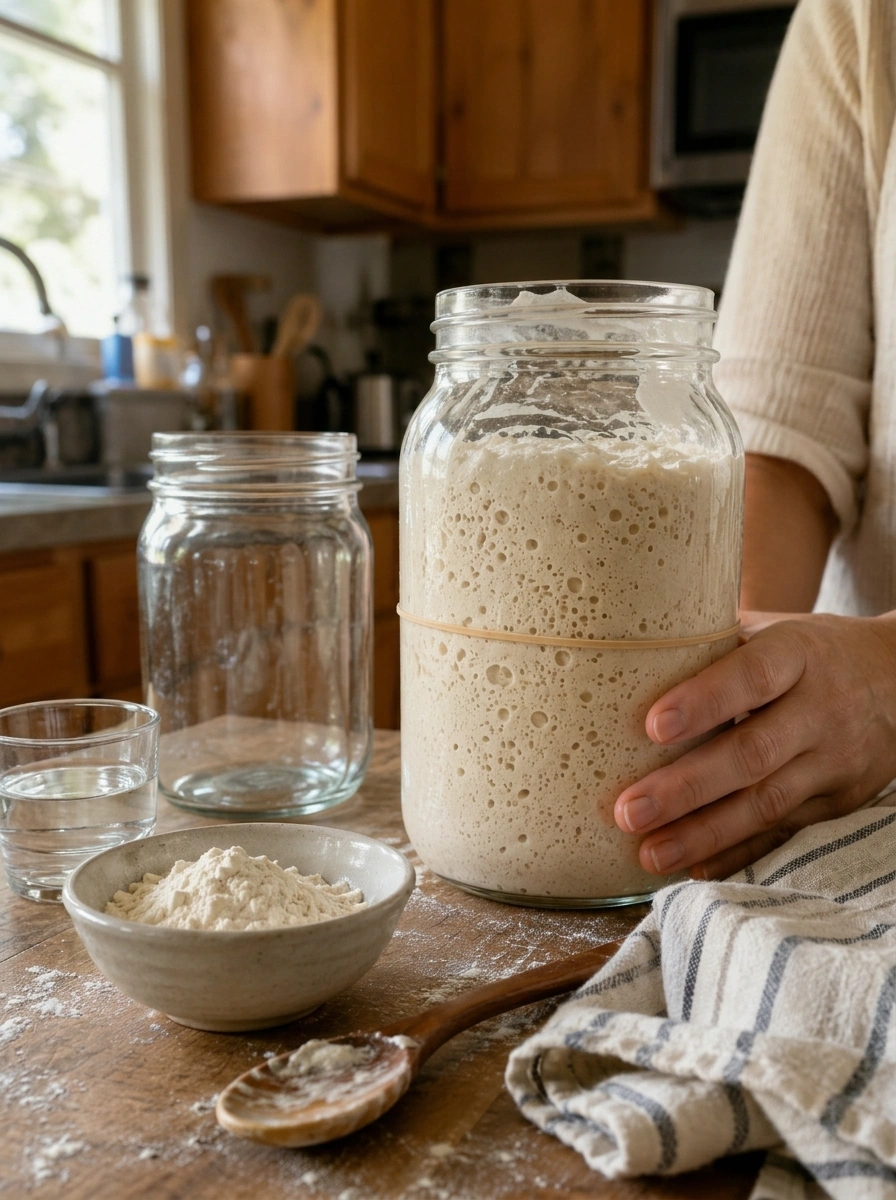
Making your own sourdough starter from scratch is much easier than it might seem. With just flour, water, a clean jar, and a little patience, you can create a naturally fermented starter that can eventually be used to make homemade sourdough bread and dozens of other recipes.
The most important thing to remember is that sourdough starter develops on its own schedule. Some starters become active within several days, while others need more time to become strong and predictable.
Instead of watching the calendar, watch your starter. Bubbles, rising, falling, aroma, and how quickly it responds after feeding will tell you much more than simply reaching Day 7.
This beginner-friendly guide walks you through the process from the first mixture of flour and water to maintaining a bubbly, active starter that’s ready for your first loaf.
What Is a Sourdough Starter?
A sourdough starter is a fermented mixture of flour and water that develops a community of wild yeast and lactic acid bacteria.
Once established, these microorganisms help dough rise while also contributing to the flavor and character associated with sourdough bread.
Unlike recipes that rely on packaged commercial yeast, traditional sourdough uses an active starter as its leavening culture.
A starter needs regular feedings of fresh flour and water to remain active. After feeding, a healthy starter typically rises as fermentation produces gas, reaches a peak, and eventually begins falling again.
Learning to recognize this cycle is one of the most useful skills for a new sourdough baker.
Why You’ll Love This Homemade Sourdough Starter
If you’ve never made sourdough before, this is a simple place to begin.
- Only two basic ingredients: You need flour and water to get started.
- No commercial yeast: The starter develops through natural fermentation.
- Beginner-friendly feeding ratio: The simple 1:1:1 ratio is easy to remember.
- Easy to monitor: A glass jar and rubber band make it simple to track growth.
- Useful for many recipes: Once established, your starter can become the foundation for breads, pizza, pancakes, waffles, crackers, and more.
Best of all, maintaining a starter becomes much easier once you understand its normal rise-and-fall pattern.
What You Need to Make a Sourdough Starter
You don’t need a collection of specialty equipment to begin.
Glass Jar
A clean glass jar makes it easy to watch the bubbles and monitor how much your starter rises after feeding.
Choose a jar with enough extra room for the starter to expand without reaching the top.
Digital Kitchen Scale
For consistent results, measuring flour, water, and starter by weight is much easier and more precise than relying on measuring cups.
This recipe uses grams throughout the feeding process.
Rubber Band
Place a rubber band around the outside of the jar immediately after feeding.
Position it at the top of the freshly mixed starter.
As the starter rises, you’ll have a clear visual reference showing exactly how much it has grown.
Spoon or Spatula
Use a clean spoon or small spatula for mixing and scraping down the inside of the jar.
Loose-Fitting Lid
Cover the jar without sealing it tightly.
The goal is to protect the starter while allowing fermentation gases to escape.
Sourdough Starter Ingredients
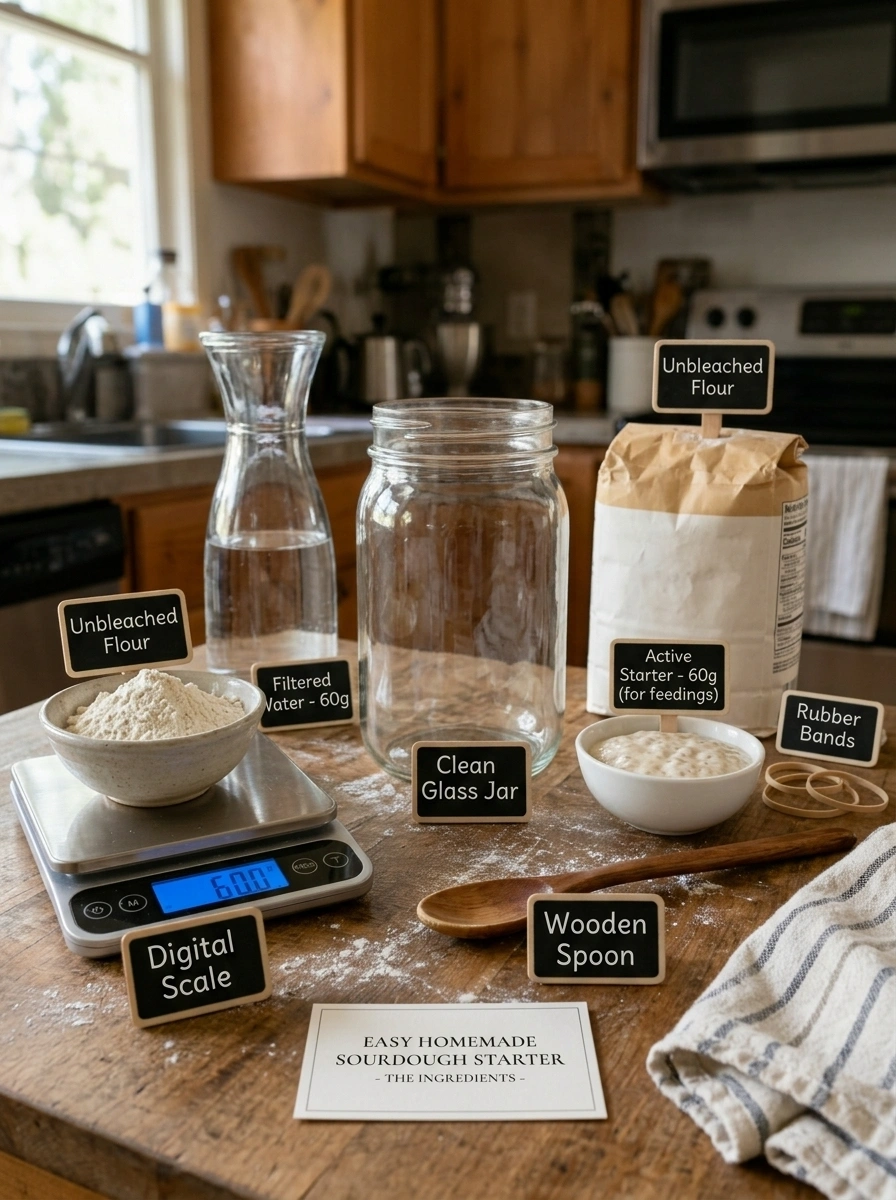
One of the best things about making a starter is the extremely short ingredient list.
Day 1
- 60 g unbleached all-purpose flour or bread flour
- 60 g filtered water, room temperature
For Each Feeding
- 60 g sourdough starter
- 60 g unbleached all-purpose flour or bread flour
- 60 g filtered water
This creates a simple 1:1:1 feeding ratio by weight.
That means you’re feeding equal weights of starter, flour, and water.
What Is the Best Flour for Sourdough Starter?
Several types of flour can work for creating and maintaining a sourdough starter.
Unbleached All-Purpose Flour
Unbleached all-purpose flour is an accessible option for beginners and can be used for regular feedings.
It’s inexpensive, easy to find in most grocery stores, and convenient if you plan to maintain your starter long term.
Bread Flour
Bread flour can also be used successfully.
Because it generally has a higher protein content than all-purpose flour, the consistency and structure of your starter may look slightly different.
Whole Wheat Flour
Whole wheat flour is another popular choice for sourdough starters.
Some bakers use a portion of whole wheat flour when establishing or feeding a starter, particularly when they want to encourage fermentation in a sluggish young starter.
Rye Flour
Rye flour is also commonly used in sourdough baking and starter maintenance.
You don’t have to continuously switch between different flours, however. Consistency is useful when you’re learning because it makes changes in your starter easier to recognize.
Does Water Matter for Sourdough Starter?
Water is the second ingredient, so its quality and temperature are worth considering.
Room-temperature filtered water is an easy choice.
Avoid using very hot water. Excessive heat can negatively affect the microorganisms you’re trying to cultivate.
If your tap water works well for fermentation, it may also be suitable. However, water treatment varies by location, so filtered water provides a simple, consistent option for this beginner recipe.
How to Make a Sourdough Starter From Scratch
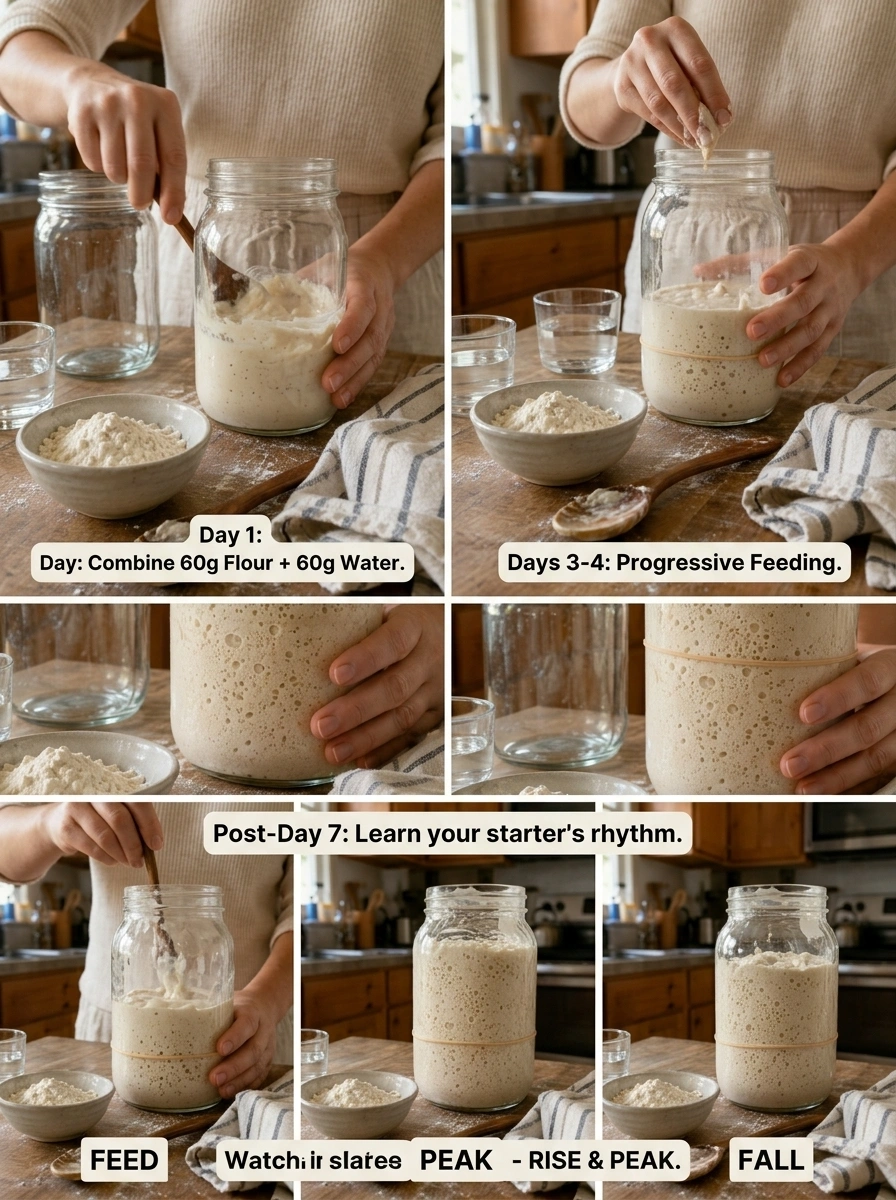
Here’s the day-by-day process.
Day 1 — Mix the Flour and Water
Add 60 grams of flour and 60 grams of room-temperature filtered water to a clean glass jar.
Stir thoroughly until no pockets of dry flour remain.
The mixture should resemble a thick, sticky batter.
Scrape down the sides of the jar so you can easily monitor future activity.
Cover the jar loosely and leave it at room temperature for approximately 24 hours.
Don’t worry if nothing dramatic happens during the first day.
Fermentation takes time.
Day 2 — Give Your Starter Its First Feeding
Check the jar for activity.
You might notice a few small bubbles or a slight change in aroma. You may also see very little happening.
Either situation can occur with a young starter.
Keep 60 grams of starter and remove the remainder.
To the 60 grams you’re keeping, add:
- 60 g flour
- 60 g filtered water
Stir until thoroughly combined.
Scrape down the sides, cover loosely, and leave the starter at room temperature for another 24 hours.
Days 3–4 — Continue Feeding
Repeat the same basic feeding routine every 24 hours:
Keep 60 g starter → Add 60 g flour → Add 60 g water → Mix
This is when things can become interesting.
You may notice:
- More bubbles
- Increased volume
- A stronger fermented aroma
- Changes in texture
- A noticeable rise followed by a fall
Some young starters experience a surprisingly dramatic burst of activity during the first several days.
Don’t assume this automatically means your starter is mature enough for bread.
It can subsequently become much quieter.
Continue feeding consistently and give the microbial community time to develop.
Days 5–7 — Start Watching the Rise
Continue feeding your starter consistently.
After each feeding, use your rubber band to mark the starting level.
Now watch what happens over the following hours.
You’re looking for a recognizable cycle:
FEED → RISE → DOUBLE → PEAK → FALL → FEED AGAIN
As your starter becomes stronger, its behavior should gradually become more predictable.
Don’t worry if yours isn’t ready exactly on Day 7.
Seven days is a useful milestone, not a deadline.
Some starters need additional time before they’re strong and consistent enough for baking.
What Does a Healthy Sourdough Starter Look Like?
An increasingly active starter usually gives you several visual clues.
You may notice bubbles throughout the mixture rather than only on the surface.
The texture may become lighter and airier as fermentation progresses.
After feeding, the starter should eventually expand upward in the jar.
At its peak, the surface may look slightly domed or aerated. Later, the starter begins to fall as it moves past peak activity.
This rise-and-fall cycle is much more useful than expecting your starter to look exactly like a picture online.
Every kitchen environment is slightly different.
How Do You Know When Sourdough Starter Is Ready?
This is one of the most common questions new sourdough bakers ask.
Don’t rely exclusively on the age of your starter.
Instead, look for a combination of signs.
A starter that’s becoming strong enough for baking should generally:
- Show plenty of bubbles throughout
- Rise predictably after feeding
- Roughly double in volume under favorable conditions
- Develop a light, aerated texture
- Have a pleasantly fermented, tangy or yeasty aroma
- Reach a recognizable peak
- Gradually fall after reaching its peak
- Repeat its behavior consistently after subsequent feedings
For a starter maintained with this feeding method, doubling within roughly 4–8 hours after feeding under favorable conditions can be a useful sign of increasing activity.
However, temperature, flour, feeding ratio, starter maturity, and other factors can change the timing.
Consistency matters more than hitting an exact number on the clock.
How Long Does Sourdough Starter Take to Double?
There’s no universal doubling time that applies to every starter.
A mature, active starter in a comfortably warm kitchen may rise much faster than a young starter sitting in a cool room.
Factors affecting fermentation speed include:
- Room temperature
- Flour type
- Starter maturity
- Feeding ratio
- Water temperature
- Consistency of feedings
This is why using a rubber band is so helpful.
Mark the starter immediately after feeding and check it periodically.
Over several feedings, you’ll begin learning your starter’s individual rhythm.
Why Is My Sourdough Starter Not Rising?
A starter that isn’t rising doesn’t necessarily mean you’ve failed.
This is especially common during the first week.
Here are several things to consider.
Your Starter Is Still Young
Creating a starter is a fermentation process, not an instant recipe.
If you’re only several days into the process, continue your feeding routine and watch for gradual changes.
Your Kitchen Is Cool
Fermentation generally progresses more slowly in cooler environments.
If your kitchen is cool, your starter may simply need more time between feeding and peak activity.
Keep it in a comfortably warm area rather than trying to force activity with excessive heat.
Your Feeding Routine Has Been Inconsistent
Consistency makes your starter easier to understand.
Try to maintain a predictable feeding schedule while establishing it.
Your Flour Changed
Different flours absorb water differently and can affect both consistency and fermentation behavior.
If you suddenly change flour, don’t be surprised if the starter looks slightly different.
You’re Expecting Constant Growth
A sourdough starter doesn’t stay doubled forever.
It rises, reaches its peak, and falls.
If you check the jar after it has already fallen, you may mistakenly think it never rose.
Look for starter residue or streaks higher on the jar, which can indicate that it rose and fell while you weren’t watching.
Why Did My Sourdough Starter Rise and Then Fall?
Falling after rising is a normal part of a starter’s fermentation cycle.
After feeding, microorganisms ferment available nutrients and produce gases that become trapped in the mixture, causing the starter to expand.
Eventually, the starter reaches its peak.
After peak activity, it begins losing structure and falls back down.
This is why marking the starting level with a rubber band is so useful.
Instead of thinking:
“My starter fell, so something went wrong.”
Think:
“My starter completed another fermentation cycle.”
Learning when your starter peaks will eventually help you decide when to use it in bread recipes.
What Should Sourdough Starter Smell Like?
The aroma of your starter can change as it develops.
You may notice aromas that are:
- Tangy
- Yeasty
- Mildly sour
- Fermented
- Slightly fruity
Young starters can go through noticeable changes in smell during their development.
What matters is learning what’s normal for your established starter and paying attention to major changes in appearance or odor.
If you see visible mold or unusual colored growth, don’t simply mix it back into the starter.
When food safety is uncertain, it’s better to err on the side of caution.
How Often Should You Feed a Sourdough Starter?
During the early stages of this method, feed the starter approximately every 24 hours as described in the recipe.
Once your starter becomes mature and active, your feeding routine can depend on how you plan to use it.
Someone baking frequently may maintain a starter at room temperature and feed it regularly.
Someone who only bakes occasionally may prefer refrigerator storage once the starter is well established.
Whatever routine you choose, watching how the starter responds after feeding is more informative than following the clock without observing it.
How to Store Sourdough Starter
Once your starter is mature and consistently active, you have two common options.
Room-Temperature Storage
Keeping your starter at room temperature makes sense when you’re baking frequently.
Because fermentation continues relatively quickly at room temperature, the starter will require regular feeding.
Refrigerator Storage
If you don’t bake frequently, refrigeration can slow fermentation and reduce how often you need to maintain the starter.
Before baking, you may need to bring the starter back into an active feeding routine so it becomes vigorous and predictable again.
The exact schedule will depend on the starter and how long it has been refrigerated.
What Can You Make With Sourdough Starter?
Your starter isn’t limited to rustic sourdough loaves.
Once you’ve established a healthy starter, you can explore recipes such as:
- Sourdough sandwich bread
- Sourdough baguettes
- Sourdough focaccia
- Sourdough pizza crust
- Sourdough bagels
- Sourdough English muffins
- Sourdough pancakes
- Sourdough waffles
- Sourdough cinnamon rolls
- Sourdough crackers
- Sourdough dinner rolls
And don’t forget about sourdough discard.
Depending on the recipe and the maturity of your starter, discard can be incorporated into many recipes instead of automatically throwing it away.
Tips for a Successful Sourdough Starter
Use a Kitchen Scale
Weighing your ingredients makes feeding ratios much easier to reproduce.
Mark the Starting Level
Use a rubber band immediately after every feeding.
It’s one of the easiest ways to tell whether your starter is actually rising.
Don’t Obsess Over Day 7
Your starter doesn’t know what day it is.
If it isn’t reliably active after seven days, continue caring for it and watch its behavior.
Keep Your Routine Consistent
Changing flour, ratios, temperature, and feeding schedules simultaneously makes troubleshooting much harder.
Keep things simple while you’re learning.
Don’t Use Excessive Heat
A comfortably warm environment is enough. Trying to dramatically accelerate fermentation with excessive heat can create unnecessary problems.
Learn Your Starter’s Peak
Eventually, you’ll recognize what your starter looks like immediately after feeding, while rising, at peak activity, and after falling.
That’s more valuable than memorizing an exact timetable.
Frequently Asked Questions
Can I Make Sourdough Starter With All-Purpose Flour?
Yes. Unbleached all-purpose flour can be used to establish and maintain a sourdough starter.
Bread flour, whole wheat flour, and rye flour are also commonly used by sourdough bakers.
Does Sourdough Starter Have to Be Ready in 7 Days?
No.
Some starters may show strong activity relatively quickly, while others require additional time to become consistently active.
Watch the starter’s behavior rather than treating Day 7 as a strict deadline.
Why Did My Starter Suddenly Stop Rising?
Young starters can experience noticeable changes in activity.
An early dramatic rise doesn’t necessarily mean the starter is mature.
Continue feeding consistently and monitor its behavior over subsequent days.
Should Sourdough Starter Double After Feeding?
A strong starter will often substantially increase in volume after feeding, and doubling can be a useful visual benchmark.
However, the exact amount and timing depend on the starter, flour, feeding ratio, temperature, and consistency.
Can I Use Bread Flour for My Starter?
Yes.
Bread flour can be used for both creating and feeding a sourdough starter.
Can I Use Whole Wheat Flour?
Yes.
Whole wheat flour can be used in sourdough starter, either on its own or as part of a flour mixture depending on your feeding method.
Why Do I Need to Discard Some Starter?
If you continually add flour and water without removing starter, the quantity can quickly become unnecessarily large.
Keeping a smaller amount before each feeding makes the feeding ratio manageable and prevents you from accumulating an enormous jar of starter.
Once appropriate, some discard can also be used in recipes designed specifically for sourdough discard.
When Can I Bake My First Sourdough Bread?
Don’t choose your first baking day simply because your starter has reached a certain age.
Wait until it shows strong, repeatable activity after feeding.
A predictable rise, abundant bubbles, a recognizable peak, and consistent performance across multiple feedings are much better indicators.
Print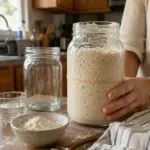
Easy Homemade Sourdough Starter (Beginner-Friendly Guide)
- Total Time: Approximately 7 days or longer
- Yield: 1 sourdough starter 1x
Ingredients
Day 1
- 60 g unbleached all-purpose flour or bread flour
- 60 g filtered water, room temperature
Each Feeding
- 60 g sourdough starter
- 60 g unbleached flour
- 60 g filtered water
Instructions
Day 1
Combine 60 g flour and 60 g water in a clean glass jar.
Stir thoroughly until no dry flour remains.
Scrape down the sides, cover loosely, and leave at room temperature for approximately 24 hours.
Day 2
Keep 60 g of the starter and remove the remainder.
Add 60 g flour and 60 g water.
Mix thoroughly, cover loosely, and leave at room temperature for approximately another 24 hours.
Days 3–4
Continue the same feeding routine approximately every 24 hours:
60 g starter + 60 g flour + 60 g water.
Watch for bubbles, changes in aroma, and increasing fermentation activity.
Don’t assume an early dramatic rise means the starter is ready for bread.
Days 5–7 and Beyond
Continue feeding consistently.
After each feeding, place a rubber band around the jar at the starter’s starting level.
Watch for the complete cycle:
FEED → RISE → DOUBLE → PEAK → FALL
Continue beyond Day 7 when necessary.
Your starter should become increasingly predictable and active before you rely on it to leaven bread.
Important Notes
Temperature: A cooler kitchen generally means slower fermentation.
Flour: Unbleached all-purpose or bread flour works well for this method.
Water: Room-temperature filtered water provides a simple, consistent option.
Timing: Don’t judge readiness based exclusively on the number of days.
Feeding ratio: Remember the simple formula:
60 g starter + 60 g flour + 60 g water = 1:1:1 by weight.
The most important lesson when making your first sourdough starter is simple:
Watch your starter, not just the calendar.
Once you learn its rhythm—feeding, rising, peaking, and falling—you’ll have a much better idea of when it’s active, when it needs feeding, and when it’s becoming strong enough to turn into beautiful homemade sourdough bread.
- Prep Time: 5 minutes per feeding