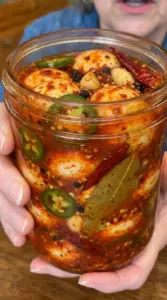
Amish Sweet Pepper Relish: Sweet, Tangy, Crunchy, and Bursting With Old-Fashioned Homemade Flavor
There’s a certain kind of food that tastes like it came from somewhere real — a farmhouse kitchen, a church potluck, a grandmother’s pantry lined with jewel-colored jars. Amish Sweet Pepper Relish is exactly that kind of food. Sweet, tangy, and packed with the satisfying crunch of finely chopped bell peppers and onion, it’s the kind of condiment that makes everything it touches taste more complete. Spoon it onto a hot dog and it becomes a proper meal. Add it to a burger and every bite is suddenly more interesting. Set it out with crackers and cheese and watch it disappear before anything else on the table.
This relish is rooted in the Amish tradition of putting up seasonal produce — preserving the abundance of summer’s bell pepper harvest in sweet, spiced brine so it can be enjoyed through the colder months. It’s one of those recipes that has been passed down through generations not because it’s complicated, but because it’s genuinely perfect. The balance of sweet and tangy, the warmth of mustard and celery seed, the golden glow of turmeric — everything about it is exactly right.
And the best part? It’s surprisingly simple to make. Thirty-five minutes of active work produces jars of something so good people will assume you spent all day in the kitchen. This guide walks you through everything: the history behind the recipe, a full ingredient breakdown, step-by-step instructions, tips for the best texture and flavor, and every possible way to use it once you have jars on the shelf.
The Amish Tradition of Putting Up Relish
To understand Amish Sweet Pepper Relish, it helps to understand the broader Amish approach to food preservation. In traditional Amish communities, home canning is not a hobby or a wellness trend — it’s a fundamental part of how food is managed. Amish kitchens put up hundreds of jars each summer: fruits, vegetables, pickles, jams, sauces, and relishes that will stock the pantry through fall and winter.
Relish occupies a special place in this tradition. It’s the ideal vehicle for using large quantities of garden vegetables — particularly bell peppers, which produce abundantly and ripen all at once. By cooking the peppers down with vinegar, sugar, and spices, you transform a seasonal surplus into something shelf-stable and deeply flavorful that can be enjoyed for months.
The flavor profile of Amish Sweet Pepper Relish is distinctly old-fashioned in the best way. It doesn’t taste like anything you’d find in a plastic squeeze bottle at a ball game. It tastes handmade and honest — bright from the vinegar, sweet from the sugar, warm and aromatic from the mustard seeds, celery seeds, and turmeric. It’s the kind of relish that reminds people of food they ate at someone’s kitchen table a long time ago and have been quietly missing ever since.
Making it at home connects you to that tradition. And once you taste the difference between homemade and store-bought, you’ll understand immediately why Amish families have been making it this way for generations.
Ingredient Breakdown: What Every Element Contributes
Great relish — like any great preserve — is about balance. Every ingredient here plays a specific role, and understanding what each one does makes you a better cook and a better preserver.
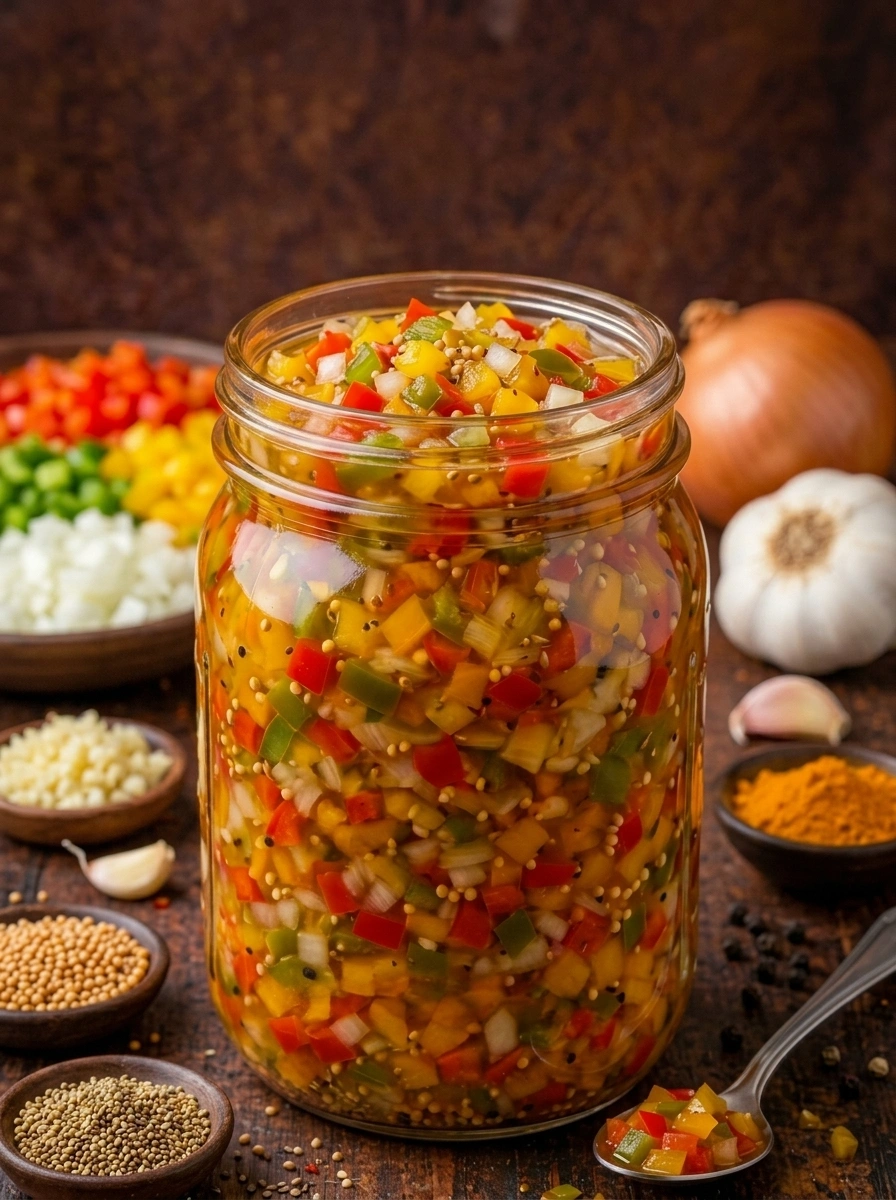
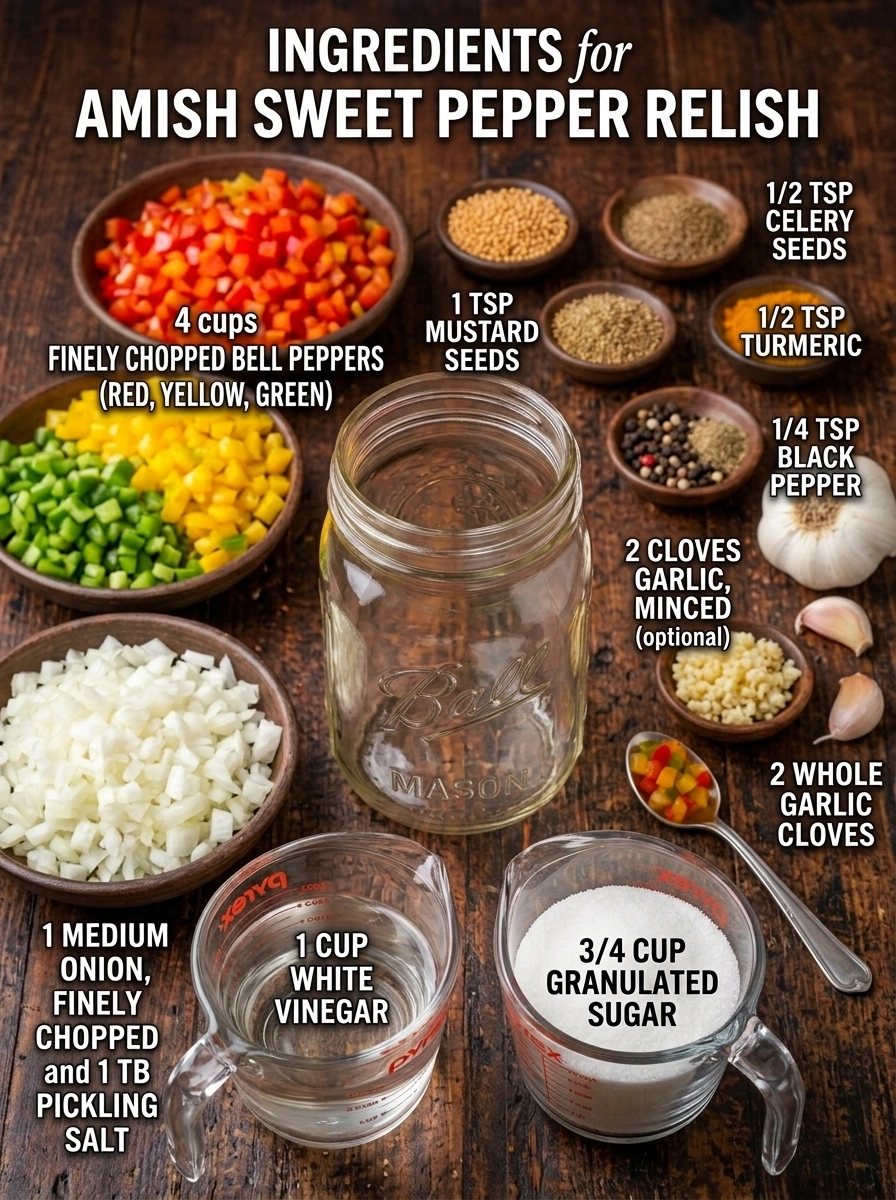
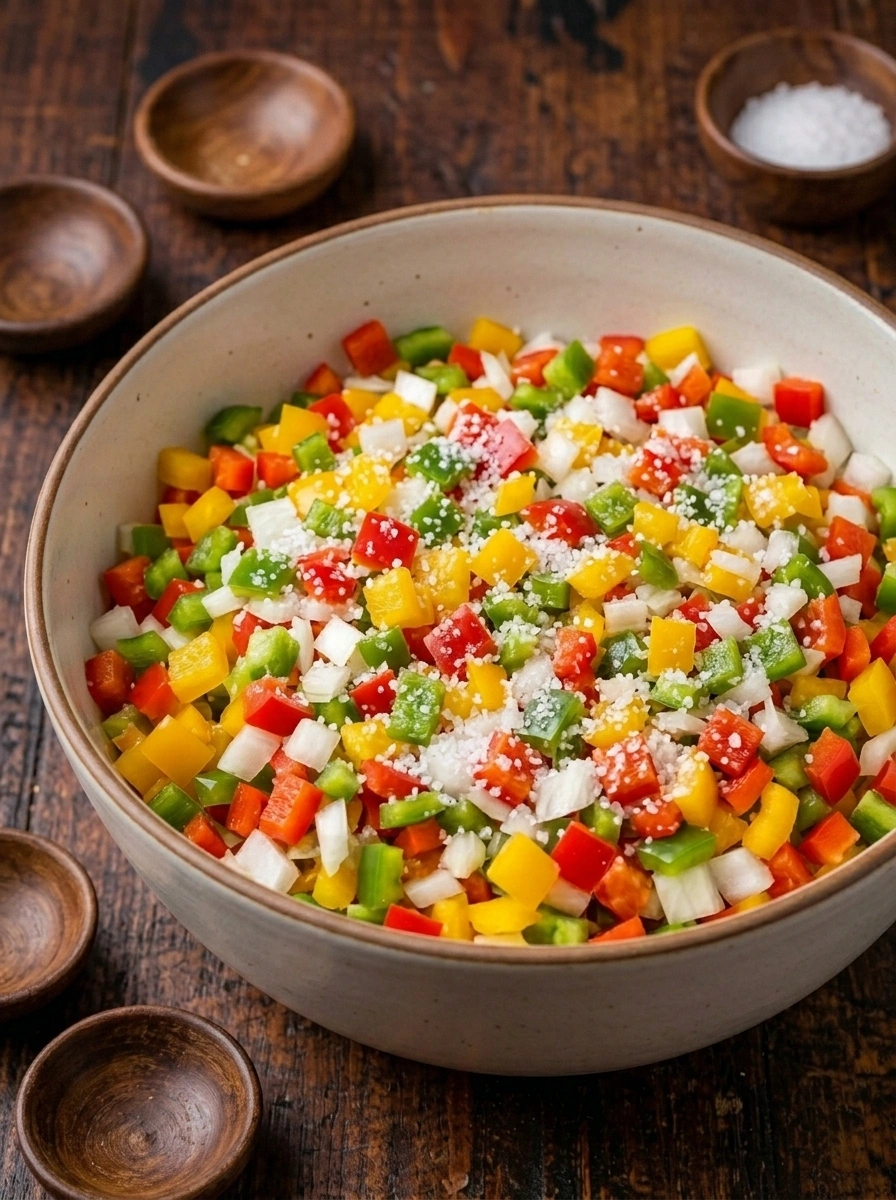
Sweet Bell Peppers (4 cups, finely chopped — red, yellow, and green)
The star of the show. Using a mix of red, yellow, and green bell peppers isn’t just for visual appeal — though the jewel-toned result is genuinely beautiful — it also creates a more complex flavor. Red and yellow bell peppers are sweeter and more fruity, having fully ripened on the vine. Green bell peppers are grassier and slightly more bitter, adding a vegetal counterpoint that keeps the relish from tasting one-dimensional. The combination produces a relish with more depth and interest than any single color would provide.
Finely chop the peppers into small, even pieces — roughly ¼ inch or smaller. Smaller pieces mean more surface area in contact with the brine, faster and more even flavor absorption, and a better texture on a hot dog or burger where you want the relish to distribute evenly rather than slide off in chunks.
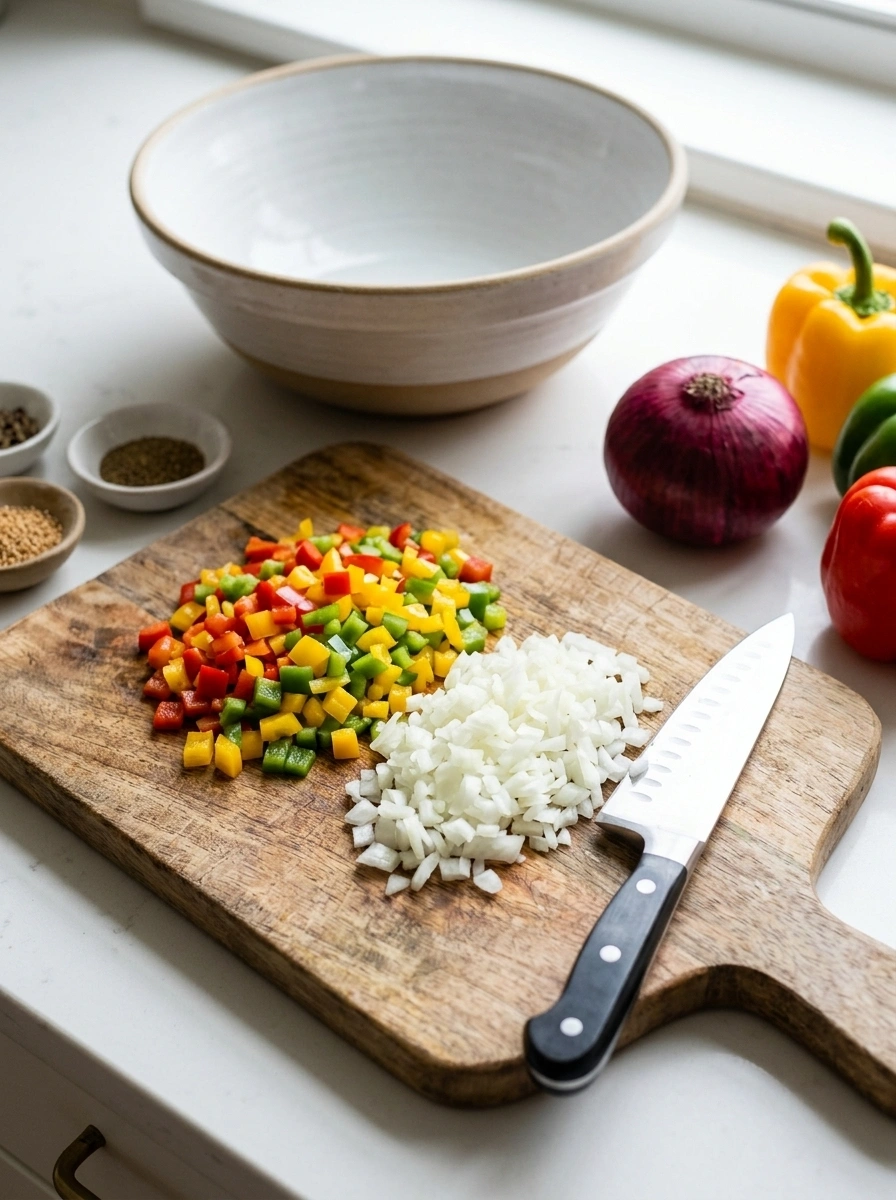
Onion (1 medium, finely chopped)
Onion adds savory depth and a gentle sharpness that balances the sweetness of the peppers and the sugar. Raw onion is pungent and assertive; cooked onion in vinegar brine mellows into something sweet, soft, and savory that weaves through the relish rather than dominating it. Don’t skip it — the relish needs its savory backbone.
White Vinegar (1 cup)
The acidic preserving agent and the source of the tangy brightness that makes this relish pop. White vinegar is used here for its clean, neutral flavor that doesn’t compete with the sweetness of the peppers or the warmth of the spices. It keeps the colors vivid and the flavor clear. Apple cider vinegar can be substituted for a slightly fruitier, more complex result, though it will add an amber tint to the brine.
Granulated Sugar (¾ cup)
Amish relish is unambiguously sweet — that’s part of its identity. Three-quarters of a cup might sound like a lot, but across 24 servings, each portion contains just a small amount. The sweetness is what makes this relish so compelling as a condiment: it balances the acidity of the vinegar, softens the sharpness of the onion, and makes the whole jar inviting rather than challenging. You can reduce the sugar slightly if you prefer a tangier relish, but go gradually — the sweet-tangy ratio is what defines this style.
Pickling Salt (1 tbsp)
Salt is essential in two ways here. First, it’s used in the pre-salting step before cooking — drawing excess moisture out of the peppers and onion so the relish develops a better texture and doesn’t water down the brine. Second, it seasons the relish. Use pickling salt (also called canning salt) or kosher salt for clean, pure flavor. Iodized table salt can make the brine cloudy and leave a slightly metallic taste — avoid it.
Mustard Seeds (1 tsp)
A quintessential pickling and relish spice. Whole mustard seeds add a mild, earthy nuttiness and a satisfying pop of texture in the finished relish. They look beautiful in the jar and slowly release their flavor into the brine over time. If you bite into a mustard seed in a spoonful of relish, you get a little burst of warm, earthy flavor — one of the small pleasures of old-fashioned relish.
Celery Seeds (½ tsp)
Celery seeds don’t taste strongly of celery — they taste more herbal, slightly bitter, and aromatic. They’re a traditional relish spice that adds a complexity you’d miss if it weren’t there. Along with mustard seeds, they’re part of what makes this taste distinctly old-fashioned and homemade rather than like something out of a bottle.
Turmeric (½ tsp)
Turmeric’s role here is primarily visual. It gives the brine and the finished relish a warm golden-yellow glow that’s characteristic of traditional American relish — think of the yellow tinge in classic hot dog relish and you’ll recognize it immediately. Its flavor contribution is subtle: a faint earthiness and a mild warmth that supports the other spices without announcing itself. As a bonus, turmeric contains curcumin, which has been widely studied for its anti-inflammatory properties, though at these quantities it’s more seasoning than supplement.
Black Pepper (¼ tsp)
A quiet background note that adds just enough warmth to keep the relish from tasting flat. Black pepper’s aromatic spice rounds out the profile without competing with the mustard seeds or celery seeds.
Garlic (2 cloves, minced — optional)
The garlic is listed as optional, and it genuinely is — traditional Amish Sweet Pepper Relish often doesn’t include it. But if you enjoy garlic, adding two cloves minced creates a savory depth that makes the relish more versatile and complex. It pairs particularly well on burgers and sandwiches where you want a more robust flavor. Leave it out for a cleaner, more traditional profile that’s a bit sweeter and more straightforwardly bright.
How to Make Amish Sweet Pepper Relish: Step-by-Step
Step 1: Chop and Salt the Vegetables
Finely chop the bell peppers and onion and place them in a large bowl. Sprinkle the pickling salt over them and toss well to combine. Let the salted vegetables sit for one full hour.
This step — called pre-salting or osmotic treatment — is one of the most important things you’ll do in this entire recipe. Salt draws moisture out of the vegetables through osmosis. During that hour, a significant amount of liquid will pool in the bottom of the bowl. This liquid is mostly water — which would otherwise dilute your brine and produce a thin, watery relish with mushy texture. Getting it out before cooking means your brine stays concentrated, your relish stays punchy, and your peppers hold their shape better during cooking.
Don’t skip this step. Don’t shorten it. Give it the full hour.
Step 2: Drain and Squeeze
After an hour, pour the vegetables into a fine-mesh strainer and drain thoroughly. Then, working in small handfuls, squeeze the peppers and onion firmly over the sink to press out as much remaining liquid as possible. Be thorough here — the more liquid you remove now, the better the texture and flavor of the finished relish.
Step 3: Make the Brine
In a medium or large saucepan, combine the white vinegar, sugar, mustard seeds, celery seeds, turmeric, black pepper, and garlic if using. Bring to a gentle simmer over medium heat, stirring occasionally until the sugar dissolves completely. The brine will turn a beautiful golden color from the turmeric.
Step 4: Cook the Relish
Add the drained peppers and onion to the saucepan. Stir to combine everything thoroughly. Bring back to a gentle simmer and cook for 10 to 15 minutes, stirring occasionally. The vegetables will soften slightly and absorb the brine, and the mixture will reduce and concentrate. Watch the heat — you want a gentle simmer, not a rolling boil. Too much heat causes the peppers to break down and turn mushy rather than tender-crisp.
At the 10-minute mark, taste the relish. If you want the peppers a little softer, cook for the full 15 minutes. If you prefer more texture and crunch, pull it earlier. The relish will firm up slightly as it cools, so factor that in.
Step 5: Cool and Jar
Remove the saucepan from the heat and let the relish cool for 10 minutes or so. Spoon it into clean glass jars, making sure the liquid covers the vegetables. Let cool completely to room temperature before sealing.
Step 6: Refrigerate Overnight
Seal the jars and refrigerate. The relish is technically ready to eat once cool, but it’s significantly better after a full overnight rest. The flavors meld and deepen overnight in a way that’s noticeable — it goes from good to exceptional with 8 to 12 hours of refrigeration.
Refrigerator vs. Water-Bath Canning: Which Should You Choose?
This recipe gives you two options for storage, and the right choice depends on how much relish you’re making and how you plan to use it.
Refrigerator storage is by far the easier option. No special equipment, no processing time, no headspace calculations. Make the relish, cool it, put it in a jar, and stick it in the fridge. It will keep for up to 3 weeks — long enough for most households to finish a batch comfortably. This is the right choice for most people making this recipe.
Water-bath canning is the choice if you want pantry-stable jars that last up to a year without refrigeration. This method requires proper canning jars (like Ball or Mason jars with new lids), a water-bath canning pot, and following established canning guidelines carefully. The USDA and the National Center for Home Food Preservation provide tested, safe recipes and processing times for bell pepper relishes. If you plan to make large batches to stock the pantry for winter, give as gifts, or sell at a farmers market, canning is absolutely worth learning. But if you’re making your first batch, start with refrigerator storage and get comfortable with the recipe before taking the canning step.
Tips for the Best Texture and Flavor
Chop consistently and fine. Uneven pieces mean uneven cooking and uneven texture. Take your time with the knife work or use a food processor with a chopping blade for efficiency — pulse rather than purée.
Don’t rush the salt rest. One hour is the minimum. If you have time, two hours is even better. The more moisture you extract before cooking, the better the finished relish.
Simmer gently. A gentle simmer keeps the peppers tender-crisp. A hard boil turns them mushy. Keep the heat medium-low once the vegetables are added.
Taste and adjust. Every batch of peppers and every brand of vinegar is slightly different. Before jarring, taste the relish and adjust as needed: more sugar for sweetness, a splash more vinegar for tang, a pinch more salt for seasoning.
Refrigerate overnight before serving. This is non-negotiable for the best flavor. Fresh-made relish is good; overnight relish is outstanding.
Every Way to Use Amish Sweet Pepper Relish
On hot dogs. This is the most classic application, and it’s classic for a reason. A spoonful of this relish on a good hot dog — ideally with a little mustard — is one of the great simple pleasures of summer.
On burgers. Mix it into your burger sauce, spoon it on top of the patty, or layer it under the cheese. It adds sweetness, tang, and crunch that elevates every bite.
On bratwurst and sausages. Grilled bratwurst with this relish is extraordinary. The sweetness of the peppers plays beautifully against the smoky, fatty richness of a good brat.
On grilled chicken. Spoon a generous amount over grilled chicken breasts or thighs as a finishing condiment. It functions like a bright, chunky sauce that needs no additional preparation.
Stirred into egg salad or chicken salad. A spoonful or two folded into egg salad or chicken salad adds crunch, sweetness, and a brightness that elevates the whole thing without overwhelming it.
On a charcuterie or snack board. A small jar or bowl of this relish alongside crackers, sharp cheddar, cream cheese, and cured meats is an instant conversation piece. People who’ve never had it before ask what it is and want the recipe.
Spread on a cream cheese block. Pour relish over a block of softened cream cheese and serve with buttery crackers. This is one of the fastest, most crowd-pleasing appetizers imaginable — five ingredients, no cooking, disappears in minutes.
As a sandwich spread. Use it the way you’d use mustard on deli sandwiches, wraps, or pressed paninis. Turkey and brie with a smear of sweet pepper relish on sourdough is quietly spectacular.
As a glaze for pork. Brush onto pork tenderloin or pork chops during the last few minutes of grilling or roasting. The sugar caramelizes slightly under the heat and creates a golden, sticky glaze with a complex flavor.
Stirred into baked beans. Add a few spoonfuls to a pot of baked beans for sweetness, pepper flavor, and a brightness that lightens the richness of the beans beautifully.
Variations to Try
Hot Pepper Relish: Replace one or two of the bell peppers with banana peppers, cubanelles, or Anaheim peppers for a gentle heat. For real fire, add one or two jalapeños, finely chopped, to the mix.
Corn and Pepper Relish: Add one cup of fresh or frozen corn kernels along with the peppers. The corn adds sweetness, color, and texture that makes this relish even more versatile. Serve it on fish tacos or alongside grilled chicken.
All-Red Pepper Relish: Use only red bell peppers for a sweeter, fruitier relish with a deep, jewel-red color that looks stunning in a jar. This variation is slightly less complex but more uniformly sweet.
Apple Cider Vinegar Version: Swap the white vinegar for apple cider vinegar for a slightly earthier, more complex tang. The color will shift from bright to amber-golden, and the flavor will have more depth.
Reduced-Sugar Version: Cut the sugar to ½ cup for a tangier relish with less sweetness. It won’t be as traditionally Amish in character, but it’s excellent in savory applications like chicken salad and grain bowls.
Frequently Asked Questions
Can I use any color bell pepper? Yes. Any combination of red, yellow, orange, and green bell peppers works. Red, yellow, and orange are sweeter; green is more vegetal and slightly bitter. The classic approach uses all three colors for flavor balance and visual appeal.
Do I have to use pickling salt? Pickling salt is ideal but not mandatory. Kosher salt is a perfectly acceptable substitute in the same quantity. Avoid iodized table salt, which can affect color, flavor, and clarity of the brine.
Can I make this relish less sweet? Yes — reduce the sugar gradually and taste as you go. Keep in mind that the sweet-tangy ratio is central to what makes this an Amish-style relish. If you reduce the sugar significantly, you’ll end up with a different style of relish — still delicious, just different in character.
Why is the salting step necessary? Pre-salting draws excess water out of the vegetables before cooking. Without it, the vegetables release that water into the brine during cooking, which dilutes the flavor and produces a thinner, waterier relish with a mushier texture.
How do I know if my canned jars have sealed properly? After processing, let the jars cool undisturbed for 24 hours. The lids should be concave and firm — press the center of the lid and it should not flex or pop. Any jars that haven’t sealed should be refrigerated and used within 3 weeks.
Can this relish be frozen? Freezing is not recommended. The texture of the peppers deteriorates after freezing and thawing, resulting in a soft, watery relish. Refrigerator storage or canning are both better options.
Recipe at a Glance
| Detail | Info |
|---|---|
| Prep Time | 20 minutes |
| Cook Time | 15 minutes |
| Total Time | 35 minutes (plus 1 hour salt rest) |
| Servings | 24 (~2 tbsp each) |
| Calories | ~35 per serving |
| Refrigerator Storage | Up to 3 weeks |
| Canned Storage | Up to 1 year (unopened) |
Final Thoughts
Amish Sweet Pepper Relish is one of those recipes that feels like it belongs to a slower, more deliberate way of cooking — one that values patience, good ingredients, and the deep satisfaction of making something from scratch that people genuinely love. It connects you to a long tradition of home preservation, and once you have a jar of it in your refrigerator, you’ll find yourself reaching for it constantly.
Make a batch for yourself. Make extra jars to give away. Put them in a basket with a ribbon and hand them to neighbors, teachers, and family members who will open them and immediately ask how you made them.
The answer is simple: a few peppers, some pantry staples, a little time, and a recipe that’s been getting it right for generations.
Print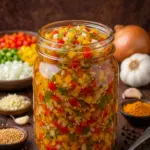
Amish Sweet Pepper Relish
- Total Time: 35 minutes (plus 1 hour salt rest)
Ingredients
Great relish — like any great preserve — is about balance. Every ingredient here plays a specific role, and understanding what each one does makes you a better cook and a better preserver.
Sweet Bell Peppers (4 cups, finely chopped — red, yellow, and green)
The star of the show. Using a mix of red, yellow, and green bell peppers isn’t just for visual appeal — though the jewel-toned result is genuinely beautiful — it also creates a more complex flavor. Red and yellow bell peppers are sweeter and more fruity, having fully ripened on the vine. Green bell peppers are grassier and slightly more bitter, adding a vegetal counterpoint that keeps the relish from tasting one-dimensional. The combination produces a relish with more depth and interest than any single color would provide.
Finely chop the peppers into small, even pieces — roughly ¼ inch or smaller. Smaller pieces mean more surface area in contact with the brine, faster and more even flavor absorption, and a better texture on a hot dog or burger where you want the relish to distribute evenly rather than slide off in chunks.
Onion (1 medium, finely chopped)
Onion adds savory depth and a gentle sharpness that balances the sweetness of the peppers and the sugar. Raw onion is pungent and assertive; cooked onion in vinegar brine mellows into something sweet, soft, and savory that weaves through the relish rather than dominating it. Don’t skip it — the relish needs its savory backbone.
White Vinegar (1 cup)
The acidic preserving agent and the source of the tangy brightness that makes this relish pop. White vinegar is used here for its clean, neutral flavor that doesn’t compete with the sweetness of the peppers or the warmth of the spices. It keeps the colors vivid and the flavor clear. Apple cider vinegar can be substituted for a slightly fruitier, more complex result, though it will add an amber tint to the brine.
Granulated Sugar (¾ cup)
Amish relish is unambiguously sweet — that’s part of its identity. Three-quarters of a cup might sound like a lot, but across 24 servings, each portion contains just a small amount. The sweetness is what makes this relish so compelling as a condiment: it balances the acidity of the vinegar, softens the sharpness of the onion, and makes the whole jar inviting rather than challenging. You can reduce the sugar slightly if you prefer a tangier relish, but go gradually — the sweet-tangy ratio is what defines this style.
Pickling Salt (1 tbsp)
Salt is essential in two ways here. First, it’s used in the pre-salting step before cooking — drawing excess moisture out of the peppers and onion so the relish develops a better texture and doesn’t water down the brine. Second, it seasons the relish. Use pickling salt (also called canning salt) or kosher salt for clean, pure flavor. Iodized table salt can make the brine cloudy and leave a slightly metallic taste — avoid it.
Mustard Seeds (1 tsp)
A quintessential pickling and relish spice. Whole mustard seeds add a mild, earthy nuttiness and a satisfying pop of texture in the finished relish. They look beautiful in the jar and slowly release their flavor into the brine over time. If you bite into a mustard seed in a spoonful of relish, you get a little burst of warm, earthy flavor — one of the small pleasures of old-fashioned relish.
Celery Seeds (½ tsp)
Celery seeds don’t taste strongly of celery — they taste more herbal, slightly bitter, and aromatic. They’re a traditional relish spice that adds a complexity you’d miss if it weren’t there. Along with mustard seeds, they’re part of what makes this taste distinctly old-fashioned and homemade rather than like something out of a bottle.
Turmeric (½ tsp)
Turmeric’s role here is primarily visual. It gives the brine and the finished relish a warm golden-yellow glow that’s characteristic of traditional American relish — think of the yellow tinge in classic hot dog relish and you’ll recognize it immediately. Its flavor contribution is subtle: a faint earthiness and a mild warmth that supports the other spices without announcing itself. As a bonus, turmeric contains curcumin, which has been widely studied for its anti-inflammatory properties, though at these quantities it’s more seasoning than supplement.
Black Pepper (¼ tsp)
A quiet background note that adds just enough warmth to keep the relish from tasting flat. Black pepper’s aromatic spice rounds out the profile without competing with the mustard seeds or celery seeds.
Garlic (2 cloves, minced — optional)
The garlic is listed as optional, and it genuinely is — traditional Amish Sweet Pepper Relish often doesn’t include it. But if you enjoy garlic, adding two cloves minced creates a savory depth that makes the relish more versatile and complex. It pairs particularly well on burgers and sandwiches where you want a more robust flavor. Leave it out for a cleaner, more traditional profile that’s a bit sweeter and more straightforwardly bright.
Instructions
Step 1: Chop and Salt the Vegetables
Finely chop the bell peppers and onion and place them in a large bowl. Sprinkle the pickling salt over them and toss well to combine. Let the salted vegetables sit for one full hour.
This step — called pre-salting or osmotic treatment — is one of the most important things you’ll do in this entire recipe. Salt draws moisture out of the vegetables through osmosis. During that hour, a significant amount of liquid will pool in the bottom of the bowl. This liquid is mostly water — which would otherwise dilute your brine and produce a thin, watery relish with mushy texture. Getting it out before cooking means your brine stays concentrated, your relish stays punchy, and your peppers hold their shape better during cooking.
Don’t skip this step. Don’t shorten it. Give it the full hour.
Step 2: Drain and Squeeze
After an hour, pour the vegetables into a fine-mesh strainer and drain thoroughly. Then, working in small handfuls, squeeze the peppers and onion firmly over the sink to press out as much remaining liquid as possible. Be thorough here — the more liquid you remove now, the better the texture and flavor of the finished relish.
Step 3: Make the Brine
In a medium or large saucepan, combine the white vinegar, sugar, mustard seeds, celery seeds, turmeric, black pepper, and garlic if using. Bring to a gentle simmer over medium heat, stirring occasionally until the sugar dissolves completely. The brine will turn a beautiful golden color from the turmeric.
Step 4: Cook the Relish
Add the drained peppers and onion to the saucepan. Stir to combine everything thoroughly. Bring back to a gentle simmer and cook for 10 to 15 minutes, stirring occasionally. The vegetables will soften slightly and absorb the brine, and the mixture will reduce and concentrate. Watch the heat — you want a gentle simmer, not a rolling boil. Too much heat causes the peppers to break down and turn mushy rather than tender-crisp.
At the 10-minute mark, taste the relish. If you want the peppers a little softer, cook for the full 15 minutes. If you prefer more texture and crunch, pull it earlier. The relish will firm up slightly as it cools, so factor that in.
Step 5: Cool and Jar
Remove the saucepan from the heat and let the relish cool for 10 minutes or so. Spoon it into clean glass jars, making sure the liquid covers the vegetables. Let cool completely to room temperature before sealing.
Step 6: Refrigerate Overnight
Seal the jars and refrigerate. The relish is technically ready to eat once cool, but it’s significantly better after a full overnight rest. The flavors meld and deepen overnight in a way that’s noticeable — it goes from good to exceptional with 8 to 12 hours of refrigeration.
- Prep Time: 20 minutes
- Cook Time: 15 minutes
Nutrition
- Serving Size: 24 (~2 tbsp each)
- Calories: 35 per serving