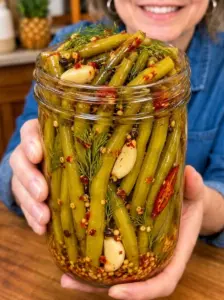
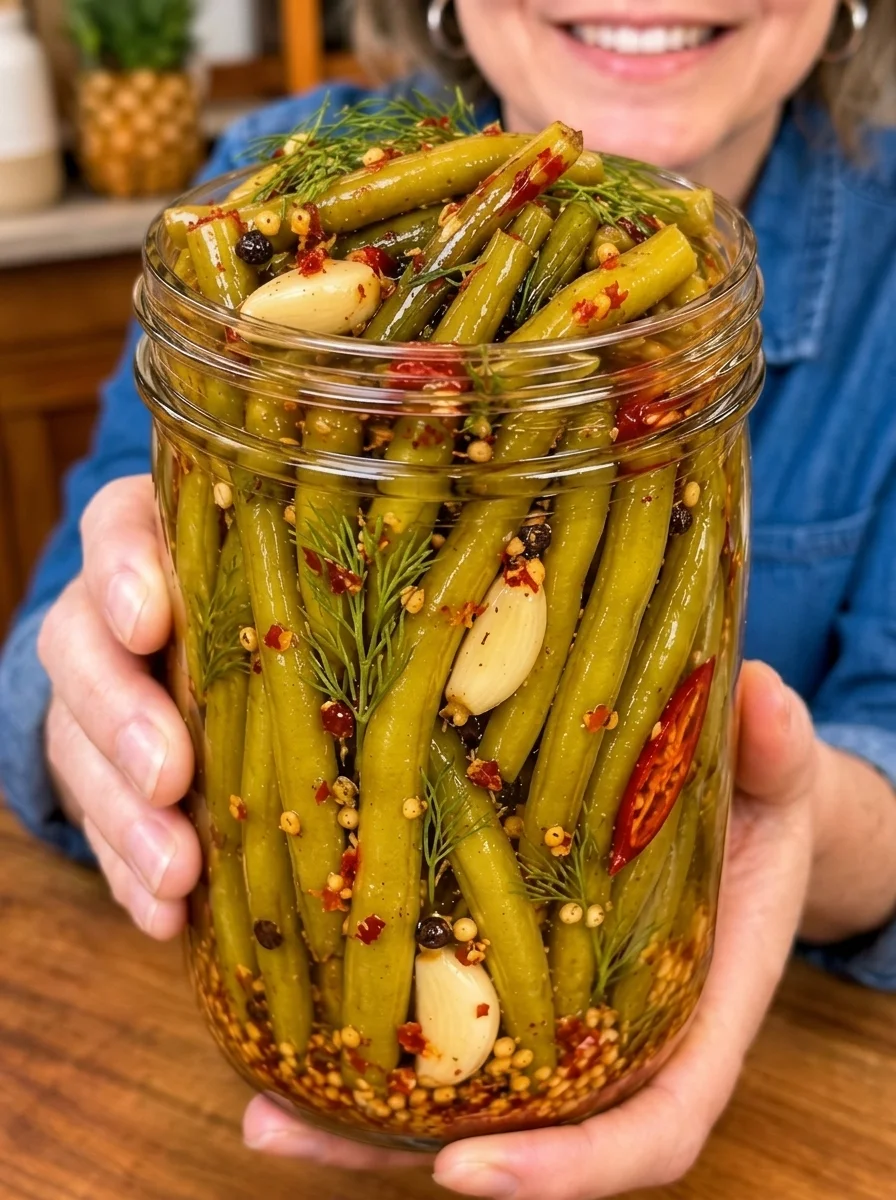
Spicy Garlic Dill Pickled Green Beans combine the fresh bite of green beans with tangy vinegar, fragrant dill, crushed garlic, and a warm chile finish. Mustard seeds and peppercorns add a savory background, while a small amount of sugar softens the sharpness without making the beans taste like sweet pickles.
They are useful anywhere a meal needs a little crunch and acidity: beside a sandwich, on an appetizer board, tucked into a burger plate, or served with grilled chicken. Their long shape also makes them a convenient garnish for a tomato-based mocktail.
This is a small-batch refrigerator recipe. You warm the liquid, pack the beans and seasonings, and keep everything chilled while the flavor develops. There is no canning step, and a tightly closed jar does not make the contents suitable for pantry storage.
Recipe note: This article expands the supplied recipe, which has not been kitchen-tested here. It clarifies the optional chile quantity, gives a brief blanching option, and replaces a fixed counter-cooling period with prompt refrigeration in suitable containers. The storage target below is not a laboratory-validated shelf life for this exact variation.
What to Expect
These beans are decidedly tangy, with a familiar dill-pickle aroma and noticeable garlic. One teaspoon of red pepper flakes makes a lively starting point, but heat depends on the product and any additional chile you choose.
Raw beans retain a firmer, more fresh-vegetable bite. Brief blanching produces a slightly more tender pickle that may be easier to eat. Neither option can turn mature, stringy beans into young, crisp ones, so ingredient selection matters.
The first day gives you a lightly developed pickle flavor. After two or three days, the garlic, dill, and pepper become more integrated. The beans may gradually shift from bright green toward an olive color in the acidic liquid; that alone is not a spoilage sign.
Ingredients
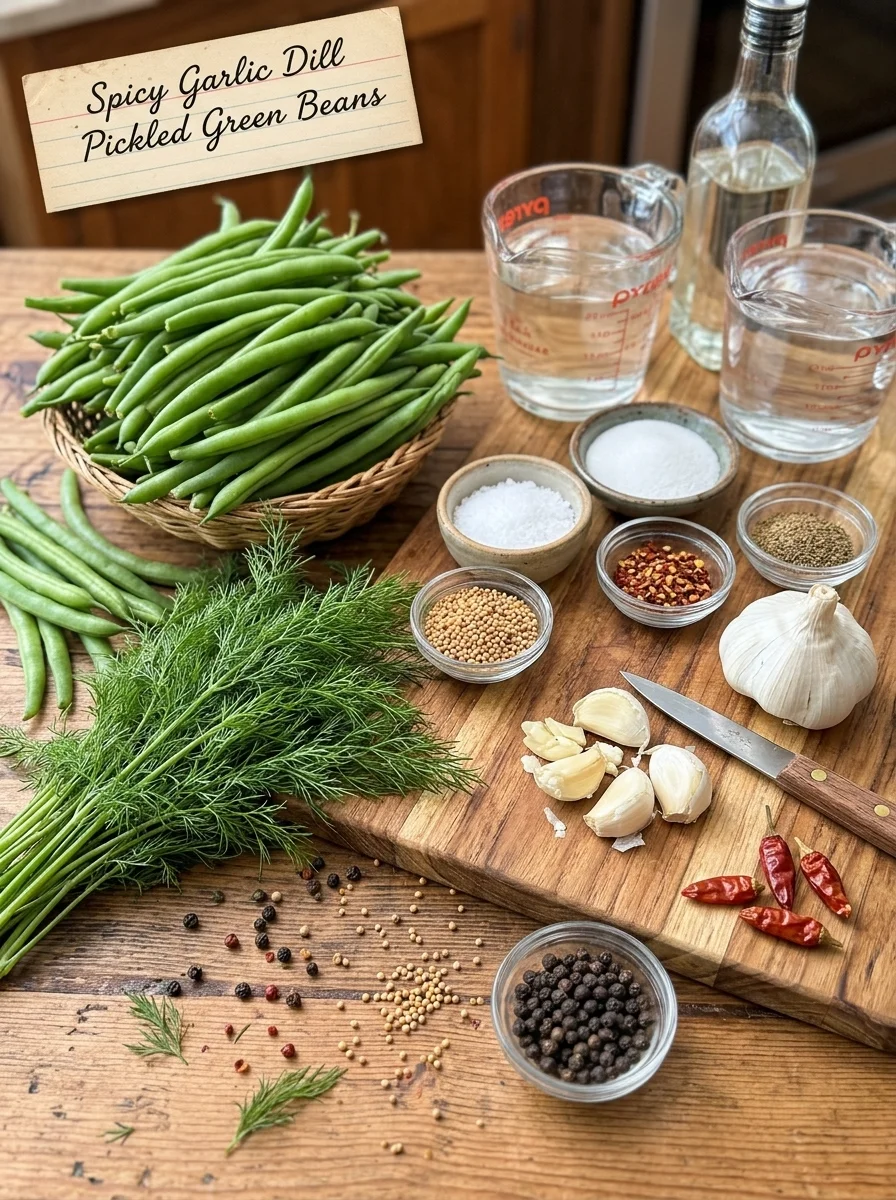
- 1 pound fresh green beans, washed and trimmed
- 1 cup distilled white vinegar labeled 5% acidity
- 1 cup water
- 1 tablespoon kosher salt, with brand considerations below
- 1 tablespoon granulated sugar
- 4 garlic cloves, peeled and lightly crushed
- 4 fresh dill sprigs, rinsed
- 1 teaspoon crushed red pepper flakes, or less for milder beans
- 1 teaspoon mustard seeds
- 1/2 teaspoon whole black peppercorns
- 1/4 teaspoon celery seeds, optional
- 1 small dried red chile, optional, divided between the jars if desired
Yield: Approximately two pint jars, depending on bean length, thickness, and packing. Have an additional clean container available rather than forcing an overfilled pack.
The optional dried chile is one total for the batch, matching the ingredient list. Adding one to each jar would use two and could produce a substantially hotter result.
Choosing the Beans
Look for slender beans that feel firm and snap cleanly when bent. Small seeds and relatively even thickness are useful signs for a pleasant pickled texture.
Avoid limp beans, soft spots, sliminess, or badly damaged pods. Pickling cannot restore freshness. Very mature beans with bulging seeds may remain fibrous even after soaking in the liquid.
Wash under running water and trim the stem ends. If you notice tough strings along the seams, remove them. Cut the beans to fit below the liquid with room above them for headspace.
Short pieces are not wasted. Pack suitable shorter lengths into gaps or save them for a cooked dish. Do not leave long ends sticking above the liquid simply to maintain the upright appearance.
Understanding the Other Ingredients
Vinegar
Distilled white vinegar gives a clean, sharp flavor that lets dill and garlic stand out. Check for 5% acidity on the label.
Do not substitute cleaning vinegar, homemade vinegar, or a product with an unknown or lower acidity. Keep the listed vinegar and water quantities rather than weakening the mixture with extra water.
A tangy taste is not a measurement of preservation safety. This recipe remains refrigerated regardless of how sour the liquid seems.
Kosher Salt
Kosher salt brands vary considerably in density. A tablespoon of light flakes can contain much less salt than a tablespoon of a denser crystal.
Use the same brand consistently and record it when you make the first batch. Do not replace the tablespoon with an equal volume of fine table salt without considering the difference in salt quantity.
Salt contributes flavor here, but the recipe is not a salt-fermentation method. Do not leave the beans at room temperature to ferment.
Sugar
One tablespoon rounds out the vinegar without making a sugary pickle. It should not taste like a bread-and-butter pickle or a sweet relish.
Changing the sugar changes flavor. It does not make the jar shelf-stable, and it is not a reason to lengthen storage.
Garlic
Lightly crush the cloves rather than mincing them finely. This exposes more surface area while keeping pieces easy to identify in the jars.
Choose fresh, firm cloves without mold or soft areas. A very large clove contributes more flavor than a small one, so four cloves are a practical starting quantity rather than a precise aroma guarantee.
The garlic flavor develops over time. Wait through the chilling period before deciding the batch needs several extra cloves.
Dill
Fresh dill supplies a green, aromatic flavor that differs from dill seeds. Use clean, lively sprigs and discard wilted or damaged portions.
Sprig size varies. Four modest sprigs are intended, not four dense bunches. Divide them between the jars and tuck some between the beans rather than packing all the herb material into one bottom layer.
Chile and Whole Spices
Red pepper flakes provide most of the heat. A dried whole chile can add significantly more depending on its variety, so it is optional.
Mustard seeds add a familiar pickle seasoning, and peppercorns supply a gentle pepper note. Celery seeds are strongly aromatic even in a small amount; the optional quarter teaspoon is enough for the first batch.
The whole spices primarily season the liquid. You do not need to eat a forkful of seeds with every serving of beans.
Equipment and Jar Capacity
Use two clean pint jars or another suitable food-safe container with enough room for the vegetables and liquid. A wide mouth makes vertical packing easier.
Have a small saucepan, knife, cutting board, measuring tools, and clean tongs ready. For the optional blanching step, prepare a pot of boiling water, a bowl of ice water, and a colander.
Use containers rated for warm liquid. Pouring hot liquid into cold ordinary glass risks thermal shock. Follow the manufacturer’s temperature guidance and inspect jars for cracks before filling.
A clean food-safe pickling weight can help keep floating beans submerged. Avoid improvised objects not intended for food contact.
How to Make the Pickled Green Beans
1. Prepare the Workspace
Wash your hands and clean the counter and tools. Wash the jars and lids thoroughly, rinse, and set them where you can fill them safely.
Read the steps before heating the liquid. It is easier to work smoothly when the beans, seasonings, and containers are already prepared.
2. Trim and Size the Beans
Wash the beans, remove the stems, and shorten them to fit inside the jars. Leave about 1/2 inch of headspace and enough room for liquid above the vegetables.
Pat away excess rinse water. This is about avoiding unnecessary surface water, not drying the beans so aggressively that they bruise.
Try a few pieces in the empty jar before cutting the whole batch. That prevents repeatedly trimming individual beans after the jar has already been packed.
3. Choose Raw or Briefly Blanched
For the firmest, most raw-bean-like bite, pack the prepared beans without blanching.
For a slightly more tender result, boil the beans for one to two minutes, then transfer immediately to ice water. Once cool, drain thoroughly and pat away excess moisture.
The blanch should soften the beans slightly, not cook them fully. Oregon State University Extension includes short blanching followed by rapid cooling as an option for green beans in its refrigerator vegetable guidance.
The optional step adds preparation time, and it does not make the jars safe for room-temperature storage.
4. Divide the Seasonings
Split the garlic, dill, pepper flakes, mustard seeds, peppercorns, and optional celery seeds between the jars.
If using the single dried chile, break or cut it with appropriate care and divide it, or put it in one jar for a hotter variation. Do not automatically double the number because there are two jars.
Set aside a little dill to place between layers if you like a more even distribution.
5. Pack the Beans
Stand the beans upright, fitting them snugly together without crushing them. Fill gaps with suitable short pieces.
Leave paths for liquid to flow between the beans. A completely compressed pack can trap air and make it harder to keep everything covered.
If the last handful will not fit, use the additional container or reserve it for another dish. The two-pint yield is an estimate, not a requirement to force every piece into those exact jars.
6. Heat the Liquid
Combine the vinegar, water, kosher salt, and sugar in the saucepan. Warm over medium heat, stirring until dissolved, then bring to a gentle simmer and remove from the heat.
There is no need to reduce it for an extended period. Prolonged boiling changes the amount available to cover the beans and can concentrate the flavor unnecessarily.
Keep your face away from the vinegar steam and place the saucepan securely before pouring.
7. Cover the Beans
Carefully pour the warm liquid into suitable heat-safe containers, covering the vegetables completely while retaining about 1/2 inch headspace.
Release trapped air with a clean nonmetallic utensil or a gentle tap. Check again after the liquid settles and add more of the prepared mixture if needed.
If additional liquid is necessary, make more using the same ingredient proportions. Do not top up the jars with plain water. If there is extra liquid after packing, you do not need to force it into an already full container.
8. Cover and Refrigerate Promptly
Fit the clean lids according to the containers’ instructions and refrigerate promptly. Do not wait through a mandatory 30-minute counter-cooling period or insist that the contents become completely room temperature.
Small amounts of warm food can be refrigerated in suitable containers. Protect glass from sudden temperature changes, and use smaller appropriate containers if needed rather than delaying refrigeration for hours.
Label with the preparation date and keep the refrigerator at 40°F or below. Store where the jars will remain consistently cold.
9. Let the Flavor Develop
Wait at least 24 hours before tasting. Allow 48 to 72 hours for a more developed garlic-dill flavor.
Use a clean utensil for a sample and return the jar to the refrigerator promptly. The flavor-development period happens in the refrigerator, not on the counter.
If the top beans move above the liquid, reposition them or use a suitable weight. Keep the vegetables covered throughout storage.
10. Serve Cold
Remove a small portion, drain lightly, and serve alongside sandwiches or appetizers. Chop the beans into shorter lengths if that makes them easier to eat.
Put out only the amount needed, keeping the remaining jar cold. Do not return beans from a used serving platter to the main storage container.
Tips for Better Crunch and Flavor
Start with fresh beans. This matters more than adding extra spices or relying on a long soak to improve texture.
Keep the blanch brief if you use it. Fully cooked beans will not regain a crisp bite in vinegar.
Drain after washing or ice cooling. Surface water carried into the jar is an uncontrolled addition.
Allow the seasoning time to develop. Garlic can smell strong before the beans themselves have absorbed much flavor.
Measure the heat. A second teaspoon of pepper flakes or an extra whole chile can change the batch substantially.
Keep the uppermost beans covered. Flavoring and storage work best with a properly packed, consistently chilled container.
Adjusting the Heat
For mild beans, reduce the flakes to a small pinch and omit the dried chile. Dill, garlic, mustard, and vinegar still supply plenty of flavor.
For medium heat, begin with the stated teaspoon of flakes across the whole batch. Taste after a couple of days before deciding that future batches need more.
For a hotter variation, add a few thin jalapeño slices or the optional dried chile. Do not add every hot ingredient at full strength unless that is a deliberate preference.
Jalapeño heat varies, and removing the pale inner membranes reduces heat more reliably than removing only loose seeds. Wear gloves when appropriate and wash your hands and tools after handling fresh peppers.
Serving Ideas
Serve a small bundle beside a burger, grilled chicken, or a deli sandwich. Their acidity gives a useful contrast to rich food.
For a cheese board, use a separate small bowl so the liquid does not soak crackers or bread. Mild cheddar or a creamy cheese spread pairs well with the garlic-dill flavor.
Cut into short pieces and add a modest quantity to potato salad or a grain bowl shortly before serving. Taste before adding more salt to the surrounding dish.
Use a few long beans as a garnish for a chilled tomato mocktail. Keep the storage jar refrigerated and remove garnish portions with clean tongs.
For lunch, pair a few drained beans with a sandwich, cheese, and fruit. They work as a condiment rather than needing to fill the entire vegetable portion of the meal.
Storage and Make-Ahead Guidance
Keep the beans refrigerated at 40°F or below, covered with liquid in clean, lidded containers. The supplied two-week period can be treated as a short best-quality target for this variation, not a laboratory-validated shelf life or a guarantee under poor handling.
The published Extension refrigerator vegetable recipe linked below has its own ingredient quantities and storage instructions. Its guidance should not be treated as automatic validation of every modification. For standardized preservation instructions, follow a published recipe directly.
Date the jars and use clean utensils. Do not add new raw beans to old liquid, and do not reuse vegetable-exposed liquid for another batch.
Discard contents with mold, unexpected gas or bubbling, a swollen lid, slime, or an unusual odor. Do not taste a questionable pickle to decide whether it is safe. Normal appearance and smell also cannot prove that a mishandled jar is safe.
These are not shelf-stable canned beans or a fermentation recipe. A lid that happens to draw down during cooling does not change that distinction.
Freezing is not recommended for the intended crunchy texture. For a party, make a modest batch two or three days ahead and keep it cold during transport and serving.
Flavor Variations
Extra Dill
Add a small amount of chopped dill near serving for a fresher aroma rather than packing the jar with a large excess of herbs.
Peppercorn Focus
Omit the dried chile and use the listed black peppercorns and a restrained amount of flakes. This keeps the flavor savory without as much chile heat.
Celery Seed Version
Include the optional quarter teaspoon for a stronger aromatic note that works well with tomato-based drinks or sandwich plates.
Garlic-Forward
Use firm, fresh garlic and lightly crush it. Before adding more cloves in a future batch, allow the original quantity the full two- to three-day flavor-development period.
Flavor adjustments do not establish a longer storage period or make the formula suitable for canning.
Troubleshooting
The Beans Are Too Tough
They may be mature, thick, or stringy, or you may prefer the blanched option. More chilling develops flavor but does not reliably correct a fibrous pod.
The Beans Are Too Soft
They may have started old or been blanched too long. Choose younger beans and shorten the optional blanch in the next batch.
The Pickles Taste Too Sharp
They are intended to be tangy. Give the flavor a couple of days to settle and serve with something creamy or rich. Do not weaken the storage liquid with extra water.
The Beans Float
Air can remain between closely packed vegetables. Release bubbles gently during filling and use an appropriate clean weight if necessary.
The Garlic Seems Weak
Whole crushed cloves need time to release flavor. Old, dry garlic may also be less aromatic. Wait before increasing the quantity dramatically.
The Liquid Is Cloudy
Minerals, spices, or other ingredients can affect appearance, but cloudiness is not enough on its own to establish safety. If it accompanies gas, slime, mold, or an unusual odor, discard the jar. Do not use a taste test to resolve uncertainty.
Frequently Asked Questions
Do I Have to Blanch the Beans?
No. The supplied preparation uses raw beans, while the optional brief blanch gives a slightly more tender bite. Both versions remain refrigerated preparations.
Can I Use Frozen Beans?
Fresh beans are preferred for this texture. Frozen beans have already undergone processing and may soften considerably. This recipe has not been developed around them.
Can I Use a Quart Jar?
Yes, if the beans and liquid fit with suitable headspace. Two pint jars are convenient for portioning, but jar capacity and packing vary.
Can I Can This Recipe?
No. Use a separately tested pickled green bean canning recipe and follow its ingredients, jar size, processing method, and altitude adjustments exactly.
Can I Make a Smaller Batch?
Yes. Halve all ingredients and use appropriately sized containers. Keep the same proportions rather than reducing vinegar to make the liquid milder.
Print
Spicy Garlic Dill Pickled Green Beans
Description
Yield: Approximately two pints, with extra container space if needed
Servings: About eight small portions
Prep time: Approximately 15 minutes
Liquid heating time: Approximately 5 minutes
Optional blanch: 1–2 minutes, plus ice cooling and draining
Chill: 24–72 hours
Minimum total: About 24 hours 20 minutes without optional blanching
Method: Refrigerator pickling
Ingredients
- 1 pound fresh green beans, washed and trimmed
- 1 cup distilled white vinegar labeled 5% acidity
- 1 cup water
- 1 tablespoon kosher salt, with brand considerations below
- 1 tablespoon granulated sugar
- 4 garlic cloves, peeled and lightly crushed
- 4 fresh dill sprigs, rinsed
- 1 teaspoon crushed red pepper flakes, or less for milder beans
- 1 teaspoon mustard seeds
- 1/2 teaspoon whole black peppercorns
- 1/4 teaspoon celery seeds, optional
- 1 small dried red chile, optional, divided between the jars if desired
Yield: Approximately two pint jars, depending on bean length, thickness, and packing. Have an additional clean container available rather than forcing an overfilled pack.
The optional dried chile is one total for the batch, matching the ingredient list. Adding one to each jar would use two and could produce a substantially hotter result.
Instructions
- Wash, trim, and size 1 pound green beans. Optionally blanch briefly, ice-cool, and drain.
- Divide 4 crushed garlic cloves, 4 dill sprigs, 1 teaspoon each pepper flakes and mustard seeds, 1/2 teaspoon peppercorns, and optional 1/4 teaspoon celery seeds between suitable clean containers. Add the optional single dried chile as desired.
- Pack beans snugly without crushing them.
- Heat 1 cup 5%-acidity white vinegar, 1 cup water, 1 tablespoon kosher salt, and 1 tablespoon sugar until dissolved and gently simmering.
- Cover the beans with warm liquid in heat-safe containers, leaving about 1/2 inch headspace. Release bubbles and keep all vegetables covered.
- Cover appropriately and refrigerate promptly. Chill at least 24 hours, preferably 48–72 hours, before serving cold.
Storage: Refrigerate at 40°F or below. The two-week best-quality target is not a validated shelf life for this exact variation. Do not store in the pantry or use these instructions for canning.
Nutrition: A serving is about one-eighth of the drained bean solids. The supplied 35-calorie figure is an unverified estimate; actual intake depends on portions and how much sugar-containing liquid is consumed. Sodium also varies with salt brand and retained liquid.