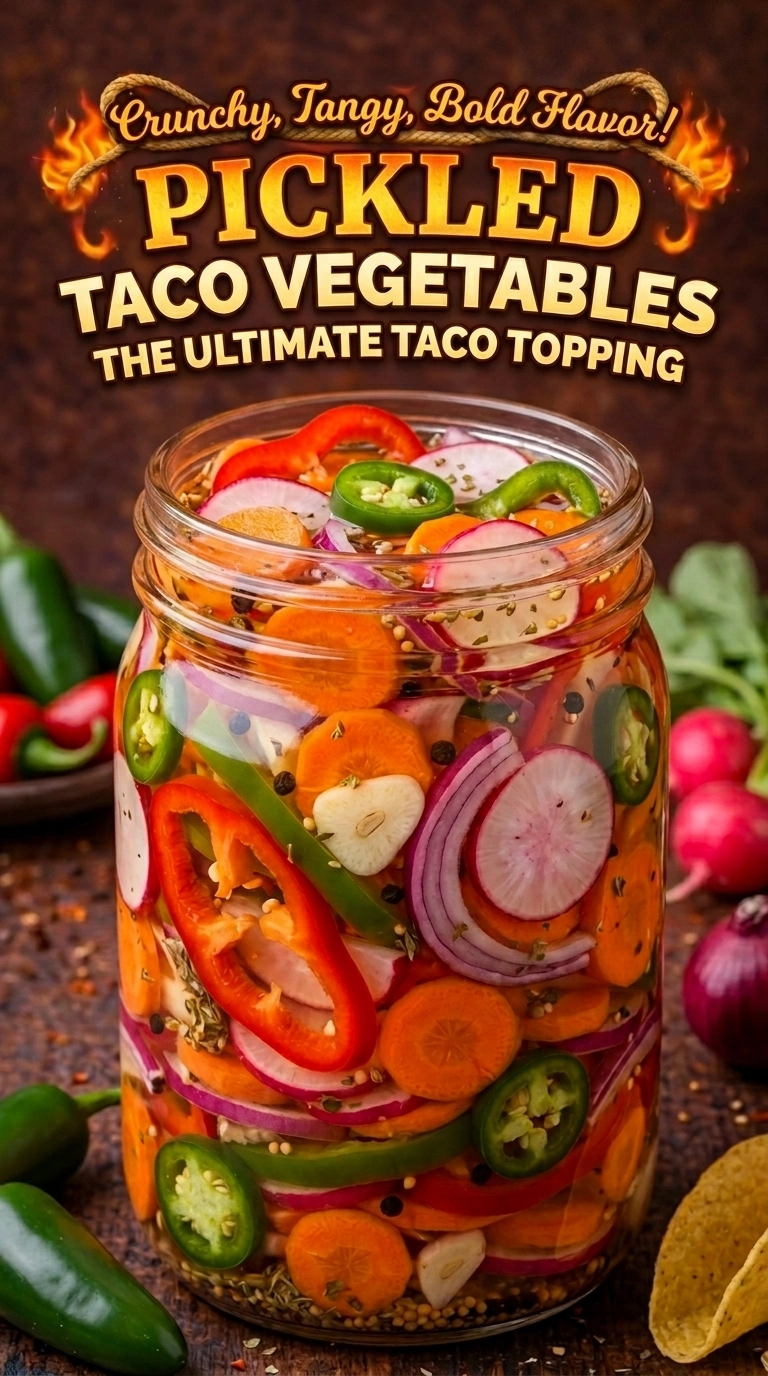
If you’ve ever bitten into a taco and thought something’s missing, this recipe is your answer. Pickled taco vegetables — a vibrant, crunchy, tangy medley of carrots, radishes, red onion, jalapeños, and bell pepper — are the secret weapon that turns a good taco into an unforgettable one. And the best part? They come together in just 20 minutes with simple pantry ingredients.
Whether you’re a longtime fan of Mexican-inspired cooking or just discovering the magic of quick pickling, this guide will walk you through everything you need to know: what these pickled veggies are, why they work so well, how to make them perfectly every time, and all the delicious ways to use them beyond tacos.
What Are Pickled Taco Vegetables?
Pickled taco vegetables — sometimes called escabeche or taqueria-style pickled vegetables — are a classic condiment found throughout Mexican and Tex-Mex cuisine. You’ve likely seen a jar of them sitting on the counter at your favorite taqueria, sitting next to the salsa verde and the hot sauce. And if you’ve ever helped yourself to a forkful, you know exactly why they’re always there.
These aren’t your grandmother’s dill pickles. The brine is bright and balanced — equal parts vinegar and water, lightly sweetened with sugar, seasoned with salt, and perfumed with oregano, black peppercorns, mustard seeds, and a bay leaf. The result is a pickling liquid that’s tangy without being overwhelming, savory without being salty, and aromatic without competing with your food.
The vegetables stay crisp even after soaking in the brine, which makes every bite a satisfying crunch. The colors — deep orange carrots, hot pink radishes, bright red onion, green jalapeños, and vivid bell pepper — make them as beautiful as they are delicious.
Why You’ll Love This Recipe
They’re Ready in Just 20 Minutes (Plus Chilling Time)
Unlike traditional fermented pickles that require weeks of patience, these quick-pickled vegetables use a hot brine method that dramatically speeds up the process. You pour hot pickling liquid over the vegetables, let everything cool, then refrigerate. After just 2 hours, they’re ready to eat. After overnight, they’re absolutely spectacular.
They Last Up to Two Weeks in the Fridge
Make a big batch on Sunday and enjoy pickled veggies all week long. They keep beautifully in the refrigerator for up to 2 weeks — assuming they last that long. In most households, a jar disappears within a few days because they’re just that good.
They’re Incredibly Low in Calories
At roughly 25 calories per serving, these pickled vegetables are one of the most guilt-free ways to add big, bold flavor to any meal. No oil, no heavy sauces — just vegetables, brine, and spices.
They Go With Everything
Tacos are just the beginning. These pickled veggies are a game-changer on burritos, burgers, sandwiches, grain bowls, quesadillas, and more. Once you have a jar in your fridge, you’ll start putting them on everything.
Ingredients You’ll Need
Here’s a closer look at what goes into this recipe and why each component matters:
The Vegetables:
- Carrots (2 cups, thinly sliced) — The workhorse of the jar. Carrots hold their texture beautifully in brine and absorb flavor without turning mushy. Their natural sweetness balances the acidity of the vinegar.
- Radishes (1 cup, thinly sliced) — One of the most underrated pickling vegetables. Raw radishes are peppery and sharp, but once pickled, they mellow into something bright and subtly spicy. They also turn a gorgeous magenta-pink color that makes the jar look stunning.
- Red onion (1 small, thinly sliced) — Pickled red onion is a revelation. The brine tames their sharpness and brings out their sweetness while keeping a little bite. They’re one of the most versatile pickled vegetables you can make.
- Jalapeños (1–2, thinly sliced) — These add heat. Use one for a mild kick, two for something with a little more fire. You can also remove the seeds and membranes before slicing if you want flavor without as much heat.
- Bell pepper (1, thinly sliced) — Adds color, crunch, and sweetness. Any color works — red, yellow, and orange bell peppers will add sweetness, while green adds a slightly more vegetal note.
- Garlic (2 cloves, sliced) — Infuses the brine with a savory depth that ties all the vegetables together.
The Brine:
- White vinegar (1 cup) — The backbone of the pickling liquid. White vinegar is clean and sharp, letting the flavors of the vegetables and spices come through.
- Water (1 cup) — Dilutes the vinegar to a mellow, balanced tang rather than an aggressive sourness.
- Sugar (2 tbsp) — Takes the edge off the vinegar and creates a pleasant sweet-tangy balance.
- Pickling salt or kosher salt (1 tbsp) — Seasons the brine and helps draw moisture from the vegetables, enhancing their texture. Use pickling salt or kosher salt — avoid iodized table salt, which can make pickles cloudy.
- Dried oregano (1 tsp) — Adds an herbal, slightly floral note that’s quintessentially Mexican in flavor.
- Black peppercorns (½ tsp) — Provide a gentle, warming spice that blooms beautifully in the brine.
- Mustard seeds (½ tsp) — A classic pickling spice that adds a subtle, earthy bite.
- Bay leaf (1) — Lends a quiet, complex herbal background note to the brine.
How to Make Pickled Taco Vegetables: Step-by-Step
Step 1: Prep and Pack Your Vegetables
Thinly slice all your vegetables — the thinner the slices, the faster they’ll absorb the brine and the more delicate the texture. A mandoline works beautifully here if you have one, but a sharp knife works perfectly well.
Pack the carrots, radishes, red onion, jalapeños, bell pepper, and garlic into a clean glass jar or airtight container. You want them snug but not compressed — the brine needs to be able to circulate around every piece.
Pro tip: Layer the vegetables for a visually stunning jar. Alternate colors as you pack — a layer of orange carrots, then pink radishes, then red onion and green jalapeños. It looks gorgeous on your counter (or in your fridge) and makes a wonderful gift.
Step 2: Make the Pickling Brine
Combine the white vinegar, water, sugar, salt, oregano, black peppercorns, mustard seeds, and bay leaf in a small saucepan. Heat over medium heat, stirring occasionally, until the sugar and salt dissolve completely. This only takes a few minutes — you don’t need to bring it to a rolling boil, just enough heat to dissolve the solids.
Step 3: Pour the Hot Brine Over the Vegetables
Carefully pour the hot brine over your packed vegetables. Make sure every piece is fully submerged. The hot liquid will slightly soften the outermost layer of the vegetables while the centers stay crisp — this gives you that ideal texture of tender-on-the-outside, crunchy-on-the-inside.
If any vegetables float above the brine, press them down gently with a spoon. You can also place a small piece of parchment paper directly on top of the vegetables to keep them submerged.
Step 4: Cool, Seal, and Refrigerate
Let the jar cool to room temperature before sealing — this usually takes 30 to 45 minutes. Once cooled, seal the jar tightly and refrigerate.
The vegetables are ready to eat after 2 hours but are at their absolute best after overnight refrigeration. The overnight rest allows the flavors to fully develop and the vegetables to absorb more of the brine’s complexity.
How Long Do Pickled Taco Vegetables Last?
Stored properly in an airtight jar in the refrigerator, pickled taco vegetables will last up to 2 weeks. Keep the vegetables completely submerged in the brine at all times — this is key to maintaining their freshness and food safety.
Always use clean utensils when serving from the jar to avoid introducing bacteria that could shorten their shelf life. If at any point the brine becomes cloudy (beyond normal cloudiness from spices), or you notice any off smells, discard the batch.
Creative Ways to Use Pickled Taco Vegetables
You already know they’re perfect on tacos — but don’t stop there.
Tacos and Burritos: Pile them generously onto carne asada tacos, chicken burritos, fish tacos, or bean and cheese burritos. The tang cuts through the richness of the meat and cheese beautifully.
Burgers: Swap out standard pickles for a spoonful of these pickled veggies on your next burger. They add crunch, tang, and a complexity that regular pickles simply can’t match.
Sandwiches and Wraps: Layer them into turkey sandwiches, veggie wraps, banh mi-inspired subs, or grilled cheese. The acidity brightens every bite.
Grain Bowls: Top a bowl of rice, quinoa, or farro with grilled protein, avocado, and a generous helping of pickled vegetables for a restaurant-worthy grain bowl at home.
Nachos: Scatter them over loaded nachos just before serving for a pop of freshness and acidity that balances the richness of cheese and beans.
Eggs: Pickled vegetables are incredible alongside scrambled eggs, huevos rancheros, or on top of a breakfast burrito.
Charcuterie Boards: Add a small bowl of pickled taco vegetables to your next charcuterie or snack board. They pair wonderfully with cured meats, sharp cheeses, and crackers.
Tips and Variations
Make it spicier: Add an extra jalapeño or toss in a few slices of serrano pepper or habanero for serious heat.
Make it milder: Remove the seeds and white membranes from the jalapeños before slicing, or swap them for a mild Anaheim or poblano pepper.
Add fresh herbs: A few sprigs of fresh thyme, cilantro stems, or dill tucked into the jar before pouring the brine adds a lovely herbal note.
Try different vinegars: Apple cider vinegar gives a slightly fruitier, more complex flavor. Red wine vinegar is bolder and earthier. Rice vinegar produces a more delicate, mild pickle.
Add cucumber: Thinly sliced Persian cucumber is a wonderful addition. Add it to the jar along with the other vegetables.
Make it sugar-free: Swap the sugar for a few drops of liquid stevia or simply omit it. The pickles will be tangier but still delicious.
Frequently Asked Questions
Can I use a different type of vinegar? Yes! White vinegar is standard for its clean, neutral flavor, but apple cider vinegar, rice vinegar, or white wine vinegar all work beautifully. Each will give the pickles a slightly different flavor profile.
Do I have to use a glass jar? Glass is ideal because it doesn’t absorb odors or flavors and is easy to clean. You can use a BPA-free plastic airtight container if needed, but avoid reactive metals like aluminum, which can interact with the vinegar.
Can I can these for shelf-stable storage? This recipe is designed for refrigerator pickles, not shelf-stable canning. If you want to process these for long-term pantry storage, you’ll need to follow USDA-approved canning guidelines, which require different ratios and processing times.
Why are my pickles soft instead of crunchy? Soft pickles usually result from slicing the vegetables too thickly (they won’t firm up) or too thinly (they’ll go soft quickly), or from keeping them too long. Aim for slices about ⅛ inch thick for the best texture. For extra crunch, some cooks add a small piece of grape leaf or a pinch of calcium chloride (Pickle Crisp) to the jar.
Can I reuse the brine? You can top off the brine with a bit more vinegar and water as the level drops, but the brine will weaken over time. For a fresh batch of vegetables, make a fresh batch of brine for best results.
Recipe at a Glance
| Detail | Info |
|---|---|
| Prep Time | 15 minutes |
| Cook Time | 5 minutes |
| Total Time | 20 minutes (plus chilling) |
| Servings | 10 |
| Calories | ~25 per serving |
| Storage | Up to 2 weeks refrigerated |
Final Thoughts
Pickled taco vegetables are one of those recipes that seems almost too simple to be as transformative as it is. A handful of fresh vegetables, a quick brine, and 20 minutes of your time produces something that elevates everything it touches. Once you have a jar of these in your refrigerator, you’ll wonder how you ever made tacos without them.
The beauty of this recipe is also in its flexibility. Play with the vegetables, experiment with the spices, adjust the heat — make it your own. However you customize it, the result is the same: a crunchy, colorful, tangy condiment that makes every bite better.
So grab a jar, slice some vegetables, and get pickling. Your tacos are waiting.
Print
Pickled Taco Vegetables: The Ultimate Crunchy, Tangy Taco Topping You Need to Make Right Now
- Total Time: 20 minutes (plus chilling)
Ingredients
Ingredients You’ll Need
Here’s a closer look at what goes into this recipe and why each component matters:
The Vegetables:
-
- Carrots (2 cups, thinly sliced) — The workhorse of the jar. Carrots hold their texture beautifully in brine and absorb flavor without turning mushy. Their natural sweetness balances the acidity of the vinegar.
-
- Radishes (1 cup, thinly sliced) — One of the most underrated pickling vegetables. Raw radishes are peppery and sharp, but once pickled, they mellow into something bright and subtly spicy. They also turn a gorgeous magenta-pink color that makes the jar look stunning.
- Red onion (1 small, thinly sliced) — Pickled red onion is a revelation. The brine tames their sharpness and brings out their sweetness while keeping a little bite. They’re one of the most versatile pickled vegetables you can make.
- Jalapeños (1–2, thinly sliced) — These add heat. Use one for a mild kick, two for something with a little more fire. You can also remove the seeds and membranes before slicing if you want flavor without as much heat.
- Bell pepper (1, thinly sliced) — Adds color, crunch, and sweetness. Any color works — red, yellow, and orange bell peppers will add sweetness, while green adds a slightly more vegetal note.
- Garlic (2 cloves, sliced) — Infuses the brine with a savory depth that ties all the vegetables together.
The Brine:
-
- White vinegar (1 cup) — The backbone of the pickling liquid. White vinegar is clean and sharp, letting the flavors of the vegetables and spices come through.
- Water (1 cup) — Dilutes the vinegar to a mellow, balanced tang rather than an aggressive sourness.
- Sugar (2 tbsp) — Takes the edge off the vinegar and creates a pleasant sweet-tangy balance.
-
- Pickling salt or kosher salt (1 tbsp) — Seasons the brine and helps draw moisture from the vegetables, enhancing their texture. Use pickling salt or kosher salt — avoid iodized table salt, which can make pickles cloudy.
- Dried oregano (1 tsp) — Adds an herbal, slightly floral note that’s quintessentially Mexican in flavor.
- Black peppercorns (½ tsp) — Provide a gentle, warming spice that blooms beautifully in the brine.
- Mustard seeds (½ tsp) — A classic pickling spice that adds a subtle, earthy bite.
- Bay leaf (1) — Lends a quiet, complex herbal background note to the brine.
Instructions
Thinly slice all your vegetables — the thinner the slices, the faster they’ll absorb the brine and the more delicate the texture. A mandoline works beautifully here if you have one, but a sharp knife works perfectly well.
Pack the carrots, radishes, red onion, jalapeños, bell pepper, and garlic into a clean glass jar or airtight container. You want them snug but not compressed — the brine needs to be able to circulate around every piece.
Pro tip: Layer the vegetables for a visually stunning jar. Alternate colors as you pack — a layer of orange carrots, then pink radishes, then red onion and green jalapeños. It looks gorgeous on your counter (or in your fridge) and makes a wonderful gift.
Combine the white vinegar, water, sugar, salt, oregano, black peppercorns, mustard seeds, and bay leaf in a small saucepan. Heat over medium heat, stirring occasionally, until the sugar and salt dissolve completely. This only takes a few minutes — you don’t need to bring it to a rolling boil, just enough heat to dissolve the solids.
Carefully pour the hot brine over your packed vegetables. Make sure every piece is fully submerged. The hot liquid will slightly soften the outermost layer of the vegetables while the centers stay crisp — this gives you that ideal texture of tender-on-the-outside, crunchy-on-the-inside.
If any vegetables float above the brine, press them down gently with a spoon. You can also place a small piece of parchment paper directly on top of the vegetables to keep them submerged.
Let the jar cool to room temperature before sealing — this usually takes 30 to 45 minutes. Once cooled, seal the jar tightly and refrigerate.
The vegetables are ready to eat after 2 hours but are at their absolute best after overnight refrigeration. The overnight rest allows the flavors to fully develop and the vegetables to absorb more of the brine’s complexity.
- Prep Time: 15 minutes
- Cook Time: 5 minutes