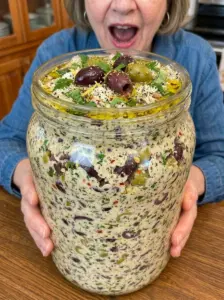
Pickled Green Onions: The Crisp, Tangy Condiment That Upgrades Every Meal
If you’re looking for one simple ingredient that instantly transforms tacos, burgers, sandwiches, salads, and grain bowls, look no further than pickled green onions. Crisp, tangy, and packed with bold, briny flavor, these little jars of magic are one of the easiest and most versatile pickles you can make at home.
Unlike heavier pickled vegetables, pickled green onions have a light, crunchy bite with a sharp tang that cuts through rich, fatty, or heavy dishes. They’re the kind of condiment you’ll want to keep stocked in your fridge at all times, ready to top off anything from breakfast tacos to a simple bowl of rice.
This recipe is quick, requires no canning equipment, and comes together with pantry staples you likely already have on hand. Within just a few hours, you’ll have a jar of crisp, tangy green onions ready to elevate practically any meal. Let’s walk through everything you need to know to make the best pickled green onions, plus tips, serving ideas, and answers to common questions.
Why You’ll Love This Pickled Green Onions Recipe
Ready in minutes, not days. Unlike many pickling recipes that require days to develop flavor, pickled green onions only need about an hour in the fridge to become deliciously tangy, though chilling overnight gives you the best texture and flavor.
Incredibly versatile. These pickled onions work with just about everything. Add them to tacos, burgers, sandwiches, salads, grain bowls, avocado toast, or eat them straight out of the jar as a crunchy, low-calorie snack.
Low-calorie and refreshing. At roughly 15 calories per serving, this is a guilt-free way to add big flavor to your meals without adding many calories, fat, or carbs.
No canning required. This is a refrigerator pickle, meaning there’s no need for a hot water bath, sterilized jars, or any special canning equipment. Just a saucepan, a jar, and a little patience.
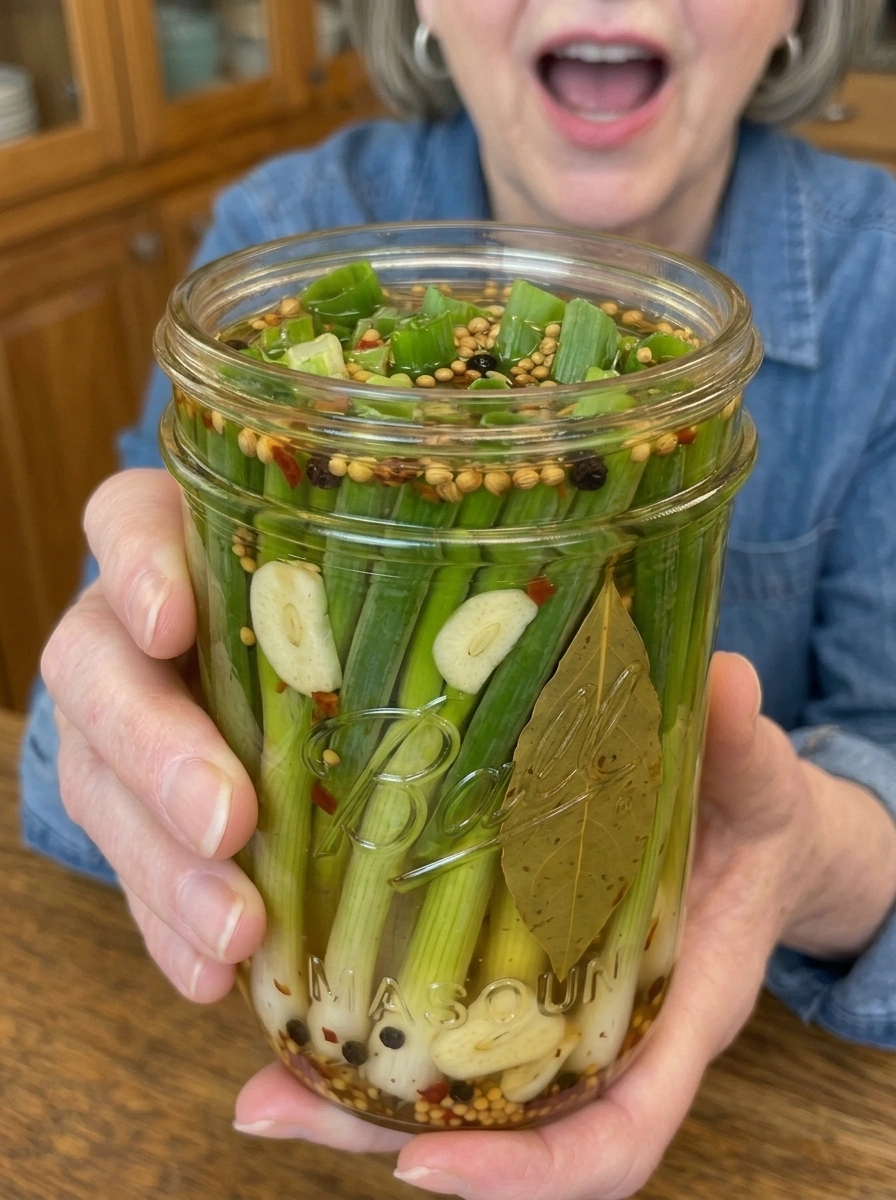
Beautiful and vibrant. Bright green stalks paired with sliced garlic and warm spices make this jar as pretty as it is flavorful, perfect for topping dishes or gifting to friends and family.
Budget-friendly. Green onions are inexpensive and widely available year-round, making this an affordable way to keep a flavorful, crunchy condiment on hand at all times.
What Are Pickled Green Onions?
Pickled green onions are exactly what they sound like: fresh green onions (also known as scallions) submerged in a tangy vinegar brine seasoned with garlic, peppercorns, mustard seeds, and other warm spices. As the onions sit in the brine, they soften slightly while absorbing the tangy, garlicky, slightly spicy flavor of the pickling liquid, all while retaining a satisfying crunch.
This style of quick pickle, often called a refrigerator pickle, has become incredibly popular thanks to its simplicity and speed. Rather than fermenting or canning the vegetables for long-term shelf storage, the vinegar brine works quickly to flavor and lightly preserve the onions for a few weeks in the refrigerator.
Green onions are a fantastic candidate for pickling because their mild, slightly sweet flavor pairs beautifully with tangy vinegar and warm spices, while their sturdy structure helps them hold up well in brine without becoming mushy.
Ingredients You’ll Need
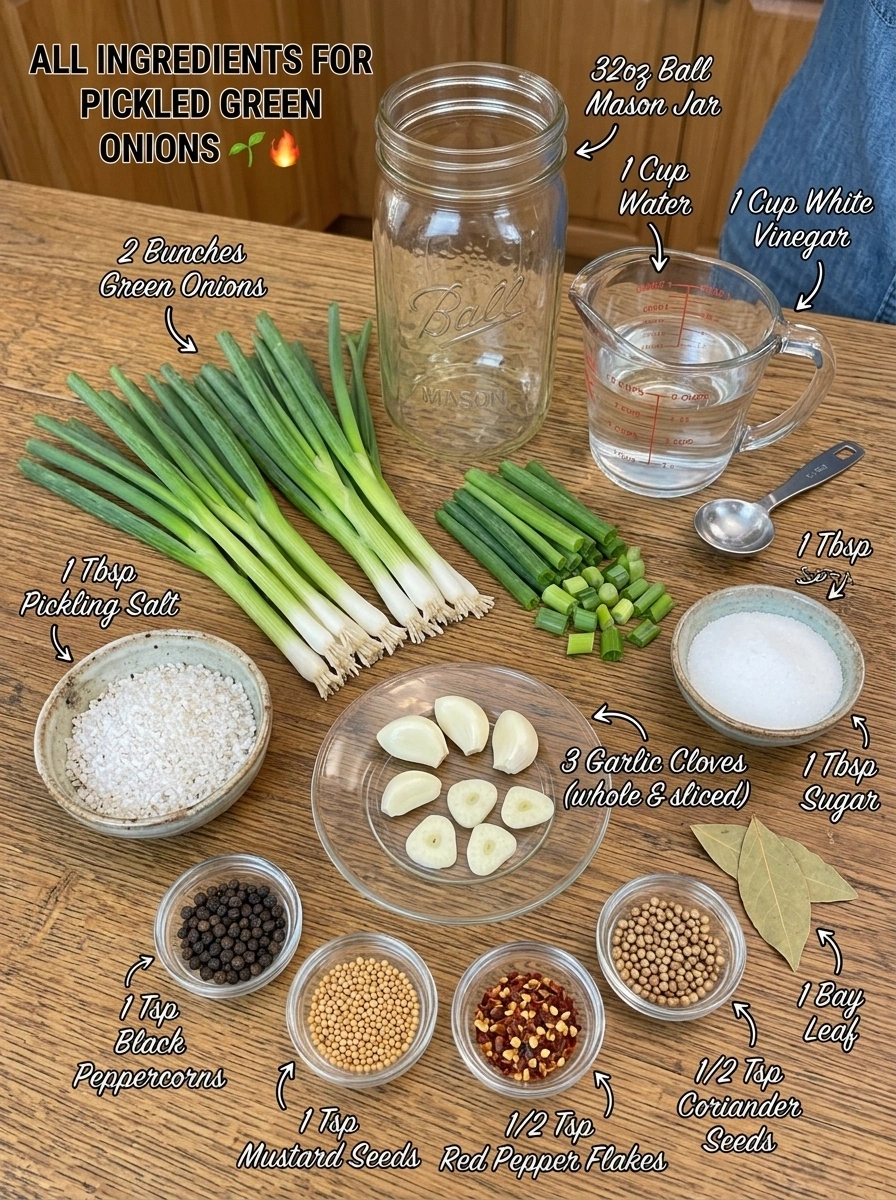
Here’s a closer look at what goes into this recipe and why each ingredient matters.
Green onions: Two bunches of green onions, trimmed and cut to fit your jar, form the base of this recipe. Look for green onions with firm, bright green tops and crisp white bulbs for the best texture and flavor.
White vinegar: Provides the sharp, tangy backbone of the pickling brine. White vinegar has a clean, neutral flavor that lets the other spices shine through.
Water: Balances the acidity of the vinegar so the brine isn’t overly sharp or overpowering.
Pickling salt or kosher salt: Helps season the onions while supporting the pickling process. Pickling salt is ideal because it dissolves cleanly and won’t cloud the brine, though kosher salt also works well.
Sugar: A small amount of sugar helps balance the acidity of the vinegar, rounding out the flavor of the brine so it isn’t purely sour.
Garlic: Sliced garlic cloves infuse the brine with a warm, aromatic flavor that mellows and sweetens slightly as it pickles alongside the onions.
Black peppercorns: Adds a subtle warmth and gentle bite to the brine, a classic pickling spice found in most quick pickle recipes.
Mustard seeds: Contribute a slightly tangy, earthy flavor that’s a staple in pickling recipes and pairs perfectly with the sharpness of the vinegar.
Red pepper flakes: Adds a touch of heat throughout the brine. Adjust the amount depending on how spicy you’d like your pickled onions to be.
Coriander seeds (optional): Adds a warm, slightly citrusy, floral note to the brine. While optional, it’s a wonderful addition if you enjoy more complex pickling spice blends.
Bay leaf: Infuses the brine with a subtle herbal depth as it heats and cools, rounding out the overall flavor profile.
How to Make Pickled Green Onions
This recipe comes together quickly and requires just a few simple steps.
Step 1: Prep the Green Onions
Wash the green onions thoroughly to remove any dirt or grit, then trim off the root ends. Cut the onions into smaller pieces if needed so they fit neatly into your clean glass jar. Depending on the size of your jar, you may want to cut them in half or into thirds.
Step 2: Pack the Jar
Pack the green onions tightly into the jar along with the sliced garlic. Packing them snugly helps ensure they stay submerged in the brine and pickle evenly throughout.
Step 3: Make the Pickling Brine
In a saucepan, combine the white vinegar, water, pickling salt, sugar, black peppercorns, mustard seeds, red pepper flakes, coriander seeds (if using), and bay leaf.
Heat the mixture over medium heat, stirring occasionally, until the sugar and salt fully dissolve. There’s no need to bring it to a full boil; you just want the ingredients to dissolve completely and the brine to become fragrant.
Step 4: Pour Over the Onions
Carefully pour the hot brine over the green onions, making sure they are fully submerged in the liquid. This step is important, since any onions left exposed above the brine line may not pickle evenly or could spoil more quickly.
Step 5: Cool and Seal
Let the jar cool to room temperature on the counter. Once cooled, seal it tightly with a lid.
Step 6: Chill Before Serving
Refrigerate the jar for at least 1 hour before serving. While the onions are technically ready to eat after an hour, chilling overnight gives them the best flavor and crunch, allowing the brine to fully penetrate the onions.
Tips for the Best Pickled Green Onions
Use fresh, firm green onions. Choose bunches with vibrant green tops and firm white bulbs. Avoid onions that look wilted or slimy, as they won’t hold up as well in the brine.
Don’t skip the cooling step. Allowing the jar to cool to room temperature before sealing helps prevent excess condensation from forming inside the jar, which can affect texture over time.
Keep everything submerged. Make sure the green onions stay fully covered by the brine throughout the pickling process for the most consistent flavor and best preservation.
Adjust the spice level to your liking. If you prefer a milder version, reduce or omit the red pepper flakes. For extra heat, feel free to add more or include a few slices of fresh chili pepper.
Chill overnight for the best results. While an hour in the fridge is enough to get a tangy bite, letting the jar sit overnight allows the flavors to fully develop and results in the best texture and taste.
Reuse the brine. Once you’ve finished the green onions, the leftover brine can be reused to quickly pickle other vegetables like radishes, cucumbers, or carrots.
Serving Suggestions
Pickled green onions are incredibly versatile and can be used in a variety of ways:
- Add them to tacos for a tangy, crunchy topping that cuts through rich meats and sauces.
- Pile them onto burgers or sandwiches for an extra pop of flavor and texture.
- Toss them into salads for a bright, tangy addition.
- Add to grain bowls, rice bowls, or noodle dishes for a quick flavor boost.
- Top off avocado toast or eggs for a zesty morning upgrade.
- Serve alongside grilled meats, fish, or barbecue as a tangy side.
- Eat them straight from the jar as a crunchy, refreshing snack.
This simple condiment is a fantastic way to add brightness and acidity to otherwise heavy or rich dishes, helping balance out flavors on your plate.
Storage Information
Store the pickled green onions in an airtight jar in the refrigerator for up to 2 weeks. Be sure to keep the onions fully covered with the pickling brine throughout storage for the freshest flavor and best texture.
Since this is a refrigerator pickle rather than a shelf-stable canned product, it’s important to always keep the jar chilled and to use clean utensils when removing onions from the jar to help prevent contamination.
Frequently Asked Questions
Can I use the white and green parts of the onion, or just one? You can use both the white bulbs and the green tops. The white parts tend to stay crunchier, while the green tops soften slightly and absorb more of the tangy brine flavor. Using both gives you a nice variety of texture in every bite.
How long do I need to wait before eating them? The onions are ready to eat after chilling for at least 1 hour, but for the best flavor and crunch, it’s recommended to let them chill overnight before enjoying.
Can I make this recipe less spicy? Yes, simply reduce or omit the red pepper flakes if you prefer a milder pickled onion. The rest of the brine will still provide plenty of tangy, garlicky flavor.
Is this recipe gluten-free? Yes, all of the ingredients in this recipe are naturally gluten-free, making it a great condiment option for those following a gluten-free diet.
Can I double or triple this recipe? Absolutely. This recipe scales up easily. Simply increase the ingredients proportionally and divide the onions and brine among additional jars as needed.
Do I need special canning jars for this recipe? No, since this is a refrigerator pickle rather than a shelf-stable canned pickle, you don’t need special canning jars or a hot water bath. Any clean glass jar with a tight-fitting lid will work well.
Can I use apple cider vinegar instead of white vinegar? Yes, apple cider vinegar can be used as a substitute, though it will give the onions a slightly different, somewhat sweeter and more mellow flavor compared to the sharper taste of white vinegar.
Recipe Card
Pickled Green Onions Prep Time: 10 minutes Cook Time: 5 minutes Total Time: 15 minutes Servings: 8 Calories: ~15 per serving
Ingredients
- 2 bunches green onions, trimmed and cut to fit your jar
- 1 cup white vinegar
- 1 cup water
- 1 tbsp pickling salt or kosher salt
- 1 tbsp sugar
- 3 cloves garlic, sliced
- 1 tsp black peppercorns
- 1 tsp mustard seeds
- 1/2 tsp red pepper flakes
- 1/2 tsp coriander seeds (optional)
- 1 bay leaf
Directions
- Wash the green onions and cut them into smaller pieces if needed to fit into a clean glass jar.
- Pack the green onions tightly into the jar with sliced garlic.
- In a saucepan, combine vinegar, water, salt, sugar, black peppercorns, mustard seeds, red pepper flakes, coriander seeds, and bay leaf.
- Heat over medium heat until the sugar and salt dissolve completely.
- Carefully pour the hot brine over the green onions until fully submerged.
- Let the jar cool to room temperature.
- Seal tightly and refrigerate for at least 1 hour before serving.
- For the best flavor and crunch, chill overnight before enjoying.
Storage
Store in an airtight jar in the refrigerator for up to 2 weeks. Keep the onions fully covered with the pickling brine for the freshest flavor.
Final Thoughts
Pickled green onions are proof that some of the best condiments are also the simplest. With just a handful of pantry staples and about 15 minutes of hands-on time, you can create a jar of crisp, tangy, garlicky green onions that instantly upgrades practically any meal. Keep a jar in your fridge at all times, and you’ll always have a quick way to add brightness, crunch, and bold flavor to tacos, burgers, sandwiches, salads, and so much more.
Once you try this recipe, it’s likely to become a permanent staple in your fridge. It’s quick, affordable, endlessly versatile, and absolutely delicious straight from the jar.
Print
Pickled Green Onions: The Crisp, Tangy Condiment That Upgrades Every Meal
- Total Time: 15 minutes
Ingredients
-
- 2 bunches green onions, trimmed and cut to fit your jar
- 1 cup white vinegar
- 1 cup water
-
- 1 tbsp pickling salt or kosher salt
- 1 tbsp sugar
- 3 cloves garlic, sliced
-
- 1 tsp black peppercorns
- 1 tsp mustard seeds
- 1/2 tsp red pepper flakes
- 1/2 tsp coriander seeds (optional)
- 1 bay leaf
Instructions
This recipe comes together quickly and requires just a few simple steps.
Step 1: Prep the Green Onions
Wash the green onions thoroughly to remove any dirt or grit, then trim off the root ends. Cut the onions into smaller pieces if needed so they fit neatly into your clean glass jar. Depending on the size of your jar, you may want to cut them in half or into thirds.
Step 2: Pack the Jar
Pack the green onions tightly into the jar along with the sliced garlic. Packing them snugly helps ensure they stay submerged in the brine and pickle evenly throughout.
Step 3: Make the Pickling Brine
In a saucepan, combine the white vinegar, water, pickling salt, sugar, black peppercorns, mustard seeds, red pepper flakes, coriander seeds (if using), and bay leaf.
Heat the mixture over medium heat, stirring occasionally, until the sugar and salt fully dissolve. There’s no need to bring it to a full boil; you just want the ingredients to dissolve completely and the brine to become fragrant.
Step 4: Pour Over the Onions
Carefully pour the hot brine over the green onions, making sure they are fully submerged in the liquid. This step is important, since any onions left exposed above the brine line may not pickle evenly or could spoil more quickly.
Step 5: Cool and Seal
Let the jar cool to room temperature on the counter. Once cooled, seal it tightly with a lid.
Step 6: Chill Before Serving
Refrigerate the jar for at least 1 hour before serving. While the onions are technically ready to eat after an hour, chilling overnight gives them the best flavor and crunch, allowing the brine to fully penetrate the onions.
- Prep Time: 10 minutes
- Cook Time: 5 minutes
Nutrition
- Serving Size: 15 per serving
- Calories: 8