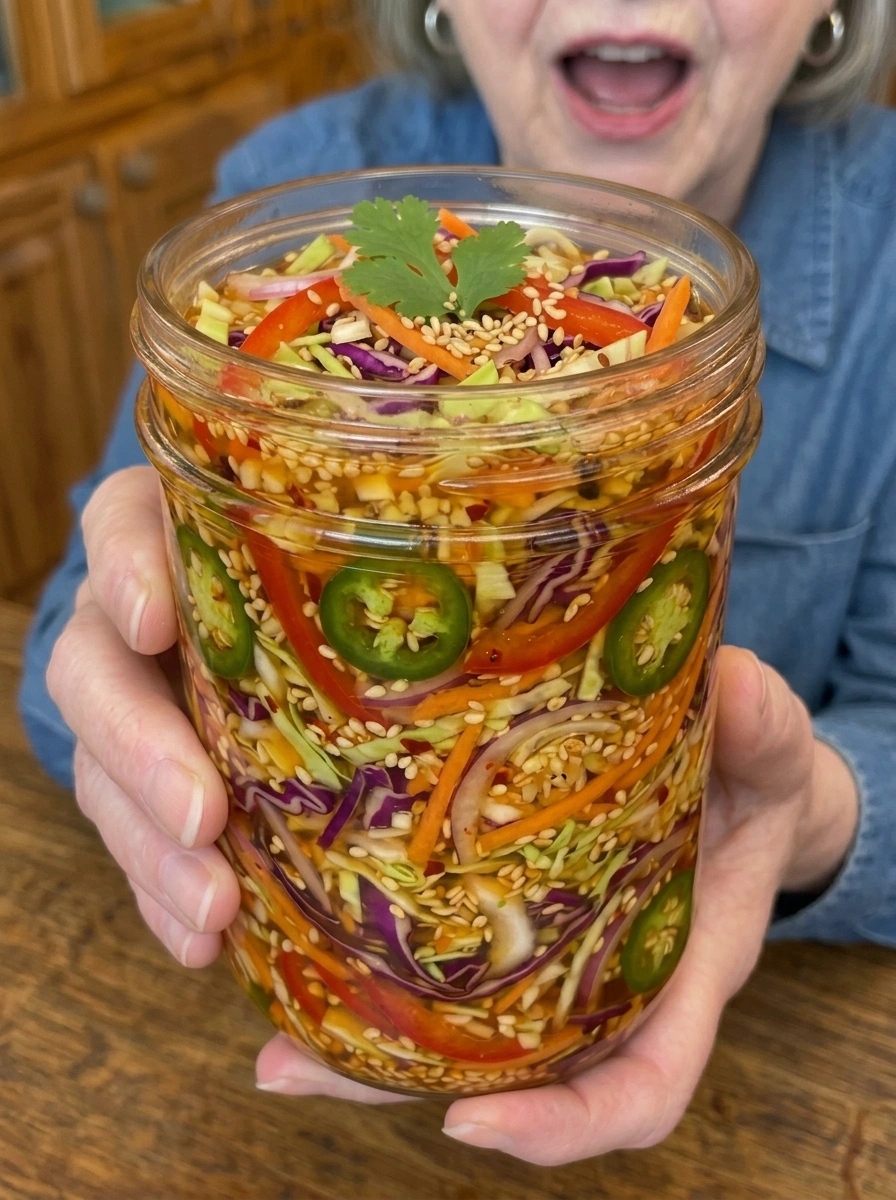
If you’re looking for a vibrant, crave-worthy side dish that adds instant crunch and flavor to just about anything, this Sweet Chili Pickled Asian Slaw is exactly what your recipe rotation is missing. Crisp cabbage, sweet carrots, colorful bell pepper, and sharp red onion come together in a bright, tangy rice vinegar brine infused with sweet chili sauce, fresh ginger, garlic, and toasted sesame oil. The result is a bold, refreshing slaw that’s sweet, tangy, and just a little spicy — the kind of condiment you’ll want to put on everything.
Unlike heavy, mayo-based slaws, this refrigerator-pickled version is light, bright, and packed with texture. It comes together quickly with simple pantry staples and fresh produce, and it only gets better the longer it sits in the fridge, making it an ideal make-ahead recipe for busy weeknights, weekend cookouts, or meal-prep sessions.
Whether you’re piling it onto tacos, layering it into a pulled chicken sandwich, topping a rice bowl, or simply eating it straight from the jar as a crunchy snack, this Sweet Chili Pickled Asian Slaw delivers big, bold flavor in every bite. In this article, you’ll find a full breakdown of the ingredients, step-by-step instructions, expert tips, creative variations, serving ideas, storage information, and answers to the most common questions about this quick-pickled slaw.
What Is Sweet Chili Pickled Asian Slaw?
This recipe is a refrigerator-pickled slaw, meaning the vegetables are tossed in a warm, seasoned brine and left to marinate in the fridge rather than being canned for shelf-stable storage. This quick-pickling method softens the vegetables just slightly while allowing them to absorb the bold flavors of the brine, all while retaining that signature crisp, satisfying crunch.
The base of the slaw is a mix of finely shredded green and red cabbage, julienned carrot, thinly sliced red bell pepper, red onion, and green onion, with optional jalapeño or Fresno chile for extra heat and fresh cilantro for brightness. What sets this slaw apart from a traditional coleslaw is the brine: a combination of unseasoned rice vinegar, sweet chili sauce, sugar or honey, garlic, fresh ginger, and toasted sesame oil. This brine delivers a distinctly Asian-inspired flavor profile — sweet, tangy, garlicky, and subtly spicy — that pairs beautifully with a huge range of dishes.
Because it’s a quick refrigerator pickle rather than a canning recipe, it’s incredibly beginner-friendly. There’s no need for canning jars, water baths, or special equipment — just a saucepan, a mixing bowl, and a container to store it in the fridge.
Why You’ll Love This Recipe
- Ready in about 20 minutes of active prep — the rest is hands-off marinating time in the fridge.
- Bold, balanced flavor — sweet, tangy, garlicky, and just spicy enough.
- Incredibly versatile — works as a topping, side dish, or standalone snack.
- Gets better with time — the flavor deepens the longer it sits in the brine.
- No canning required — this is a simple refrigerator pickle, not a shelf-stable preserve.
- Naturally vegan and gluten-free friendly — easily adaptable to fit various diets (double-check your sweet chili sauce for gluten-free needs).
- Great for meal prep — make a batch and use it throughout the week to add crunch and flavor to meals.
Ingredients You’ll Need
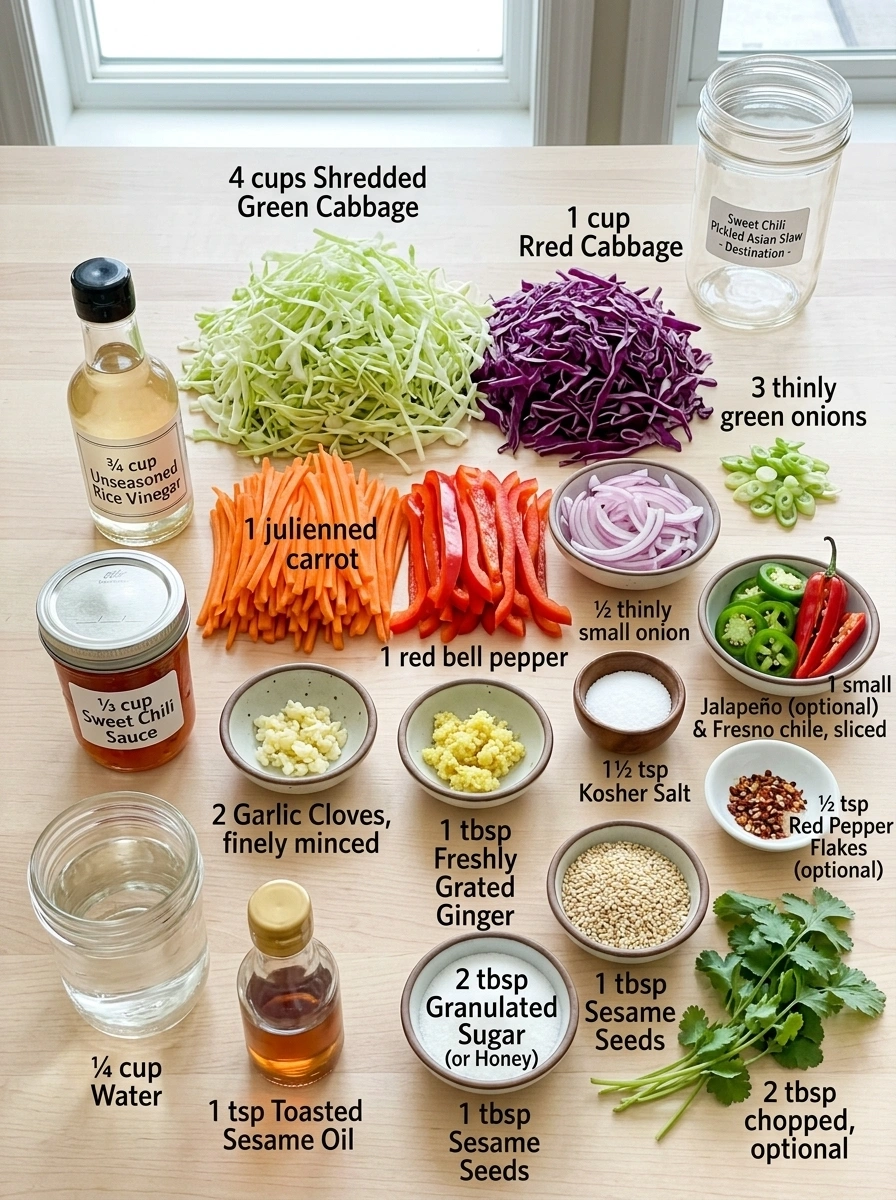
For the Slaw
- 4 cups finely shredded green cabbage — the crunchy, neutral base of the slaw.
- 1 cup shredded red cabbage — adds color and a slightly peppery bite.
- 1 large carrot, julienned or shredded — brings natural sweetness and extra crunch.
- 1 red bell pepper, thinly sliced — adds color, sweetness, and crisp texture.
- ½ small red onion, very thinly sliced — adds a sharp, tangy bite that mellows as it pickles.
- 3 green onions, thinly sliced — a milder onion flavor with a fresh, grassy note.
- 1 small jalapeño or Fresno chile, thinly sliced, optional — for those who want extra heat.
- 2 tbsp chopped fresh cilantro, optional — adds herby freshness.
For the Sweet Chili Pickling Brine 🌶️
- ¾ cup unseasoned rice vinegar — the tangy base of the brine; unseasoned ensures you control the sweetness yourself.
- ¼ cup water — balances the acidity of the vinegar.
- ⅓ cup sweet chili sauce — brings sweetness, mild heat, and a signature Asian-inspired flavor.
- 2 tbsp granulated sugar or honey — enhances the sweet-tangy balance of the brine.
- 1½ tsp kosher salt — essential for both flavor and the pickling process.
- 2 garlic cloves, finely minced — adds bold, aromatic flavor.
- 1 tbsp freshly grated ginger — brings warmth and a signature zesty bite.
- 1 tsp toasted sesame oil — adds a nutty, aromatic depth of flavor.
- ½ tsp red pepper flakes, optional — for those who want an extra kick of heat.
For Finishing
- 1 tbsp sesame seeds — adds a nutty crunch and visual appeal.
- Fresh cilantro — for a final pop of freshness.
- Sliced green onions — for extra color and mild onion flavor.
- Extra sweet chili sauce, optional — drizzle on top for a sweeter, stickier finish.
Step-by-Step Instructions
Step 1: Prepare the Vegetables 🥬
Wash and dry all of your vegetables thoroughly, as excess water can dilute the pickling brine. Finely shred the green and red cabbage, then julienne or shred the carrot. Thinly slice the bell pepper and red onion, and slice the green onions. If you’d like extra heat, thinly slice a jalapeño or Fresno chile to add to the mix.
Step 2: Combine the Slaw
Add the shredded cabbage, carrot, bell pepper, red onion, green onions, and optional chile to a large mixing bowl. Toss everything together until the vegetables are evenly distributed throughout the bowl.
Step 3: Make the Sweet Chili Brine 🌶️
In a small saucepan, combine the rice vinegar, water, sweet chili sauce, sugar, and salt. Heat gently over medium-low heat, stirring occasionally, until the sugar and salt fully dissolve. Remove the saucepan from the heat, then stir in the minced garlic, grated ginger, toasted sesame oil, and optional red pepper flakes.
Step 4: Add the Brine
Allow the brine to cool for several minutes so that it’s warm rather than boiling hot. Pour the warm brine over the prepared vegetables and toss thoroughly until everything is evenly coated in the tangy, sweet mixture.
Step 5: Pack Into Jars 🫙
Transfer the slaw into clean glass jars or an airtight container. Press the vegetables down gently so they’re fully surrounded by the pickling liquid, being careful not to crush the cabbage excessively — you want it to remain crisp and crunchy, not mushy.
Step 6: Refrigerate ❄️
Cover the jars or container tightly and refrigerate for at least 2 hours. For the best flavor, let the slaw pickle for 12–24 hours before serving. As it rests, the vegetables will soften slightly while absorbing the sweet, tangy, spicy brine, all while retaining plenty of satisfying crunch.
Step 7: Finish & Serve
Before serving, give the slaw a good toss to redistribute the brine and seasonings. Finish with a sprinkle of sesame seeds, fresh cilantro, and sliced green onions. For a sweeter, stickier finish, drizzle a small amount of additional sweet chili sauce over the top just before serving.
Expert Tips for the Best Pickled Slaw
- Don’t skip drying the vegetables. Excess water on the cabbage and other vegetables can dilute the brine and weaken the overall flavor.
- Let the brine cool slightly before pouring. Boiling-hot brine can cause the vegetables to wilt too much. A warm (not scalding) brine helps them absorb flavor while staying crisp.
- Slice everything thinly and evenly. Uniform, thin slices pickle more evenly and give the slaw a better overall texture.
- Be patient. While the slaw is technically ready after 2 hours, letting it sit for 12–24 hours makes a significant difference in flavor depth.
- Use fresh ginger and garlic. These aromatics are key to the bold, distinctive flavor of this slaw — powdered substitutes won’t deliver the same brightness.
- Press gently when packing. You want the vegetables submerged in the brine, but avoid pressing so hard that you crush the crunch out of the cabbage.
- Taste and adjust. If you prefer a sweeter or tangier slaw, adjust the sugar or vinegar slightly to suit your taste before pouring the brine over the vegetables.
Flavor Variations ✨
This slaw is easy to customize based on your flavor preferences or what you have on hand:
- Extra Spicy: Add sliced serrano pepper along with additional red pepper flakes for a fierier kick.
- Mango Chili Slaw: Add thin strips of firm mango shortly before serving for a sweet, tropical twist.
- Cucumber Slaw: Add thinly sliced cucumber for extra freshness and crunch.
- Peanut-Style: Sprinkle chopped roasted peanuts over individual servings just before eating for a nutty, textural contrast.
- Extra Ginger: Double the fresh ginger for a sharper, brighter, more warming flavor.
Serving Ideas 🌮
This Sweet Chili Pickled Asian Slaw is incredibly versatile and pairs well with a wide variety of dishes. Try serving it with:
- Korean-style tacos
- Pulled chicken sandwiches
- Burgers
- Grilled chicken
- Shrimp tacos
- Rice bowls
- Lettuce wraps
- Grilled fish
- Spring rolls
- BBQ meats
It also works beautifully as a crunchy topping for rich or spicy dishes, where the bright vinegar and sweet chili flavor help cut through and balance heavier, richer flavors.
Storage Information ❄️
Keep the slaw covered and refrigerated at all times. For the best crunch and freshness, enjoy it within about 3–5 days. Keep in mind that the vegetables will continue to soften the longer they remain in the brine, so texture will gradually change over time.
Important: This is a refrigerator-pickled slaw, not a shelf-stable canning recipe. It must be kept refrigerated and is not intended for long-term pantry storage.
Tip: Don’t pour boiling-hot brine directly onto the shredded cabbage. Let it cool slightly first — the warm brine helps the vegetables absorb flavor while preserving the fresh, satisfying crunch that makes this slaw so good.
Recipe Card
Sweet Chili Pickled Asian Slaw
Crisp, colorful, sweet, tangy, and just a little spicy — crunchy cabbage, carrots, bell pepper, and red onion tossed in a bright rice vinegar brine with sweet chili sauce, ginger, garlic, and sesame.
- Prep Time: 20 minutes
- Pickling Time: 2–24 hours (12–24 hours recommended)
- Total Time: approximately 24 hours 20 minutes (mostly hands-off)
- Servings: 8–10
Ingredients: See full ingredient list above.
Instructions: See full step-by-step instructions above.
Frequently Asked Questions
1. How long does this slaw need to pickle before eating? It’s ready to eat after about 2 hours in the fridge, but for the best flavor, let it pickle for 12–24 hours so the vegetables have time to fully absorb the brine.
2. Is this a canning recipe I can store on the shelf? No, this is a refrigerator-pickled slaw, not a shelf-stable canning recipe. It must be kept refrigerated at all times and consumed within about 3–5 days.
3. Can I make this slaw less spicy? Yes, simply omit the jalapeño or Fresno chile and skip the optional red pepper flakes in the brine for a milder version.
4. What can I use instead of sweet chili sauce? If you don’t have sweet chili sauce on hand, you can combine a bit of rice vinegar, sugar, and a small amount of chili garlic sauce or sriracha as a substitute, though the flavor will be slightly different.
5. Why does the recipe call for unseasoned rice vinegar? Unseasoned rice vinegar doesn’t contain added sugar or salt, which allows you to control the sweetness and saltiness of the brine precisely rather than ending up with an overly sweet result.
6. Can I use pre-shredded coleslaw mix instead of shredding my own cabbage? Yes, a bagged coleslaw mix can work as a shortcut, though freshly shredded cabbage typically offers a crisper texture and better flavor absorption.
7. Will the vegetables get soggy over time? The vegetables will soften gradually the longer they sit in the brine, but they should retain a pleasant crunch for the first several days when stored properly in the refrigerator.
8. Can I double this recipe for a larger gathering? Yes, this recipe doubles easily. Simply double all of the ingredients and use a larger container or multiple jars to store the slaw.
9. What’s the best way to serve this slaw at a party? Serve it chilled in a large bowl with tongs or a slotted spoon, allowing guests to add it as a topping to tacos, sandwiches, or bowls, or to enjoy on its own as a light, crunchy side dish.
Final Thoughts
This Sweet Chili Pickled Asian Slaw is a vibrant, flavor-packed addition to your recipe collection — crisp, tangy, sweet, and just spicy enough to keep things interesting. It’s simple to make, endlessly versatile, and only gets better the longer it sits, making it a perfect make-ahead recipe for busy weeks, cookouts, and gatherings alike. Once you try it, you’ll find yourself reaching for a spoonful straight from the jar just as often as you use it as a topping.
Give this recipe a try, and don’t forget to share your favorite way to serve it. Tag us with your creations!
Print
Sweet Chili Pickled Asian Slaw
- Total Time: approximately 24 hours 20 minutes (mostly hands-off)
Ingredients
For the Slaw
- 4 cups finely shredded green cabbage — the crunchy, neutral base of the slaw.
- 1 cup shredded red cabbage — adds color and a slightly peppery bite.
- 1 large carrot, julienned or shredded — brings natural sweetness and extra crunch.
- 1 red bell pepper, thinly sliced — adds color, sweetness, and crisp texture.
- ½ small red onion, very thinly sliced — adds a sharp, tangy bite that mellows as it pickles.
- 3 green onions, thinly sliced — a milder onion flavor with a fresh, grassy note.
- 1 small jalapeño or Fresno chile, thinly sliced, optional — for those who want extra heat.
- 2 tbsp chopped fresh cilantro, optional — adds herby freshness.
For the Sweet Chili Pickling Brine 🌶️
- ¾ cup unseasoned rice vinegar — the tangy base of the brine; unseasoned ensures you control the sweetness yourself.
- ¼ cup water — balances the acidity of the vinegar.
- ⅓ cup sweet chili sauce — brings sweetness, mild heat, and a signature Asian-inspired flavor.
- 2 tbsp granulated sugar or honey — enhances the sweet-tangy balance of the brine.
- 1½ tsp kosher salt — essential for both flavor and the pickling process.
- 2 garlic cloves, finely minced — adds bold, aromatic flavor.
- 1 tbsp freshly grated ginger — brings warmth and a signature zesty bite.
- 1 tsp toasted sesame oil — adds a nutty, aromatic depth of flavor.
- ½ tsp red pepper flakes, optional — for those who want an extra kick of heat.
For Finishing
- 1 tbsp sesame seeds — adds a nutty crunch and visual appeal.
- Fresh cilantro — for a final pop of freshness.
- Sliced green onions — for extra color and mild onion flavor.
- Extra sweet chili sauce, optional — drizzle on top for a sweeter, stickier finish.
Instructions
Wash and dry all of your vegetables thoroughly, as excess water can dilute the pickling brine. Finely shred the green and red cabbage, then julienne or shred the carrot. Thinly slice the bell pepper and red onion, and slice the green onions. If you’d like extra heat, thinly slice a jalapeño or Fresno chile to add to the mix.
Add the shredded cabbage, carrot, bell pepper, red onion, green onions, and optional chile to a large mixing bowl. Toss everything together until the vegetables are evenly distributed throughout the bowl.
In a small saucepan, combine the rice vinegar, water, sweet chili sauce, sugar, and salt. Heat gently over medium-low heat, stirring occasionally, until the sugar and salt fully dissolve. Remove the saucepan from the heat, then stir in the minced garlic, grated ginger, toasted sesame oil, and optional red pepper flakes.
Allow the brine to cool for several minutes so that it’s warm rather than boiling hot. Pour the warm brine over the prepared vegetables and toss thoroughly until everything is evenly coated in the tangy, sweet mixture.
Transfer the slaw into clean glass jars or an airtight container. Press the vegetables down gently so they’re fully surrounded by the pickling liquid, being careful not to crush the cabbage excessively — you want it to remain crisp and crunchy, not mushy.
Cover the jars or container tightly and refrigerate for at least 2 hours. For the best flavor, let the slaw pickle for 12–24 hours before serving. As it rests, the vegetables will soften slightly while absorbing the sweet, tangy, spicy brine, all while retaining plenty of satisfying crunch.
Before serving, give the slaw a good toss to redistribute the brine and seasonings. Finish with a sprinkle of sesame seeds, fresh cilantro, and sliced green onions. For a sweeter, stickier finish, drizzle a small amount of additional sweet chili sauce over the top just before serving.
- Prep Time: 20 minutes
- Cook Time: 2–24 hours (12–24 hours recommended)