Bread and Butter Pickles: The Sweet, Tangy Classic Everyone Loves
There’s a reason Bread and Butter Pickles have earned their place as one of the most beloved pickle styles in American kitchens for generations. These homemade pickles are sweet, tangy, and perfectly crisp, made with onions, mustard seeds, and warm spices for a classic flavor everyone loves. One bite and you’ll be stacking them on burgers, sandwiches, and snacking straight from the jar without a second thought.
Unlike sharper, more assertively sour dill pickles, bread and butter pickles strike a completely different balance, leaning into sweetness while still delivering that signature tangy pickle bite. The combination of thinly sliced cucumbers and sweet onion, paired with a brine built on sugar, mustard seeds, and turmeric, creates a pickle that’s beautifully golden in color and irresistibly sweet-and-sour in flavor. It’s a nostalgic classic that pairs perfectly with just about anything off the grill.
This complete guide covers everything you need to know to make perfect Bread and Butter Pickles at home, including a full ingredient breakdown, detailed step-by-step instructions, expert tips for the best crunch and flavor, creative variations, serving suggestions, storage guidelines, and answers to the most frequently asked questions about making this classic pickle.
What Are Bread and Butter Pickles?
Bread and Butter Pickles are a classic American pickle style made from thinly sliced cucumbers and sweet onion, salted briefly to draw out excess moisture, then submerged in a sweet, tangy brine built on a combination of white vinegar and apple cider vinegar, sugar, mustard seeds, celery seeds, and turmeric. The name is said to have originated from Depression-era home cooks who would trade these pickles for other staples like bread and butter, though the exact history is debated among food historians.
What sets this pickle apart from other cucumber pickle styles is its pronounced sweetness. With a full 1½ cups of granulated sugar in the brine, bread and butter pickles are noticeably sweeter than a traditional dill pickle, while turmeric lends them their classic golden-yellow hue. The result is a pickle that’s simultaneously sweet, tangy, and mildly spiced, with a satisfying crunch that makes it endlessly snackable.
Why This Recipe Works So Well
There are several reasons this recipe consistently produces the classic, crisp, sweet-and-tangy result that bread and butter pickles are known for.
Salting the cucumbers and onions first is essential. Tossing the sliced vegetables with salt and letting them sit for an hour draws out excess moisture, which helps concentrate their flavor and prevents the finished pickles from becoming watery once combined with the brine.
A dual-vinegar brine adds layered acidity. Combining white vinegar with apple cider vinegar creates a more complex tang than either vinegar could achieve alone, with the apple cider vinegar contributing a subtle fruity depth.
A generous amount of sugar creates the classic sweet-tangy balance. Rather than using sugar sparingly to soften the vinegar’s edge, this recipe embraces a full 1½ cups, resulting in the pronounced sweetness that defines the bread and butter pickle style.
Turmeric delivers the signature golden color. Beyond its subtle earthy flavor, turmeric gives these pickles their classic bright yellow hue, an instantly recognizable visual signature of this pickle style.
The warm spice blend adds gentle complexity. Mustard seeds, celery seeds, black peppercorns, and a touch of ground cloves each contribute their own warm, slightly sweet, or peppery notes, rounding out the brine’s flavor without overwhelming the pickle’s classic character.
Ingredients You’ll Need
Here’s everything required to make a full batch of Bread and Butter Pickles.
For the vegetables:
- 2 lbs pickling cucumbers, thinly sliced
- 1 large sweet onion, thinly sliced
For the brine:
- 2 cups white vinegar
- 1 cup apple cider vinegar
- 1 cup water
- 1½ cups granulated sugar
- 2 tablespoons pickling salt or kosher salt
Spices and aromatics:
- 1 tablespoon mustard seeds
- 1 teaspoon celery seeds
- 1 teaspoon turmeric
- 1/2 teaspoon whole black peppercorns
- 1/4 teaspoon ground cloves
- 2 cloves garlic, thinly sliced (optional)
A Closer Look at the Key Ingredients
Pickling cucumbers are the foundation of this recipe. Look for small, firm cucumbers with thin skin and few seeds, often labeled specifically as “pickling cucumbers” or Kirby cucumbers at the grocery store or farmers market. Their firm texture holds up beautifully to both the salting process and the sweet brine.
Sweet onion adds a mild, slightly sweet bite that complements the cucumbers perfectly, softening slightly in the brine while still retaining some texture.
White vinegar provides sharp acidity, while apple cider vinegar adds a layer of fruity complexity, together creating a more nuanced tang than a single vinegar could achieve alone.
Granulated sugar is used generously in this recipe, creating the pronounced sweetness that defines the classic bread and butter pickle flavor, balancing beautifully against the sharp vinegar.
Pickling salt or kosher salt serves two purposes in this recipe: drawing excess moisture out of the cucumbers and onions during the initial salting step, and later dissolving into the brine to enhance the overall flavor.
Mustard seeds and celery seeds are classic pickling spices that contribute subtle bursts of texture and flavor throughout the brine, both essential to the traditional bread and butter pickle taste.
Turmeric provides that signature golden color along with a subtle earthy note that’s characteristic of this pickle style.
Whole black peppercorns add a mild peppery background note, while ground cloves, used sparingly, introduce a warm, slightly sweet spice that rounds out the brine beautifully.
Garlic, while optional, adds a subtle savory depth for those who want a bit more complexity in their finished pickles.
Step-by-Step Instructions
Making Bread and Butter Pickles is a straightforward process, and following these steps closely will help you achieve the classic sweet, tangy, crisp result.
Step 1: Prep the Cucumbers and Onion
Wash the cucumbers thoroughly and slice them into 1/4-inch rounds. Thinly slice the sweet onion as well.
Step 2: Salt and Rest
In a large bowl, toss the cucumber slices and onions with the pickling salt. Cover and let them sit for 1 hour to draw out excess moisture. This step is essential for achieving the classic crisp texture and preventing the finished pickles from becoming watery.
Step 3: Drain and Dry
Drain the cucumbers and onions well, then rinse briefly under cold water to remove excess salt. Pat dry with paper towels to ensure the brine coats them properly rather than becoming diluted.
Step 4: Pack the Jars
Pack the cucumber and onion mixture into a large, clean glass jar, or divide it evenly between two quart-sized jars.
Step 5: Build the Brine
In a medium saucepan, combine the white vinegar, apple cider vinegar, water, sugar, mustard seeds, celery seeds, turmeric, black peppercorns, cloves, and garlic if using.
Step 6: Heat Gently
Heat the mixture over medium heat, stirring until the sugar and salt are completely dissolved. Do not let the brine boil, as gentle heat is all that’s needed to dissolve the solids without dulling the brine’s flavor.
Step 7: Pour Over the Vegetables
Carefully pour the warm brine over the cucumbers and onions, making sure they are completely submerged.
Step 8: Cool and Seal
Seal the jars tightly and allow them to cool to room temperature. This step helps prevent pressure buildup inside the jars and preserves the freshness of the spices.
Step 9: Refrigerate and Wait
Refrigerate for at least 24 hours before serving. For the best sweet and tangy flavor, allow the pickles to cure for 5 to 7 days, giving the brine time to fully penetrate each slice.
Tips for the Best Bread and Butter Pickles
Use true pickling cucumbers when possible. Standard slicing cucumbers tend to have thicker skin and more seeds, both of which can result in a softer, less crisp final pickle. Pickling or Kirby cucumbers are specifically bred for their firm texture and thin skin.
Don’t skip the salting step. This is the key to achieving the classic crisp texture in these pickles. Without it, the cucumbers can release excess water once combined with the sweet brine, resulting in a watered-down, less flavorful final product.
Slice the cucumbers and onion to a consistent thickness. Uniform 1/4-inch slices ensure the brine penetrates evenly, resulting in consistently flavored pickles throughout the jar.
Don’t be alarmed by the sweetness. Bread and butter pickles are meant to be noticeably sweeter than a traditional dill pickle. If you prefer a less sweet version, you can reduce the sugar slightly, though this will shift the pickle further from its classic character.
Keep the pickles fully submerged. Any slices poking above the brine line are more susceptible to spoilage and won’t pick up the seasoning as evenly. If needed, use a small, clean, food-safe weight to keep everything submerged.
Be patient for the best flavor. While the pickles are safe to eat after 24 hours, the full 5 to 7 day curing period allows the sweet, tangy, and spiced flavors to fully develop throughout each slice, and they become even more delicious as the spices continue to infuse over time.
Flavor Variations to Try
Once you’ve made the classic version, here are a few ways to customize Bread and Butter Pickles to your taste.
Spicy Bread and Butter Version: Add a sliced jalapeño or a pinch of crushed red pepper flakes to the brine for a spicy twist on the classic sweet-and-tangy flavor.
Extra Sweet Version: Increase the sugar slightly for an even sweeter pickle that leans further into dessert-pickle territory, popular with those who love a very sweet bite.
Reduced Sugar Version: Decrease the sugar by about a third for a less sweet, more traditionally tangy pickle, while still retaining some of that classic bread and butter character.
Extra Garlicky Version: Increase the garlic for those who want a more pronounced savory depth alongside the sweet and tangy flavors.
Colorful Mixed Version: Add a few thin slices of red bell pepper along with the cucumbers and onions for a more colorful jar with a slightly sweeter overall flavor.
How to Serve Bread and Butter Pickles
These sweet, tangy pickles are wonderfully versatile and perfect for a wide range of dishes.
- On burgers: A classic pairing, adding sweet, tangy crunch that balances the richness of a juicy burger.
- On sandwiches: Layered into a sandwich for a sweet and tangy bite that complements deli meats and cheeses beautifully.
- On hot dogs: Chopped or sliced and piled onto a hot dog for a sweet, tangy topping that’s a beloved classic at cookouts.
- On BBQ platters: Served alongside barbecue dishes as a refreshing, sweet-tangy contrast to smoky, rich meats.
- On charcuterie boards: Arranged alongside cured meats and cheeses for a sweet, colorful addition to any spread.
- Straight from the jar: A simple, satisfying snack that delivers that classic sweet-and-tangy pickle flavor whenever a craving strikes.
Storage Information
Proper storage is key to keeping your Bread and Butter Pickles crisp, flavorful, and safe to eat.
- Store in an airtight jar in the refrigerator. Keep the pickles refrigerated at all times, never at room temperature.
- Use within one month. For the best quality, flavor, and food safety, plan to enjoy your bread and butter pickles within 1 month of making them.
- Keep the pickles fully submerged. This is essential for the best flavor and crisp texture, as any exposed slices are more prone to spoilage and texture loss.
- Expect the flavor to improve over time. These pickles become even more delicious after several days as the spices continue to infuse, so don’t be afraid to let them cure a bit longer for maximum flavor.
- Use clean utensils when serving. Always remove pickles with a clean fork or tongs rather than your fingers to help prevent contamination and extend freshness.
- Watch for signs of spoilage. If you notice an off smell, sliminess, unusual discoloration, or a bulging jar lid, discard the pickles immediately.
Recipe Overview
- Prep Time: 20 minutes
- Cook Time: 10 minutes
- Total Time: 30 minutes (plus chilling time)
- Servings: 10
- Calories: Approximately 45 per serving
Frequently Asked Questions
How long do Bread and Butter Pickles need to cure before eating them? At a minimum, refrigerate the pickles for 24 hours so the brine has time to penetrate. For the best sweet and tangy flavor, allow them to cure for 5 to 7 days.
Why are Bread and Butter Pickles so sweet compared to other pickles? This is simply the defining characteristic of the style. Unlike dill pickles, which lean into sour, tangy flavors, bread and butter pickles are built around a generous amount of sugar in the brine, creating their signature sweet-and-tangy taste.
Why do I need to salt the cucumbers and onions before pickling? Salting draws out excess moisture from the vegetables, which helps concentrate their flavor and prevents the finished pickles from becoming watery once combined with the sweet brine.
Do I need to boil the brine? No. You only need to heat the brine gently, just until the sugar and salt dissolve completely. A full boil isn’t necessary and can dull some of the brine’s fresher flavors.
Can I use regular cucumbers instead of pickling cucumbers? While standard slicing cucumbers can work in a pinch, pickling cucumbers, such as Kirby cucumbers, have thinner skin and fewer seeds, resulting in a crisper, more traditional final pickle.
Where does the name “bread and butter pickles” come from? The exact origin is debated, but one popular story traces it back to Depression-era farmers who would trade jars of these pickles for staples like bread and butter, giving the pickle its enduring name.
How long do these pickles last in the refrigerator? When stored properly, fully submerged in brine and refrigerated at all times, Bread and Butter Pickles will stay fresh for up to 1 month.
Can I freeze bread and butter pickles? Freezing isn’t recommended, as it will cause the cucumbers to lose their crisp texture and become soft and watery once thawed. Refrigeration is the best storage method for maintaining both flavor and crunch.
Can I reuse the brine for a second batch of pickles? It’s best to make a fresh batch of brine for each new batch of cucumbers and onions, since reusing brine dilutes its sweetness and acidity over time, which can affect both taste and food safety.
Final Thoughts
Bread and Butter Pickles bring that classic, beloved sweet-and-tangy flavor to your kitchen with a straightforward, approachable recipe that’s perfect for both pickling beginners and experienced home cooks. With a generous, well-balanced brine, a touch of turmeric for that signature golden color, and a blend of classic pickling spices, these pickles deliver the crisp, sweet, tangy bite that’s made them a beloved American classic for generations.
Once you make your first batch, don’t be surprised if it becomes a permanent staple in your refrigerator. Gather your ingredients, prep that sweet brine, and get ready to enjoy one of the most nostalgic, crowd-pleasing pickles you’ll ever make at home.
Print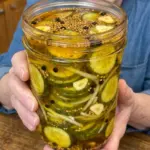
Bread and Butter Pickles
- Total Time: 30 minutes (plus chilling time)
Ingredients
Here’s everything required to make a full batch of Bread and Butter Pickles.
For the vegetables:
-
- 2 lbs pickling cucumbers, thinly sliced
- 1 large sweet onion, thinly sliced
For the brine:
-
- 2 cups white vinegar
- 1 cup apple cider vinegar
-
- 1 cup water
- 1½ cups granulated sugar
- 2 tablespoons pickling salt or kosher salt
Spices and aromatics:
-
- 1 tablespoon mustard seeds
- 1 teaspoon celery seeds
-
- 1 teaspoon turmeric
- 1/2 teaspoon whole black peppercorns
- 1/4 teaspoon ground cloves
- 2 cloves garlic, thinly sliced (optional)
Instructions
Making Bread and Butter Pickles is a straightforward process, and following these steps closely will help you achieve the classic sweet, tangy, crisp result.
Step 1: Prep the Cucumbers and Onion
Wash the cucumbers thoroughly and slice them into 1/4-inch rounds. Thinly slice the sweet onion as well.
Step 2: Salt and Rest
In a large bowl, toss the cucumber slices and onions with the pickling salt. Cover and let them sit for 1 hour to draw out excess moisture. This step is essential for achieving the classic crisp texture and preventing the finished pickles from becoming watery.
Step 3: Drain and Dry
Drain the cucumbers and onions well, then rinse briefly under cold water to remove excess salt. Pat dry with paper towels to ensure the brine coats them properly rather than becoming diluted.
Step 4: Pack the Jars
Pack the cucumber and onion mixture into a large, clean glass jar, or divide it evenly between two quart-sized jars.
Step 5: Build the Brine
In a medium saucepan, combine the white vinegar, apple cider vinegar, water, sugar, mustard seeds, celery seeds, turmeric, black peppercorns, cloves, and garlic if using.
Step 6: Heat Gently
Heat the mixture over medium heat, stirring until the sugar and salt are completely dissolved. Do not let the brine boil, as gentle heat is all that’s needed to dissolve the solids without dulling the brine’s flavor.
Step 7: Pour Over the Vegetables
Carefully pour the warm brine over the cucumbers and onions, making sure they are completely submerged.
Step 8: Cool and Seal
Seal the jars tightly and allow them to cool to room temperature. This step helps prevent pressure buildup inside the jars and preserves the freshness of the spices.
Step 9: Refrigerate and Wait
Refrigerate for at least 24 hours before serving. For the best sweet and tangy flavor, allow the pickles to cure for 5 to 7 days, giving the brine time to fully penetrate each slice.
- Prep Time: 20 minutes
- Cook Time: 10 minutes
Nutrition
- Serving Size: 10
- Calories: Approximately 45 per serving