Introduction to Turquoise Sea Urchin Crystals
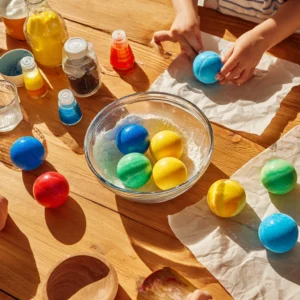
Creating beautiful decor pieces can be a fulfilling way to express your creativity while adding a personal touch to your home. If you’re a busy mom or professional looking for a simple yet stunning project, crafting with turquoise sea urchin crystals is the perfect solution. These unique shells, combined with a bit of resin and creativity, can transform your living space into a coastal paradise. Let’s dive into this DIY project that not only beautifies your home but also provides a relaxing escape from your daily routine.
Why You’ll Love This Turquoise Sea Urchin Crystals
You’ll adore this project for its blend of creativity, affordability, and simplicity. Turquoise sea urchin crystals are not only visually striking but also easy to work with, making them ideal for crafters of all skill levels. Plus, you can create stunning decor pieces without breaking the bank, allowing you to enjoy a beautiful home without the hefty price tag.
Materials Needed for Turquoise Sea Urchin Crystals
To get started on your turquoise sea urchin crystals project, gather the following materials:
- Turquoise sea urchin shells – 5: These will serve as the base for your decor.
- Clear epoxy resin – 1 cup: This will create a glossy finish and hold everything together.
- Glitter – 2 tablespoons: Adds sparkle and enhances the coastal theme.
- LED fairy lights – 1 string: Provides a magical glow to your finished pieces.
- Paintbrush – 1: For applying the resin mixture.
For a printable full list of materials, see below.
Tools Required for Turquoise Sea Urchin Crystals
Before you start crafting, make sure you have the following tools on hand:
- Mixing cup: For combining the resin and glitter.
- Stirring stick: To mix the resin thoroughly.
- Protective gloves: Essential for keeping your hands safe from the resin.
- Drop cloth: To protect your workspace from spills.
How to Make Turquoise Sea Urchin Crystals
Follow these step-by-step instructions to create your stunning turquoise sea urchin crystals:
- Prepare Your Workspace: Lay down a drop cloth to protect your surfaces from any resin spills.
- Wear Protective Gear: Put on your protective gloves to keep your skin safe while working with epoxy resin.
- Mix the Epoxy Resin: In a mixing cup, combine the clear epoxy resin according to the package instructions.
- Add Glitter: Stir in the glitter to the resin mixture until well combined, creating a sparkly effect.
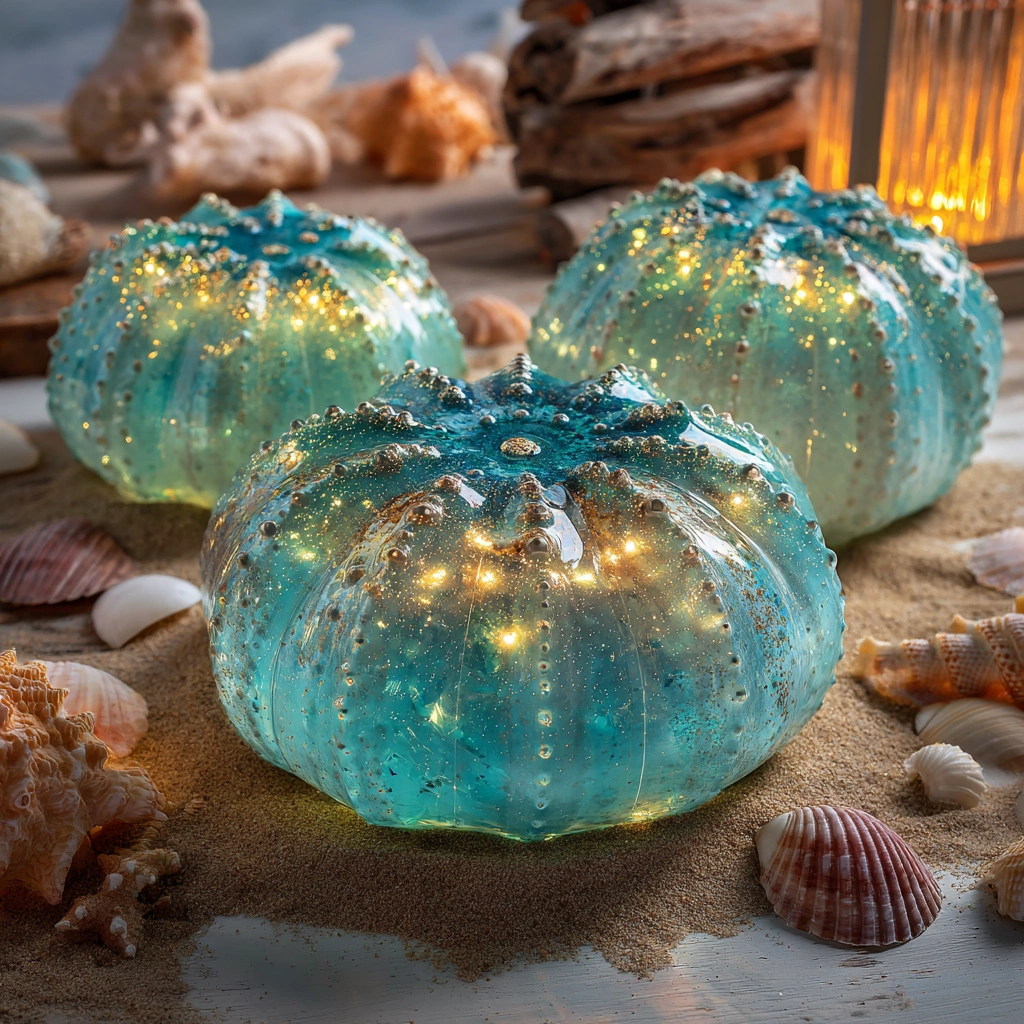
- Fill the Sea Urchin Shells: Carefully fill each turquoise sea urchin shell with the glittery resin mixture.
- Insert LED Fairy Lights: While the resin is still wet, gently insert the LED fairy lights into the shells, ensuring they are evenly distributed.
- Allow to Cure: Let the resin cure completely as per the instructions on the packaging. This may take up to 24 hours.
- Display Your Creations: Once cured, your beautiful turquoise sea urchin crystals are ready to be displayed as stunning decor pieces.
Tips for Best Results
To ensure your crafting experience is smooth and successful, consider these practical tips:
- Experiment with different colors of glitter for unique effects.
- Use a small funnel to help fill the sea urchin shells without spilling.
- Consider adding small seashells or sand for added texture.
Project Variations
Feel free to get creative with your turquoise sea urchin crystals! Here are some variations to consider:
- Color Changes: Use different shades of glitter to match your home decor.
- Seasonal Adaptations: Incorporate seasonal elements like autumn leaves or holiday-themed decorations.
- Style Variations: Combine with other coastal elements like driftwood or coral for a more eclectic look.
Decoration and Usage Ideas
Once your turquoise sea urchin crystals are complete, here are some ideas on where and how to use them:
- Table Centerpieces: Place them on your dining or coffee table for a coastal vibe.
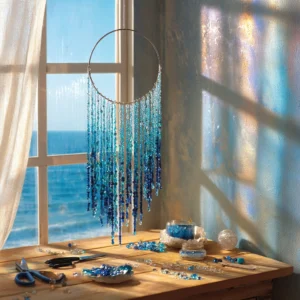
- Window Sills: Brighten up your windows with these eye-catching decor pieces.
- Outdoor Spaces: Use them to enhance your patio or garden area.
- Gift Ideas: These make wonderful handmade gifts for friends and family.
FAQs about Turquoise Sea Urchin Crystals
Q: Can I use other types of shells?
A: Yes, you can experiment with different shell types, but ensure they are sturdy enough to hold the resin.
Q: How long does the resin take to cure?
A: Curing time can vary, but it typically takes about 24 hours for the resin to fully harden.
Q: Is this project safe for kids?
A: This project involves epoxy resin, which should be handled by adults. Kids can assist with supervision.
Final Thoughts
Crafting with turquoise sea urchin crystals is not just a fun DIY project; it’s a way to bring a piece of the ocean into your home. As you create these stunning decor pieces, you’ll find joy in the process and satisfaction in your finished work. So gather your materials, unleash your creativity, and enjoy the calming experience of crafting. Your home will thank you for the beautiful coastal touch!
Introduction to Turquoise Sea Urchin Crystals
Creating beautiful decor pieces can be a fulfilling way to express your creativity while adding a personal touch to your home. If you’re a busy mom or professional looking for a simple yet stunning project, crafting with turquoise sea urchin crystals is the perfect solution. These unique shells, combined with a bit of resin and creativity, can transform your living space into a coastal paradise. Let’s dive into this DIY project that not only beautifies your home but also provides a relaxing escape from your daily routine.
Why You’ll Love This Turquoise Sea Urchin Crystals
You’ll absolutely adore this project for its delightful blend of creativity, affordability, and simplicity. As a busy mom, I often find myself juggling multiple responsibilities, and I cherish any opportunity to unwind and express my artistic side. Crafting with turquoise sea urchin crystals is a perfect escape that allows me to do just that.
These unique shells are not only visually striking but also incredibly easy to work with. I remember my first attempt at this project; I was pleasantly surprised by how quickly I was able to create something beautiful. The vibrant turquoise color of the sea urchin shells instantly brightens up any space, making them ideal for crafters of all skill levels. Whether you’re a seasoned DIY enthusiast or just starting out, you’ll find this project accessible and enjoyable.
One of the best parts? You can create stunning decor pieces without breaking the bank! I love that I can transform my home into a coastal paradise without spending a fortune. The materials are relatively inexpensive, and the end result is a beautiful piece that feels luxurious and unique. It’s a win-win situation that allows me to enjoy a beautiful home without the hefty price tag.
So, if you’re looking for a fun and rewarding way to add a personal touch to your living space, crafting with turquoise sea urchin crystals is the perfect solution. Trust me, you’ll find joy in the process and satisfaction in your finished work!
Materials Needed for Turquoise Sea Urchin Crystals
To get started on your turquoise sea urchin crystals project, gather the following materials:
- Turquoise sea urchin shells – 5: These will serve as the base for your decor. I love how each shell has its own unique texture and color, making every piece one-of-a-kind.
- Clear epoxy resin – 1 cup: This will create a glossy finish and hold everything together. When I first used resin, I was amazed at how it transformed the shells into something truly stunning.
- Glitter – 2 tablespoons: Adds sparkle and enhances the coastal theme. You can choose different colors to match your decor; I often mix shades for a more dynamic look!
- LED fairy lights – 1 string: Provides a magical glow to your finished pieces. The soft light creates a cozy atmosphere, perfect for any room in your home.
- Paintbrush – 1: For applying the resin mixture. A good brush makes all the difference in achieving a smooth finish.
*For a printable full list of materials, see below.*
Tools Required for Turquoise Sea Urchin Crystals
Before you start crafting, make sure you have the following tools on hand:
- Mixing cup: This is essential for combining the resin and glitter. I recommend using a disposable cup to make cleanup easier!
- Stirring stick: A simple wooden stick or even a popsicle stick works great for mixing the resin thoroughly. I always keep a few on hand for various projects.
- Protective gloves: These are essential for keeping your hands safe from the resin. Trust me, you don’t want to deal with sticky fingers!
- Drop cloth: To protect your workspace from spills. I like to use an old tablecloth or a plastic sheet to make cleanup a breeze.
Having the right tools ready can make your crafting experience much smoother. I’ve learned the hard way that being prepared saves time and frustration, especially when you’re juggling a busy schedule. So gather your tools, and let’s get crafting!
How to Make Turquoise Sea Urchin Crystals
Follow these step-by-step instructions to create your stunning turquoise sea urchin crystals:
- Prepare Your Workspace: Lay down a drop cloth to protect your surfaces from any resin spills. I always find that having a clean and organized workspace helps me focus and enjoy the crafting process more.
- Wear Protective Gear: Put on your protective gloves to keep your skin safe while working with epoxy resin. Trust me, this step is crucial! Resin can be tricky, and you want to avoid any sticky situations.
- Mix the Epoxy Resin: In a mixing cup, combine the clear epoxy resin according to the package instructions. I like to take my time with this step, ensuring that I mix it thoroughly for the best results.
- Add Glitter: Stir in the glitter to the resin mixture until well combined, creating a sparkly effect. This is where the magic happens! I love watching the glitter swirl and blend into the resin, transforming it into something special.
- Fill the Sea Urchin Shells: Carefully fill each turquoise sea urchin shell with the glittery resin mixture. I recommend using a small spoon or a dropper to avoid spills. It’s a bit like filling a delicate cupcake; you want to be gentle yet precise!
- Insert LED Fairy Lights: While the resin is still wet, gently insert the LED fairy lights into the shells, ensuring they are evenly distributed. This step adds a whimsical touch that truly brings your creations to life.
- Allow to Cure: Let the resin cure completely as per the instructions on the packaging. This may take up to 24 hours. I know it’s hard to wait, but trust me, the end result will be worth it!
- Display Your Creations: Once cured, your beautiful turquoise sea urchin crystals are ready to be displayed as stunning decor pieces. I love placing mine on my coffee table or in a sunny window where they can catch the light and sparkle.
Tips for Best Results
To ensure your crafting experience is smooth and successful, consider these practical tips that I’ve learned through my own crafting adventures:
- Experiment with Different Colors of Glitter: Don’t be afraid to mix and match! I love using various shades of glitter to create unique effects. For instance, combining turquoise with silver or gold can give your turquoise sea urchin crystals a stunning, multi-dimensional look. It’s like painting with light!
- Use a Small Funnel: Filling the sea urchin shells can be a bit tricky, especially if you want to avoid spills. I’ve found that using a small funnel makes this process much easier and cleaner. It’s a simple tool that can save you from a messy workspace!
- Consider Adding Small Seashells or Sand: For added texture and a more authentic coastal feel, think about incorporating small seashells or a sprinkle of sand into your design. I often collect tiny shells from my beach trips, and they add a personal touch to my creations. It’s like bringing a piece of the ocean home!
These tips not only enhance the beauty of your turquoise sea urchin crystals but also make the crafting process more enjoyable. Remember, crafting is all about having fun and expressing yourself, so let your creativity shine!
Project Variations
Feel free to get creative with your turquoise sea urchin crystals! One of the most enjoyable aspects of crafting is the ability to personalize your projects, and this one is no exception. Here are some variations to consider that can help you express your unique style:
- Color Changes: Don’t hesitate to experiment with different shades of glitter to match your home decor. I’ve found that using a mix of turquoise and silver creates a stunning effect, especially when the light hits it just right. You can even try pastel colors for a softer look or bold hues for a vibrant statement piece!
- Seasonal Adaptations: Incorporate seasonal elements like autumn leaves or holiday-themed decorations. For instance, during the fall, I love adding tiny faux pumpkins or leaves to my sea urchin crystals. It’s a simple way to keep your decor fresh and in tune with the changing seasons.
- Style Variations: Combine your turquoise sea urchin crystals with other coastal elements like driftwood or coral for a more eclectic look. I often create a small display with my sea urchin crystals, some driftwood, and a few small shells I’ve collected over the years. It tells a story and adds depth to my decor.
These variations not only enhance the beauty of your turquoise sea urchin crystals but also allow you to showcase your creativity. Remember, there are no rules in crafting—just have fun and let your imagination run wild!
Decoration and Usage Ideas
Once your turquoise sea urchin crystals are complete, you’ll be amazed at how versatile they can be! Here are some delightful ideas on where and how to use them in your home:
- Table Centerpieces: Place them on your dining or coffee table for a coastal vibe. I love arranging my sea urchin crystals in a cluster, surrounded by candles or small plants. It creates a stunning focal point that sparks conversation during family dinners or gatherings with friends.
- Window Sills: Brighten up your windows with these eye-catching decor pieces. The way the sunlight dances through the resin and glitter is simply magical! I often place mine in my kitchen window, where they catch the light beautifully, adding a cheerful touch to my day.
- Outdoor Spaces: Use them to enhance your patio or garden area. I’ve found that my turquoise sea urchin crystals look fantastic nestled among potted plants or on outdoor tables. They bring a bit of the beach to my backyard, making it feel like a coastal retreat.
- Gift Ideas: These make wonderful handmade gifts for friends and family. I love giving them as housewarming presents or for special occasions. Each piece is unique, and the personal touch of a handmade gift is always appreciated. You can even customize them with different colors or embellishments to suit the recipient’s style!
These ideas are just the beginning! The beauty of crafting with turquoise sea urchin crystals is that you can let your creativity flow and find new ways to incorporate them into your decor. Whether you’re sprucing up your own space or sharing the joy with others, these stunning pieces are sure to bring a smile to your face.
FAQs about Turquoise Sea Urchin Crystals
Q: Can I use other types of shells?
A: Yes, you can experiment with different shell types, but ensure they are sturdy enough to hold the resin. I’ve tried using clam shells and even some larger conch shells, and they turned out beautifully! Just make sure they can withstand the weight of the resin without cracking.
Q: How long does the resin take to cure?
A: Curing time can vary, but it typically takes about 24 hours for the resin to fully harden. I always set a timer and try to forget about it for a day. It’s like waiting for a cake to bake—so worth it when you finally get to see the finished product!
Q: Is this project safe for kids?
A: This project involves epoxy resin, which should be handled by adults. Kids can assist with supervision, especially in the decorating phase. I often let my kids help with choosing glitter colors or arranging the fairy lights, making it a fun family activity while keeping the resin work to myself.
Final Thoughts
Crafting with turquoise sea urchin crystals is not just a fun DIY project; it’s a way to bring a piece of the ocean into your home. I can’t tell you how many times I’ve found myself lost in the process, feeling the stress of the day melt away as I mix the resin and watch the glitter swirl. Each shell becomes a canvas for my creativity, and the end result is always a delightful surprise.
As you create these stunning decor pieces, you’ll find joy in the process and satisfaction in your finished work. There’s something incredibly rewarding about transforming simple materials into beautiful art that reflects your personal style. I often find myself smiling every time I pass by my creations, reminding me of the fun I had while making them.
So gather your materials, unleash your creativity, and enjoy the calming experience of crafting. Whether you’re decorating your own space or gifting these lovely pieces to friends, you’re sure to spread joy and warmth. Your home will thank you for the beautiful coastal touch, and you might just discover a new favorite hobby along the way!
Print
Turquoise Sea Urchin Crystals Create Stunning DIY Decor.
Description
This DIY project involves creating stunning decor pieces using turquoise sea urchin crystals, perfect for adding a coastal touch to your home.
Instructions
- Prepare your workspace by laying down a drop cloth.
- Put on protective gloves.
- Mix the clear epoxy resin according to the package instructions.
- Add glitter to the resin mixture and stir well.
- Carefully fill the turquoise sea urchin shells with the glittery resin.
- Insert the LED fairy lights into the shells while the resin is still wet.
- Allow the resin to cure completely as per the instructions.
- Once cured, display your beautiful turquoise sea urchin crystals as decor.
Keywords: Turquoise Sea Urchin Crystals, DIY Decor, Coastal Decor, Home Craft