Introduction to Super Bouncy Balls at Home
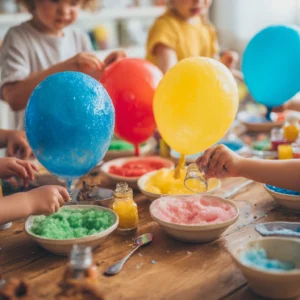
Crafting is a wonderful way to unleash creativity, especially for busy moms and professionals looking to engage with their kids or unwind after a long day. One fun and simple project that can bring joy to both children and adults is making super bouncy balls at home. This DIY craft not only provides a hands-on activity but also results in a playful toy that can be enjoyed for hours. Let’s dive into the world of crafting super bouncy balls and discover how easy it is to create these colorful, fun-filled spheres right in your own kitchen!
Why You’ll Love This Super Bouncy Balls at Home
Creating super bouncy balls at home is a delightful experience that combines creativity, affordability, and simplicity. This project is perfect for busy moms and professionals who want to spend quality time with their kids while making something fun. Plus, the materials are inexpensive and easy to find, making it a budget-friendly activity that can be done in just a few minutes!
Materials Needed for Super Bouncy Balls at Home
To get started on your super bouncy balls, gather the following materials:
- 1/2 cup of white school glue: This is the base for your bouncy ball.
- 1/2 cup of water: Helps to mix the glue and other ingredients smoothly.
- 1/4 cup of cornstarch: Adds thickness and structure to the ball.
- 1/4 cup of baking soda: Provides the bounce factor.
- Food coloring (optional): For adding vibrant colors to your bouncy balls.
- Mixing bowl: To combine all the ingredients.
- Wax paper or silicone mat: For drying the bouncy balls.
*For a printable full list of materials, see below.*
Tools Required for Super Bouncy Balls at Home
You will need the following tools to create your super bouncy balls:
- Measuring cups: To ensure accurate measurements of your ingredients.
- Mixing spoon: For stirring the mixture thoroughly.
- Gloves (optional): If you have sensitive skin, wearing gloves can help prevent irritation from the glue.
How to Make Super Bouncy Balls at Home
Follow these simple step-by-step instructions to create your own super bouncy balls at home:
- Mix Glue and Water: In a mixing bowl, combine the white school glue and water, stirring until well mixed.
- Add Cornstarch and Baking Soda: Add the cornstarch and baking soda to the mixture, stirring until there are no lumps.
- Add Color (Optional): If desired, add a few drops of food coloring and mix until the color is evenly distributed.
- Let It Thicken: Once the mixture is well combined, let it sit for about 10 minutes to thicken.
- Knead the Mixture: After thickening, use your hands to knead the mixture until it forms a ball shape.
- Roll into Balls: Roll the mixture into small balls and place them on wax paper or a silicone mat to dry.
- Drying Time: Allow the balls to dry for at least 24 hours before using them.
I remember the first time I made these super bouncy balls with my kids. We were all giggling as we mixed the ingredients, and the anticipation of waiting for them to dry was almost unbearable! But once they were ready, the joy on their faces was priceless. It’s moments like these that remind me why I love crafting so much.
So, gather your materials and let’s get bouncing! This project is not just about the end product; it’s about the laughter and memories created along the way.
Why You’ll Love This Super Bouncy Balls at Home
Creating super bouncy balls at home is a delightful experience that combines creativity, affordability, and simplicity. As a busy mom, I often find myself juggling work, household chores, and family time. This project is perfect for those moments when I want to engage with my kids while also enjoying a bit of creative fun.
The best part? The materials are inexpensive and easy to find! I remember the first time I decided to make these bouncy balls; I was amazed at how quickly I could gather everything from my kitchen. With just a few common ingredients like white school glue and baking soda, I was ready to embark on a crafting adventure with my children.
Not only is this a budget-friendly activity, but it also takes minimal time to set up. In just 10 minutes of prep and 15 minutes of crafting, we were on our way to creating colorful, bouncy spheres. The anticipation of waiting for them to dry was almost as exciting as the bouncing itself!
This project is not just about making toys; it’s about creating lasting memories. I cherish the laughter and joy that filled our kitchen as we mixed, kneaded, and rolled our creations. It’s a wonderful way to bond with your kids, and I encourage you to give it a try. You’ll find that the joy of crafting lies not only in the final product but in the shared experience of creating something together.
Materials Needed for Super Bouncy Balls at Home
To get started on your super bouncy balls, gather the following materials:
- 1/2 cup of white school glue: This is the base for your bouncy ball.
- 1/2 cup of water: Helps to mix the glue and other ingredients smoothly.
- 1/4 cup of cornstarch: Adds thickness and structure to the ball.
- 1/4 cup of baking soda: Provides the bounce factor.
- Food coloring (optional): For adding vibrant colors to your bouncy balls.
- Mixing bowl: To combine all the ingredients.
- Wax paper or silicone mat: For drying the bouncy balls.
*For a printable full list of materials, see below.*
Tools Required for Super Bouncy Balls at Home
You will need the following tools to create your super bouncy balls:
- Measuring cups: To ensure accurate measurements of your ingredients. I always find that having the right tools makes the process smoother and more enjoyable.
- Mixing spoon: For stirring the mixture thoroughly. A sturdy spoon can make all the difference when it comes to blending those ingredients together!
- Gloves (optional): If you have sensitive skin, wearing gloves can help prevent irritation from the glue. I learned this the hard way during my first crafting session, so I always keep a pair handy now!
Having the right tools not only makes the crafting process easier but also adds to the fun! I remember the excitement of gathering everything together with my kids, turning it into a mini adventure. So, let’s get those tools ready and dive into the world of crafting super bouncy balls at home!
How to Make Super Bouncy Balls at Home
Follow these simple step-by-step instructions to create your own super bouncy balls:
Step 1: Mix Glue and Water
In a mixing bowl, combine the white school glue and water, stirring until well mixed. I love watching the glue swirl into the water, creating a milky mixture that feels like magic!
Step 2: Add Cornstarch and Baking Soda
Add the cornstarch and baking soda to the mixture, stirring until there are no lumps. This is where the fun begins! The texture starts to change, and you can feel the mixture thickening.
Step 3: Add Color (Optional)
If desired, add a few drops of food coloring and mix until the color is evenly distributed. I remember my kids’ eyes lighting up as they chose their favorite colors. It’s a great way to personalize each bouncy ball!
Step 4: Let It Thicken
Once the mixture is well combined, let it sit for about 10 minutes to thicken. This is the perfect time to clean up a bit or grab a snack while you wait. The anticipation builds as you think about the bouncy fun ahead!
Step 5: Knead the Mixture
After thickening, use your hands to knead the mixture until it forms a ball shape. This step can get a little messy, but that’s part of the joy! I always encourage my kids to get in there and really feel the texture change.
Step 6: Roll into Balls
Roll the mixture into small balls and place them on wax paper or a silicone mat to dry. I love seeing the colorful little spheres take shape, each one unique and full of potential!
Step 7: Drying Time
Allow the balls to dry for at least 24 hours before using them. This waiting period can be tough, especially for eager little hands, but trust me, the wait is worth it! Once they’re ready, the bouncing begins, and the laughter fills the room.
I cherish these moments spent crafting with my kids. It’s not just about making super bouncy balls at home; it’s about creating memories that will last a lifetime. So, gather your materials and let’s get bouncing!
Tips for Best Results
To ensure your super bouncy balls turn out great, consider these practical crafting tips that I’ve learned through my own experiences:
- Experiment with different colors and sizes: Don’t be afraid to get creative! Mixing colors can lead to beautiful marbled effects, and varying the size of the balls can create different bouncing experiences. I once made a giant bouncy ball that was a hit at my kids’ birthday party!
- Knead the mixture well: This step is crucial for achieving the best bounce. I’ve found that the more I knead, the better the texture becomes. It’s a bit like making bread; the more you work it, the fluffier it gets!
- Store the bouncy balls properly: To maintain their bounce, keep your bouncy balls in a cool, dry place. I like to store ours in a decorative jar on a shelf. Not only does it keep them safe, but it also makes for a fun display that reminds us of our crafting day!
Crafting is all about trial and error, and I’ve had my fair share of mishaps along the way. But each mistake has taught me something valuable. So, embrace the process, and remember that the joy of crafting lies in the journey, not just the destination. Happy crafting!
Project Variations
Get creative with your super bouncy balls! This project is not just about following the recipe; it’s about exploring your imagination and having fun. Here are some exciting variations to try:
- Color Combinations: Mix different colors together for a marbled effect. I remember the first time we tried this; my kids were thrilled to see how the colors swirled and blended. It felt like we were creating little works of art!
- Seasonal Themes: Create bouncy balls in colors that represent different holidays. For instance, red and green for Christmas, pastels for Easter, or orange and black for Halloween. This not only adds a festive touch but also makes for great decorations or gifts during the holidays.
- Size Variations: Make larger or smaller balls for different bouncing experiences. I once made a giant bouncy ball that was a hit at my kids’ birthday party! The kids loved seeing how high it could bounce compared to the smaller ones.
These variations not only enhance the fun but also allow you to tailor the project to your family’s interests and the seasons. I encourage you to experiment and see what unique creations you can come up with. The possibilities are endless, and the joy of crafting is in the exploration!
Decoration and Usage Ideas
Once your super bouncy balls at home are ready, the fun doesn’t stop there! There are so many creative ways to use and display your colorful creations. Here are some of my favorite ideas that I’ve enjoyed with my kids:
- Playtime: These bouncy balls are perfect for games! We love playing catch in the backyard or bouncing them against the wall to see how high they can go. It’s a simple yet entertaining way to get everyone moving and laughing. I remember one afternoon when we had a mini competition to see who could bounce their ball the highest—it was a blast!
- Decorative Items: If you want to add a pop of color to your home, consider placing your bouncy balls in a clear jar or bowl. It makes for a cheerful display on a shelf or table. I often use them as a centerpiece during family gatherings, and they always spark conversations about our crafting adventures.
- Party Favors: These bouncy balls make fantastic party favors for kids’ birthday parties! I’ve given them out at my children’s parties, and the kids absolutely love them. You can even personalize them by adding a little tag with the birthday child’s name or a fun message. It’s a memorable way to thank guests for celebrating with you!
The joy of crafting super bouncy balls at home extends beyond just making them; it’s about finding new ways to enjoy them together. Whether you’re playing games, decorating your space, or sharing them with friends, these bouncy balls are sure to bring smiles and laughter. So, get creative and let the fun continue!
FAQs about Super Bouncy Balls at Home
Q: Can I use other types of glue?
A: While white school glue works best, you can experiment with other types, but results may vary. I’ve tried using clear glue once, and while it worked, the texture was slightly different. It’s all about finding what works for you!
Q: How long do the bouncy balls last?
A: If stored properly, your bouncy balls can last for several weeks. I’ve kept some in a jar on my shelf for months, and they still bounce beautifully! Just make sure to keep them in a cool, dry place to maintain their bounce.
Q: Can I make them larger?
A: Yes! Just adjust the amount of mixture you use to create larger balls. I remember making a giant bouncy ball for my kids’ birthday party, and it was a huge hit! Just keep in mind that larger balls may take a bit longer to dry.
These FAQs are a great way to address common questions and concerns that might pop up while crafting super bouncy balls at home. Remember, crafting is all about experimenting and having fun, so don’t hesitate to try new things and make this project your own!
Final Thoughts
Making super bouncy balls at home is not just a fun craft; it’s an opportunity to bond with your children and unleash your creativity. I can’t tell you how many wonderful memories I’ve created with my kids while crafting these colorful spheres. Each time we gather our materials and dive into the project, it feels like a mini adventure filled with laughter and excitement.
This easy DIY project is perfect for busy moms and professionals looking for a quick and enjoyable activity. With just a few simple ingredients and minimal prep time, you can transform an ordinary afternoon into a delightful crafting session. I often find that these moments spent together are the ones my kids cherish the most, and I love seeing their faces light up as they watch their creations come to life.
So gather your materials, invite your kids to join in, and let the bouncing begin! Whether you’re experimenting with colors, sizes, or even creating themed bouncy balls, the possibilities are endless. Remember, the joy of crafting lies not just in the final product but in the memories you create along the way.
Happy crafting! I can’t wait to hear about your own adventures in making super bouncy balls at home. Let the fun and creativity bounce into your lives!
Print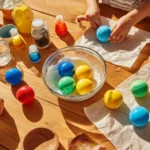
Super Bouncy Balls at Home: Easy DIY Craft Ideas!
Description
This DIY project teaches you how to create super bouncy balls at home using simple ingredients, providing a fun and engaging activity for kids and adults alike.
Instructions
- In a mixing bowl, combine the white school glue and water, stirring until well mixed.
- Add the cornstarch and baking soda to the mixture, stirring until there are no lumps.
- If desired, add a few drops of food coloring and mix until the color is evenly distributed.
- Once the mixture is well combined, let it sit for about 10 minutes to thicken.
- After thickening, use your hands to knead the mixture until it forms a ball shape.
- Roll the mixture into small balls and place them on wax paper or a silicone mat to dry.
- Allow the balls to dry for at least 24 hours before using them.
Keywords: Super Bouncy Balls, DIY Craft, Kids Activities, Home Projects, Fun Crafts