Introduction to Spicy Tuna Sushi Bake Recipe
As a passionate home cook, I find joy in exploring new flavors and sharing delightful dishes with my family and friends. One of my all-time favorites is the Spicy Tuna Sushi Bake. This dish is like a warm hug on a chilly evening, combining the comforting essence of sushi with the heartiness of a baked casserole. It’s a perfect blend of textures and flavors that never fails to impress.
My journey with this recipe began during a cozy dinner party. I wanted to serve something unique, something that would spark conversation and excitement. After some experimentation, I stumbled upon the idea of a sushi bake. The first bite was a revelation! The creamy, spicy tuna paired with the fluffy sushi rice created a symphony of flavors that danced on my palate. It was a hit, and I knew I had to share it with others.
What I love most about this Spicy Tuna Sushi Bake is its versatility. You can customize it to suit your taste buds, whether you prefer it extra spicy or loaded with fresh veggies. Plus, it’s a fantastic way to introduce sushi to those who might be hesitant about raw fish. The baked version feels more approachable, and trust me, it’s just as delicious!
In this article, I’ll guide you through the ingredients, preparation steps, and tips to make the best Spicy Tuna Sushi Bake. Whether you’re a seasoned chef or a kitchen novice, I promise you’ll find joy in creating this dish. So, roll up your sleeves, and let’s dive into this culinary adventure together!
Ingredients for Spicy Tuna Sushi Bake Recipe
Before we dive into the cooking process, let’s gather all the ingredients for our Spicy Tuna Sushi Bake. Having everything ready makes the cooking experience smoother and more enjoyable. I always find it helpful to lay out my ingredients like a painter with their palette, ready to create a masterpiece!
Main Ingredients
- 2 cups sushi rice
- 2 ½ cups water
- 1 tablespoon rice vinegar
- 1 tablespoon sugar
- ½ teaspoon salt
- 1 can (5 oz) of tuna, drained (I prefer using sushi-grade tuna for the best flavor)
- ¼ cup mayonnaise (Japanese mayo, like Kewpie, adds a delightful creaminess)
- 2 tablespoons sriracha (adjust to your spice preference)
- 1 teaspoon sesame oil
- 1 green onion, finely chopped
- 1 sheet of nori, cut into strips (for garnish)
- 1 cup shredded cheese (I love using a mix of mozzarella and cheddar for that gooey texture)
Optional Add-ons
- 1 avocado, sliced (adds a creamy texture)
- 1 small cucumber, diced (for a refreshing crunch)
- Pickled ginger (for serving)
- Sesame seeds (for garnish)
- Extra sriracha or spicy mayo (for drizzling on top)
When selecting your ingredients, I recommend choosing high-quality sushi rice and fresh tuna. The rice should be sticky enough to hold together, while the tuna should be vibrant and fresh. If you can find it, sushi-grade tuna is the way to go! It makes a world of difference in flavor and texture.
Now that we have our ingredients ready, let’s move on to the next exciting step: preparing the sushi rice!
How to Prepare Spicy Tuna Sushi Bake Recipe
Now that we have our ingredients ready, it’s time to roll up our sleeves and get cooking! Preparing the Spicy Tuna Sushi Bake is a delightful journey, and I can’t wait to share each step with you. Let’s dive right in!
Step 1: Prepare the Sushi Rice
First things first, we need to cook the sushi rice. This step is crucial because the rice is the foundation of our dish. Here’s how to do it:
- Rinse the sushi rice under cold water until the water runs clear. This removes excess starch and helps achieve that perfect sticky texture.
- In a rice cooker or pot, combine the rinsed rice and water. Let it soak for about 30 minutes. This helps the rice absorb water and cook evenly.
- Cook the rice according to your rice cooker instructions or bring it to a boil, then reduce the heat to low, cover, and simmer for about 18-20 minutes.
- Once cooked, remove it from heat and let it sit, covered, for another 10 minutes. This allows the rice to steam and become fluffy.
- In a small bowl, mix the rice vinegar, sugar, and salt until dissolved. Gently fold this mixture into the warm rice, being careful not to mash it.
Tips for Cooking Sushi Rice
To achieve the best sushi rice, I recommend using a rice cooker if you have one. It takes the guesswork out of cooking! Also, remember to let the rice cool slightly before using it in the bake. This helps it hold its shape better.
Step 2: Make the Spicy Tuna Mixture
Next up is the star of the show: the spicy tuna mixture! This is where the magic happens, and the flavors start to come together.
- In a mixing bowl, combine the drained tuna, mayonnaise, sriracha, and sesame oil. Use a fork to break up the tuna and mix everything until well combined.
- Add the chopped green onion and mix again. This adds a fresh crunch that complements the creamy tuna.
Tips for Mixing Tuna
When mixing the tuna, be gentle. You want to keep some texture rather than turning it into a paste. If you like it spicier, feel free to add more sriracha to suit your taste!
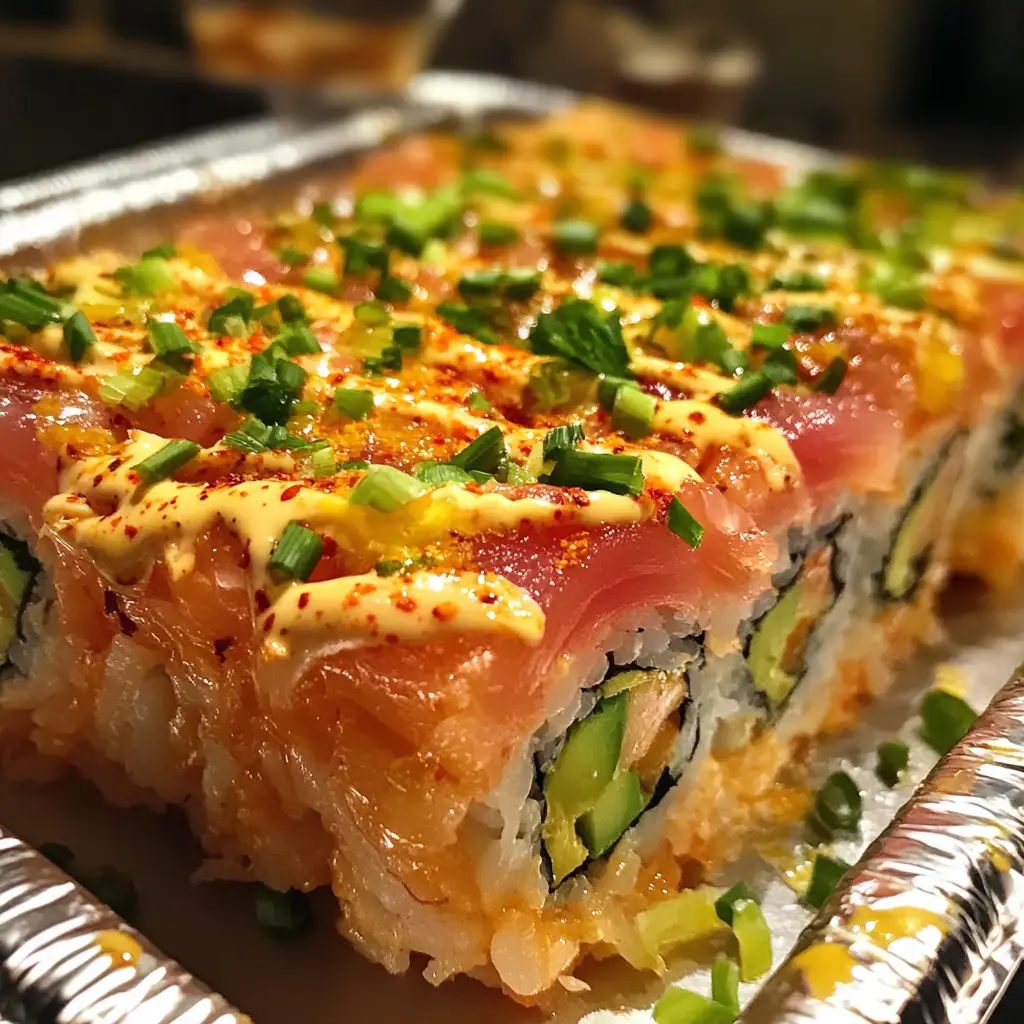
Step 3: Assemble the Sushi Bake
Now comes the fun part—assembling our sushi bake! This is where you can get creative.
- Preheat your oven to 350°F (175°C).
- In a baking dish, spread the prepared sushi rice evenly across the bottom. Use a spatula to press it down gently.
- Next, layer the spicy tuna mixture over the rice, spreading it out evenly.
- Finally, sprinkle the shredded cheese on top. This will melt beautifully and create a deliciously gooey layer.
Tips for Layering Ingredients
Make sure to spread the tuna mixture all the way to the edges of the rice. This ensures every bite is packed with flavor. And don’t skimp on the cheese—it’s the cherry on top!
Step 4: Bake the Dish
We’re almost there! It’s time to bake our creation and let those flavors meld together.
- Place the baking dish in the preheated oven and bake for about 20-25 minutes, or until the cheese is bubbly and golden brown.
- Once done, remove it from the oven and let it cool for a few minutes before serving. This helps the layers set a bit.
Tips for Baking Time and Temperature
Keep an eye on the cheese as it bakes. You want it to be perfectly melted and slightly browned, but not burnt. If you like a little extra crispiness, you can broil it for the last few minutes, but watch it closely!
And there you have it! Your Spicy Tuna Sushi Bake is ready to be enjoyed. The aroma wafting through your kitchen will have everyone eagerly waiting to dig in. Let’s move on to the next section, where we’ll discuss the equipment you’ll need for this delightful dish!
Equipment Needed for Spicy Tuna Sushi Bake Recipe
Before we dive into the deliciousness of the Spicy Tuna Sushi Bake, let’s make sure we have the right tools at our disposal. Having the right equipment can make the cooking process smoother and more enjoyable. Here’s what you’ll need:
- Rice Cooker or Pot: A rice cooker is my go-to for perfectly cooked sushi rice. If you don’t have one, a pot with a tight-fitting lid works just as well.
- Baking Dish: A medium-sized baking dish (about 9×9 inches) is perfect for this recipe. If you don’t have one, any oven-safe dish will do.
- Mixing Bowls: You’ll need a couple of mixing bowls for combining the tuna and the rice vinegar mixture. I love using glass bowls because they’re easy to clean!
- Spatula: A spatula is essential for spreading the sushi rice and layering the tuna mixture evenly. A silicone spatula works wonders for this task.
- Fork: A fork is handy for mixing the tuna and breaking it up without turning it into mush.
- Measuring Cups and Spoons: Accurate measurements are key to achieving the best flavor, so don’t skip these!
If you find yourself missing any of these tools, don’t fret! You can often improvise with what you have at home. For example, a regular pot can replace a rice cooker, and a casserole dish can serve as a baking dish. The most important thing is to have fun and enjoy the cooking process!
Variations of Spicy Tuna Sushi Bake Recipe
One of the things I adore about the Spicy Tuna Sushi Bake is its flexibility. You can easily switch things up to suit your taste or to use what you have on hand. Here are a few variations that I’ve tried and loved:
- Salmon Sushi Bake: Swap out the tuna for fresh salmon. The rich, buttery flavor of salmon adds a delightful twist!
- Vegetarian Option: Replace the tuna with a mix of sautéed mushrooms, bell peppers, and zucchini. Add some cream cheese for that creamy texture.
- Spicy Crab Bake: Use imitation crab or real crab meat mixed with spicy mayo for a seafood twist that’s sure to impress.
- Extra Crunch: Add a layer of crispy tempura flakes on top before baking for an added crunch that elevates the dish.
- Cheesy Delight: Experiment with different cheese blends, like pepper jack for a spicy kick or a sharp cheddar for a bolder flavor.
These variations not only keep things exciting but also allow you to cater to different dietary preferences. I love how a simple change can create a whole new experience! So, feel free to get creative and make this dish your own. The possibilities are endless!
Cooking Notes for Spicy Tuna Sushi Bake Recipe
As I’ve experimented with the Spicy Tuna Sushi Bake, I’ve gathered a few cooking notes that can help you achieve the best results. These little tips can make a big difference in your final dish!
- Rice Consistency: The sushi rice should be sticky but not mushy. If it’s too dry, it won’t hold together well. If it’s too wet, it can become gummy. Finding that perfect balance is key!
- Chill the Tuna: For a fresher taste, consider chilling the tuna mixture in the fridge for about 30 minutes before layering it on the rice. This allows the flavors to meld beautifully.
- Layering Technique: When layering, make sure to press down gently but firmly. This helps the layers stick together and makes serving easier.
- Resting Time: After baking, let the dish rest for about 5-10 minutes before serving. This helps the layers set and makes it easier to cut into squares.
- Serving Temperature: While it’s tempting to dive right in, serving the sushi bake warm, but not piping hot, enhances the flavors and textures.
These cooking notes are like little nuggets of wisdom I’ve picked up along the way. They help ensure that every time I make this dish, it turns out just as delicious as the last. Happy cooking!
Serving Suggestions for Spicy Tuna Sushi Bake Recipe
Now that our Spicy Tuna Sushi Bake is ready, it’s time to think about how to serve it! Presentation can elevate the dining experience, and I love to make my dishes look as good as they taste. Here are some serving suggestions that I’ve found to be delightful:
- Garnish with Fresh Ingredients: Top the bake with sliced green onions, sesame seeds, or even a sprinkle of furikake for an extra burst of flavor and color.
- Pair with Sides: Serve the sushi bake alongside a simple salad of mixed greens dressed with a light vinaigrette. The freshness complements the richness of the bake beautifully.
- Accompany with Dipping Sauces: Offer soy sauce, spicy mayo, or even a drizzle of eel sauce on the side for those who enjoy a little extra flavor.
- Serve with Pickled Ginger: A small dish of pickled ginger not only adds a pop of color but also cleanses the palate between bites.
- Use Individual Portions: For a fun twist, consider serving the sushi bake in individual ramekins. This makes for a charming presentation and is perfect for gatherings!
These serving suggestions not only enhance the visual appeal but also add layers of flavor to your meal. I love how a few simple touches can transform a dish into a memorable dining experience. So, gather your loved ones, and enjoy this delicious creation together!
Tips for Making the Best Spicy Tuna Sushi Bake Recipe
As I’ve whipped up my fair share of Spicy Tuna Sushi Bakes, I’ve gathered some golden tips that can elevate your dish to new heights. These little tricks can make all the difference, ensuring that every bite is bursting with flavor and texture. Here’s what I’ve learned:
- Use Fresh Ingredients: Freshness is key! Opt for high-quality sushi-grade tuna and fresh vegetables. The better the ingredients, the tastier your bake will be.
- Adjust the Spice: Don’t be afraid to play with the spice levels. If you love heat, add more sriracha or even a dash of chili oil. Tailor it to your taste!
- Experiment with Cheese: While I love a blend of mozzarella and cheddar, try different cheeses like gouda or pepper jack for a unique twist. Each cheese brings its own character to the dish.
- Layer Wisely: When layering, make sure to spread the ingredients evenly. This ensures that every bite is packed with flavor, not just the edges!
- Don’t Rush the Cooling: Allow the sushi bake to cool for a few minutes after baking. This helps the layers set and makes it easier to cut into perfect squares.
These tips are like little secrets I’ve picked up along my culinary journey. They help me create a Spicy Tuna Sushi Bake that’s not just good, but truly unforgettable. So, keep these in mind as you embark on your own sushi bake adventure!
Breakdown of Time for Spicy Tuna Sushi Bake Recipe
Time management is key in the kitchen, especially when preparing a dish as delightful as the Spicy Tuna Sushi Bake. Knowing how long each step takes can help you plan your cooking session better. Here’s a quick breakdown of the time involved:
- Prep Time: Approximately 30 minutes. This includes gathering your ingredients, rinsing the rice, and preparing the spicy tuna mixture.
- Cooking Time: About 25 minutes. This is the time it takes to bake the dish until the cheese is bubbly and golden brown.
- Total Time: Roughly 55 minutes. This encompasses both prep and cooking time, making it a relatively quick and satisfying meal to whip up!
With this time breakdown, you can easily fit the Spicy Tuna Sushi Bake into your busy schedule. Whether it’s a weeknight dinner or a weekend gathering, this dish is not only delicious but also efficient to prepare. So, let’s get cooking and enjoy every moment in the kitchen!
Nutritional Information for Spicy Tuna Sushi Bake Recipe
As a home cook, I always find it important to consider the nutritional aspects of the dishes I prepare. The Spicy Tuna Sushi Bake is not only delicious but also offers a good balance of nutrients. Here’s a quick overview of the nutritional information per serving, based on the ingredients listed:
- Calories: Approximately 350-400 calories
- Protein: About 20-25 grams (thanks to the tuna and cheese)
- Carbohydrates: Roughly 40-45 grams (mostly from the sushi rice)
- Fat: Around 15-20 grams (from the mayonnaise and cheese)
- Sodium: Approximately 600-700 mg (depending on added sauces and seasonings)
This dish provides a hearty serving of protein and carbohydrates, making it a filling meal. If you’re looking to lighten it up, consider using less cheese or opting for a lighter mayonnaise. You can also add more veggies to boost the fiber content. I love how this recipe can be adjusted to fit different dietary needs while still being incredibly satisfying!
Frequently Asked Questions about Spicy Tuna Sushi Bake Recipe
As I’ve shared my Spicy Tuna Sushi Bake with friends and family, I’ve encountered a few common questions that pop up. It’s always great to clarify any doubts and ensure everyone feels confident in making this delicious dish. Here are some frequently asked questions that I hope will help you on your culinary journey!
Can I use canned tuna for this recipe?
Absolutely! Canned tuna is a convenient option and works perfectly in this recipe. Just make sure to drain it well. If you can find sushi-grade tuna, that’s even better for a fresher taste, but canned tuna is a great alternative!
How can I make this dish gluten-free?
To make your Spicy Tuna Sushi Bake gluten-free, simply use gluten-free soy sauce or tamari instead of regular soy sauce. Additionally, check the labels on your mayonnaise and sriracha to ensure they are gluten-free. It’s easy to adapt this recipe to fit your dietary needs!
Can I prepare this dish ahead of time?
Yes! You can prepare the sushi rice and the spicy tuna mixture a day in advance. Just store them separately in the fridge. When you’re ready to bake, layer them in the dish and pop it in the oven. It’s a great way to save time on busy days!
What can I serve with the Spicy Tuna Sushi Bake?
I love serving this dish with a simple side salad or some pickled ginger. You can also offer dipping sauces like soy sauce or spicy mayo for an extra kick. It pairs wonderfully with fresh veggies or even some crispy seaweed snacks!
How do I store leftovers?
If you have any leftovers (which is rare, but it happens!), store them in an airtight container in the fridge. They should last for about 2-3 days. To reheat, simply pop it in the oven at 350°F (175°C) until warmed through. The flavors will still be delicious!
These questions are just a few of the common inquiries I’ve encountered while sharing my Spicy Tuna Sushi Bake. I hope this section helps clear up any uncertainties you might have. Cooking should be a joyful experience, and I’m here to support you every step of the way!
Conclusion on Spicy Tuna Sushi Bake Recipe
As we wrap up our culinary journey through the Spicy Tuna Sushi Bake, I can’t help but feel a sense of excitement about this dish. It’s more than just a recipe; it’s a delightful experience that brings people together. The warm, creamy layers of spicy tuna and fluffy sushi rice create a comforting meal that’s perfect for any occasion.
What I love most is its versatility. Whether you’re hosting a dinner party or enjoying a cozy night in, this dish adapts beautifully to your needs. Plus, it’s a fantastic way to introduce sushi flavors to those who might be hesitant about raw fish. The baked version feels approachable and satisfying, making it a hit with everyone!
So, gather your ingredients, roll up your sleeves, and dive into this delicious adventure. I hope you find as much joy in making and sharing this Spicy Tuna Sushi Bake as I do. Happy cooking, and may your kitchen always be filled with love and laughter!