Introduction to Rainbow Crystal Jelly Gems
Crafting is a wonderful way to express creativity and bring a splash of color into your home. If you’re a busy mom or professional looking for a fun and easy DIY project, creating Rainbow Crystal Jelly Gems is the perfect solution. These vibrant, gelatin-based gems not only serve as delightful decorations but also make unique gifts for friends and family. In just a few simple steps, you can transform basic ingredients into stunning, colorful creations that brighten up any space.
Why You’ll Love This Rainbow Crystal Jelly Gems
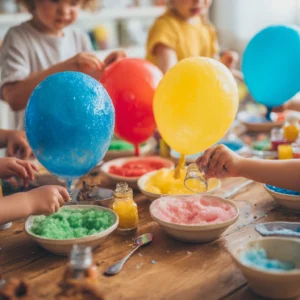
I absolutely adore making Rainbow Crystal Jelly Gems because they are not only visually appealing but also incredibly affordable and simple to make. This project allows me to unleash my creativity while spending quality time with my kids or enjoying a relaxing afternoon. I remember the first time I made these gems; my children were so excited to help mix the colors and pour them into the molds. The satisfaction of crafting something beautiful with my own hands is unmatched, and I know you’ll feel the same way!
Materials Needed for Rainbow Crystal Jelly Gems
To create your Rainbow Crystal Jelly Gems, you will need the following materials:
- Gelatin – 2 packets (this is the base for your gems)
- Water – 2 cups (to dissolve the gelatin)
- Food coloring – various colors (for the rainbow effect)
- Sugar – 1 cup (to sweeten your gems)
- Flavoring (optional) – 1 tsp (to add a unique taste)
*For a printable full list of materials, see below.*
Tools Required for Rainbow Crystal Jelly Gems
Before you start crafting, gather the following tools:
- Mixing bowl – for combining your ingredients
- Whisk – to ensure everything is well mixed
- Measuring cups – for accurate ingredient measurements
- Measuring spoons – for precise flavoring
- Silicone molds – to shape your jelly gems
- Refrigerator – for setting the gems
*If you don’t have silicone molds, you can use any small containers or ice cube trays.*
How to Make Rainbow Crystal Jelly Gems
Creating Rainbow Crystal Jelly Gems is a delightful process that I find incredibly rewarding. The first time I attempted this project, I was amazed at how simple it was to turn ordinary ingredients into something so beautiful. Here’s how you can make your own stunning gems in just a few easy steps:
Step 1: Combine Gelatin and Sugar
In a mixing bowl, I start by combining the gelatin and sugar. This mixture forms the base of my jelly gems, and the sweet aroma of sugar always brings a smile to my face.
Step 2: Dissolve in Boiling Water
Next, I boil the water and pour it into the bowl, whisking until the gelatin and sugar dissolve completely. Be careful here; the steam can be quite hot! I always remind myself to take my time and enjoy the process.
Step 3: Divide the Mixture
Once everything is dissolved, I divide the mixture into separate bowls for each color I want to create. This is where the fun really begins!
Step 4: Add Food Coloring
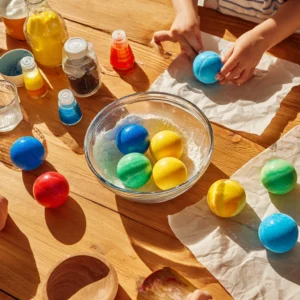
I add a few drops of food coloring to each bowl and mix well until I achieve my desired shades. Watching the colors swirl together is like painting a masterpiece!
Step 5: Layer the Mixtures
Pouring the colored mixtures into silicone molds is my favorite part. I layer them carefully to create a beautiful rainbow effect. It’s like building a colorful tower, and I can’t help but feel excited about the final result.
Step 6: Refrigerate
After pouring, I refrigerate the molds for at least 4 hours or until the gems are set. This waiting period is tough, but it gives me time to clean up and plan how I’ll use my new creations.
Step 7: Remove from Molds
Once set, I carefully remove the jelly gems from the molds. The moment I see those vibrant colors pop out is pure joy!
Step 8: Enjoy!
Finally, I get to enjoy my stunning Rainbow Crystal Jelly Gems as decorations or gifts. They always bring a smile to my face and to those who receive them. I hope you find as much joy in this project as I do!
Why You’ll Love This Rainbow Crystal Jelly Gems
I absolutely adore making Rainbow Crystal Jelly Gems because they are not only visually appealing but also incredibly affordable and simple to make. This project allows me to unleash my creativity while spending quality time with my kids or enjoying a relaxing afternoon. I remember the first time I made these gems; my children were so excited to help mix the colors and pour them into the molds. The satisfaction of crafting something beautiful with my own hands is unmatched, and I know you’ll feel the same way!
One of the best parts about this DIY project is how versatile it is. Whether you’re looking to create a colorful centerpiece for your dining table or a unique gift for a friend, these gems fit the bill perfectly. Plus, the ingredients are easy to find and budget-friendly, making it a great option for busy moms like us who want to craft without breaking the bank.
I also love how this project encourages creativity. You can experiment with different colors, shapes, and even flavors! Each batch of Rainbow Crystal Jelly Gems can be a new adventure, and I find that it sparks joy not just in me, but in my family as well. Watching my kids’ faces light up as they see the vibrant colors come to life is a memory I cherish.
So, if you’re looking for a fun and easy way to brighten your day, I highly recommend diving into this colorful crafting experience. You’ll be amazed at what you can create, and the joy it brings will be worth every minute spent!
Materials Needed for Rainbow Crystal Jelly Gems
To create your Rainbow Crystal Jelly Gems, you will need the following materials:
- Gelatin – 2 packets (this is the base for your gems)
- Water – 2 cups (to dissolve the gelatin)
- Food coloring – various colors (for the rainbow effect)
- Sugar – 1 cup (to sweeten your gems)
- Flavoring (optional) – 1 tsp (to add a unique taste)
*For a printable full list of materials, see below.*
Tools Required for Rainbow Crystal Jelly Gems
Before you start crafting, it’s essential to gather the right tools to make your Rainbow Crystal Jelly Gems experience smooth and enjoyable. Here’s what you’ll need:
- Mixing bowl – This is where the magic begins! I love using a large bowl to combine my ingredients, allowing plenty of space for mixing.
- Whisk – A good whisk is crucial for ensuring everything is well mixed. I find that a sturdy whisk helps dissolve the gelatin and sugar quickly, making the process easier.
- Measuring cups – Accurate measurements are key to a successful batch. I always keep my measuring cups handy to ensure I get the right amount of water and sugar.
- Measuring spoons – These are perfect for adding precise amounts of flavoring. I love experimenting with different flavors, and having the right tools makes it so much easier!
- Silicone molds – These molds are fantastic for shaping your jelly gems. I adore the flexibility of silicone, which makes it easy to pop out the finished gems without any hassle.
- Refrigerator – This is where your gems will set and transform into beautiful creations. I always make sure to clear some space in my fridge before starting this project.
*If you don’t have silicone molds, don’t worry! You can use any small containers or ice cube trays you have on hand. The key is to have fun and be creative with whatever tools you choose!*
How to Make Rainbow Crystal Jelly Gems
Creating Rainbow Crystal Jelly Gems is a delightful process that I find incredibly rewarding. The first time I attempted this project, I was amazed at how simple it was to turn ordinary ingredients into something so beautiful. Here’s how you can make your own stunning gems in just a few easy steps:
Step 1: Combine Gelatin and Sugar
In a mixing bowl, I start by combining the gelatin and sugar. This mixture forms the base of my jelly gems, and the sweet aroma of sugar always brings a smile to my face. It’s the perfect way to kick off this colorful adventure!
Step 2: Dissolve in Boiling Water
Next, I boil the water and pour it into the bowl, whisking until the gelatin and sugar dissolve completely. Be careful here; the steam can be quite hot! I always remind myself to take my time and enjoy the process, as the anticipation builds for the vibrant colors to come.
Step 3: Divide the Mixture
Once everything is dissolved, I divide the mixture into separate bowls for each color I want to create. This is where the fun really begins! I love seeing the different bowls lined up, each ready to be transformed into a rainbow gem.
Step 4: Add Food Coloring
I add a few drops of food coloring to each bowl and mix well until I achieve my desired shades. Watching the colors swirl together is like painting a masterpiece! It’s a moment of pure joy as I see the vibrant hues come to life.
Step 5: Layer the Mixtures
Pouring the colored mixtures into silicone molds is my favorite part. I layer them carefully to create a beautiful rainbow effect. It’s like building a colorful tower, and I can’t help but feel excited about the final result. Each layer adds a new dimension to the gems!
Step 6: Refrigerate
After pouring, I refrigerate the molds for at least 4 hours or until the gems are set. This waiting period is tough, but it gives me time to clean up and plan how I’ll use my new creations. I often find myself daydreaming about the vibrant colors that will soon be ready to shine.
Step 7: Remove from Molds
Once set, I carefully remove the jelly gems from the molds. The moment I see those vibrant colors pop out is pure joy! It’s like unwrapping a present, and I can’t wait to show them off.
Step 8: Enjoy!
Finally, I get to enjoy my stunning Rainbow Crystal Jelly Gems as decorations or gifts. They always bring a smile to my face and to those who receive them. I hope you find as much joy in this project as I do!
Tips for Best Results
As I’ve dived deeper into making Rainbow Crystal Jelly Gems, I’ve picked up a few tips that have truly enhanced my crafting experience. Here are some of my favorite suggestions to ensure your gems turn out beautifully every time:
- Experiment with Different Flavorings: Don’t be afraid to get creative! Adding different flavorings can elevate the taste of your jelly gems. I’ve tried everything from vanilla to fruity extracts, and each batch brings a delightful surprise. It’s a fun way to personalize your gems and make them even more special!
- Use Clear Molds: If you want your colors to really pop, I highly recommend using clear silicone molds. The transparency allows the light to shine through, making the colors appear more vibrant. I love how the finished gems look like little jewels when displayed in a sunny spot!
- Layer Colors Carefully: To create a stunning gradient effect, take your time when layering the colors. Pour slowly and let each layer set slightly before adding the next. This not only adds depth to your gems but also creates a mesmerizing visual that’s sure to impress anyone who sees them.
By following these tips, you’ll be well on your way to crafting the most beautiful Rainbow Crystal Jelly Gems that will brighten up your home or make perfect gifts. Happy crafting!
Project Variations
One of the things I love most about creating Rainbow Crystal Jelly Gems is the endless possibilities for customization. Each time I make a batch, I find myself experimenting with different styles and colors, which keeps the crafting experience fresh and exciting. Here are some fun project variations to inspire your creativity:
- Style Variations: Don’t limit yourself to just one shape! Try using different molds, such as stars, hearts, or even seasonal shapes like pumpkins or snowflakes. Each unique shape adds a special touch to your gems, making them perfect for various occasions.
- Color Changes: If you’re looking for a softer look, consider using pastel colors for your gems. They create a delicate and charming aesthetic that’s perfect for springtime or baby showers. On the other hand, if you want to make a bold statement, neon colors can add a fun and vibrant twist to your creations!
- Seasonal Adaptations: Get into the holiday spirit by creating themed gems! For Christmas, use red and green colors to make festive treats. For Halloween, orange and black can create spooky delights. You can even make pastel shades for Easter or warm tones for Thanksgiving. The possibilities are endless, and it’s a great way to celebrate the seasons with your crafting!
By exploring these variations, you can turn your Rainbow Crystal Jelly Gems into personalized treasures that reflect your style and the spirit of the occasion. I can’t wait to see what creative twists you come up with!
Decoration and Usage Ideas
Once you’ve created your stunning Rainbow Crystal Jelly Gems, the fun doesn’t stop there! There are so many creative ways to showcase and use these colorful gems that can brighten up any space or occasion. Here are some of my favorite ideas:
- Home Decor: I love placing my jelly gems in a decorative bowl on my coffee table. The vibrant colors catch the light beautifully, adding a cheerful touch to my living room. You can also scatter them around a centerpiece or use them in a glass jar for a pop of color on a shelf.
- Party Favors: If you’re hosting a gathering, consider wrapping the gems in cellophane and tying them with a colorful ribbon. They make delightful party favors that guests will love to take home. I’ve found that they’re always a hit at birthday parties and baby showers!
- Gift Additions: Want to add a special touch to your gift baskets? Use your Rainbow Crystal Jelly Gems as a colorful addition! They not only look beautiful but also add a sweet treat for the recipient to enjoy. I often include them in gifts for friends and family, and they always appreciate the personal touch.
- Kids’ Parties: These gems are a fantastic treat for children’s birthday parties. I’ve served them as a fun dessert, and the kids absolutely love the vibrant colors and unique shapes. You can even let the kids help make them as a fun activity during the party!
With these decoration and usage ideas, your Rainbow Crystal Jelly Gems will not only be a joy to create but also a delightful addition to your home and celebrations. I can’t wait to see how you choose to showcase your colorful creations!
FAQs about Rainbow Crystal Jelly Gems
As I’ve shared my love for creating Rainbow Crystal Jelly Gems, I often get questions from fellow crafters and curious friends. Here are some of the most common FAQs that I’ve encountered, along with my answers to help you on your crafting journey:
Q: How long do the jelly gems last?
A: When stored in an airtight container in the refrigerator, they can last up to a week. I always make sure to keep them sealed to maintain their freshness and vibrant colors. It’s a great way to enjoy your creations for a little longer!
Q: Can I use other types of gelatin?
A: Yes, you can use flavored gelatin for added taste and color. I’ve experimented with different flavors, and it’s a fun way to customize your Rainbow Crystal Jelly Gems. Just keep in mind that flavored gelatin may alter the texture slightly, but it’s worth trying for a unique twist!
Q: Are these safe for kids?
A: Absolutely! As long as they are supervised during the boiling process and the ingredients are safe for consumption, these gems are a fun and safe project for kids. I love involving my children in the crafting process, and it’s a great way to teach them about colors and creativity while having fun together.
I hope these FAQs help clarify any questions you might have about making your own Rainbow Crystal Jelly Gems. If you have more questions, feel free to reach out! Happy crafting!
Final Thoughts
Creating Rainbow Crystal Jelly Gems is not just a fun DIY project; it’s an opportunity to bond with your family and unleash your creativity. I can’t tell you how many wonderful memories I’ve made while crafting these colorful gems with my kids. Each time we gather around the kitchen table, laughter fills the air as we mix colors and share ideas. It’s a beautiful way to connect and create something special together.
Whether you’re decorating your home or gifting these colorful gems to loved ones, the joy of crafting is truly rewarding. I’ve found that these gems make perfect gifts for birthdays, holidays, or just because. The smiles on my friends’ faces when they receive a handmade gift are priceless, and it warms my heart to know I’ve shared a piece of my creativity with them.
So gather your materials, set aside some time, and let your imagination run wild. Don’t worry if things don’t turn out perfectly; crafting is all about the journey and the joy it brings. You’ll be amazed at what you can create! Each batch of Rainbow Crystal Jelly Gems is a new adventure, and I can’t wait for you to experience the magic of this colorful project. Happy crafting!
Print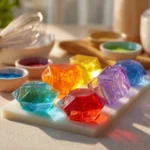
“Create Stunning Rainbow Crystal Jelly Gems Easily!”
Description
This DIY project guides you through creating beautiful and colorful Rainbow Crystal Jelly Gems that can be used for decoration or as unique gifts.
Instructions
- In a mixing bowl, combine the gelatin and sugar.
- Boil the water and pour it into the bowl, whisking until the gelatin and sugar dissolve completely.
- Divide the mixture into separate bowls for each color you want to create.
- Add a few drops of food coloring to each bowl and mix well.
- Pour the colored mixtures into silicone molds, layering them for a rainbow effect.
- Refrigerate the molds for at least 4 hours or until the gems are set.
- Once set, carefully remove the jelly gems from the molds.
- Enjoy your stunning Rainbow Crystal Jelly Gems!
Keywords: Rainbow Crystal Jelly Gems, DIY, Craft, Home Decor, Gifts