
Introduction to Peanut Butter Chocolate Layer Cake
Welcome to the world of indulgence with my Peanut Butter Chocolate Layer Cake! If you’re like me, juggling a busy life while trying to whip up something special can feel overwhelming. This cake is your answer! It’s rich, decadent, and perfect for any celebration, whether it’s a birthday, an anniversary, or just a Tuesday that needs a little sweetness. Imagine the joy on your loved ones’ faces as they dive into layers of chocolate and creamy peanut butter. Trust me, this cake is not just a dessert; it’s a slice of happiness!
Why You’ll Love This Peanut Butter Chocolate Layer Cake
This Peanut Butter Chocolate Layer Cake is a dream come true for busy moms and professionals alike. It’s not only easy to make, but it also comes together quickly, making it a perfect solution for last-minute celebrations. The combination of rich chocolate and creamy peanut butter creates a flavor explosion that will leave everyone asking for seconds. Plus, it’s a guaranteed crowd-pleaser, ensuring smiles all around!
Ingredients for Peanut Butter Chocolate Layer Cake
Gathering the right ingredients is the first step to creating your Peanut Butter Chocolate Layer Cake. Here’s what you’ll need:
- All-purpose flour: This is the backbone of your cake, providing structure and texture.
- Granulated sugar: Sweetness is key! It helps balance the rich flavors of chocolate and peanut butter.
- Unsweetened cocoa powder: For that deep chocolate flavor, choose a high-quality cocoa for the best results.
- Baking powder and baking soda: These leavening agents help your cake rise, making it light and fluffy.
- Salt: A pinch enhances all the flavors, making them pop!
- Large eggs: They bind the ingredients together and add moisture.
- Whole milk: This adds richness and helps create a tender crumb.
- Vegetable oil: For moisture and a soft texture, oil is a great choice over butter in this cake.
- Vanilla extract: A splash of vanilla adds warmth and depth to the flavor.
- Boiling water: This may sound unusual, but it helps to bloom the cocoa, intensifying the chocolate flavor.
- Creamy peanut butter: The star of the show! It brings that luscious, nutty flavor we all love.
- Powdered sugar: This is used for the frosting, giving it a smooth, sweet finish.
- Unsalted butter: Softened butter adds creaminess to the frosting without being overly salty.
- Heavy cream: This helps achieve a silky texture in the frosting, making it spreadable and delicious.
For exact measurements, check the bottom of the article where you can find everything listed for easy printing. Happy baking!
How to Make Peanut Butter Chocolate Layer Cake
Step 1: Preheat and Prepare
First things first, let’s get that oven preheating to 350°F (175°C). This step is crucial for baking success! While the oven warms up, grab two 9-inch round cake pans and grease them well. I like to use a bit of butter or cooking spray to ensure the cakes slide out easily later. You can also line the bottoms with parchment paper for extra insurance. Trust me, there’s nothing worse than a cake that sticks!
Step 2: Mix Dry Ingredients
In a large mixing bowl, combine your dry ingredients. Start with the all-purpose flour, granulated sugar, cocoa powder, baking powder, baking soda, and salt. Whisk them together until they’re well blended. This step is important because it ensures that the leavening agents are evenly distributed throughout the flour. A good mix here means a fluffy cake later! Plus, the aroma of cocoa wafting through your kitchen is simply divine.
Step 3: Combine Wet Ingredients
Now, it’s time to add the wet ingredients to your dry mix. Crack in the eggs, pour in the whole milk, vegetable oil, and vanilla extract. Using a hand mixer or a whisk, mix everything together until it’s smooth and well combined. Don’t worry if it looks a bit thick at first; that’s perfectly normal! This mixture is the foundation of your Peanut Butter Chocolate Layer Cake, so make sure it’s mixed well.
Step 4: Add Boiling Water
Here comes the secret weapon: boiling water! Carefully stir in one cup of boiling water to the batter. This step might seem odd, but it’s essential for blooming the cocoa powder. It intensifies the chocolate flavor and creates a moist cake. The batter will be quite thin, but that’s exactly what you want. It’ll bake up beautifully, so don’t be alarmed by the consistency!
Step 5: Bake the Cakes
Pour the batter evenly into your prepared cake pans. Pop them into the preheated oven and bake for 30-35 minutes. To check for doneness, insert a toothpick into the center of the cakes. If it comes out clean or with just a few crumbs, they’re ready! Keep an eye on them, as oven temperatures can vary. The smell of chocolate will fill your kitchen, and trust me, it’s hard to resist sneaking a taste!
Step 6: Cool the Cakes
Once baked, remove the cakes from the oven and let them cool in the pans for about 10 minutes. This cooling time is crucial; it allows the cakes to firm up a bit. After that, carefully transfer them to wire racks to cool completely. If you skip this step, the frosting might melt right off! Patience is key here, but the wait will be worth it when you taste that first slice.
Step 7: Make the Peanut Butter Frosting
While the cakes cool, let’s whip up that creamy peanut butter frosting! In a separate bowl, beat together the creamy peanut butter, powdered sugar, and softened unsalted butter until it’s smooth and fluffy. Then, add in the vanilla extract and heavy cream. Mix until everything is well combined and has a silky texture. This frosting is the perfect complement to your rich chocolate cake, and you might find yourself sneaking a spoonful or two!
Step 8: Assemble the Cake
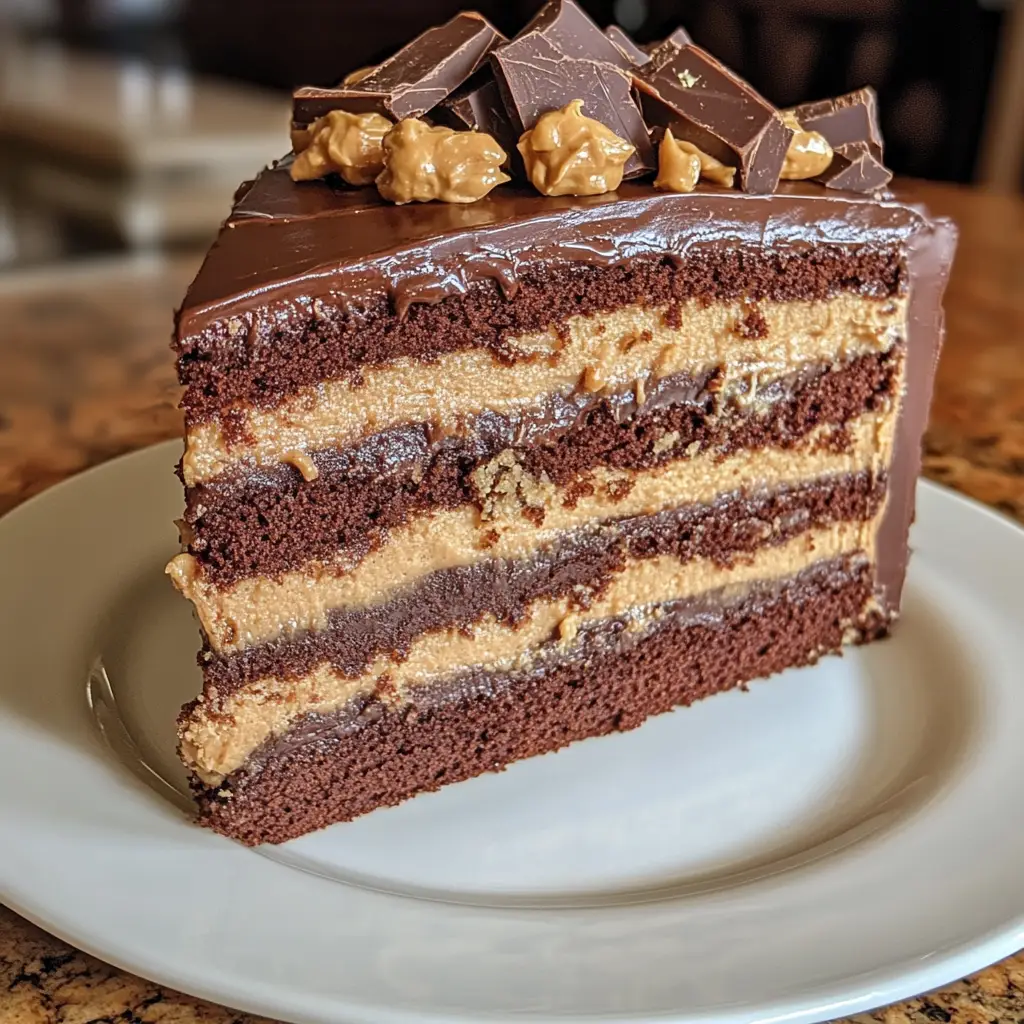
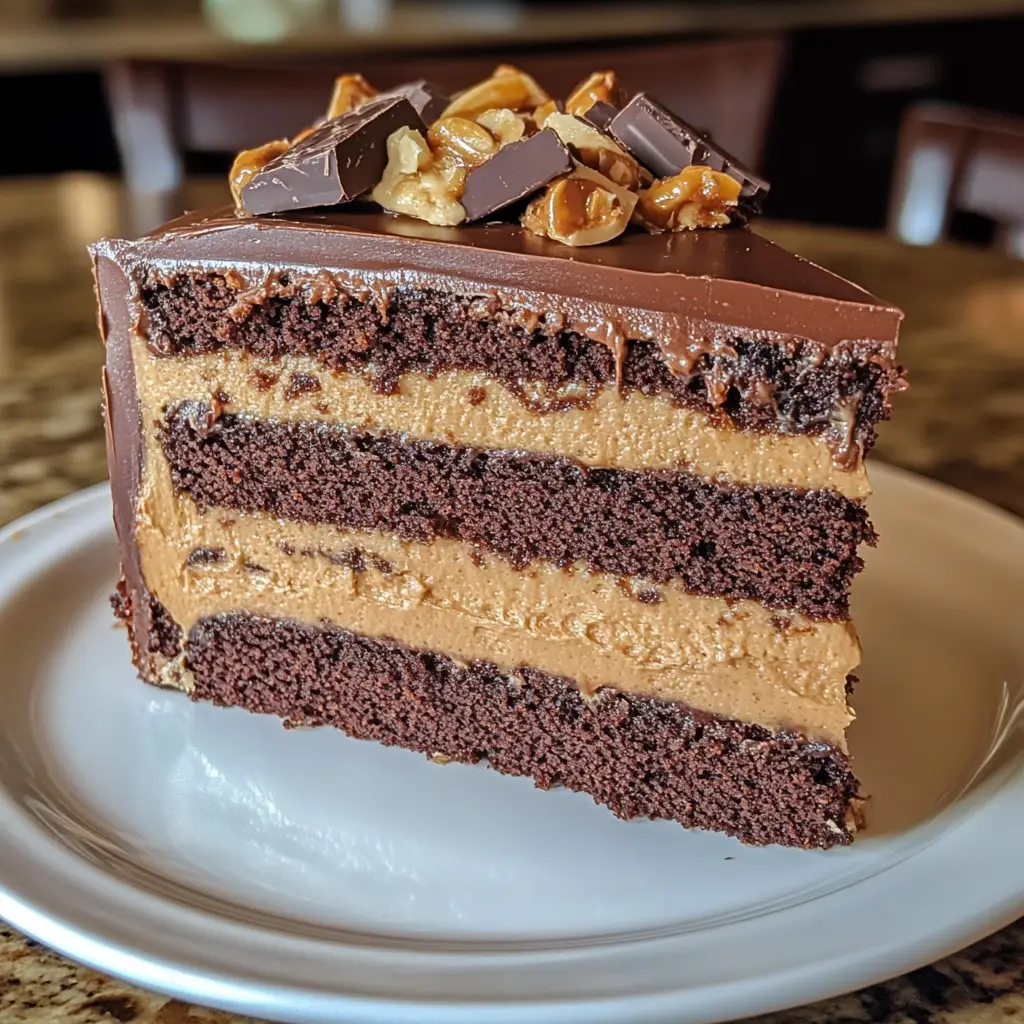
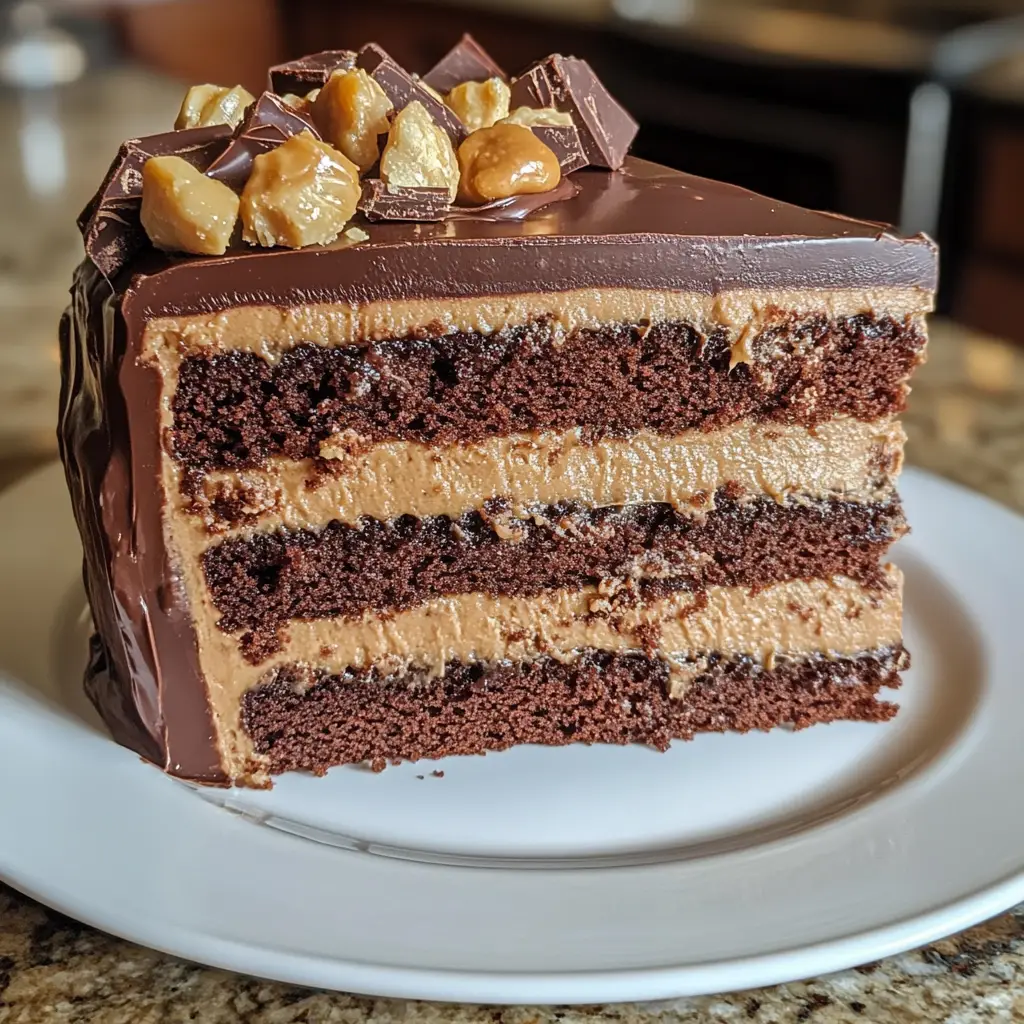
Now comes the fun part—assembling your Peanut Butter Chocolate Layer Cake! Once the cakes are completely cool, place one layer on a serving plate. Spread a generous amount of peanut butter frosting on top, then gently place the second layer on top. Frost the top and sides of the cake with the remaining frosting. For a finishing touch, feel free to decorate with chocolate shavings or a drizzle of extra peanut butter. Your masterpiece is ready to impress!
Tips for Success
- Measure your ingredients accurately for the best results.
- Use room temperature eggs and milk for a smoother batter.
- Don’t skip the cooling time; it helps the cake set properly.
- For a richer flavor, consider using dark chocolate cocoa powder.
- Feel free to customize the frosting with your favorite mix-ins!
Equipment Needed
- Two 9-inch round cake pans (or one 9×13-inch pan for a single layer)
- Mixing bowls (a large one for dry ingredients and a medium one for wet)
- Whisk or hand mixer (a whisk works just fine if you prefer a workout!)
- Measuring cups and spoons (accurate measurements are key!)
- Cooling racks (if you don’t have these, a plate will do in a pinch)
Variations
- Gluten-Free: Substitute all-purpose flour with a gluten-free blend to make this cake gluten-free.
- Nut-Free: Use sun butter or soy nut butter instead of peanut butter for a nut-free version.
- Vegan: Replace eggs with flax eggs and use plant-based milk and butter for a vegan-friendly cake.
- Chocolate Lovers: Add chocolate chips to the batter for an extra chocolatey treat!
- Peanut Butter Lovers: Swirl additional peanut butter into the frosting for a more intense flavor.
Serving Suggestions
- Pair with a scoop of vanilla ice cream for a delightful contrast.
- Serve alongside fresh berries for a pop of color and freshness.
- Drizzle with chocolate sauce for an extra indulgent touch.
- Enjoy with a cup of coffee or a glass of cold milk.
- Garnish with chopped peanuts for added crunch and flavor.
FAQs about Peanut Butter Chocolate Layer Cake
Can I make this Peanut Butter Chocolate Layer Cake ahead of time?
Absolutely! This cake can be made a day in advance. Just store it in an airtight container in the refrigerator. The flavors will meld beautifully overnight, making it even more delicious!
What can I use instead of peanut butter?
If you need a nut-free option, try using sun butter or soy nut butter. They provide a similar creamy texture and flavor without the nuts!
How should I store leftovers?
Store any leftover cake in an airtight container at room temperature for up to three days. If you want to keep it longer, refrigerate it for up to a week.
Can I freeze this cake?
Yes! You can freeze the cake layers before frosting. Just wrap them tightly in plastic wrap and foil. They’ll stay fresh for up to three months. Thaw in the fridge before frosting and serving.
What drinks pair well with this cake?
This Peanut Butter Chocolate Layer Cake pairs wonderfully with a glass of cold milk or a rich cup of coffee. For a fun twist, try it with a chocolate milkshake!
Final Thoughts
Creating this Peanut Butter Chocolate Layer Cake is more than just baking; it’s about crafting memories. Each layer tells a story of love, laughter, and indulgence. As you slice into this cake, you’ll see the joy it brings to your family and friends. The rich chocolate and creamy peanut butter blend together in a way that feels like a warm hug. Whether it’s a special occasion or a simple weeknight treat, this cake is sure to brighten your day. So, roll up your sleeves, embrace the mess, and enjoy every delicious moment of this baking adventure!
Print
Peanut Butter Chocolate Layer Cake: A Slice of Heaven!
- Total Time: 55 minutes
- Yield: 12 servings 1x
- Diet: Vegetarian
Description
A rich and decadent Peanut Butter Chocolate Layer Cake that combines the creamy goodness of peanut butter with the indulgence of chocolate, perfect for any celebration.
Ingredients
- 2 cups all-purpose flour
- 2 cups granulated sugar
- 3/4 cup unsweetened cocoa powder
- 1 1/2 teaspoons baking powder
- 1 1/2 teaspoons baking soda
- 1 teaspoon salt
- 2 large eggs
- 1 cup whole milk
- 1/2 cup vegetable oil
- 2 teaspoons vanilla extract
- 1 cup boiling water
- 1 cup creamy peanut butter
- 1 cup powdered sugar
- 1/2 cup unsalted butter, softened
- 1 teaspoon vanilla extract (for frosting)
- 1/4 cup heavy cream
Instructions
- Preheat the oven to 350°F (175°C) and grease two 9-inch round cake pans.
- In a large bowl, combine flour, sugar, cocoa powder, baking powder, baking soda, and salt.
- Add eggs, milk, oil, and vanilla to the dry ingredients and mix until well combined.
- Stir in boiling water until the batter is smooth.
- Pour the batter evenly into the prepared cake pans.
- Bake for 30-35 minutes or until a toothpick inserted in the center comes out clean.
- Let the cakes cool in the pans for 10 minutes, then transfer to wire racks to cool completely.
- In a separate bowl, beat together peanut butter, powdered sugar, and softened butter until creamy.
- Add vanilla and heavy cream to the peanut butter mixture and mix until smooth.
- Once the cakes are cool, spread the peanut butter frosting between the layers and on top of the cake.
- Decorate with chocolate shavings or additional peanut butter if desired.
Notes
- For a richer flavor, use dark chocolate cocoa powder.
- Store leftovers in an airtight container at room temperature for up to 3 days.
- This cake can be made a day in advance and stored in the refrigerator.
- Prep Time: 20 minutes
- Cook Time: 35 minutes
- Category: Dessert
- Method: Baking
- Cuisine: American
Nutrition
- Serving Size: 1 slice
- Calories: 450
- Sugar: 35g
- Sodium: 300mg
- Fat: 20g
- Saturated Fat: 8g
- Unsaturated Fat: 10g
- Trans Fat: 0g
- Carbohydrates: 60g
- Fiber: 3g
- Protein: 6g
- Cholesterol: 50mg
Keywords: Peanut Butter, Chocolate, Layer Cake, Dessert, Celebration


