
Introduction to Olivier Salad Recipe
Ah, the Olivier Salad! Just the name brings back a flood of memories from family gatherings and festive celebrations. I remember the first time I tasted this delightful dish at my grandmother’s table. The vibrant colors of the vegetables, the creamy dressing, and the savory bits of meat all danced together in perfect harmony. It was love at first bite!
Originating in Russia, this salad has a rich history that dates back to the 1860s. It was created by a French chef named Lucien Olivier, who worked at a famous restaurant in Moscow. Over the years, the recipe has evolved, with each family adding their own twist. For me, it’s not just a salad; it’s a tradition that brings people together. Every holiday season, I find myself in the kitchen, chopping, mixing, and reminiscing about the laughter and stories shared over this dish.
What I adore about the Olivier Salad is its versatility. You can customize it to suit your taste or dietary preferences. Whether you prefer chicken, ham, or even a vegetarian version, the possibilities are endless! Plus, it’s a fantastic way to use up leftover vegetables and proteins. I often find myself raiding the fridge, pulling out whatever I can find, and creating my own unique version of this classic salad.
In this article, I’ll guide you through my favorite Olivier Salad recipe, sharing tips and tricks that I’ve learned along the way. So, grab your apron, and let’s dive into the world of flavors and textures that make this salad a beloved staple in my home!
Ingredients for Olivier Salad Recipe
Before we get our hands dirty in the kitchen, let’s gather all the ingredients for this delightful Olivier Salad. I always believe that the quality of ingredients can make or break a dish. So, let’s make sure we’re using the best of the best!
Main Ingredients
- 2 medium potatoes, peeled and diced
- 2 medium carrots, peeled and diced
- 1 cup frozen peas, thawed
- 1 cup cooked chicken or ham, diced (or a mix of both!)
- 4 hard-boiled eggs, chopped
- 1 medium cucumber, diced (I prefer using pickled cucumbers for an extra zing!)
- 1 cup mayonnaise (homemade or store-bought, but I always opt for homemade for that fresh taste)
- Salt and pepper to taste
When selecting your vegetables, I recommend choosing firm potatoes and vibrant carrots. They should feel heavy for their size, which usually means they’re fresh and full of flavor. And don’t forget to check the expiration date on your mayonnaise if you’re going store-bought!
Optional Add-ons
- 1/2 cup diced bell peppers (for a pop of color)
- 1/2 cup cooked corn (sweet and crunchy!)
- Fresh herbs like dill or parsley (for a fresh finish)
- 1 tablespoon mustard (for a tangy twist)
These optional ingredients can elevate your salad to new heights. I often toss in some fresh dill from my garden, which adds a lovely aroma and flavor. Feel free to get creative! The beauty of the Olivier Salad is that it can be tailored to your taste. If you have leftover roasted vegetables, toss them in! The more, the merrier!
How to Prepare Olivier Salad Recipe
Now that we have all our ingredients ready, it’s time to roll up our sleeves and get cooking! Preparing the Olivier Salad is a delightful process that fills your kitchen with wonderful aromas. I always find it therapeutic to chop and mix, and I can’t wait to share my step-by-step guide with you. Let’s get started!
Step 1: Prepare the Vegetables
First things first, we need to prepare our vegetables. Start by peeling and dicing the potatoes and carrots into small, even pieces. This ensures they cook evenly and blend well in the salad.
Tips for Choosing Fresh Vegetables
- Look for potatoes that are firm and free from blemishes. They should feel heavy for their size.
- Choose bright orange carrots that are crisp and smooth. Avoid any that are soft or shriveled.
- For the cucumbers, pick ones that are firm and have a vibrant color. If you’re using pickled cucumbers, make sure they’re crunchy!
Step 2: Cook the Proteins
Next, it’s time to cook our proteins. If you’re using chicken, boil it in salted water until it’s fully cooked. This usually takes about 15-20 minutes. If you’re opting for ham, you can simply dice it up if it’s already cooked.
Tips for Cooking Chicken or Ham
- For juicy chicken, don’t overcook it! Use a meat thermometer to check that it reaches 165°F (75°C).
- If you have leftover rotisserie chicken, it works perfectly in this salad and saves you time!
- For ham, choose a smoked variety for an extra layer of flavor.
Step 3: Combine Ingredients
Once your vegetables are cooked and cooled, it’s time to combine everything in a large mixing bowl. Add the diced potatoes, carrots, peas, chicken or ham, chopped eggs, and cucumbers. Gently fold the ingredients together to avoid mashing them.
Tips for Mixing Without Mashing
- Use a spatula or wooden spoon to fold the ingredients. This helps keep everything intact.
- Be gentle! You want to maintain the shape of the vegetables and proteins for a beautiful presentation.
Step 4: Add Dressing
Finally, it’s time to add the dressing! Pour in the mayonnaise and sprinkle with salt and pepper. Mix everything together until all the ingredients are well-coated. The dressing should be creamy but not overly thick.
Tips for Achieving the Right Consistency
- If the salad seems too dry, add a little more mayonnaise or a splash of lemon juice for brightness.
- For a lighter version, you can mix in some Greek yogurt with the mayonnaise.
And there you have it! Your Olivier Salad is ready to shine on the table. I always feel a sense of accomplishment when I see the colorful medley of ingredients come together. It’s not just a salad; it’s a celebration of flavors and memories!
Equipment Needed for Olivier Salad Recipe
Before we dive into the kitchen, let’s make sure we have all the necessary tools at our fingertips. Having the right equipment can make the process smoother and more enjoyable. Here’s what you’ll need to whip up this delightful Olivier Salad:
- Cutting Board: A sturdy cutting board is essential for chopping your vegetables and proteins. If you don’t have one, a clean countertop will do in a pinch!
- Sharp Knife: A good knife is key for dicing your ingredients evenly. A paring knife works well for smaller tasks, while a chef’s knife is perfect for larger vegetables.
- Large Mixing Bowl: You’ll need a big bowl to combine all your ingredients. If you don’t have one, any large container will work, just make sure it’s deep enough to prevent spills!
- Measuring Cups and Spoons: Accurate measurements help ensure your salad turns out just right. If you don’t have measuring tools, you can use a regular cup or spoon, but keep in mind that the results may vary.
- Spatula or Wooden Spoon: These are perfect for gently folding your ingredients together without mashing them. If you don’t have either, a large spoon can work too!
- Pot for Boiling: If you’re cooking chicken or potatoes, a pot is necessary. A deep saucepan will do the trick. Just make sure it’s big enough to hold everything comfortably.
With these tools in hand, you’re all set to create your Olivier Salad masterpiece! I always find that having everything organized makes the cooking process more enjoyable. So, let’s get chopping and mixing!
Variations of Olivier Salad Recipe
One of the things I love most about the Olivier Salad is its adaptability. You can easily switch up the ingredients to create a version that suits your taste or dietary needs. Here are a few variations that I’ve tried and absolutely enjoyed:
- Vegetarian Olivier Salad: Swap out the chicken or ham for diced tofu or chickpeas. This version is just as hearty and satisfying!
- Seafood Olivier Salad: For a coastal twist, add cooked shrimp or crab meat. The seafood brings a delightful freshness to the dish.
- Spicy Olivier Salad: If you like a kick, mix in some diced jalapeños or a dash of hot sauce. It adds a fun zing that livens up the flavors!
- Herbed Olivier Salad: Experiment with different herbs like basil or cilantro instead of dill. Each herb brings its own unique flavor profile.
These variations not only keep things interesting but also allow you to use what you have on hand. I often find myself experimenting with whatever leftovers I have in the fridge, and it’s always a delightful surprise to see how each version turns out. So, don’t hesitate to get creative and make this salad your own!
Cooking Notes for Olivier Salad Recipe
As I dive into the world of Olivier Salad, I’ve picked up a few cooking notes that can make your experience even better. These little tips can help you avoid common pitfalls and ensure your salad turns out just right!
- Chill Before Serving: I always recommend letting the salad chill in the fridge for at least an hour before serving. This allows the flavors to meld beautifully, creating a more harmonious taste.
- Make Ahead: If you’re planning for a gathering, you can prepare the salad a day in advance. Just keep it covered in the fridge. It’s a great time-saver!
- Adjust Seasoning: Taste your salad before serving. Sometimes, a little extra salt or a squeeze of lemon can elevate the flavors. Don’t be afraid to adjust to your liking!
- Texture Matters: Aim for a balance of textures. The crunch of the vegetables should complement the creaminess of the dressing. If you find it too mushy, consider adding more fresh ingredients.
These cooking notes have helped me refine my Olivier Salad over the years. Each time I make it, I learn something new, and I hope these tips will enhance your culinary adventure as well!
Serving Suggestions for Olivier Salad Recipe
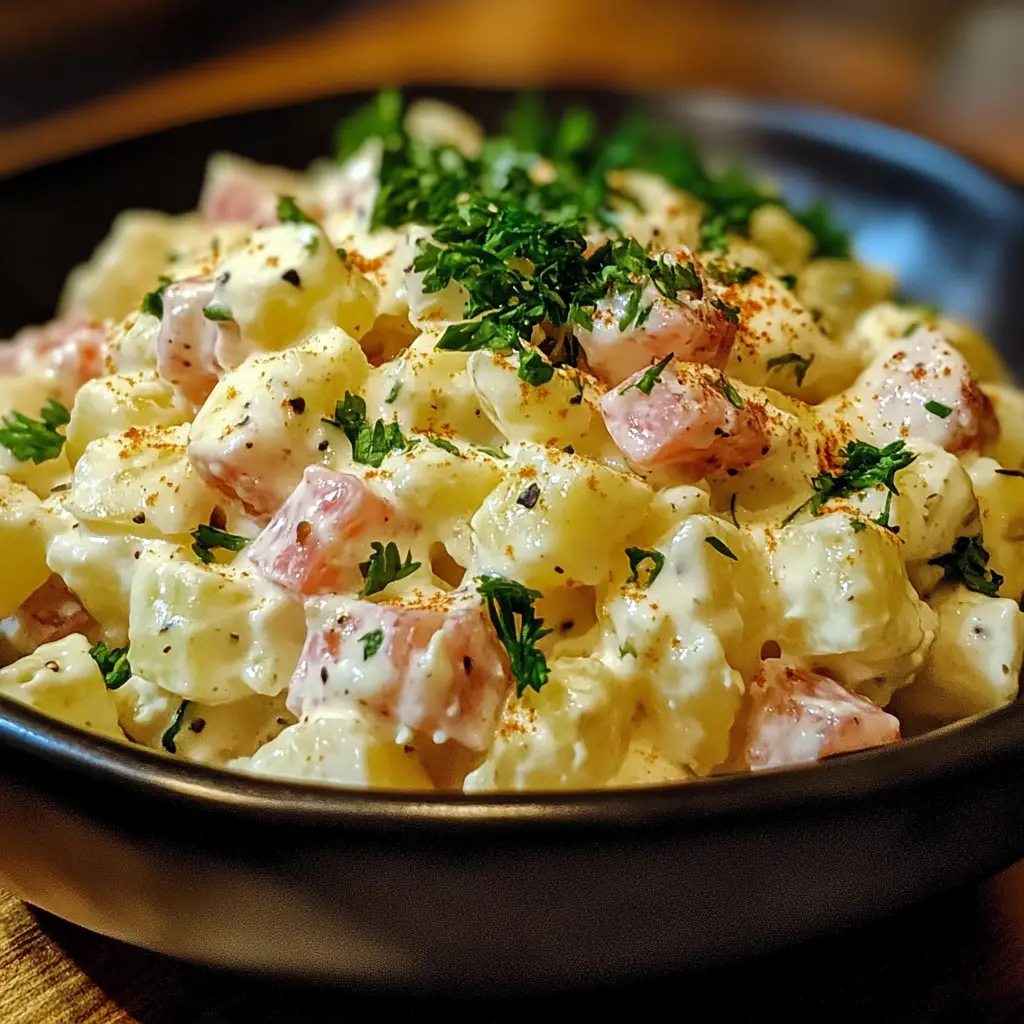
Now that your Olivier Salad is ready, it’s time to think about how to serve it! Presentation can elevate any dish, and this salad is no exception. I love to serve it in a large, colorful bowl that showcases the vibrant ingredients. Here are some of my favorite serving suggestions:
- Chilled Delight: Serve the salad cold, straight from the fridge. The refreshing temperature enhances the flavors and makes it a perfect dish for warm days.
- Garnish with Fresh Herbs: A sprinkle of fresh dill or parsley on top adds a pop of color and a burst of flavor. It’s like a little green crown for your salad!
- Individual Portions: For a more elegant touch, serve the salad in small cups or on individual plates. This makes it easy for guests to enjoy and adds a personal touch.
- Pair with Bread: I often serve Olivier Salad alongside crusty bread or crispy crackers. The crunch complements the creaminess of the salad beautifully.
- Perfect for Buffets: This salad is a fantastic addition to any buffet spread. It pairs well with various dishes, making it a versatile choice for gatherings.
These serving suggestions not only enhance the visual appeal but also create a delightful dining experience. I always find that the way a dish is presented can make it even more enjoyable. So, get creative and have fun with it! Your Olivier Salad is sure to be a hit at any table.
Tips for Making the Best Olivier Salad Recipe
As I’ve journeyed through the world of Olivier Salad, I’ve gathered a treasure trove of tips that can elevate your salad to new heights. These little nuggets of wisdom have transformed my cooking experience, and I’m excited to share them with you!
- Use Fresh Ingredients: Freshness is key! I always choose the ripest vegetables and the best quality proteins. It makes a world of difference in flavor.
- Don’t Rush the Cooling: After cooking your vegetables and proteins, let them cool completely before mixing. This prevents the mayonnaise from becoming runny and keeps the salad crisp.
- Experiment with Textures: I love adding a variety of textures to my salad. Consider including crunchy nuts or seeds for an unexpected twist!
- Balance the Flavors: Taste as you go! A pinch of salt or a dash of vinegar can brighten the flavors. Don’t hesitate to adjust to your liking.
- Let It Rest: Allow the salad to sit in the fridge for a while before serving. This resting time lets the flavors meld together beautifully, creating a more delicious dish.
These tips have helped me create the best Olivier Salad time and time again. I hope they inspire you to experiment and find your own perfect version of this classic dish. Happy cooking!
Breakdown of Time for Olivier Salad Recipe
Now that we’ve covered the ingredients and preparation steps, let’s talk about the time it takes to create this delightful Olivier Salad. I always find it helpful to have a clear idea of how long each part of the process will take. Here’s a quick breakdown:
- Prep Time: 20 minutes – This includes washing, peeling, and chopping all your vegetables and proteins. I like to set aside a little extra time to enjoy the chopping process!
- Cooking Time: 30 minutes – This is the time needed to boil the potatoes, carrots, and chicken. If you’re using pre-cooked ham, you can skip this step!
- Total Time: 50 minutes – In just under an hour, you can have a delicious Olivier Salad ready to impress your family and friends.
Of course, if you’re making this salad ahead of time, you can always chill it in the fridge for an hour or more before serving. This resting time allows the flavors to meld beautifully, making it even more delicious. I often find that the best things in life take a little time, and this salad is no exception!
Nutritional Information for Olivier Salad Recipe
As a passionate home cook, I always pay attention to the nutritional value of the dishes I prepare. The Olivier Salad is not only delicious but also packed with nutrients that can contribute to a balanced diet. Here’s a quick overview of the nutritional information for a typical serving of Olivier Salad:
- Calories: Approximately 250-300 calories per serving, depending on the amount of mayonnaise and proteins used.
- Protein: Around 10-15 grams, thanks to the chicken or ham and eggs, making it a satisfying option.
- Carbohydrates: About 30-35 grams, primarily from the potatoes and carrots, providing a good source of energy.
- Fat: Roughly 15-20 grams, mainly from the mayonnaise. Opting for a lighter version can reduce this number.
- Fiber: Approximately 3-5 grams, thanks to the vegetables, which is great for digestion.
These values can vary based on the specific ingredients and portion sizes you choose. I often find that by using fresh vegetables and lean proteins, I can create a healthier version of this classic dish without sacrificing flavor. Plus, the addition of optional ingredients like bell peppers or herbs can enhance the nutritional profile even further!
So, whether you’re enjoying it as a side dish or a main course, the Olivier Salad can be a delightful and nutritious addition to your meal. It’s all about balance, and I love how this salad brings together so many wholesome ingredients in one bowl!
Frequently Asked Questions about Olivier Salad Recipe
As I’ve shared my love for Olivier Salad, I often get questions from friends and family eager to try their hand at this classic dish. It’s always exciting to see others dive into the culinary adventure! Here are some of the most common questions I receive, along with my answers to help you on your journey:
Can I make Olivier Salad ahead of time?
Absolutely! In fact, I often prepare it a day in advance. Just keep it covered in the fridge. The flavors meld beautifully overnight, making it even tastier when you serve it. Just remember to give it a gentle stir before serving!
What can I substitute for mayonnaise?
If you’re looking for a lighter option, Greek yogurt is a fantastic substitute. It adds creaminess while cutting down on calories. You can also mix yogurt with a bit of mayonnaise for a balanced flavor. I’ve tried this, and it works wonderfully!
Is Olivier Salad gluten-free?
Yes, the traditional Olivier Salad is gluten-free as long as you use gluten-free mayonnaise. Just double-check the labels on any store-bought ingredients to ensure they meet your dietary needs. I always feel good knowing my salad can be enjoyed by everyone!
Can I add fruits to the salad?
While it’s not traditional, adding fruits like diced apples or grapes can bring a sweet twist to the salad. I’ve experimented with this, and it adds a refreshing contrast to the savory flavors. If you’re feeling adventurous, give it a try!
How long does Olivier Salad last in the fridge?
When stored properly in an airtight container, Olivier Salad can last for about 3-4 days in the fridge. However, I recommend enjoying it within the first couple of days for the best texture and flavor. After that, the vegetables may start to lose their crunch.
These questions reflect the curiosity and creativity that come with making Olivier Salad. I love how this dish invites exploration and adaptation, allowing each cook to put their own spin on it. So, don’t hesitate to ask questions and experiment as you create your own version of this beloved salad!
Conclusion on Olivier Salad Recipe
As I wrap up my journey through the delightful world of Olivier Salad, I can’t help but feel a sense of joy and nostalgia. This dish is more than just a salad; it’s a celebration of flavors, memories, and traditions that bring people together. The vibrant colors and textures create a feast for the eyes, while the creamy dressing and hearty ingredients make it a satisfying meal.
What I love most about the Olivier Salad is its versatility. Whether you’re hosting a festive gathering or simply enjoying a quiet dinner at home, this salad can adapt to any occasion. You can customize it to suit your taste, dietary preferences, or even the ingredients you have on hand. It’s a canvas for creativity, allowing you to experiment and make it your own.
Moreover, the nutritional benefits of this salad make it a wholesome choice. Packed with vegetables, proteins, and healthy fats, it can be a nourishing addition to your meals. Plus, it’s a fantastic way to use up leftovers, reducing food waste while still creating something delicious.
So, whether you’re a seasoned cook or just starting your culinary adventure, I encourage you to give the Olivier Salad a try. Embrace the process, enjoy the chopping and mixing, and savor the delightful flavors that come together in this classic dish. I promise, it will become a cherished recipe in your home, just as it has in mine!


