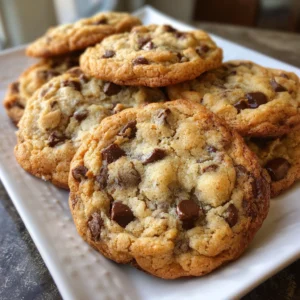
Introduction to No-Churn Ice Cream Cups
As a busy mom, I know how precious time can be, especially when it comes to whipping up a sweet treat. That’s why I absolutely adore these No-Churn Ice Cream Cups! They’re a delightful dessert that requires no fancy equipment or hours in the kitchen. Just a few simple ingredients and a little patience, and you’ll have a creamy, dreamy dessert that’s perfect for hot summer days or any occasion. Whether you’re looking to impress your loved ones or simply treat yourself, these cups are a quick solution that will leave everyone smiling!
Why You’ll Love This No-Churn Ice Cream Cups
These No-Churn Ice Cream Cups are a game-changer for anyone who loves dessert but is short on time. They come together in just 15 minutes, making them a breeze to whip up after a long day. Plus, the creamy texture and rich flavor will have your taste buds dancing with joy. With endless customization options, you can create a treat that suits everyone’s preferences, making dessert time a delightful experience!
Ingredients for No-Churn Ice Cream Cups
Gathering the right ingredients is the first step to creating your No-Churn Ice Cream Cups. Here’s what you’ll need:
- Heavy Cream: This is the star of the show! It gives the ice cream its rich, creamy texture. Make sure to use heavy cream for the best results.
- Sweetened Condensed Milk: This ingredient adds sweetness and creaminess without the need for extra sugar. It’s a magical shortcut that makes this recipe so easy!
- Vanilla Extract: A splash of vanilla enhances the flavor, making your ice cream taste like a scoop of happiness. You can also experiment with other extracts like almond or mint.
- Chocolate Chips (optional): For those who crave a little extra indulgence, chocolate chips add a delightful crunch and richness. You can use dark, milk, or even white chocolate!
- Crushed Cookies (optional): If you’re a cookie lover, folding in crushed cookies can add a fun texture and flavor. Think Oreos, graham crackers, or your favorite treats!
Feel free to get creative with your mix-ins! The exact quantities for each ingredient are listed at the bottom of the article, where you can also find a printable version of the recipe.

How to Make No-Churn Ice Cream Cups
Now that you have your ingredients ready, let’s dive into the fun part—making these delightful No-Churn Ice Cream Cups! Follow these simple steps, and you’ll be on your way to a creamy treat that everyone will love.
Step 1: Whip the Cream
Start by pouring the heavy cream into a large mixing bowl. Using an electric mixer, whip the cream on medium speed until stiff peaks form. This means the cream should hold its shape when you lift the beaters. This step is crucial because it gives your ice cream that light, airy texture. Trust me, the fluffier, the better!
Step 2: Mix Condensed Milk and Vanilla
In another bowl, combine the sweetened condensed milk and vanilla extract. Stir them together until they’re well blended. This mixture will add sweetness and creaminess to your ice cream. It’s like a hug for your taste buds! Make sure there are no lumps, as you want a smooth base for your ice cream cups.
Step 3: Fold in the Whipped Cream
Now comes the fun part! Gently fold the whipped cream into the condensed milk mixture. Use a spatula and scoop from the bottom, turning the mixture over. This technique helps keep the air in the whipped cream, ensuring your ice cream stays light and fluffy. Be careful not to overmix; you want to see those beautiful swirls!
Step 4: Add Optional Mix-Ins
If you’re feeling adventurous, now’s the time to fold in your chocolate chips or crushed cookies. This is where you can get creative! Whether you choose crunchy Oreos or rich chocolate chips, these mix-ins will add a delightful surprise in every bite. Just be sure to fold them in gently, so they’re evenly distributed.
Step 5: Freeze the Mixture
Once everything is combined, pour the mixture into cups or a container. Make sure to leave a little space at the top, as it will expand while freezing. Cover it tightly with plastic wrap or a lid, and pop it in the freezer for at least 4 hours. This is the hardest part—waiting! But trust me, it’s worth it.
Step 6: Serve and Enjoy
When you’re ready to serve, take the ice cream cups out of the freezer. Let them sit at room temperature for a few minutes to soften slightly. This makes scooping a breeze! Then, dig in and enjoy your delicious No-Churn Ice Cream Cups. You’ve earned it!
Tips for Success
- Use cold heavy cream for better whipping results.
- Don’t rush the folding process; gentle movements keep the mixture airy.
- Experiment with different extracts for unique flavors.
- For a creamier texture, let the ice cream sit out for a few minutes before serving.
- Store leftovers in an airtight container to maintain freshness.

Equipment Needed
- Mixing Bowls: A large bowl for whipping cream and a smaller one for mixing condensed milk. Any size will do!
- Electric Mixer: A hand mixer or stand mixer works best for whipping cream. You can also whisk by hand if you’re feeling strong!
- Spatula: A rubber spatula is perfect for folding ingredients together without deflating the whipped cream.
- Cups or Container: Use any cups or a freezer-safe container to hold your ice cream mixture.
Variations of No-Churn Ice Cream Cups
- Fruit Swirls: Add pureed fruits like strawberries or mangoes for a refreshing twist. Just swirl them in before freezing!
- Nutty Delight: Fold in chopped nuts like almonds or pecans for a crunchy texture. They add a lovely flavor too!
- Chocolate Lovers: Use chocolate syrup instead of vanilla extract for a rich chocolate base. You can even add cocoa powder for extra chocolatey goodness!
- Vegan Option: Substitute heavy cream with coconut cream and use a plant-based sweetened condensed milk for a dairy-free treat.
- Spiced Up: Add a pinch of cinnamon or nutmeg for a warm, cozy flavor. Perfect for fall gatherings!
Serving Suggestions for No-Churn Ice Cream Cups
- Top with whipped cream and a cherry for a classic sundae look.
- Serve alongside fresh fruit like berries or banana slices for a refreshing contrast.
- Pair with a warm chocolate sauce for a delightful hot-and-cold experience.
- Garnish with mint leaves for a pop of color and freshness.
- Present in colorful cups for a fun, festive touch at gatherings!
FAQs about No-Churn Ice Cream Cups
As you embark on your journey to create these delightful No-Churn Ice Cream Cups, you might have a few questions. Here are some common queries I’ve encountered, along with helpful answers!
Can I use a different type of cream?
While heavy cream is best for that rich texture, you can use whipping cream. Just keep in mind that the final product may be slightly less creamy.
How long can I store the No-Churn Ice Cream Cups?
You can store them in the freezer for up to two weeks. Just make sure they’re in an airtight container to keep them fresh!
Can I make this recipe dairy-free?
Absolutely! Substitute heavy cream with coconut cream and use a dairy-free sweetened condensed milk. You’ll still get a delicious treat!
What mix-ins work best?
The sky’s the limit! Chocolate chips, crushed cookies, or even fruit purees can elevate your No-Churn Ice Cream Cups. Get creative!
How do I make it easier to scoop?
Let the ice cream sit at room temperature for a few minutes before serving. This will soften it just enough for easy scooping!
Final Thoughts
Creating these No-Churn Ice Cream Cups is more than just making a dessert; it’s about bringing joy to your family and friends. The smiles on their faces as they savor each creamy bite are priceless. This recipe is a reminder that even on the busiest days, you can whip up something special without a lot of fuss. Plus, the endless customization options mean you can make it your own. So, gather your loved ones, share a cup, and enjoy the sweet moments together. Trust me, this delightful treat will become a cherished favorite in your home!
Print
No-Churn Ice Cream Cups: A Simple Treat You’ll Love!
- Total Time: 4 hours 15 minutes
- Yield: 4 servings 1x
- Diet: Vegetarian
Description
No-Churn Ice Cream Cups are a delightful and easy-to-make dessert that requires no ice cream maker. Perfect for hot days or any occasion!
Ingredients
- 2 cups heavy cream
- 1 cup sweetened condensed milk
- 1 teaspoon vanilla extract
- 1/2 cup chocolate chips (optional)
- 1/2 cup crushed cookies (optional)
Instructions
- In a large bowl, whip the heavy cream until stiff peaks form.
- In another bowl, mix the sweetened condensed milk and vanilla extract until well combined.
- Gently fold the whipped cream into the condensed milk mixture until fully incorporated.
- If desired, fold in chocolate chips or crushed cookies.
- Pour the mixture into cups or a container and freeze for at least 4 hours or until firm.
- Serve and enjoy your delicious no-churn ice cream cups!
Notes
- Feel free to customize with your favorite mix-ins.
- Store any leftovers in the freezer for up to 2 weeks.
- Let the ice cream sit at room temperature for a few minutes before serving for easier scooping.
- Prep Time: 15 minutes
- Cook Time: 0 minutes
- Category: Dessert
- Method: No-Churn
- Cuisine: American
Nutrition
- Serving Size: 1 cup
- Calories: 300
- Sugar: 25g
- Sodium: 50mg
- Fat: 20g
- Saturated Fat: 12g
- Unsaturated Fat: 8g
- Trans Fat: 0g
- Carbohydrates: 30g
- Fiber: 1g
- Protein: 3g
- Cholesterol: 70mg
Keywords: No-Churn Ice Cream Cups, easy dessert, summer treat


