Sensory-Rich Introduction with Immediate Craving
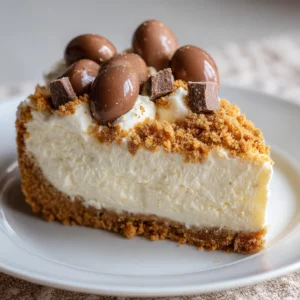
Imagine slicing into a No-Bake Easter Cheesecake and revealing its creamy, velvety texture, glistening under the soft light of spring. The moment you take a bite, the rich, sweet flavor of cream cheese envelops your palate, perfectly balanced by a hint of tanginess from fresh lemon juice. Topped with vibrant, juicy berries, each forkful is a delightful explosion of color and flavor that beckons you to indulge just a little more.
I still remember the first time I made this cheesecake for Easter. It was a sunny afternoon, and my family gathered around the table, laughter filling the air. As I presented the cheesecake, adorned with fresh strawberries and blueberries, I could see the excitement in their eyes. That first slice was met with a chorus of “Mmm!” and “Wow!”—a symphony of joy that made all the effort worthwhile. It was more than just a dessert; it was a moment of connection, a sweet memory that we still cherish today.
Holidays like Easter are all about sharing love and delicious food with those we hold dear. This cheesecake embodies that spirit perfectly. Whether it’s for a festive brunch, a spring celebration, or simply a refreshing treat on a warm day, it brings people together. The laughter, the stories, and the smiles shared over a slice of this cheesecake are what make it truly special. So, let’s dive into this delightful recipe and create some sweet memories of our own!
Why You’ll Love This No-Bake Easter Cheesecake
Let me tell you, this No-Bake Easter Cheesecake is not just a dessert; it’s an experience that will have you coming back for seconds (and maybe thirds!). Here’s why you’ll fall head over heels for it:
- Texture Contrast: The moment you take a bite, you’ll be greeted by the smooth, velvety filling that melts in your mouth, perfectly complemented by the crunchy graham cracker crust. It’s a delightful mouthfeel that keeps you coming back for more!
- Flavor Balance: Each forkful is a harmonious blend of flavors. The sweetness of the cream cheese is beautifully offset by the tangy lemon juice, creating a refreshing taste that dances on your palate. It’s like a spring day in dessert form!
- Versatility: One of the best things about this cheesecake is its adaptability. You can easily customize it with different toppings or flavors to suit any palate or occasion. Want to add a chocolate swirl? Go for it! Prefer a berry compote? You got it!
- Ease of Preparation: No baking means no fuss! This cheesecake is a simple and quick dessert option, perfect for busy hosts or anyone who wants to impress without spending hours in the kitchen. You can whip it up in no time and still have plenty of time to enjoy the festivities.
- Universal Appeal: This cheesecake is a crowd-pleaser, loved by both children and adults alike. It’s the kind of dessert that brings smiles to faces and joy to gatherings, making it a must-have for any celebration.
So, whether you’re hosting an Easter brunch or just looking for a sweet treat to brighten your day, this cheesecake is sure to be a hit. Trust me, once you try it, you’ll understand why it’s become a beloved tradition in my family!
Essential Tools & Preparation Strategy
Before diving into the delightful world of this No-Bake Easter Cheesecake, let’s gather our essential tools and set the stage for success. Trust me, having the right equipment makes all the difference, especially when you’re trying to impress family and friends!
- Springform Pan: This is your best friend for cheesecakes! It allows for easy removal and presentation, ensuring your cheesecake looks as good as it tastes.
- Mixing Bowls: A couple of good-sized bowls will help you combine ingredients without making a mess. I always keep a few on hand for different components.
- Electric Mixer: A must-have for achieving that smooth, creamy filling. Trust me, your arm will thank you later!
- Spatula: Perfect for folding in whipped cream and smoothing the filling. A silicone spatula is my go-to for scraping every last bit from the bowl.
- Measuring Cups and Spoons: Accurate measurements are crucial for achieving the right flavor balance. I always double-check my measurements to avoid any surprises!
- Whisk: Handy for mixing dry ingredients and ensuring a lump-free filling. It’s also great for a quick stir if you’re in a hurry.
- Chilling Rack: Optional, but it helps in cooling the cheesecake evenly. If you have one, it’s worth using!
Now that we have our tools ready, let’s talk about preparation strategy. The key to a successful cheesecake is organization. I like to lay out all my ingredients before I start. It not only saves time but also helps me avoid the dreaded “Oh no, I forgot the sugar!” moment.
Start by preparing your crust, as it needs some time to chill. While it’s setting, you can whip up the filling. This way, you’re maximizing your time in the kitchen. And remember, patience is key when it comes to chilling—don’t rush it! A well-chilled cheesecake is a happy cheesecake.
Ingredients & Their Roles in This No-Bake Easter Cheesecake
Understanding the ingredients in your No-Bake Easter Cheesecake is key to mastering this delightful dessert. Each component plays a vital role in creating that perfect balance of flavor and texture. Let’s break it down!
Crust:
- Graham Cracker Crumbs: These little gems provide a sweet, crunchy base that contrasts beautifully with the creamy filling. Their subtle caramel notes add depth to the overall flavor.
- Unsalted Butter: This ingredient binds the crumbs together and adds richness. It’s essential for achieving that melt-in-your-mouth texture that makes each bite irresistible.
- Granulated Sugar: A touch of sweetness enhances the flavor of the crust, making it a delightful prelude to the cheesecake filling.
Filling:
- Cream Cheese: The star of the show! This ingredient provides the creamy body that defines a cheesecake. Its rich flavor is the foundation of this dessert.
- Powdered Sugar: This sweetener dissolves easily, ensuring a smooth filling without any grittiness. It’s the secret to achieving that luscious texture.
- Vanilla Extract: A splash of this aromatic extract adds depth of flavor, enhancing the overall taste profile of the cheesecake.
- Heavy Whipping Cream: Whipping this cream until stiff peaks form creates a light, airy texture that elevates the filling. It’s what makes each bite feel like a cloud of deliciousness!
- Fresh Lemon Juice: This ingredient balances the sweetness with a touch of acidity, preventing the cheesecake from being overly sweet. It’s the zing that brightens the flavor!
- Lemon Zest: Adding zest enhances the lemon flavor and brings a refreshing brightness to the filling. It’s like a burst of sunshine in every slice!
Topping:
- Fresh Berries: These colorful gems not only add visual appeal but also provide a refreshing contrast to the rich cheesecake. Their natural sweetness complements the tangy filling perfectly.
- Mint Leaves: A simple garnish that adds a pop of color and freshness. Plus, the aroma of mint elevates the overall sensory experience of the dessert.
With these ingredients, you’re well on your way to creating a No-Bake Easter Cheesecake that will impress everyone at your gathering. Each element works in harmony to deliver a dessert that’s not only delicious but also a feast for the eyes!
Step-by-Step Guide to Perfect No-Bake Easter Cheesecake
Now that we have our ingredients and tools ready, it’s time to dive into the fun part: making your No-Bake Easter Cheesecake! Follow these simple steps, and you’ll be well on your way to creating a dessert that will wow your family and friends.
- Prepare the Crust: In a medium bowl, combine 1 ½ cups graham cracker crumbs, ½ cup unsalted butter, melted, and ¼ cup granulated sugar. Mix until well combined. The mixture should resemble wet sand, holding together when pressed.
- Form the Crust: Press the mixture firmly into the bottom of a 9-inch springform pan to form an even crust. Use the back of a measuring cup or your fingers to ensure it’s compact. Chill in the refrigerator for 30 minutes to set.
- Make the Filling: In a large mixing bowl, beat 16 oz cream cheese, softened until smooth and creamy. This step is crucial; you want a silky texture without lumps!
- Add Sweetness and Flavor: Add 1 cup powdered sugar, 1 tsp vanilla extract, 2 tbsp fresh lemon juice, and 1 tsp lemon zest to the cream cheese. Mix until fully incorporated, scraping down the sides of the bowl as needed.
- Whip the Cream: In a separate bowl, whip 1 cup heavy whipping cream until stiff peaks form. This will give your cheesecake that light, airy texture that melts in your mouth.
- Combine Mixtures: Gently fold the whipped cream into the cream cheese mixture until no streaks remain. Be careful not to deflate the whipped cream; you want to keep that fluffy texture!
- Pour the Filling: Pour the filling over the chilled crust and smooth the top with a spatula. Take a moment to admire your creation—it’s already looking delicious!
- Chill to Perfection: Refrigerate for at least 4 hours or until set. For best results, chill overnight. This step is essential for achieving that perfect slice!
- Garnish and Serve: Before serving, top with fresh berries and mint leaves for garnish. Not only does this add a pop of color, but it also enhances the flavor profile with a refreshing touch.
And there you have it! A step-by-step guide to creating a stunning No-Bake Easter Cheesecake that’s sure to impress. Remember, the key to success is patience—allowing your cheesecake to chill properly will make all the difference in texture and flavor. Enjoy every moment of this delicious journey!
Chef’s Notes & Pro Tips for Flawless Results
As you embark on your journey to create the perfect No-Bake Easter Cheesecake, here are some invaluable tips and tricks I’ve gathered over the years. These insights will help you achieve a dessert that not only looks stunning but tastes divine!
- Make-Ahead Instructions: This cheesecake can be made up to 2 days in advance and stored in the refrigerator. This is a lifesaver for busy hosts! Just prepare it ahead of time, and you’ll have one less thing to worry about on the day of your gathering.
- Storage Tips: Leftovers can be kept in an airtight container in the fridge for up to 3 days. If you find yourself with extra cheesecake (which is rare, but it happens!), simply cover it well to maintain its freshness.
- Equipment Recommendations: Investing in a high-quality electric mixer is key to ensuring a smooth filling. Trust me, a good mixer will save you time and effort, making the process much more enjoyable. Plus, it helps achieve that creamy texture we all love!
- Customization Options: Don’t be afraid to get creative! You can experiment with different flavors by adding melted chocolate or fruit purees to the filling. Want a chocolate twist? Fold in some melted dark chocolate for a rich variation. Or, swirl in a berry puree for a fruity explosion!
With these tips in your back pocket, you’re well-equipped to create a No-Bake Easter Cheesecake that will impress everyone at your table. Remember, cooking is all about having fun and making it your own, so let your creativity shine!
Avoid These Common Cooking Mistakes
As you embark on your journey to create the perfect No-Bake Easter Cheesecake, it’s essential to be aware of some common pitfalls that can derail your dessert dreams. Trust me, I’ve made these mistakes myself, and I want to save you from the same fate! Here are the key things to watch out for:
- Overmixing the cream cheese: This can lead to a dense filling that lacks the lightness we crave in a cheesecake. Mix just until smooth—no need to overdo it!
- Not chilling long enough: If you skip this crucial step, you’ll end up with a runny cheesecake that won’t hold its shape. Ensure you chill it for at least 4 hours, but for the best results, overnight is ideal.
- Using cold cream cheese: Cold cream cheese can cause lumps in your filling, which is a big no-no. Always soften it to room temperature first for a smooth, creamy texture.
- Skipping the lemon juice: This ingredient is vital for balancing the sweetness of the cheesecake. Without it, your dessert can end up overly sweet. The acidity from the lemon juice is what makes each bite refreshing!
- Not pressing the crust firmly: If you don’t press the crust down firmly and evenly, it may lead to a crumbly base that falls apart when you slice it. Use the back of a measuring cup or your fingers to ensure it’s compact.
- Using too much whipped cream: While we love a light and airy filling, too much whipped cream can make it overly fluffy. Follow the recipe for the right balance to achieve that perfect texture.
- Not using a springform pan: Attempting to serve a cheesecake without a springform pan can be a disaster. This pan is designed for easy removal, making it ideal for cheesecakes. Trust me, you’ll thank yourself later!
By keeping these common mistakes in mind, you’ll be well on your way to creating a stunning No-Bake Easter Cheesecake that will impress everyone at your gathering. Remember, every great cook learns from their missteps, so don’t be discouraged—just keep these tips in your back pocket!
Creative Variations & Customizations
One of the best things about this No-Bake Easter Cheesecake is its versatility! You can easily customize it to suit your taste or the season. Here are some delightful variations that will keep your cheesecake game exciting:
- Chocolate No-Bake Cheesecake: For all the chocolate lovers out there, simply add 4 oz of melted chocolate to the filling. This rich twist will create a decadent dessert that’s sure to impress. Just make sure to let the chocolate cool slightly before mixing it in to avoid melting the cream cheese!
- Berry Swirl Cheesecake: Want to add a pop of color? Swirl in ½ cup of berry puree (think strawberries, raspberries, or blueberries) into the filling before chilling. This not only looks stunning but also adds a burst of fruity flavor with every bite!
- Lemon-Lime Cheesecake: For a zesty variation, substitute lime juice and zest for the lemon. This bright twist will give your cheesecake a refreshing tropical vibe, perfect for summer gatherings!
- Nutty Crust: If you’re looking for a gluten-free option, try using crushed nuts (like almonds or pecans) instead of graham crackers. Combine 1 ½ cups of crushed nuts with ½ cup of melted butter and ¼ cup of sugar for a deliciously crunchy base that adds a unique flavor.
- Seasonal Flavors: Embrace the seasons by incorporating ½ cup of pumpkin puree for a fall-inspired cheesecake. Add a pinch of cinnamon and nutmeg to the filling for a cozy, spiced flavor that’s perfect for autumn celebrations.
These creative variations not only keep things interesting but also allow you to tailor the cheesecake to your preferences or the occasion. So, don’t hesitate to experiment and make this No-Bake Easter Cheesecake your own!
Perfect Pairings: What to Serve With No-Bake Easter Cheesecake
When it comes to enjoying your No-Bake Easter Cheesecake, the right accompaniments can elevate the experience to new heights. Here are some delightful pairings that will complement the creamy, tangy flavors of your cheesecake:
- Sweet Riesling Wine: The natural sweetness of a Riesling beautifully complements the cheesecake’s flavors, creating a harmonious balance that enhances each bite. It’s like a match made in dessert heaven!
- Fresh Fruit Salad: A vibrant mix of seasonal fruits adds a refreshing side that balances the richness of the cheesecake. Think strawberries, kiwi, and citrus for a burst of color and flavor!
- Chocolate Shavings: For those who crave a little indulgence, adding chocolate shavings on top of your cheesecake not only enhances its visual appeal but also adds a rich, decadent touch that chocolate lovers will adore.
- Dollop of Whipped Cream: A generous dollop of freshly whipped cream enhances the richness and creaminess of the cheesecake, making each bite even more luxurious. It’s a classic pairing that never goes out of style!
- Herbal Tea: A soothing cup of herbal tea, such as chamomile or mint, provides a calming contrast to the sweetness of the cheesecake. It’s the perfect way to wind down after a delightful meal.
- Lemon Sorbet: This refreshing sorbet acts as a palate cleanser between bites, cutting through the richness of the cheesecake and leaving your taste buds refreshed and ready for more.
- Coffee: A classic pairing, a cup of coffee enhances the dessert experience, providing a warm, comforting contrast to the cool, creamy cheesecake. It’s a match that’s hard to resist!
- Selection of Nuts: A small bowl of mixed nuts adds texture and a savory contrast to the sweet cheesecake. The crunchiness of the nuts provides a delightful contrast that keeps things interesting.
These pairings not only enhance the flavors of your No-Bake Easter Cheesecake but also create a well-rounded dessert experience that your guests will love. So, gather your favorite accompaniments and get ready to indulge!
Storage & Meal Prep Instructions
Once you’ve created your stunning No-Bake Easter Cheesecake, it’s important to know how to store it properly to maintain its deliciousness. Here are some handy tips for keeping your cheesecake fresh and ready to enjoy!
- Fridge Storage: Keep the cheesecake in an airtight container for up to 3 days. This will help preserve its creamy texture and prevent it from absorbing any unwanted odors from the fridge. If you have a springform pan, you can simply cover it with plastic wrap or foil.
- Freezer Storage: If you want to make your cheesecake ahead of time, it can be frozen for up to 2 months. Just make sure to wrap it tightly in plastic wrap and then in aluminum foil to prevent freezer burn. When you’re ready to serve, thaw it in the refrigerator overnight for the best results.
- Reheating Methods: Not applicable, as this is a no-bake dessert; serve chilled. The beauty of this cheesecake lies in its cool, creamy texture, so there’s no need for reheating!
By following these storage and meal prep instructions, you can enjoy your No-Bake Easter Cheesecake at its best, whether you’re savoring it right after making it or pulling it out of the freezer for a special occasion. Happy indulging!
Nutrition Facts & Health Insights
Understanding the nutritional profile of your No-Bake Easter Cheesecake can help you enjoy it guilt-free! Here’s a detailed breakdown of the key nutrients per serving, so you can indulge while being mindful of your health:
| Nutrient | Amount per Serving (1 slice) |
|---|---|
| Calories | 350 |
| Sugar | 25 grams |
| Sodium | 200 milligrams |
| Total Fat | 25 grams |
| Saturated Fat | 15 grams |
| Unsaturated Fat | 5 grams |
| Trans Fat | 0 grams |
| Carbohydrates | 30 grams |
| Fiber | 1 gram |
| Protein | 4 grams |
| Cholesterol | 70 milligrams |
Now, let’s talk about the health benefits of some key ingredients in this delightful cheesecake:
- Cream Cheese: Rich in protein and calcium, cream cheese provides a creamy texture while contributing to your daily protein intake. It’s a great source of energy, making it a satisfying treat.
- Fresh Berries: Berries are packed with antioxidants, vitamins, and minerals. They help combat oxidative stress and inflammation, making them a nutritious topping that adds both flavor and health benefits to your cheesecake.
- Lemon Juice: This zesty ingredient is not only refreshing but also rich in vitamin C, which supports your immune system. The acidity from lemon juice helps balance the sweetness of the cheesecake, making it a healthier option.
- Graham Crackers: While they provide a delicious crunch, graham crackers also contain whole grains, which can contribute to your daily fiber intake. Opting for whole-grain varieties can enhance the nutritional value of your crust.
With this No-Bake Easter Cheesecake, you can enjoy a delicious dessert that not only satisfies your sweet tooth but also offers some nutritional benefits. So go ahead, indulge in a slice (or two) and feel good about it!
Frequently Asked Questions
As you embark on your journey to create the perfect No-Bake Easter Cheesecake, you might have a few questions along the way. Don’t worry; I’ve got you covered! Here are some of the most common queries I receive, along with helpful answers to guide you:
- Can I use low-fat cream cheese?
Absolutely! Low-fat cream cheese can be used in this recipe, but keep in mind that it may alter the texture slightly, making it less creamy. For the best results, I recommend using a blend of low-fat and regular cream cheese to maintain that luscious mouthfeel. - How can I make this cheesecake gluten-free?
To make this cheesecake gluten-free, simply substitute the graham cracker crumbs with gluten-free graham crackers or crushed nuts. You can also use gluten-free cookies for a unique flavor twist. Just ensure that all your ingredients are certified gluten-free! - What can I substitute for heavy cream?
If you’re looking for a lighter option, you can substitute heavy cream with whipped coconut cream or a non-dairy whipped topping. Keep in mind that this may change the flavor slightly, but it will still yield a delicious cheesecake! - How long does it take to set?
For the best results, allow your cheesecake to chill in the refrigerator for at least 4 hours or overnight. This ensures that it sets properly and achieves that perfect slice. Patience is key here! - Can I use a different type of crust?
Absolutely! Feel free to experiment with different crusts. You can use crushed Oreos, vanilla wafers, or even a nut-based crust for a gluten-free option. Just remember to adjust the measurements accordingly! - What if I don’t have a springform pan?
If you don’t have a springform pan, you can use a regular pie dish or a round cake pan. Just be sure to line the bottom with parchment paper for easy removal. It may not look as polished, but it will still taste amazing! - How do I prevent cracks in the cheesecake?
To prevent cracks, make sure to mix the cream cheese until smooth without overmixing. Also, avoid opening the refrigerator door frequently while it’s chilling, as temperature fluctuations can cause cracks. Lastly, chilling it slowly in the fridge helps maintain its structure. - Can I add more lemon flavor?
Definitely! If you love a zesty kick, feel free to add more lemon juice or zest to the filling. Just be cautious not to overdo it, as too much acidity can overpower the sweetness of the cheesecake. - What’s the best way to slice the cheesecake?
For clean slices, use a sharp knife dipped in hot water. Wipe the knife clean between cuts to maintain that beautiful presentation. This will ensure each slice looks as good as it tastes! - How do I store leftovers?
Store any leftovers in an airtight container in the refrigerator for up to 3 days. If you want to keep it longer, you can freeze it for up to 2 months. Just remember to thaw it in the fridge before serving!
With these FAQs answered, you’re well on your way to mastering the art of the No-Bake Easter Cheesecake. Don’t hesitate to reach out if you have more questions or need further assistance. Happy baking!
Final Inspiration & Kitchen Confidence
As you stand in your kitchen, ready to embark on the delightful journey of making this No-Bake Easter Cheesecake, I want to take a moment to remind you of the joy that comes from creating something delicious. There’s a certain magic that happens when you mix ingredients together, transforming them into a beautiful dessert that will bring smiles to the faces of your loved ones. Embrace that magic!
Remember, you have the culinary skills to make this cheesecake a reality. Whether you’re a seasoned pro or a novice in the kitchen, each step you take is a testament to your creativity and passion for cooking. The satisfaction of sharing a homemade dessert, especially one as delightful as this cheesecake, is truly unparalleled. It’s not just about the end result; it’s about the love and effort you put into every bite.
So, as you whip up this creamy, velvety delight, I encourage you to take a moment to savor the process. And once your cheesecake is complete, don’t forget to share your beautiful creation on social media! Tag your friends, family, and fellow foodies, and celebrate your success together. Let’s spread the joy of homemade desserts and inspire others to create their own sweet memories. Happy baking!
Print
No-Bake Easter Cheesecake: Creamy, Velvety Delight Awaits!
- Total Time: 4 hours 30 minutes
- Yield: 8 servings 1x
- Diet: Vegetarian
Description
Indulge in a creamy, velvety no-bake Easter cheesecake that melts in your mouth. The rich, sweet flavor of cream cheese is perfectly balanced with a hint of tanginess from fresh lemon juice, while the buttery graham cracker crust adds a delightful crunch.
Ingredients
- Crust:
- 1 ½ cups graham cracker crumbs
- ½ cup unsalted butter, melted
- ¼ cup granulated sugar
- Filling:
- 16 oz cream cheese, softened
- 1 cup powdered sugar
- 1 tsp vanilla extract
- 1 cup heavy whipping cream
- 2 tbsp fresh lemon juice
- 1 tsp lemon zest
- Topping:
- Fresh berries (strawberries, blueberries, raspberries)
- Mint leaves for garnish
Instructions
- In a medium bowl, combine graham cracker crumbs, melted butter, and granulated sugar. Mix until well combined.
- Press the mixture firmly into the bottom of a 9-inch springform pan to form the crust. Chill in the refrigerator for 30 minutes.
- In a large mixing bowl, beat the softened cream cheese until smooth and creamy.
- Add powdered sugar, vanilla extract, lemon juice, and lemon zest to the cream cheese. Mix until fully incorporated.
- In a separate bowl, whip the heavy cream until stiff peaks form.
- Gently fold the whipped cream into the cream cheese mixture until no streaks remain.
- Pour the filling over the chilled crust and smooth the top with a spatula.
- Refrigerate for at least 4 hours or until set. For best results, chill overnight.
- Before serving, top with fresh berries and mint leaves for garnish.
Notes
- This cheesecake can be made up to 2 days in advance and stored in the refrigerator.
- Leftovers can be kept in an airtight container in the fridge for up to 3 days.
- For a gluten-free version, use gluten-free graham crackers.
- Prep Time: 30 minutes
- Cook Time: 0 minutes
- Category: desserts
- Method: no-bake
- Cuisine: American
Nutrition
- Serving Size: 1 slice (1/8 of the cheesecake)
- Calories: 350
- Sugar: 25 grams
- Sodium: 200 milligrams
- Fat: 25 grams
- Saturated Fat: 15 grams
- Unsaturated Fat: 5 grams
- Trans Fat: 0 grams
- Carbohydrates: 30 grams
- Fiber: 1 gram
- Protein: 4 grams
- Cholesterol: 70 milligrams
Keywords: No-Bake Easter Cheesecake, creamy cheesecake, Easter dessert, no-bake dessert, spring dessert, cheesecake recipe, easy cheesecake, festive dessert, lemon cheesecake, berry cheesecake, holiday dessert, vegetarian dessert, chilled cheesecake