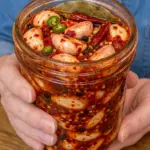
Ingredients
Here’s everything you’ll need for this fiery pickled garlic.
- 2 cups fresh garlic cloves, peeled — The main ingredient. Fresh garlic absorbs the spicy vinegar brine while maintaining a satisfying texture.
- 1 cup white vinegar — Provides the bright acidity that forms the base of the pickling liquid.
- 1 cup water — Balances the acidity of the white vinegar.
- 1 tbsp kosher salt or pickling salt — Seasons the garlic and creates the salty component of the brine.
- 1 tbsp sugar — Provides just enough sweetness to balance the vinegar and chile heat.
- 2 tbsp hot sauce — Adds another layer of heat and tanginess to the pickling liquid.
- 1 tsp red pepper flakes — Infuses the jar with lingering chile heat.
- 2–3 small fresh chili peppers, sliced — Add fresh pepper flavor and additional spice.
- 2 dried red chili peppers — Provide deeper chile character as the garlic pickles.
- 1 tsp black peppercorns — Add subtle peppery warmth.
- 1 tsp mustard seeds — Bring a classic savory pickling note.
- ½ tsp smoked paprika, optional — Adds subtle smoky depth that complements the chiles.
Instructions
These spicy refrigerator pickles require only a few minutes of hands-on preparation.
Step 1: Prepare the Garlic
Peel the fresh garlic cloves and inspect them carefully.
Discard any cloves that are soft, damaged, or discolored.
Place the peeled cloves into a clean glass jar.
Step 2: Add the Chilies and Spices
Add the sliced fresh chili peppers and dried red chiles to the jar.
Sprinkle in the red pepper flakes, black peppercorns, mustard seeds, and optional smoked paprika.
Distribute the peppers and spices throughout the garlic.
Step 3: Prepare the Pickling Brine
Combine the white vinegar, water, kosher or pickling salt, sugar, and hot sauce in a small saucepan.
Place the saucepan over medium heat.
Step 4: Heat the Brine
Stir while heating until the salt and sugar have completely dissolved.
Bring the mixture to a gentle simmer.
A lengthy boil isn’t necessary.
Step 5: Pour the Brine Over the Garlic
Carefully pour the warm pickling liquid over the garlic, chilies, and spices.
Make sure everything is completely covered with brine.
Step 6: Cool the Jar
Allow the jar to cool to room temperature.
Once cooled, seal it tightly with a lid.
Step 7: Refrigerate
Transfer the jar to the refrigerator.
Allow the garlic to pickle for at least 3 days before eating.
Step 8: Develop a Deeper Chili Flavor
For a deeper, hotter chile flavor, let the garlic pickle for 5–7 days before serving.
Keep the garlic submerged in the brine throughout the pickling and storage period.