
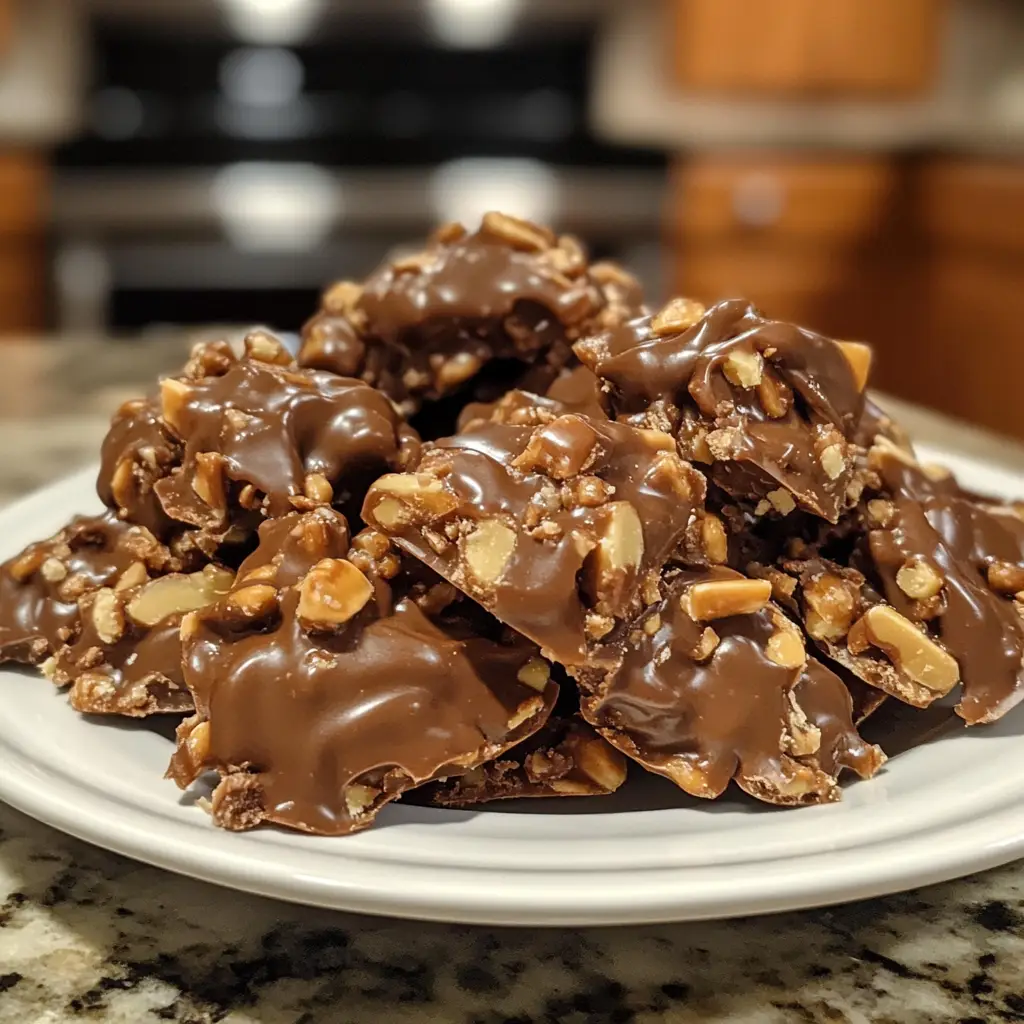
Introduction to Homemade Turtle Candy Clusters Recipe
As a passionate home cook, I find joy in creating sweet treats that bring smiles to faces. One of my all-time favorites is the Homemade Turtle Candy Clusters Recipe. The moment I first tasted these delightful morsels, I was transported back to my childhood, where my grandmother would whip up batches of these gooey, chocolatey wonders during the holidays. The combination of crunchy nuts, rich caramel, and smooth chocolate is simply irresistible!
What I love most about making turtle candy clusters is how easy it is to customize them. You can use your favorite nuts, experiment with different types of chocolate, or even add a sprinkle of sea salt for that perfect sweet-and-salty balance. Each batch feels like a little adventure in the kitchen, and I can’t help but share them with friends and family. They always ask for seconds, and I can’t blame them!
In this recipe, I’ll guide you through each step, sharing tips and tricks I’ve learned along the way. Whether you’re a seasoned pro or a beginner, I promise you’ll find joy in making these delightful treats. So, roll up your sleeves, and let’s dive into the world of homemade turtle candy clusters. Trust me, your taste buds will thank you!
Ingredients for Homemade Turtle Candy Clusters Recipe
Before we embark on our sweet adventure, let’s gather all the ingredients we’ll need for these delightful Homemade Turtle Candy Clusters. I always believe that quality ingredients make a world of difference in the final product. So, let’s make sure we have the best of the best!
Main Ingredients
- 1 cup of pecans (or your favorite nuts)
- 1 cup of caramel candies (about 14 ounces)
- 2 tablespoons of heavy cream
- 1 cup of semi-sweet chocolate chips (or milk chocolate, if you prefer)
- 1 teaspoon of vanilla extract (for an extra flavor boost)
When choosing your nuts, I recommend going for fresh, high-quality pecans. They add a lovely crunch and a buttery flavor that pairs perfectly with the caramel and chocolate. If you’re feeling adventurous, you can also try using walnuts or almonds for a different twist!
Optional Add-ons
- A pinch of sea salt (to enhance the flavors)
- 1/2 cup of crushed pretzels (for a salty crunch)
- 1/2 cup of dried fruit (like cranberries or cherries for a fruity touch)
- White chocolate chips (for a fun drizzle)
These optional add-ons can take your turtle candy clusters to the next level! I love adding a sprinkle of sea salt on top right before the chocolate sets. It creates a delightful contrast that makes each bite even more enjoyable. And if you have a sweet tooth, consider mixing in some crushed pretzels or dried fruit for a unique flavor combination. The possibilities are endless!
How to Prepare Homemade Turtle Candy Clusters Recipe
Now that we have our ingredients ready, it’s time to roll up our sleeves and get cooking! Making Homemade Turtle Candy Clusters is a delightful process that fills your kitchen with sweet aromas. Let’s dive into the steps together!
Step 1: Prepare the Nuts
First things first, we need to prepare our nuts. I love to toast them lightly in a dry skillet over medium heat for about 5 minutes. This step enhances their flavor and adds a lovely crunch. Just keep an eye on them; you don’t want them to burn!
Tips for Choosing the Right Nuts
When selecting nuts, I always go for fresh pecans. They have a rich, buttery taste that complements the caramel beautifully. If you prefer a different nut, walnuts or almonds work well too. Just make sure they’re unsalted for the best flavor balance!
Step 2: Melt the Caramel
Next up, let’s melt the caramel. In a medium saucepan, combine the caramel candies and heavy cream over low heat. Stir gently until the mixture is smooth and creamy. This step is crucial, as we want a luscious caramel that will hold everything together.
Tips for Melting Caramel Smoothly
To avoid any lumps, make sure to stir continuously. If you find the caramel is too thick, you can add a little more cream to reach your desired consistency. Patience is key here; take your time to achieve that silky texture!
Step 3: Assemble the Clusters
Now comes the fun part—assembling our clusters! On a parchment-lined baking sheet, drop spoonfuls of the toasted nuts. Then, drizzle the melted caramel over the nuts, making sure to cover them generously. This is where the magic happens!
Tips for Even Distribution
To ensure each cluster has a good mix of nuts and caramel, I like to use a small cookie scoop. It helps me create uniform clusters that look as good as they taste. Plus, it’s a great way to keep things neat and tidy!
Step 4: Drizzle with Chocolate
Finally, let’s add that delicious chocolate drizzle! Melt the chocolate chips in a microwave-safe bowl, heating in 30-second intervals and stirring in between until smooth. Then, using a fork, drizzle the melted chocolate over the caramel clusters.
Tips for a Perfect Chocolate Drizzle
For a beautiful finish, I recommend using a piping bag or a zip-top bag with a corner snipped off. This gives you more control over the drizzle and makes it look extra fancy. Don’t be shy—let that chocolate flow!
And there you have it! With these steps, you’re well on your way to creating your very own Homemade Turtle Candy Clusters. The combination of flavors and textures will surely impress anyone who gets to taste them. Let’s keep the sweet momentum going!
Equipment Needed for Homemade Turtle Candy Clusters Recipe
Before we dive into the sweet world of turtle candy clusters, let’s make sure we have the right tools at our fingertips. Having the right equipment can make the process smoother and more enjoyable. Here’s what you’ll need:
- Medium saucepan: This is essential for melting the caramel. If you don’t have one, a small pot will work just fine.
- Parchment paper: Lining your baking sheet with parchment paper prevents the clusters from sticking. If you’re out of parchment, a silicone baking mat is a great alternative.
- Cookie scoop or spoon: A cookie scoop helps create uniform clusters, but a regular spoon will do the trick if you don’t have one.
- Microwave-safe bowl: This is where you’ll melt the chocolate. If you prefer, you can also use a double boiler for a more controlled melting process.
- Fork or piping bag: Use a fork to drizzle the chocolate over the clusters. A piping bag or a zip-top bag with a corner snipped off can give you more precision.
With these tools in hand, you’re all set to create your delicious Homemade Turtle Candy Clusters. Remember, the right equipment can make your cooking experience more enjoyable, so don’t hesitate to get creative with what you have! Let’s keep the sweet adventure going!
Variations of Homemade Turtle Candy Clusters Recipe
As I’ve experimented with my Homemade Turtle Candy Clusters Recipe, I’ve discovered that there are countless ways to put a unique spin on this classic treat. Each variation brings its own delightful twist, making it even more fun to create and share. Here are a few of my favorite variations that you might want to try:
- Nutty Delight: Swap out pecans for a mix of your favorite nuts, like cashews and hazelnuts. Each nut adds a different flavor and crunch, making every bite a surprise!
- Chocolate Lovers: Use dark chocolate or even white chocolate for the drizzle. You can also mix in chocolate chips into the caramel for an extra chocolatey experience.
- Spiced Up: Add a sprinkle of cinnamon or cayenne pepper to the caramel for a warm, spicy kick. It’s a fun way to surprise your taste buds!
- Fruit Fusion: Incorporate dried fruits like apricots or raisins into the clusters. The sweetness of the fruit pairs beautifully with the rich caramel and chocolate.
- Salted Caramel: For a gourmet touch, sprinkle flaky sea salt on top of the chocolate drizzle. This adds a delightful contrast that elevates the flavors.
These variations not only keep things exciting in the kitchen but also allow you to cater to different tastes and preferences. I love to experiment and see what new combinations I can come up with. So, don’t be afraid to get creative and make this recipe your own!
Cooking Notes for Homemade Turtle Candy Clusters Recipe
As I’ve whipped up my Homemade Turtle Candy Clusters over the years, I’ve gathered a few cooking notes that can help you achieve the best results. These little tips can make a big difference in your candy-making adventure!
- Temperature Matters: When melting caramel, keep the heat low. High temperatures can cause the caramel to seize up or burn, ruining that smooth texture we’re aiming for.
- Chill Time: After assembling your clusters, let them cool at room temperature for about 30 minutes. If you’re in a hurry, pop them in the fridge for 10-15 minutes to help the chocolate set faster.
- Storage Tips: Store your turtle candy clusters in an airtight container at room temperature. They’ll stay fresh for up to a week, but I bet they won’t last that long!
- Experiment with Timing: If you’re making these for a special occasion, consider making them a day ahead. They taste even better after the flavors have had time to meld together.
These cooking notes are just a few of the insights I’ve picked up along the way. They’ll help you navigate the process with ease and confidence. So, let’s keep the sweet momentum going and create some delicious memories together!
Serving Suggestions for Homemade Turtle Candy Clusters Recipe
Now that we’ve crafted our delightful Homemade Turtle Candy Clusters, it’s time to think about how to serve them! Presentation can elevate your treats from simple snacks to show-stopping desserts. Here are a few serving suggestions that I absolutely love:
- On a Decorative Platter: Arrange the clusters on a beautiful serving platter. You can even add some fresh fruit or edible flowers around them for a pop of color. It makes for a stunning centerpiece at any gathering!
- In Gift Boxes: If you’re feeling generous, package the clusters in cute little boxes or bags. Tie them with a ribbon for a thoughtful homemade gift. Friends and family will appreciate the personal touch!
- With Ice Cream: Serve the clusters alongside a scoop of vanilla or chocolate ice cream. The warm caramel and chocolate pair perfectly with the cold ice cream, creating a delightful contrast.
- As a Topping: Crumble some clusters over a slice of cheesecake or brownies. This adds a crunchy texture and a burst of flavor that takes your dessert to the next level!
- With Coffee or Tea: Enjoy these sweet treats with a warm cup of coffee or tea. The rich flavors of the clusters complement the warmth of your drink, making for a cozy afternoon snack.
These serving suggestions not only enhance the experience of enjoying your Homemade Turtle Candy Clusters but also allow you to share the joy with others. Whether it’s a casual family gathering or a festive celebration, these clusters are sure to impress!
Tips for Making Homemade Turtle Candy Clusters Recipe
As I’ve crafted my Homemade Turtle Candy Clusters time and time again, I’ve picked up a few handy tips that can make your candy-making experience even more enjoyable. These little nuggets of wisdom can help you avoid common pitfalls and ensure your clusters turn out perfectly every time!
- Prep Ahead: Before you start, gather all your ingredients and tools. Having everything ready to go makes the process smoother and more enjoyable. Trust me, it saves you from scrambling around the kitchen!
- Use Quality Chocolate: The chocolate you choose can make a big difference in flavor. I always opt for high-quality chocolate chips or bars. It elevates the taste of your clusters and makes them feel extra special.
- Don’t Rush the Cooling: Allow your clusters to cool completely before serving or storing. This helps the chocolate set properly and keeps everything intact. Patience is key here!
- Experiment with Flavors: Don’t hesitate to try different nuts, chocolates, or add-ins. Each variation can lead to a delightful surprise. I love discovering new combinations that become instant favorites!
- Keep It Clean: Use a damp cloth to wipe down your workspace as you go. A tidy kitchen makes the process more enjoyable and helps you focus on creating those delicious clusters.
With these tips in your back pocket, you’re all set to create your own batch of Homemade Turtle Candy Clusters. Remember, cooking is all about having fun and experimenting, so let your creativity shine through!
Breakdown of Time for Homemade Turtle Candy Clusters Recipe
As a passionate home cook, I know that timing can make or break a recipe. When it comes to my Homemade Turtle Candy Clusters, having a clear breakdown of time helps me stay organized and ensures everything comes together perfectly. Here’s how the timing breaks down:
- Prep Time: 15 minutes – This includes gathering your ingredients, toasting the nuts, and melting the caramel. It’s a quick and enjoyable process that gets you excited for the sweet adventure ahead!
- Cooking Time: 10 minutes – This is the time spent melting the caramel and assembling the clusters. It’s amazing how quickly these delightful treats come together!
- Total Time: 25 minutes – In just 25 minutes, you can have your very own batch of Homemade Turtle Candy Clusters ready to cool and enjoy. It’s a sweet reward for a little bit of effort!
With this time breakdown, you can easily plan your candy-making session. Whether you’re whipping them up for a special occasion or just because, knowing how long it takes makes the process even more enjoyable. So, let’s keep the sweet momentum going and get ready to indulge in these delicious clusters!
Nutritional Information for Homemade Turtle Candy Clusters Recipe
As I whip up my Homemade Turtle Candy Clusters, I often think about the balance between indulgence and nutrition. While these treats are definitely a sweet delight, it’s good to know what we’re enjoying. Here’s a quick breakdown of the nutritional information per cluster, assuming you make about 12 clusters from the recipe:
- Calories: Approximately 150 calories
- Fat: 8 grams (mostly from nuts and chocolate)
- Carbohydrates: 18 grams
- Sugar: 10 grams (from caramel and chocolate)
- Protein: 2 grams (thanks to the nuts)
- Fiber: 1 gram (from the nuts)
Keep in mind that these values can vary based on the specific ingredients you choose. For instance, using dark chocolate or adding dried fruits can change the nutritional profile. I always encourage enjoying these clusters in moderation, as they are a delightful treat meant to be savored. So, indulge a little, and let the flavors dance on your taste buds!
Frequently Asked Questions about Homemade Turtle Candy Clusters Recipe
As I’ve shared my Homemade Turtle Candy Clusters Recipe with friends and family, I’ve noticed a few common questions pop up. It’s always great to clarify any doubts and help fellow home cooks feel confident in their candy-making adventures. Here are some of the most frequently asked questions I encounter:
Can I use different types of nuts?
Absolutely! While I love using pecans for their buttery flavor, you can easily swap them for walnuts, almonds, or even cashews. Each nut brings its own unique taste and texture, so feel free to experiment!
What if I don’t have caramel candies?
If you can’t find caramel candies, you can make your own caramel sauce using sugar, butter, and cream. Just be sure to let it cool slightly before drizzling it over the nuts. It’s a fun way to add a personal touch to your clusters!
How should I store the turtle candy clusters?
To keep your clusters fresh, store them in an airtight container at room temperature. They’ll stay delicious for up to a week. If you live in a warm climate, consider refrigerating them to prevent the chocolate from melting.
Can I make these clusters ahead of time?
Yes! In fact, making them a day in advance can enhance the flavors as they meld together. Just be sure to store them properly, and they’ll be ready to impress your guests when the time comes!
Is it possible to make these clusters vegan?
Yes, you can make vegan turtle candy clusters by using dairy-free chocolate and vegan caramel. There are many great store-bought options available, or you can make your own using coconut milk and sugar. It’s a delicious way to cater to different dietary preferences!
These FAQs should help clear up any uncertainties you might have about making your own Homemade Turtle Candy Clusters. Remember, cooking is all about having fun and experimenting, so don’t hesitate to make this recipe your own! If you have any other questions, feel free to reach out. Happy cooking!
Conclusion on Homemade Turtle Candy Clusters Recipe
As I wrap up my journey through the delightful world of Homemade Turtle Candy Clusters, I can’t help but feel a sense of joy and satisfaction. This recipe is not just about creating a sweet treat; it’s about the memories made in the kitchen, the laughter shared with loved ones, and the smiles that follow each bite. The combination of crunchy nuts, gooey caramel, and rich chocolate creates a symphony of flavors that is simply irresistible.
What I love most is how versatile this recipe is. Whether you’re making them for a special occasion, a cozy family gathering, or just because you want to indulge, these clusters are sure to impress. Plus, with the option to customize them to your taste, every batch can be a new adventure. From adding a sprinkle of sea salt to experimenting with different nuts, the possibilities are endless!
So, if you’re looking for a fun and rewarding cooking experience, I encourage you to give this Homemade Turtle Candy Clusters Recipe a try. Not only will you enjoy the process, but you’ll also create a delicious treat that brings joy to everyone who gets to taste it. Happy cooking, and may your kitchen always be filled with sweetness!


