Introduction to Homemade Rainbow Bouncy Balls
In a world where creativity often takes a backseat to busy schedules, finding a fun and engaging craft project can be a breath of fresh air. Homemade Rainbow Bouncy Balls are not only a delightful way to spend time with your kids but also a fantastic opportunity to unleash your inner artist. This DIY project is perfect for busy moms and professionals looking to add a splash of color and joy to their day.
As a busy mom myself, I understand how challenging it can be to carve out time for creative activities. However, I’ve found that taking just a few moments to craft can be incredibly rewarding. With simple ingredients and easy-to-follow steps, you can create vibrant bouncy balls that will bring smiles to faces of all ages. I remember the first time I made these with my kids; the laughter and excitement as they watched the colors swirl together was priceless!
Not only do these DIY craft projects provide a wonderful bonding experience, but they also allow us to tap into our creativity. Whether you’re a seasoned crafter or just starting out, making Homemade Rainbow Bouncy Balls is an enjoyable way to express yourself. So, gather your materials, and let’s dive into this colorful adventure together!
Why You’ll Love This Homemade Rainbow Bouncy Balls
Creating Homemade Rainbow Bouncy Balls is a delightful experience that I cherish every time I dive into this project. One of the best aspects is how it fosters creativity without breaking the bank. As a busy mom, I appreciate that this craft is not only simple but also incredibly budget-friendly. With just a few common ingredients, you can create something truly magical!
What I love most about this project is the endless customization it offers. Each time I make these bouncy balls, I find myself experimenting with different color combinations and patterns. It’s like being a kid again, mixing paints and watching the colors come to life! I remember one afternoon when my kids and I decided to create a “galaxy” theme. We swirled dark blues and purples together, and the result was nothing short of stunning. The excitement on their faces as they bounced their creations around the yard was priceless!
Another reason to love this DIY craft is how quickly you can whip up these colorful creations. In just about 25 minutes, you can go from gathering materials to bouncing your very own bouncy balls. It’s a perfect way to squeeze in a little creativity during a busy day. I often find that taking a short break to craft helps me recharge and brings a smile to my face.
So, whether you’re looking to entertain your kids or simply want to indulge in a fun, colorful project, Homemade Rainbow Bouncy Balls are the perfect choice. They not only provide hours of fun but also create lasting memories that you and your family will treasure. Let’s get crafting!
Materials Needed for Homemade Rainbow Bouncy Balls
To get started on your Homemade Rainbow Bouncy Balls, gather the following materials. I always find that having everything ready makes the crafting process smoother and more enjoyable:
- 1 cup of warm water: This helps dissolve the glue, making it easier to mix.
- 1/2 cup of white school glue: This is the base for your bouncy balls, providing that satisfying squishiness!
- 1/2 cup of liquid starch: This thickens the mixture and gives the balls their bouncy quality.
- Food coloring (various colors): Choose your favorite shades to create vibrant, colorful balls. I love using a rainbow of colors to make each ball unique!
- 1 tablespoon of cornstarch: This adds to the texture and bounce, ensuring your creations are fun to play with.
Having these materials on hand not only makes the process efficient but also allows for spontaneous creativity. I remember one time, I had a few extra colors of food coloring lying around, and we ended up with a beautiful mix of neon bouncy balls that my kids adored!
*For a printable full list of materials, see below.*
Tools Required for Homemade Rainbow Bouncy Balls
Before diving into the crafting process, it’s essential to gather the right tools to ensure a smooth and enjoyable experience. I’ve learned that having everything ready not only saves time but also makes the crafting process more fun. Here’s what you’ll need:
- Mixing bowl: This is where the magic begins! A good-sized mixing bowl is crucial for combining your ingredients without any spills. I often use a large bowl so I can mix freely without worrying about splatters.
- Spoon or spatula: You’ll need a sturdy spoon or spatula to mix the ingredients thoroughly. I prefer using a spatula because it helps scrape down the sides of the bowl, ensuring everything is well combined. Plus, it’s great for getting every last bit of that colorful mixture!
- Measuring cups: Accurate measurements are key to achieving the perfect consistency for your bouncy balls. I always keep a set of measuring cups handy, as they help me keep track of the ingredients and ensure I don’t accidentally add too much or too little.
- Gloves (optional): While it’s tempting to dive in with bare hands, I recommend using gloves to keep your hands clean while mixing. The vibrant colors can be a bit stubborn to wash off, especially if you’re in a hurry. Plus, it adds a fun touch to the crafting experience!
Having these tools ready will set you up for success as you embark on your journey to create Homemade Rainbow Bouncy Balls. I remember the first time I forgot to grab my mixing bowl, and it turned into a bit of a chaotic adventure! So, trust me, a little preparation goes a long way in making this craft enjoyable.
How to Make Homemade Rainbow Bouncy Balls
Creating your own Homemade Rainbow Bouncy Balls is a fun and straightforward process that I absolutely love! Each step is filled with excitement as you watch your colorful creations come to life. Here’s how to do it:
Step 1: Combine Water and Glue
In a mixing bowl, combine the warm water and white school glue. Stir until well mixed. I find that using warm water helps the glue dissolve better, making it easier to blend. The moment you see the mixture start to come together is so satisfying!
Step 2: Add Liquid Starch
Next, pour in the liquid starch and stir the mixture until it begins to thicken. This is where the magic happens! I remember the first time I did this; I was amazed at how quickly it transformed from a liquid to a thick, gooey mixture. It’s like watching a science experiment unfold right in your kitchen!
Step 3: Divide the Mixture
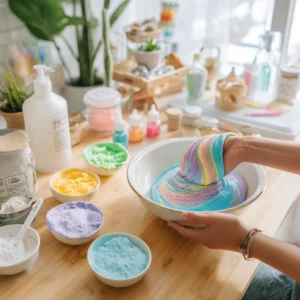
Now, divide the thickened mixture into separate bowls, one for each color you want to create. This is a great time to get creative! I often set out three or four bowls, each ready for a different vibrant hue. The anticipation of what colors will emerge is always thrilling!
Step 4: Add Food Coloring
Add a few drops of food coloring to each bowl and mix until the colors are well blended. This is my favorite part! Watching the colors swirl and blend together is like painting with a rainbow. I encourage you to experiment with different combinations—who knows what beautiful shades you’ll create!
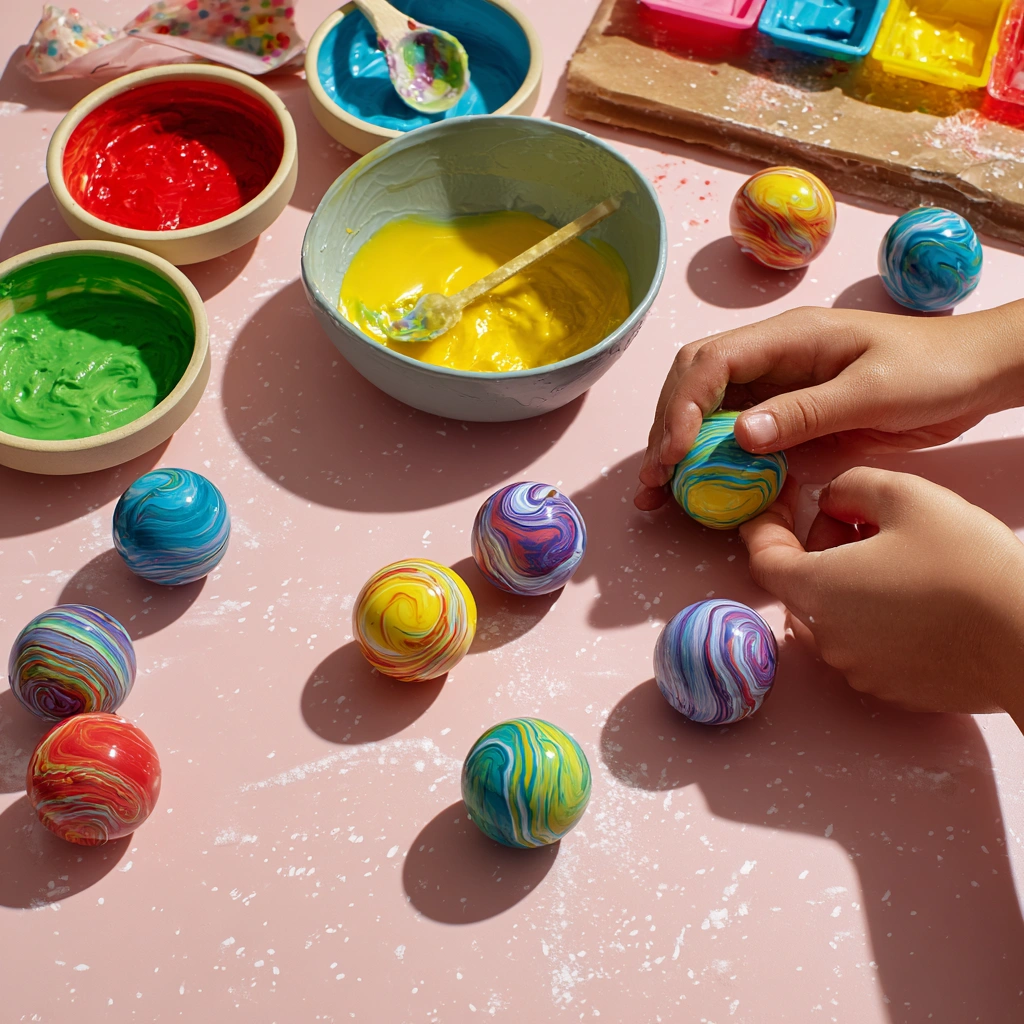
Step 5: Shape the Balls
Take a small amount of the mixture from one bowl and roll it into a ball shape with your hands. I love the tactile experience of shaping the balls; it’s so satisfying to feel them form in your palms. Just remember, the size is up to you—make them small for a fun challenge or larger for a bouncier experience!
Step 6: Let Them Firm Up
Allow the balls to sit for a few minutes to firm up. This waiting period is a great time to clean up your workspace or even plan a fun game to play with your new bouncy balls. I often find myself eagerly checking on them, excited to see how they’ve transformed!
Step 7: Enjoy!
Once they are firm, you can play with your homemade rainbow bouncy balls! The joy of bouncing them around the house or yard is unmatched. I love watching my kids’ faces light up as they play with the colorful creations we made together. It’s a simple pleasure that brings so much happiness!
Tips for Best Results
As I embarked on my journey to create Homemade Rainbow Bouncy Balls, I quickly learned that a few simple tips can make all the difference in the outcome of this delightful project. Here are some insights I’ve gathered that will help you achieve the best results:
- Experiment with Colors: Don’t be afraid to mix and match! I found that combining different food coloring shades can lead to stunning, unique patterns. Imagine a ball that transitions from a vibrant blue to a sunny yellow—it’s like holding a piece of the rainbow in your hand!
- Use Gloves: While it’s tempting to dive in with bare hands, I recommend using gloves to keep your hands clean. Trust me, the vibrant colors can be a bit stubborn to wash off, especially if you’re in a hurry!
- Storage Matters: After crafting, I learned the importance of storing the bouncy balls properly. Keeping them in a cool, dry place not only maintains their bounce but also extends their lifespan. I like to use a small container to keep them safe and sound.
These tips have transformed my crafting experience, making it not only enjoyable but also rewarding. I hope they help you as much as they helped me!
Project Variations
Get ready to unleash your creativity with some exciting variations of Homemade Rainbow Bouncy Balls! Each time I make these colorful creations, I find myself wanting to try something new. Here are some fun ideas to inspire your next crafting session:
- Style Variations: Why not add a little sparkle to your bouncy balls? I love experimenting with glitter or metallic food coloring to give them a dazzling effect. Imagine bouncing a ball that glimmers in the sunlight—it’s like having a piece of magic in your hand!
- Color Changes: Mixing colors can lead to stunning results! I often swirl different shades together to create marbled effects. The surprise of what the final product will look like is always thrilling. You might end up with a beautiful blend of colors that looks like a work of art!
- Seasonal Adaptations: Get festive by making themed colors for holidays! For instance, I love creating red and green bouncy balls for Christmas or pastel shades for Easter. It’s a fun way to celebrate the seasons and add a personal touch to your decorations or gifts.
These variations not only keep the crafting experience fresh but also allow you to tailor your DIY craft to suit any occasion. I encourage you to let your imagination run wild and see what unique creations you can come up with. Happy crafting!
Decoration and Usage Ideas
Once your Homemade Rainbow Bouncy Balls are ready, the fun doesn’t stop there! I’ve discovered so many creative ways to enjoy these colorful creations beyond just bouncing them around. Here are some delightful ideas to inspire you:
- Playtime: These bouncy balls are perfect for outdoor games or indoor fun! I love organizing mini competitions with my kids, like who can bounce their ball the highest or the farthest. It’s a great way to get everyone moving and laughing together. Plus, they make for a fantastic addition to any backyard party!
- Decor: Why not use your vibrant bouncy balls as colorful decorations? I often place them in a clear glass bowl or a decorative basket in the playroom or kids’ bedroom. They add a cheerful pop of color to the space and serve as a fun reminder of our crafting adventures. It’s like having a piece of our creativity on display!
- Gifts: These homemade treasures make unique gifts for friends or family! I love packaging them in small gift bags or boxes, especially for birthdays or special occasions. You can even include a little note about how they were made, adding a personal touch that everyone appreciates. It’s a heartfelt way to share the joy of crafting!
These ideas have transformed how I view my Homemade Rainbow Bouncy Balls. They’re not just toys; they’re a source of joy, creativity, and connection. I encourage you to explore these options and find your own unique ways to enjoy your colorful creations. Happy crafting!
FAQs about Homemade Rainbow Bouncy Balls
As I’ve shared my love for creating Homemade Rainbow Bouncy Balls, I often get questions from fellow crafters and parents. Here are some of the most common FAQs that I’ve encountered, along with my personal insights:
- Are these bouncy balls safe for kids?
Yes, all materials used in this project are non-toxic and safe for children. However, I always recommend supervising young children during the crafting process. It’s a great opportunity to bond and ensure they’re having fun safely! - How long do the bouncy balls last?
If stored properly in a cool, dry place, these colorful creations can last for several weeks. I’ve found that keeping them in a small container helps maintain their bounce and keeps them from getting squished. It’s like having a little treasure chest of joy! - Can I use other types of glue?
While white school glue is recommended for the best results, you can certainly experiment with other types. I’ve tried using clear glue in the past, and while it worked, I found that the school glue gives a better texture and bounce. It’s all about finding what works best for you!
These FAQs have helped me clarify some common concerns, and I hope they provide you with the confidence to dive into this fun DIY craft. Remember, crafting is all about exploration and creativity, so don’t hesitate to ask questions and share your experiences!
Final Thoughts
Creating Homemade Rainbow Bouncy Balls is not just a craft; it’s an opportunity to bond with your children and spark creativity in your home. I’ve found that these moments spent crafting together are some of the most cherished memories we create as a family. The laughter, the colorful mess, and the excitement of bouncing our creations around the yard are experiences that I hold dear.
This simple DIY project serves as a beautiful reminder that even in our busy lives, we can carve out moments of joy and laughter. I know how challenging it can be to find time for creative activities, but I promise you, the effort is worth it. Each bounce of those vibrant balls brings smiles not just to my kids but to me as well. It’s a delightful escape from the daily grind!
So gather your materials, invite your kids to join in, and let the colorful fun begin! Whether you’re experimenting with different colors or creating unique patterns, the joy of crafting together is what truly matters. You’ll cherish the memories made and the smiles created with each bounce. I encourage you to embrace this colorful adventure and let your creativity shine!
Print
Homemade Rainbow Bouncy Balls: Fun DIY Craft Project!
Description
This DIY project teaches you how to create colorful and bouncy balls using simple ingredients, perfect for kids and adults alike.
Instructions
- In a mixing bowl, combine the warm water and white school glue.
- Add the liquid starch to the mixture and stir until it starts to thicken.
- Divide the mixture into separate bowls for each color you want to create.
- Add a few drops of food coloring to each bowl and mix until the colors are well blended.
- Once the mixture is ready, take a small amount and roll it into a ball shape with your hands.
- Let the balls sit for a few minutes to firm up.
- Once they are firm, you can play with your homemade rainbow bouncy balls!
Keywords: Homemade Rainbow Bouncy Balls, DIY Craft, Kids Activities, Colorful Crafts