
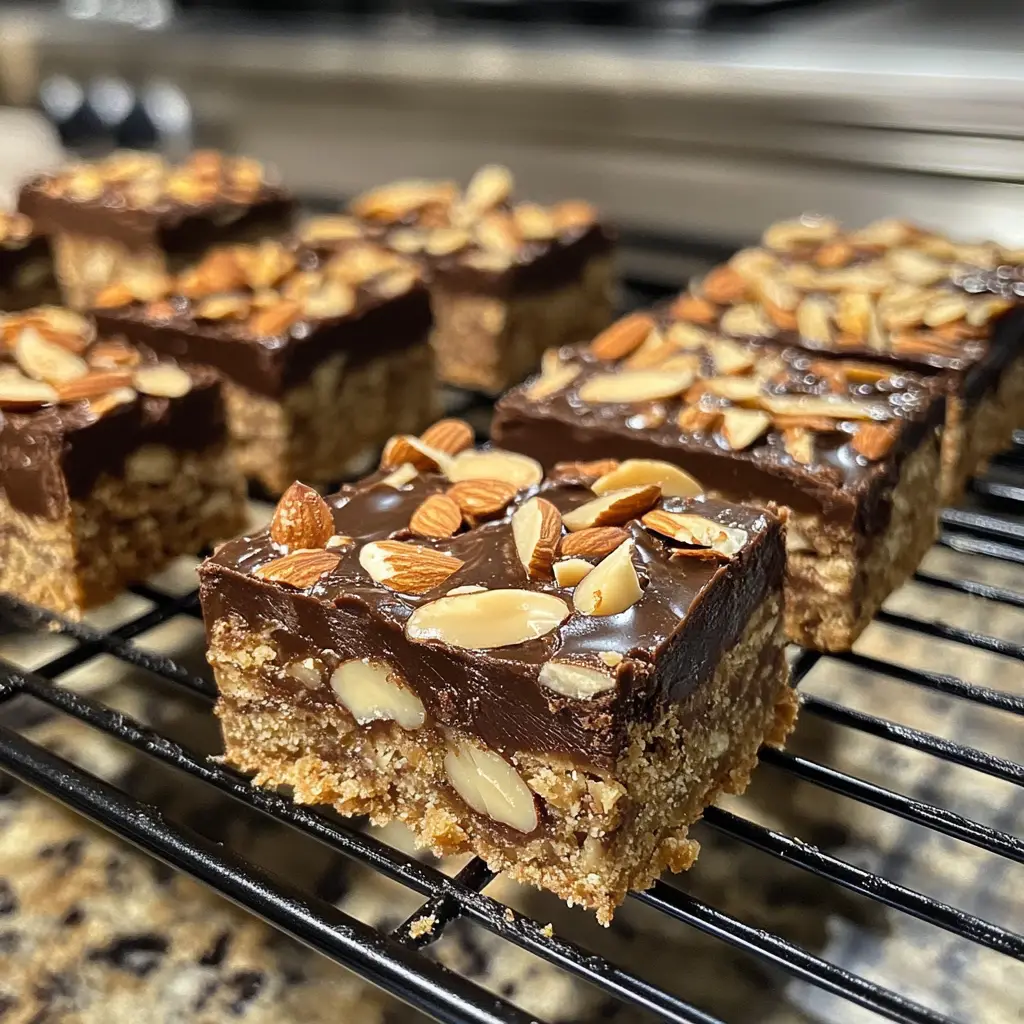
Introduction to Homemade Almond Joy Bars
As a passionate home cook, I find joy in recreating my favorite treats right in my kitchen. One of my all-time favorites is the classic Almond Joy candy bar. The combination of rich chocolate, sweet coconut, and crunchy almonds always brings back fond memories of childhood. I remember sneaking a bite of my mom’s stash, savoring each layer of flavor. It was like a little piece of paradise wrapped in shiny foil!
When I decided to make my own version of Almond Joy bars, I was thrilled to discover how simple and satisfying it could be. Not only do homemade Almond Joy bars taste incredible, but they also allow me to control the ingredients. I can use high-quality chocolate and fresh coconut, ensuring every bite is as delightful as I remember. Plus, making them at home means I can share them with friends and family, spreading the joy even further!
In this recipe, I’ll guide you through the process of creating these delicious bars from scratch. Whether you’re looking for a sweet treat to enjoy after dinner or a fun project to do with your kids, these homemade Almond Joy bars are sure to impress. So, roll up your sleeves, and let’s dive into the world of chocolatey, coconutty goodness!
Ingredients for Homemade Almond Joy Bars
Before we embark on this delightful culinary adventure, let’s gather our ingredients. I always believe that the quality of ingredients can make or break a recipe. So, let’s make sure we’re using the best! Here’s what you’ll need to create your very own homemade Almond Joy bars.
Main Ingredients
- 2 cups shredded coconut: I prefer unsweetened coconut for a more authentic taste. It gives that chewy texture we all love!
- 1 cup sweetened condensed milk: This is the magic ingredient that binds everything together. It adds sweetness and creaminess.
- 1 teaspoon vanilla extract: A splash of vanilla elevates the flavor, making it even more irresistible.
- 2 cups dark chocolate chips: I like to use at least 60% cocoa for a rich chocolatey flavor. You can also use milk chocolate if you prefer a sweeter taste.
- 1 cup whole almonds: These will add that satisfying crunch. You can toast them lightly for an extra layer of flavor!
Optional Add-ons
- Sea salt: A sprinkle of flaky sea salt on top of the chocolate can enhance the sweetness and add a gourmet touch.
- Almond extract: If you’re a fan of almond flavor, a few drops can intensify the nutty essence.
- Chopped nuts: Feel free to mix in some chopped pecans or walnuts for added texture and flavor.
When sourcing your ingredients, I recommend visiting local markets for fresh coconut and high-quality chocolate. It makes a world of difference! Now that we have everything ready, let’s move on to the next step of our delicious journey.
How to Prepare Homemade Almond Joy Bars
Now that we have our ingredients ready, it’s time to roll up our sleeves and get cooking! Making homemade Almond Joy bars is a fun and rewarding process. I love how each step brings me closer to that delicious final product. Let’s dive into the steps together!
Step 1: Prepare the Coconut Mixture
First things first, we need to create that delightful coconut base. In a large mixing bowl, combine the shredded coconut, sweetened condensed milk, and vanilla extract. Stir everything together until the coconut is well-coated and sticky. It should feel like a tropical dream!
Tips for Step 1
- Make sure to use a sturdy spatula or your hands to mix. It can get a bit sticky, but that’s part of the fun!
- If you want a more intense coconut flavor, consider adding a splash of coconut extract.
Step 2: Form the Bars
Once your coconut mixture is ready, it’s time to shape it into bars. Line a baking dish with parchment paper for easy removal. Take a handful of the coconut mixture and press it firmly into the dish, creating a flat layer. Aim for about half an inch thick. This is where the magic begins!
Tips for Step 2
- Wet your hands slightly to prevent the mixture from sticking to your fingers.
- Use a ruler to ensure even bars if you want them to look perfectly uniform.
Step 3: Melt the Chocolate
Now, let’s melt the chocolate! I usually do this in a microwave-safe bowl. Heat the chocolate chips in 30-second intervals, stirring in between until smooth and creamy. The aroma of melting chocolate is simply heavenly!
Tips for Step 3
- Be careful not to overheat the chocolate. It can seize up and become grainy if you’re not careful.
- If you prefer, you can melt the chocolate using a double boiler for more control.
Step 4: Coat the Bars
With the chocolate melted, it’s time to coat our coconut bars! Dip each bar into the chocolate, ensuring it’s fully covered. Let the excess chocolate drip off before placing it back on the parchment paper. This is where the bars start to look like the real deal!
Tips for Step 4
- For a thicker chocolate coating, you can double dip the bars after the first layer has set.
- Consider using a fork to help with dipping. It makes the process cleaner and easier!
Step 5: Add Almonds
Finally, it’s time to add the almonds! While the chocolate is still wet, gently press an almond on top of each bar. This not only adds a lovely crunch but also gives that classic Almond Joy look. It’s the cherry on top of our chocolatey creation!
Tips for Step 5
- Feel free to toast the almonds beforehand for an extra nutty flavor.
- If you’re feeling adventurous, try adding a sprinkle of sea salt on top for a sweet and salty contrast!
And there you have it! Your homemade Almond Joy bars are now ready to set. Place them in the fridge for about an hour to firm up. I can hardly wait to take a bite of these delicious treats!
Equipment Needed for Homemade Almond Joy Bars
Before we dive into the delicious world of homemade Almond Joy bars, let’s make sure we have the right tools at our fingertips. Having the right equipment can make the process smoother and more enjoyable. Here’s what you’ll need:
- Mixing Bowl: A large mixing bowl is essential for combining the coconut mixture. I love using a glass bowl because it’s easy to clean and lets me see the ingredients come together.
- Spatula: A sturdy spatula is perfect for mixing and pressing the coconut mixture into the baking dish. Silicone spatulas are my favorite because they’re flexible and won’t scratch your bowls.
- Baking Dish: A 9×9-inch baking dish works well for shaping the bars. If you don’t have one, a similar-sized dish or even a lined cookie sheet can do the trick!
- Parchment Paper: This is a must for easy removal of the bars. If you’re out of parchment paper, you can lightly grease the dish with cooking spray or oil.
- Microwave-Safe Bowl or Double Boiler: For melting the chocolate, you can use either method. A microwave-safe bowl is quick and convenient, while a double boiler gives you more control over the melting process.
- Fork or Dipping Tool: A fork is handy for dipping the bars into chocolate. If you have a candy dipping tool, that works great too!
With these tools in hand, you’re all set to create your homemade Almond Joy bars. Remember, cooking is all about improvisation, so feel free to use what you have on hand. Let’s get ready to make some magic in the kitchen!
Variations of Homemade Almond Joy Bars
As I’ve experimented with my homemade Almond Joy bars, I’ve discovered that there are so many fun variations to try! Each twist adds a unique flavor and keeps things exciting in the kitchen. Here are a few ideas that I absolutely love:
- Peanut Butter Bliss: Swap out some of the coconut for creamy peanut butter. The combination of chocolate, coconut, and peanut butter is simply divine!
- Minty Fresh: Add a few drops of peppermint extract to the coconut mixture for a refreshing minty flavor. It’s like a candy cane in bar form!
- Fruit Fusion: Mix in some dried fruits like cranberries or cherries for a burst of sweetness and a chewy texture. It’s a delightful surprise in every bite!
- Spicy Kick: For those who love a little heat, sprinkle in some cayenne pepper or chili powder to the chocolate. It adds a surprising kick that pairs beautifully with the sweetness.
- Vegan Delight: Use dairy-free chocolate and coconut cream instead of sweetened condensed milk for a vegan-friendly version. You won’t miss the dairy at all!
These variations not only keep my taste buds dancing but also allow me to cater to different preferences when sharing with friends and family. Feel free to get creative and make these bars your own! The possibilities are endless, and that’s what makes cooking so much fun!
Cooking Notes for Homemade Almond Joy Bars
As I’ve whipped up these delightful homemade Almond Joy bars, I’ve picked up a few cooking notes that can help you achieve the best results. These little tips can make a big difference in your candy-making adventure!
- Chill Time: After coating the bars in chocolate, be patient! Allow them to chill in the fridge for at least an hour. This helps the chocolate set perfectly, giving you that satisfying snap when you take a bite.
- Storage: Store your homemade Almond Joy bars in an airtight container in the fridge. They can last up to a week, but I doubt they’ll last that long once you taste them!
- Experiment with Sweetness: If you prefer a less sweet treat, feel free to adjust the amount of sweetened condensed milk. You can also use unsweetened coconut to balance the flavors.
- Chocolate Choices: While dark chocolate is my go-to, don’t hesitate to mix it up! Try using white chocolate or even a blend of chocolates for a unique twist.
- Texture Matters: For a chewier texture, let the coconut mixture sit for a few minutes after mixing. This allows the coconut to absorb some moisture from the condensed milk.
These cooking notes are just a few of the insights I’ve gathered along the way. Each batch of homemade Almond Joy bars is a chance to learn and grow as a cook. So, don’t be afraid to experiment and find what works best for you!
Serving Suggestions for Homemade Almond Joy Bars
Now that our homemade Almond Joy bars are ready, it’s time to think about how to serve them! I love to get creative with presentation, as it adds an extra touch of joy to the experience. Here are some delightful serving suggestions that I’ve enjoyed:
- On a Dessert Platter: Arrange the bars on a beautiful platter, perhaps alongside fresh fruit or other homemade treats. It makes for a stunning centerpiece at any gathering!
- With a Cup of Coffee: Pairing these bars with a warm cup of coffee or tea is a match made in heaven. The rich chocolate and sweet coconut complement the bitterness of the brew perfectly.
- As a Snack: Cut the bars into bite-sized pieces for a quick snack. They’re perfect for lunchboxes or as an afternoon pick-me-up!
- Drizzled with Extra Chocolate: For an indulgent touch, drizzle some melted chocolate over the top before serving. It adds a beautiful finish and extra flavor!
- With Ice Cream: Serve a bar alongside a scoop of vanilla or coconut ice cream for a decadent dessert. The combination of cold and creamy with the chewy bars is simply irresistible!
These serving suggestions not only enhance the enjoyment of your homemade Almond Joy bars but also make them a delightful treat for any occasion. Whether it’s a cozy night in or a festive gathering, these bars are sure to bring smiles all around!
Tips for Making Homemade Almond Joy Bars
As I’ve crafted my homemade Almond Joy bars, I’ve gathered a treasure trove of tips that can elevate your candy-making experience. These little nuggets of wisdom can help you achieve the perfect balance of flavors and textures. Here are my top tips to ensure your bars turn out amazing:
- Use Fresh Ingredients: Fresh coconut and high-quality chocolate make a world of difference. I always opt for unsweetened coconut and dark chocolate with at least 60% cocoa for the best flavor.
- Don’t Rush the Chilling: Patience is key! Allow the bars to chill in the fridge for at least an hour. This helps the chocolate set properly and makes them easier to cut.
- Experiment with Sweetness: If you prefer a less sweet treat, adjust the amount of sweetened condensed milk. You can also use unsweetened coconut to balance the sweetness.
- Get Creative with Toppings: Don’t hesitate to add your favorite toppings! A sprinkle of sea salt or a drizzle of caramel can take these bars to the next level.
- Make Ahead: These bars can be made in advance and stored in the fridge. They’re perfect for parties or as a sweet surprise for guests!
With these tips in your back pocket, you’re all set to create delicious homemade Almond Joy bars that will impress everyone. Enjoy the process, and don’t forget to savor each bite of your delightful creation!
Breakdown of Time for Homemade Almond Joy Bars
As I’ve spent time perfecting my homemade Almond Joy bars, I’ve learned that timing is everything in the kitchen. Knowing how long each step takes can help you plan your baking adventure better. Here’s a quick breakdown of the time you’ll need:
- Prep Time: 20 minutes – This includes gathering your ingredients, mixing the coconut mixture, and shaping the bars. It’s a fun and hands-on process!
- Cooking Time: 10 minutes – This is mainly for melting the chocolate and coating the bars. It’s quick, but oh-so-rewarding!
- Chilling Time: 1 hour – Patience is key here! Allowing the bars to chill in the fridge helps the chocolate set perfectly, giving you that satisfying snap when you take a bite.
Total Time: 1 hour and 30 minutes – In just a little over an hour, you’ll have delicious homemade Almond Joy bars ready to enjoy!
With this time breakdown, you can easily fit this delightful project into your day. Whether you’re making them for a special occasion or just to satisfy your sweet tooth, these bars are worth every minute spent in the kitchen!
Nutritional Information for Homemade Almond Joy Bars
As a home cook, I always find it helpful to know the nutritional content of the treats I make. It allows me to enjoy them mindfully and share that information with friends and family. Here’s a general breakdown of the nutritional information for one homemade Almond Joy bar, assuming you cut the batch into 12 bars:
- Calories: Approximately 200 calories
- Protein: 3 grams
- Fat: 12 grams
- Carbohydrates: 22 grams
- Sugar: 15 grams
- Fiber: 2 grams
Keep in mind that these values can vary based on the specific ingredients you use, such as the type of chocolate or the amount of sweetened condensed milk. If you’re looking to make these bars a bit healthier, consider using dark chocolate with a higher cocoa content or reducing the amount of sweetened condensed milk. It’s all about finding that perfect balance that suits your taste and dietary preferences!
With this nutritional information in hand, you can enjoy your homemade Almond Joy bars with a little more awareness. After all, it’s all about balance and savoring the sweet moments in life!
Frequently Asked Questions about Homemade Almond Joy Bars
As I’ve shared my love for homemade Almond Joy bars, I’ve noticed that many people have questions about the process and ingredients. It’s always great to clarify any doubts, especially when it comes to creating such a delightful treat! Here are some of the most frequently asked questions I’ve encountered, along with my answers:
Can I use unsweetened coconut instead of sweetened?
Absolutely! I often use unsweetened coconut for a more authentic flavor. Just keep in mind that you might want to adjust the amount of sweetened condensed milk to achieve the desired sweetness. It’s all about finding that perfect balance!
How long do these bars last?
When stored in an airtight container in the fridge, your homemade Almond Joy bars can last up to a week. However, I can almost guarantee they won’t last that long once you start sharing them with friends and family!
Can I freeze the bars for later?
Yes, you can! I love making a big batch and freezing some for later. Just wrap each bar tightly in plastic wrap and place them in a freezer-safe container. They can last for up to three months in the freezer. When you’re ready to enjoy them, simply let them thaw in the fridge.
What if I don’t have dark chocolate? Can I use milk chocolate instead?
Of course! While I prefer dark chocolate for its rich flavor, milk chocolate works just as well. It will give your bars a sweeter taste, which some people might enjoy even more. Feel free to use what you have on hand!
Can I make these bars vegan?
Yes, you can! To make vegan Almond Joy bars, simply substitute the sweetened condensed milk with coconut cream or a vegan alternative. Also, make sure to use dairy-free chocolate. You won’t miss the dairy at all!
How can I make the bars more chocolatey?
If you’re a chocolate lover like me, you can double dip the bars after the first layer of chocolate has set. This will give you a thicker chocolate coating that’s simply irresistible!
These questions are just a few of the common inquiries I’ve received about homemade Almond Joy bars. If you have any more questions or need further clarification, feel free to reach out! I’m always here to help fellow home cooks on their delicious journeys.
Conclusion on Homemade Almond Joy Bars
As I wrap up this delightful journey of making homemade Almond Joy bars, I can’t help but feel a sense of accomplishment and joy. These bars are not just a treat; they’re a celebration of flavors that bring back cherished memories. The combination of rich chocolate, sweet coconut, and crunchy almonds creates a symphony of taste that’s hard to resist.
What I love most about making these bars at home is the ability to customize them to my liking. Whether it’s adjusting the sweetness, experimenting with flavors, or adding a personal touch, each batch becomes a unique creation. Plus, sharing them with friends and family spreads happiness and creates new memories together.
So, if you’re looking for a fun and rewarding kitchen project, I wholeheartedly encourage you to try making your own homemade Almond Joy bars. They’re perfect for any occasion, whether it’s a cozy night in or a festive gathering. With just a few simple ingredients and a little love, you can create a treat that’s sure to delight everyone. Happy cooking!


