Galaxy Crystals: Create Stunning DIY Home Decor Today!
Introduction to Galaxy Crystals
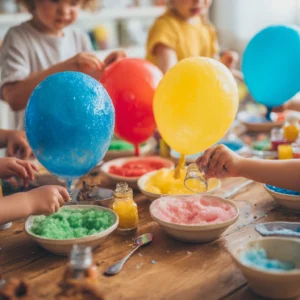
In a world where creativity often takes a backseat to our busy lives, finding time to express ourselves can be a challenge. However, crafting can be a delightful escape, especially when it results in beautiful home decor. One such project that combines simplicity and stunning results is creating Galaxy Crystals. These colorful, shimmering crystals not only add a touch of magic to your home but also provide a fun and engaging activity for busy moms and professionals alike. Let’s dive into the enchanting world of Galaxy Crystals and discover how you can create your own!
Why You’ll Love This Galaxy Crystals
Creating Galaxy Crystals is a fantastic way to unleash your creativity without breaking the bank. This DIY project is not only affordable but also incredibly simple, making it perfect for those who may not consider themselves crafty. The vibrant colors and unique shapes of the crystals will brighten up any space, allowing you to personalize your home decor effortlessly. Plus, the satisfaction of making something beautiful with your own hands is truly rewarding!
Materials Needed for Galaxy Crystals
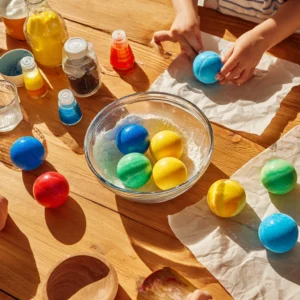
To get started on your Galaxy Crystals, gather the following materials:
- 1 cup of sugar: This is the main ingredient that will crystallize.
- 1 cup of water: Used to dissolve the sugar.
- Food coloring (various colors): To create vibrant, galaxy-like hues.
- Glass jar or container: Where the crystals will form.
- String: To suspend the crystals in the solution.
- Skewers or sticks: To hold the string in place.
For a printable full list of materials, see below.
Tools Required for Galaxy Crystals
You will need a few basic tools to create your Galaxy Crystals:
- Stove: For heating the sugar and water mixture.
- Measuring cups: To ensure accurate measurements of ingredients.
- Heat-resistant container: To mix the hot solution safely.
- Spoon: For stirring the mixture.
If you don’t have a stove, you can use a microwave-safe container to heat the water and sugar mixture in the microwave.
How to Make Galaxy Crystals
Follow these simple steps to create your own stunning Galaxy Crystals:
Step 1: Prepare the Sugar Solution
In a saucepan, combine 1 cup of water and 1 cup of sugar. Heat the mixture over medium heat, stirring until the sugar dissolves completely.
Step 2: Add Color
Once the sugar is fully dissolved, remove the saucepan from heat. Add food coloring to the mixture to achieve your desired color. Feel free to mix colors for a more vibrant galaxy effect!
Step 3: Pour into Jar
Carefully pour the colored solution into a glass jar or container, leaving some space at the top.
Step 4: Set Up the String
Attach a string to a skewer or stick, ensuring it’s long enough to hang down into the solution without touching the bottom. Place the skewer across the top of the jar so that the string dangles into the liquid.
Step 5: Let Crystals Form
Leave the jar in a cool, undisturbed place for several days. During this time, the crystals will begin to form along the string.
Step 6: Remove and Dry
Once the crystals have formed to your liking, carefully remove them from the jar and let them dry on a paper towel.
Tips for Best Results
To ensure your Galaxy Crystals turn out beautifully, keep these tips in mind:
- Experiment with different colors of food coloring for unique effects.
- Make sure the jar is not disturbed during the crystallization process.
- Use different sizes of jars for varying crystal sizes.
Project Variations
Get creative with your Galaxy Crystals by trying out these variations:
- Color Combinations: Mix different food coloring shades to create a multi-colored effect.
- Seasonal Themes: Use colors that reflect the seasons, like pastels for spring or deep reds and greens for the holidays.
- Different Shapes: Use various containers to create crystals in different shapes and sizes.
Decoration and Usage Ideas
Once your Galaxy Crystals are complete, here are some ideas on how to display them:
- Table Centerpieces: Place them in a decorative bowl for a stunning centerpiece.
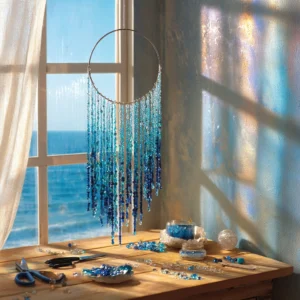
- Window Sills: Display them on window sills to catch the light and create a shimmering effect.
- Gift Ideas: Package them in pretty boxes as unique gifts for friends and family.
FAQs about Galaxy Crystals
Q: How long does it take for the crystals to form?
A: The crystallization process typically takes about 5 days.
Q: Can I use other types of sugar?
A: Yes, you can experiment with different sugars, but granulated sugar works best for this project.
Q: Are Galaxy Crystals safe for children?
A: While the materials are generally safe, adult supervision is recommended, especially when handling hot liquids.
Final Thoughts
Creating Galaxy Crystals is not just a fun DIY project; it’s an opportunity to express your creativity and add a personal touch to your home decor. As busy moms and professionals, taking a little time for yourself to craft can be incredibly rewarding. So gather your materials, unleash your inner artist, and enjoy the process of making something beautiful. Your stunning Galaxy Crystals will not only brighten your home but also serve as a reminder of the joy that comes from creating with your own hands. Happy crafting!
Introduction to Galaxy Crystals
In a world where creativity often takes a backseat to our busy lives, finding time to express ourselves can be a challenge. However, crafting can be a delightful escape, especially when it results in beautiful home decor. One such project that combines simplicity and stunning results is creating Galaxy Crystals. These colorful, shimmering crystals not only add a touch of magic to your home but also provide a fun and engaging activity for busy moms and professionals alike. Let’s dive into the enchanting world of Galaxy Crystals and discover how you can create your own!
Why You’ll Love This Galaxy Crystals
Creating Galaxy Crystals is a fantastic way to unleash your creativity without breaking the bank. I remember the first time I attempted this project; I was amazed at how something so simple could yield such stunning results. This DIY project is not only affordable but also incredibly simple, making it perfect for those of us who may not consider ourselves crafty.
The vibrant colors and unique shapes of the crystals will brighten up any space, allowing you to personalize your home decor effortlessly. I love placing my Galaxy Crystals on the window sill, where they catch the sunlight and create a mesmerizing display. It’s like having a piece of the night sky right in my home!
Plus, the satisfaction of making something beautiful with your own hands is truly rewarding. Each time I see my crystals, I’m reminded of the joy that comes from crafting. It’s a wonderful way to take a break from the hustle and bustle of daily life, even if just for a moment. So, if you’re looking for a fun and engaging activity that fits into your busy schedule, this project is definitely worth trying!
Materials Needed for Galaxy Crystals
To get started on your Galaxy Crystals, gather the following materials:
- 1 cup of sugar: This is the main ingredient that will crystallize.
- 1 cup of water: Used to dissolve the sugar.
- Food coloring (various colors): To create vibrant, galaxy-like hues.
- Glass jar or container: Where the crystals will form.
- String: To suspend the crystals in the solution.
- Skewers or sticks: To hold the string in place.
For a printable full list of materials, see below.
Tools Required for Galaxy Crystals
You will need a few basic tools to create your Galaxy Crystals:
- Stove: For heating the sugar and water mixture. I remember the first time I used my stove for this project; it felt like I was conducting a little science experiment in my kitchen!
- Measuring cups: To ensure accurate measurements of ingredients. Precision is key in crafting, and having the right tools makes all the difference.
- Heat-resistant container: To mix the hot solution safely. I always opt for a sturdy glass or metal container to avoid any mishaps.
- Spoon: For stirring the mixture. A simple tool, but one that plays a crucial role in ensuring the sugar dissolves completely.
If you don’t have a stove, you can use a microwave-safe container to heat the water and sugar mixture in the microwave. Just be sure to keep an eye on it to prevent any spills!
How to Make Galaxy Crystals
Follow these simple steps to create your own stunning Galaxy Crystals:
Step 1: Prepare the Sugar Solution
In a saucepan, combine 1 cup of water and 1 cup of sugar. Heat the mixture over medium heat, stirring until the sugar dissolves completely. I remember the excitement I felt as the sugar melted away, transforming the liquid into a sweet solution. It’s like watching magic happen right in your kitchen!
Step 2: Add Color
Once the sugar is fully dissolved, remove the saucepan from heat. Add food coloring to the mixture to achieve your desired color. Feel free to mix colors for a more vibrant galaxy effect! I love experimenting with different shades; sometimes I create a deep blue, while other times, I go for a bright purple. The possibilities are endless!
Step 3: Pour into Jar
Carefully pour the colored solution into a glass jar or container, leaving some space at the top. This is where the magic will happen, so take your time to avoid spills. I always find it helpful to use a funnel for this step, especially if I’m feeling a bit clumsy!
Step 4: Set Up the String
Attach a string to a skewer or stick, ensuring it’s long enough to hang down into the solution without touching the bottom. Place the skewer across the top of the jar so that the string dangles into the liquid. This part is crucial, as the string is what the crystals will cling to as they form. I often find myself adjusting the string to get it just right!
Step 5: Let Crystals Form
Leave the jar in a cool, undisturbed place for several days. During this time, the crystals will begin to form along the string. I always check back every day, peeking into the jar to see the progress. It’s like waiting for a surprise gift to reveal itself!
Step 6: Remove and Dry
Once the crystals have formed to your liking, carefully remove them from the jar and let them dry on a paper towel. This is the moment of truth! I can’t help but feel a sense of accomplishment as I hold my beautiful Galaxy Crystals in my hands, ready to be displayed in my home.
Tips for Best Results
To ensure your Galaxy Crystals turn out beautifully, keep these tips in mind:
- Experiment with different colors of food coloring for unique effects. I love mixing shades to create a galaxy that reflects my mood or the season. Don’t be afraid to get creative!
- Make sure the jar is not disturbed during the crystallization process. I learned this the hard way when my first batch got jostled, and the crystals didn’t form as beautifully. Find a quiet spot in your home where they can grow undisturbed.
- Use different sizes of jars for varying crystal sizes. I often use small jars for delicate crystals and larger ones for more dramatic pieces. It’s amazing how the size of the container can change the outcome!
Remember, crafting is all about enjoying the process. If things don’t turn out perfectly the first time, don’t be discouraged! Each attempt is a step toward mastering your craft. Happy crafting!
Project Variations
Get creative with your Galaxy Crystals by trying out these variations:
- Color Combinations: Mix different food coloring shades to create a multi-colored effect. I remember the first time I combined blue and purple; the result was a stunning blend that reminded me of a twilight sky. Don’t hesitate to experiment—each batch can be a unique masterpiece!
- Seasonal Themes: Use colors that reflect the seasons, like pastels for spring or deep reds and greens for the holidays. I love making soft pink and yellow crystals for Easter, and during the winter, I often opt for icy blues and whites. It’s a wonderful way to bring a seasonal touch to your home decor!
- Different Shapes: Use various containers to create crystals in different shapes and sizes. I’ve used everything from mason jars to small bowls, and each one produces a distinct look. The shape of the container can influence how the crystals form, making it a fun way to add variety to your collection.
These variations not only enhance the visual appeal of your Galaxy Crystals but also allow you to express your creativity in new ways. Each time I try a new variation, I feel like I’m embarking on a new adventure in crafting. So gather your materials, let your imagination run wild, and enjoy the process of creating something truly special!
Decoration and Usage Ideas
Once your Galaxy Crystals are complete, the fun doesn’t stop there! Here are some creative ideas on how to display them and make the most of your beautiful creations:
- Table Centerpieces: Place your crystals in a decorative bowl for a stunning centerpiece. I love using a clear glass bowl to showcase the vibrant colors of my crystals. It instantly elevates the dining table and becomes a conversation starter during family gatherings!
- Window Sills: Display them on window sills to catch the light and create a shimmering effect. The way the sunlight dances off the crystals is simply magical. I often find myself pausing to admire the view, especially in the morning when the light is just right.
- Gift Ideas: Package your Galaxy Crystals in pretty boxes as unique gifts for friends and family. I’ve given these as gifts for birthdays and holidays, and they’re always a hit! Adding a personal touch, like a handwritten note, makes it even more special.
These ideas not only enhance the beauty of your home but also allow you to share the joy of crafting with others. Each time I see my Galaxy Crystals displayed, I’m reminded of the fun I had creating them and the happiness they bring to my space. So go ahead, get creative with your displays, and let your stunning crystals shine!
FAQs about Galaxy Crystals
Q: How long does it take for the crystals to form?
A: The crystallization process typically takes about 5 days. I remember the anticipation I felt during those days, checking in on my crystals and watching them grow. It’s like waiting for a surprise to unfold!
Q: Can I use other types of sugar?
A: Yes, you can experiment with different sugars, but granulated sugar works best for this project. I’ve tried using brown sugar once, and while it created a unique texture, the results were not as vibrant. Stick with granulated sugar for the best outcome!
Q: Are Galaxy Crystals safe for children?
A: While the materials are generally safe, adult supervision is recommended, especially when handling hot liquids. I always make sure to involve my kids in the fun, but I keep a close eye on them during the heating process. It’s a great way to teach them about science and creativity while ensuring safety!
Final Thoughts
Creating Galaxy Crystals is not just a fun DIY project; it’s an opportunity to express your creativity and add a personal touch to your home decor. I can’t emphasize enough how fulfilling it is to see something beautiful emerge from a simple mixture of sugar and water. As busy moms and professionals, taking a little time for yourself to craft can be incredibly rewarding.
Every time I look at my shimmering crystals, I’m reminded of the joy that comes from creating with my own hands. It’s a wonderful way to unwind and escape the hustle and bustle of daily life, even if just for a moment. So gather your materials, unleash your inner artist, and enjoy the process of making something beautiful.
Your stunning Galaxy Crystals will not only brighten your home but also serve as a reminder of the creativity that lies within you. Whether you choose to display them proudly or gift them to loved ones, each crystal tells a story of your crafting journey. Happy crafting!
Print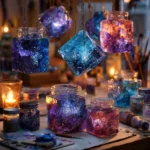
Galaxy Crystals: Create Stunning DIY Home Decor Today!
Description
Create stunning galaxy crystals that can be used as beautiful home decor pieces. This DIY project allows you to make colorful, shimmering crystals that resemble the night sky.
Instructions
- In a saucepan, combine 1 cup of water and 1 cup of sugar. Heat the mixture until the sugar dissolves completely.
- Remove the saucepan from heat and add food coloring to the mixture to achieve your desired color.
- Pour the solution into a glass jar or container.
- Attach a string to a skewer or stick and place it in the jar so that the string hangs down into the solution.
- Leave the jar in a cool, undisturbed place for several days to allow the crystals to form.
- Once the crystals have formed, carefully remove them from the jar and let them dry.
Keywords: Galaxy Crystals, DIY Home Decor, Craft Project, Colorful Crystals