Introduction to Funfetti Mini Cake Pops
Hey there, fellow home cooks! If you’re anything like me, you know that life can get pretty hectic. Between juggling work, family, and everything in between, finding time to whip up something special can feel overwhelming. That’s where these delightful Funfetti Mini Cake Pops come in! They’re not just a treat; they’re a celebration in every bite. Perfect for birthdays, holidays, or just because, these colorful little gems are sure to bring smiles to your loved ones. Plus, they’re quick and easy to make, making them a fantastic solution for busy days!
Why You’ll Love This Funfetti Mini Cake Pops
These Funfetti Mini Cake Pops are a dream come true for busy moms and professionals alike! They’re incredibly easy to make, requiring just a few simple steps. The vibrant colors and sweet flavors will brighten anyone’s day. Plus, they’re perfect for any occasion, whether it’s a birthday party or a cozy family gathering. With these cake pops, you’ll impress your loved ones without spending hours in the kitchen!
Ingredients for Funfetti Mini Cake Pops
Gathering the right ingredients is the first step to creating these delightful Funfetti Mini Cake Pops. Here’s what you’ll need:
- Funfetti cake mix: This is the star of the show! It brings that fun, colorful flair and sweet flavor.
- Large eggs: Eggs help bind the ingredients together, giving the cake pops a moist texture.
- Vegetable oil: This adds richness and keeps the cake pops tender and delicious.
- Water: A simple addition that helps to create the perfect batter consistency.
- Frosting: Whether you choose store-bought or homemade, frosting adds sweetness and helps form the cake balls.
- Chocolate candy coating: This is what makes the cake pops irresistible! It provides a smooth, sweet shell.
- Sprinkles: The finishing touch! Use colorful sprinkles to decorate and add a festive vibe.
For those looking to enhance the flavor, consider adding a splash of vanilla extract to the batter. If you’re feeling adventurous, you can even swap out the chocolate coating for white chocolate or colored candy melts to match your party theme. Remember, the exact quantities for each ingredient are listed at the bottom of the article for easy printing!
How to Make Funfetti Mini Cake Pops
Step 1: Preheat and Prepare
Let’s kick things off by preheating your oven to 350°F (175°C). While it warms up, grab your favorite cake pan and give it a light coat of non-stick spray or line it with parchment paper. This little step ensures your cake pops come out easily later. Trust me, there’s nothing worse than a stuck cake! Once the oven is ready, you’ll be all set to create that delicious funfetti cake base.
Step 2: Mix the Batter
In a large mixing bowl, combine the funfetti cake mix, three large eggs, half a cup of vegetable oil, and one cup of water. Use a whisk or an electric mixer to blend everything together until it’s smooth and well combined. The batter should be thick yet pourable, with those colorful sprinkles peeking through. This is where the magic begins! The vibrant colors will make your heart sing as you prepare for baking.
Step 3: Bake the Cake
Pour the batter into your prepared cake pan and pop it into the preheated oven. Bake according to the package instructions, usually around 30 minutes. Keep an eye on it! You’ll know it’s done when a toothpick inserted in the center comes out clean. Once baked, remove the cake from the oven and let it cool completely on a wire rack. Patience is key here; a cool cake is essential for crumbling!
Step 4: Crumble and Combine
Once your cake has cooled, it’s time for some fun! Crumble the cake into a large bowl using your hands or a fork. The texture should be fine and fluffy. Next, add in one cup of frosting. Mix it all together until the frosting is evenly distributed. This step is crucial as it binds the cake crumbs together, creating a deliciously sweet mixture that will form the base of your cake pops.
Step 5: Form Cake Balls
Now comes the fun part! Take small portions of the cake mixture and roll them into balls, about one inch in diameter. Place each ball on a baking sheet lined with parchment paper. Don’t worry if they’re not perfect; a little variation adds character! Once you’ve shaped all the cake balls, it’s time to chill them in the refrigerator for about 30 minutes. This helps them firm up, making them easier to dip later.
Step 6: Chill the Cake Balls
Chilling the cake balls is a crucial step. It allows them to set and hold their shape when you dip them in chocolate. After 30 minutes, they should feel firm to the touch. If you skip this step, you might end up with a melty mess when you try to coat them. So, grab a cup of tea and relax while you wait; it’ll be worth it!
Step 7: Melt the Chocolate
While your cake balls are chilling, it’s time to melt the chocolate candy coating. Follow the package instructions for melting, whether in the microwave or on the stovetop. If using the microwave, heat in short bursts, stirring in between to avoid burning. The chocolate should be smooth and glossy, perfect for coating your cake pops. This is where the magic happens, turning your cake balls into irresistible treats!
Step 8: Assemble the Cake Pops
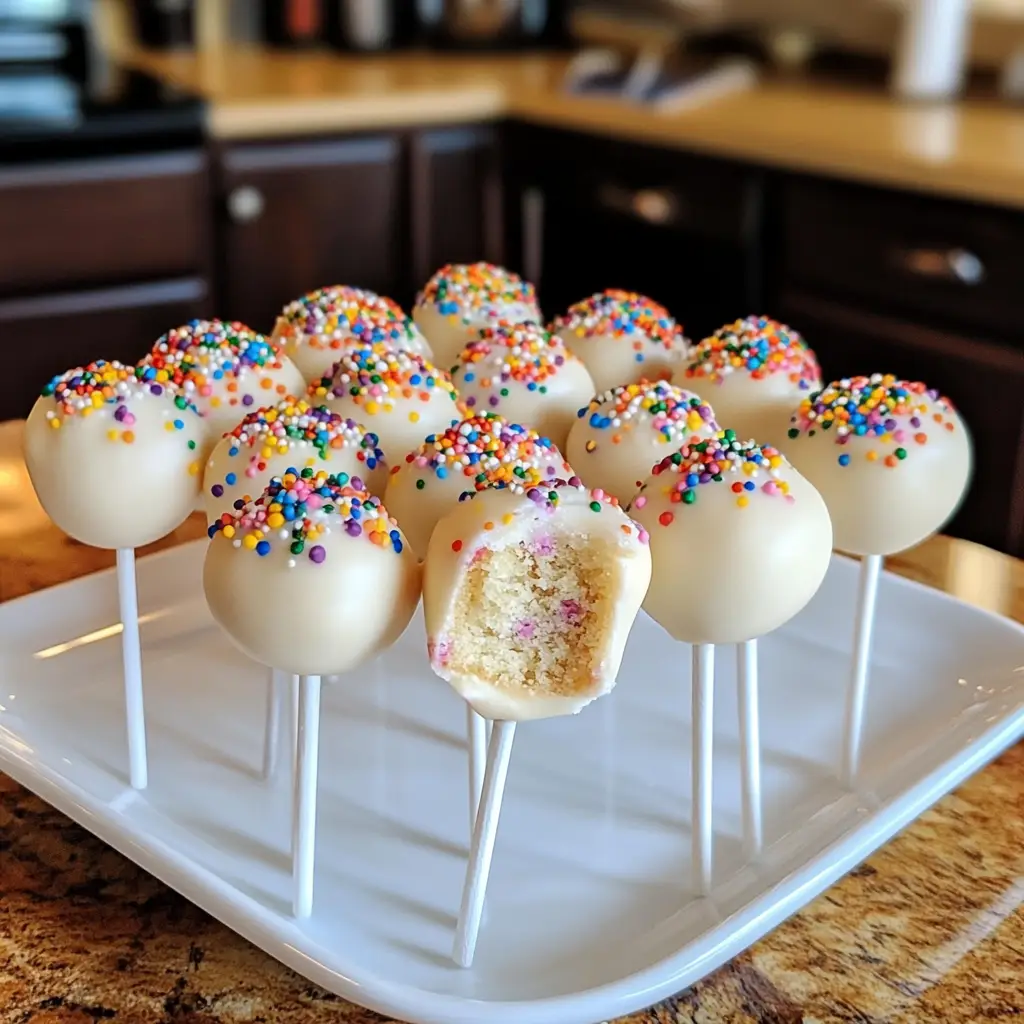
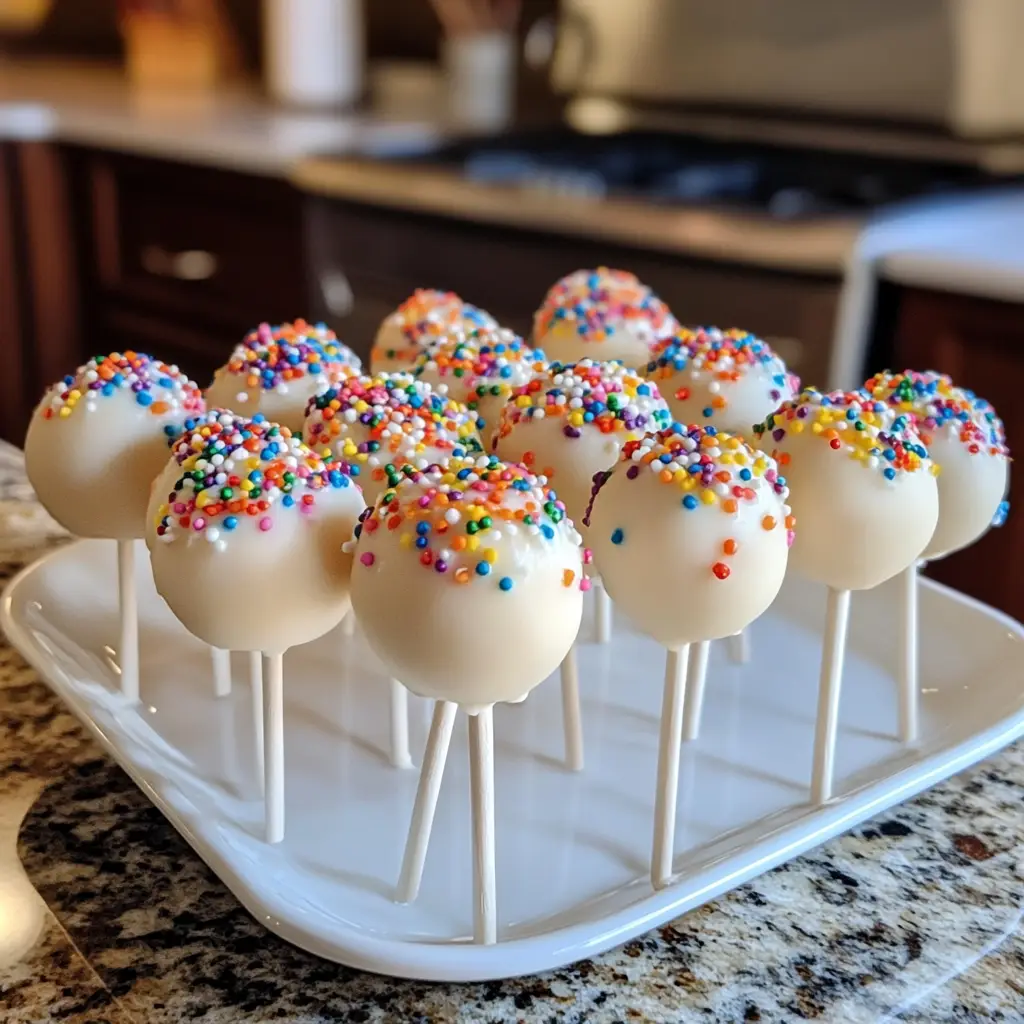
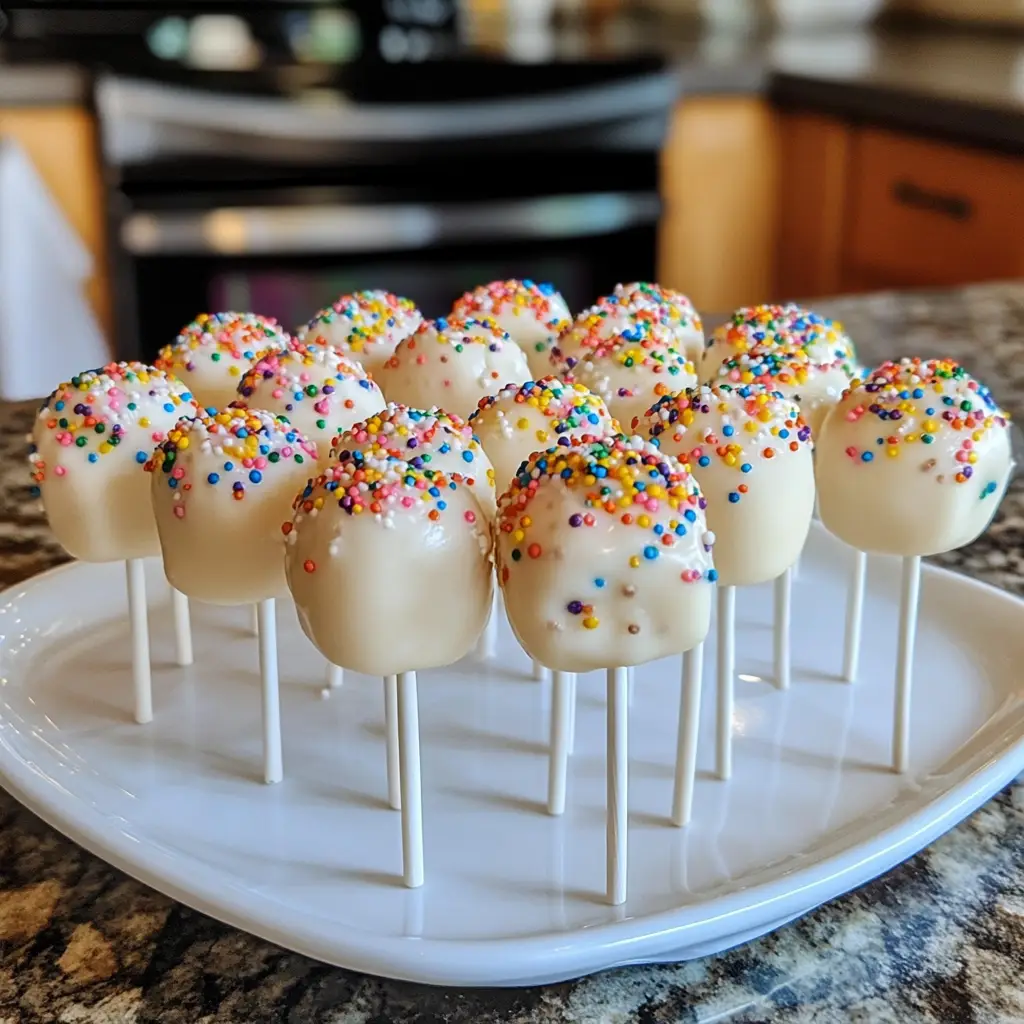
Now for the grand finale! Dip the end of a lollipop stick into the melted chocolate, then insert it into each cake ball. This helps the stick stay in place. Next, dip each cake ball into the chocolate coating, ensuring it’s fully covered. Allow any excess chocolate to drip off before adding sprinkles for decoration. Place the finished cake pops upright in a stand or a block of styrofoam to set. Voila! You’ve created a delightful batch of Funfetti Mini Cake Pops!
Tips for Success
- Make sure your cake is completely cool before crumbling; this prevents a gooey mess.
- Use a cookie scoop for uniform cake balls; it makes the process quicker and easier.
- Don’t skip the chilling step; it’s essential for keeping the cake pops firm.
- Experiment with different sprinkles to match your theme or occasion.
- Store leftover cake pops in an airtight container in the fridge for up to a week.
Equipment Needed
- Cake pan: A standard 9×13 inch pan works well, but you can use any size you have.
- Mixing bowl: A large bowl is essential; a stand mixer can save time.
- Parchment paper: This helps with easy cleanup; aluminum foil is a good alternative.
- Lollipop sticks: You can use wooden skewers if you’re in a pinch.
- Microwave-safe bowl: For melting chocolate; a double boiler works too.
Variations of Funfetti Mini Cake Pops
- Chocolate Funfetti: Swap the funfetti cake mix for chocolate cake mix for a rich twist.
- Gluten-Free Option: Use a gluten-free cake mix to make these treats suitable for gluten-sensitive friends.
- Vegan Delight: Substitute eggs with flaxseed meal and use a plant-based frosting for a vegan version.
- Flavor Infusion: Add a teaspoon of almond or lemon extract to the batter for a unique flavor profile.
- Colorful Coatings: Experiment with different colored candy melts to match your party theme or holiday.
Serving Suggestions for Funfetti Mini Cake Pops
- Pair with a glass of cold milk for a classic treat.
- Serve alongside a scoop of vanilla ice cream for an indulgent dessert.
- Display on a colorful cake stand for a festive touch.
- Include them in a dessert table for parties or celebrations.
- Wrap in clear bags tied with ribbons for cute party favors.
FAQs about Funfetti Mini Cake Pops
Can I make Funfetti Mini Cake Pops ahead of time?
Absolutely! You can prepare the cake pops a day in advance. Just store them in an airtight container in the refrigerator. They’ll stay fresh and delicious, ready to impress your guests!
What can I use instead of lollipop sticks?
If you don’t have lollipop sticks on hand, wooden skewers work perfectly! Just cut them to your desired length, and you’re good to go. They’ll hold your cake pops just as well.
How do I store leftover cake pops?
Leftover Funfetti Mini Cake Pops can be stored in an airtight container in the fridge for up to a week. Just make sure they’re completely cooled before storing to maintain their texture.
Can I freeze cake pops?
Yes, you can freeze them! Just place the cake pops in a single layer on a baking sheet until frozen, then transfer them to a freezer-safe container. They can last up to three months in the freezer.
What’s the best way to decorate my cake pops?
Get creative! Use a variety of sprinkles, edible glitter, or even drizzle with contrasting chocolate. You can also dip them in colored candy melts for a fun twist. The options are endless!
Final Thoughts
Making Funfetti Mini Cake Pops is more than just a baking project; it’s a joyful experience that brings smiles to faces young and old. Each bite is a burst of color and sweetness, perfect for celebrating life’s little moments. Whether you’re sharing them at a birthday party or enjoying them during a cozy family night, these cake pops are sure to create lasting memories. Plus, the ease of preparation means you can whip them up even on your busiest days. So, roll up your sleeves and dive into this delightful adventure—you won’t regret it!
Print
Funfetti Mini Cake Pops: A Sweet Delight You’ll Love!
- Total Time: 1 hour
- Yield: 24 cake pops 1x
- Diet: Vegetarian
Description
Funfetti Mini Cake Pops are delightful bite-sized treats that are perfect for any celebration. These colorful cake pops are made with funfetti cake and coated in chocolate, making them a sweet and festive dessert.
Ingredients
- 1 box funfetti cake mix
- 3 large eggs
- 1/2 cup vegetable oil
- 1 cup water
- 1 cup frosting (store-bought or homemade)
- 1 lb chocolate candy coating
- Sprinkles for decoration
Instructions
- Preheat your oven to 350°F (175°C) and prepare a cake pan.
- In a large bowl, mix the funfetti cake mix, eggs, vegetable oil, and water until well combined.
- Pour the batter into the prepared cake pan and bake according to package instructions.
- Once baked, let the cake cool completely.
- Crumble the cooled cake into a large bowl and mix in the frosting until well combined.
- Form the mixture into small balls and place them on a baking sheet lined with parchment paper.
- Chill the cake balls in the refrigerator for about 30 minutes to firm up.
- Melt the chocolate candy coating according to package instructions.
- Dip the end of a lollipop stick into the melted chocolate and insert it into each cake ball.
- Coat each cake pop in the melted chocolate and add sprinkles for decoration.
- Allow the cake pops to set on a stand or in a block of styrofoam.
Notes
- For a more intense flavor, consider adding vanilla extract to the cake batter.
- These cake pops can be stored in the refrigerator for up to a week.
- Feel free to customize the sprinkles to match your party theme.
- Prep Time: 20 minutes
- Cook Time: 30 minutes
- Category: Dessert
- Method: Baking and Coating
- Cuisine: American
Nutrition
- Serving Size: 1 cake pop
- Calories: 150
- Sugar: 10g
- Sodium: 50mg
- Fat: 7g
- Saturated Fat: 3.5g
- Unsaturated Fat: 3g
- Trans Fat: 0g
- Carbohydrates: 20g
- Fiber: 0g
- Protein: 2g
- Cholesterol: 30mg
Keywords: Funfetti, Mini Cake Pops, Dessert, Celebration, Sweet Treats