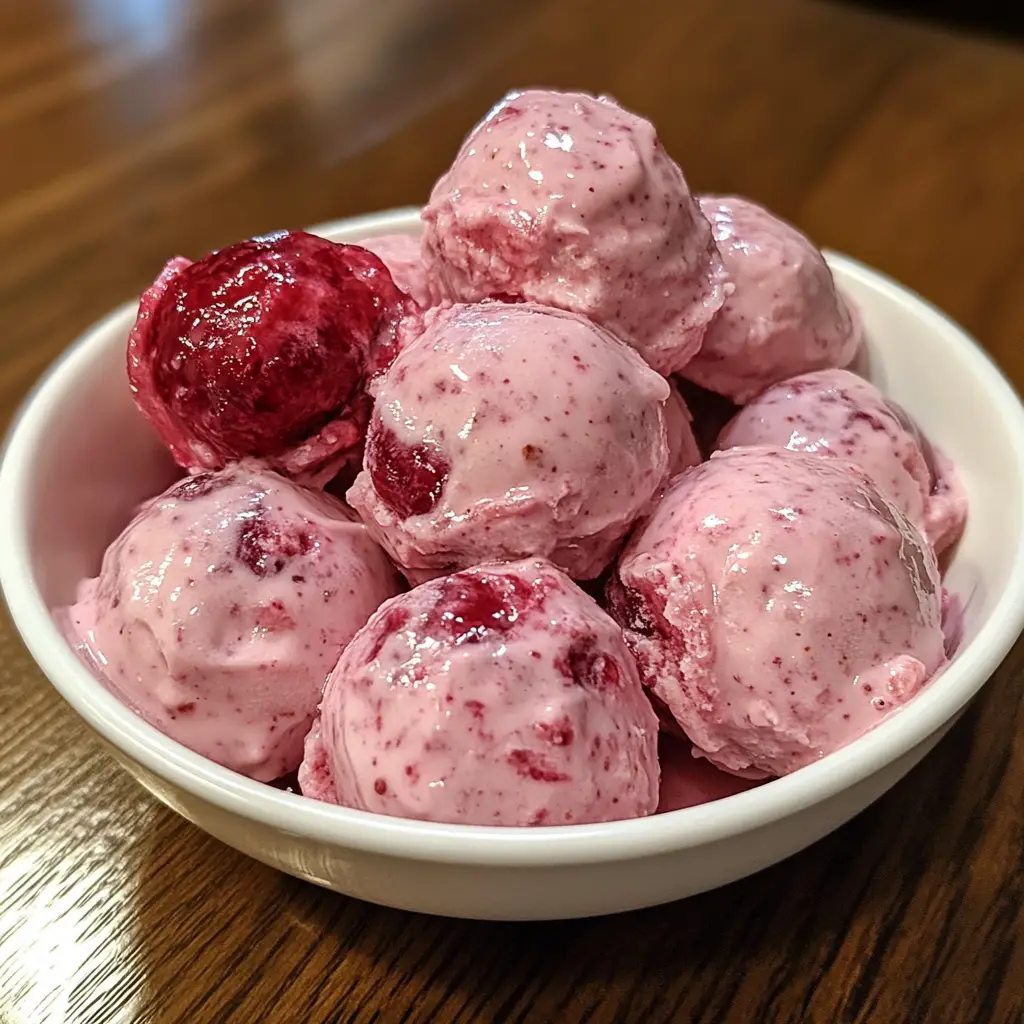
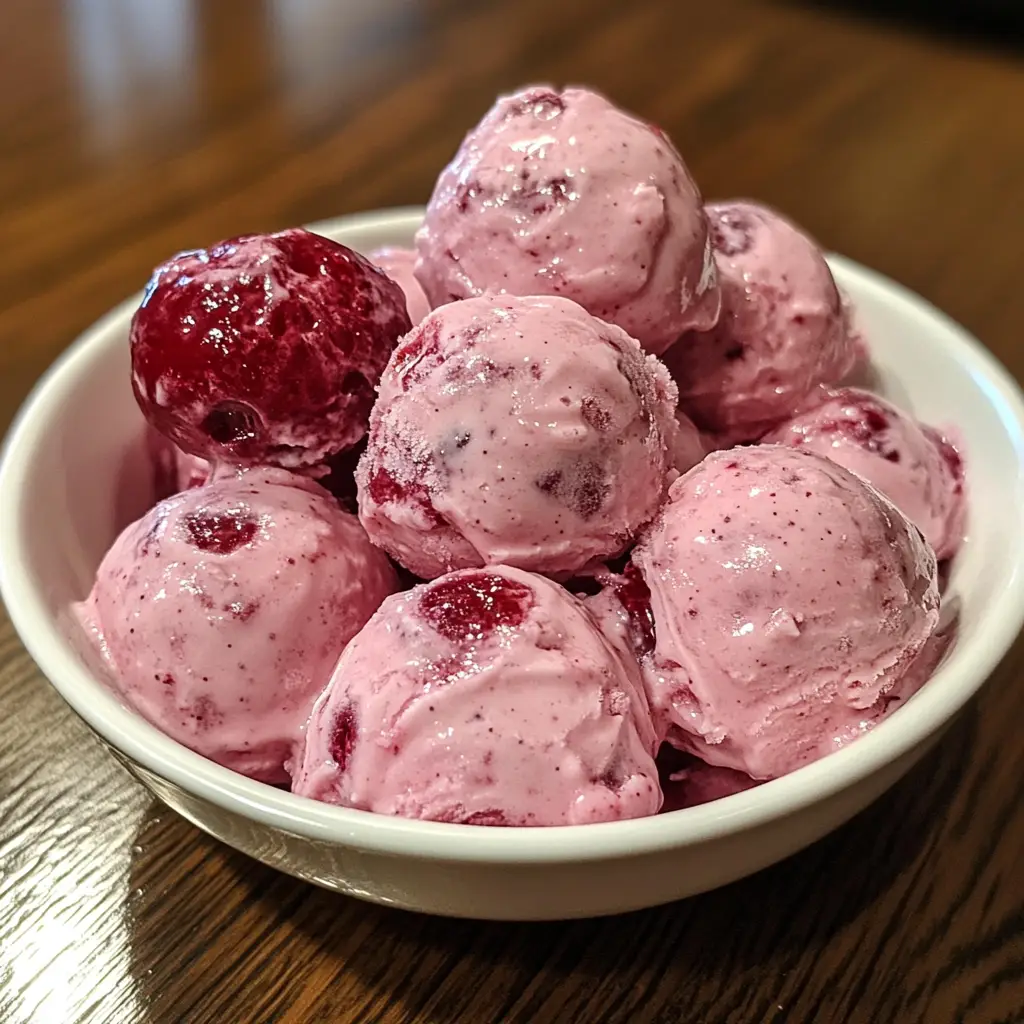
Introduction to Frozen Cherry Yogurt Bites
As a busy mom, I know how challenging it can be to find a quick and healthy snack that everyone in the family will love. That’s where these Frozen Cherry Yogurt Bites come in! They’re not just a delightful treat; they’re a refreshing escape on a hot day. With just a few simple ingredients, you can whip up a batch that’s perfect for those moments when you need something sweet yet guilt-free. Plus, they’re a fantastic way to sneak in some fruit and protein, making them a win-win for both kids and adults alike!
Why You’ll Love This Frozen Cherry Yogurt Bites
These Frozen Cherry Yogurt Bites are a game-changer for busy days! They’re incredibly easy to make, taking just 10 minutes of prep time. The best part? You can customize them to suit your family’s taste. Whether you’re craving something sweet or looking for a healthy dessert, these bites deliver on flavor and satisfaction. Plus, they’re a fun way to get your kids involved in the kitchen!
Ingredients for Frozen Cherry Yogurt Bites
Gathering the right ingredients is the first step to creating these delightful Frozen Cherry Yogurt Bites. Here’s what you’ll need:
- Greek yogurt: This creamy base is packed with protein and gives the bites a rich texture. You can use plain or flavored yogurt, depending on your preference.
- Pitted cherries: Fresh or frozen, cherries add a burst of natural sweetness and vibrant color. If cherries aren’t your thing, feel free to swap them out for strawberries or blueberries!
- Honey or maple syrup (optional): A touch of sweetness can elevate the flavor. Adjust the amount based on your taste. If you prefer a sugar-free option, you can skip this altogether.
For exact measurements, check the bottom of the article where you can find everything listed for easy printing. Happy snacking!
How to Make Frozen Cherry Yogurt Bites
Making these Frozen Cherry Yogurt Bites is a breeze! Follow these simple steps, and you’ll have a delicious treat ready to enjoy in no time. Let’s dive in!
Step 1: Prepare the Yogurt Mixture
Start by grabbing a mixing bowl. Add in your Greek yogurt, and if you’re feeling a bit sweet, drizzle in some honey or maple syrup. I love using honey for its natural flavor, but maple syrup works wonders too! Stir everything together until it’s smooth and creamy. This is where the magic begins!
Step 2: Add the Cherries
Now, it’s time to bring in the stars of the show—those lovely pitted cherries! Gently fold them into the yogurt mixture. Be careful not to mash them; we want those beautiful cherry pieces to stay intact. This step adds a pop of color and flavor to your bites!
Step 3: Line the Baking Sheet
Next, take a baking sheet and line it with parchment paper. This will prevent the yogurt bites from sticking, making it easier to remove them later. Plus, it keeps cleanup simple! Just a little prep goes a long way.
Step 4: Portion the Mixture
Using a spoon, drop generous spoonfuls of the yogurt-cherry mixture onto the prepared baking sheet. Aim for bite-sized portions, about the size of a tablespoon. Don’t worry about making them perfect; a little variation adds charm!
Step 5: Freeze the Bites
Now comes the waiting game! Place the baking sheet in the freezer and let those bites freeze for at least 2-3 hours. This is the hardest part, but trust me, it’s worth it! You’ll want them completely frozen for the best texture.
Step 6: Store and Enjoy
Once your bites are frozen solid, carefully remove them from the baking sheet. Store them in an airtight container in the freezer. They’ll keep well for up to a month! Whenever you need a refreshing treat, just grab a few and enjoy your Frozen Cherry Yogurt Bites!
Tips for Success
- Use full-fat Greek yogurt for creamier bites.
- Experiment with different fruits for variety; bananas and peaches are great alternatives!
- For a fun twist, add a sprinkle of granola on top before freezing.
- Make a double batch to ensure you always have a healthy snack on hand.
- Let the bites sit at room temperature for a few minutes before enjoying for easier eating.
Equipment Needed
- Mixing bowl: Any large bowl will do, even a pot if you’re in a pinch!
- Spoon: A regular spoon works, but a cookie scoop makes portioning easier.
- Baking sheet: A standard baking sheet is perfect; a plate can work too if you’re short on space.
- Parchment paper: If you don’t have any, aluminum foil can be a good substitute.
Variations of Frozen Cherry Yogurt Bites
- Berry Medley: Swap out cherries for a mix of your favorite berries like raspberries, blueberries, and strawberries for a colorful twist.
- Nutty Delight: Add a tablespoon of almond or peanut butter to the yogurt mixture for a nutty flavor and extra creaminess.
- Chocolate Lovers: Stir in mini chocolate chips or cocoa powder for a decadent chocolate version that satisfies sweet cravings.
- Vegan Option: Use coconut yogurt instead of Greek yogurt and maple syrup for a completely plant-based treat.
- Spiced Up: Add a pinch of cinnamon or nutmeg to the yogurt for a warm, cozy flavor that’s perfect for fall.
Serving Suggestions for Frozen Cherry Yogurt Bites
- Pair your Frozen Cherry Yogurt Bites with a refreshing glass of iced tea or lemonade for a delightful summer treat.
- Serve them on a colorful platter with fresh fruit for a beautiful presentation at gatherings.
- For a fun twist, drizzle some chocolate sauce over the bites just before serving.
- Enjoy them alongside a scoop of granola for added crunch and texture.
FAQs about Frozen Cherry Yogurt Bites
As you embark on your journey to make these delightful Frozen Cherry Yogurt Bites, you might have a few questions. Here are some common queries I’ve encountered, along with helpful answers!
Can I use other fruits instead of cherries?
Absolutely! While cherries are delicious, you can easily swap them for strawberries, blueberries, or even diced peaches. The possibilities are endless!
How long do these yogurt bites last in the freezer?
Your Frozen Cherry Yogurt Bites can be stored in an airtight container for up to a month. Just make sure they’re well-sealed to maintain their freshness.
Can I make these bites dairy-free?
<pYes! Simply use coconut yogurt or any other plant-based yogurt alternative. This way, you can enjoy a vegan-friendly treat without sacrificing flavor.
What’s the best way to serve these bites?
These bites are perfect on their own, but you can also serve them with a drizzle of honey or chocolate sauce for an extra touch of sweetness. They’re great for parties or as a refreshing snack!
Can I adjust the sweetness of the yogurt bites?
<pDefinitely! Feel free to add more or less honey or maple syrup based on your taste preferences. You can even skip the sweetener altogether if you prefer a more natural flavor.
Final Thoughts
Creating these Frozen Cherry Yogurt Bites has been a delightful experience that brings joy to my kitchen. They’re not just a snack; they’re a refreshing treat that the whole family can enjoy together. I love how easy they are to make, and the smiles on my kids’ faces when they take their first bite are priceless. Whether it’s a hot summer day or a cozy evening, these bites are the perfect way to indulge without the guilt. So, gather your ingredients and make some memories—your taste buds will thank you!
Print
Frozen Cherry Yogurt Bites: A Refreshing Treat You’ll Love!
- Total Time: 2-3 hours (freezing time)
- Yield: Approximately 20 bites 1x
- Diet: Vegan
Description
Frozen Cherry Yogurt Bites are a delicious and refreshing snack made with yogurt and cherries, perfect for a hot day or as a healthy dessert.
Ingredients
- 2 cups of Greek yogurt
- 1 cup of pitted cherries (fresh or frozen)
- 2 tablespoons of honey or maple syrup (optional)
Instructions
- In a mixing bowl, combine the Greek yogurt and honey or maple syrup, if using.
- Fold in the pitted cherries gently.
- Line a baking sheet with parchment paper.
- Drop spoonfuls of the yogurt-cherry mixture onto the prepared baking sheet.
- Spread them out evenly and flatten slightly.
- Place the baking sheet in the freezer for at least 2-3 hours or until the bites are completely frozen.
- Once frozen, remove the bites from the baking sheet and store them in an airtight container in the freezer.
- Enjoy your Frozen Cherry Yogurt Bites as a refreshing treat!
Notes
- Feel free to substitute cherries with other fruits like strawberries or blueberries.
- These bites can be stored in the freezer for up to a month.
- Adjust the sweetness according to your taste preference.
- Prep Time: 10 minutes
- Cook Time: 0 minutes
- Category: Dessert
- Method: Freezing
- Cuisine: American
Nutrition
- Serving Size: 2 bites
- Calories: 50
- Sugar: 5g
- Sodium: 20mg
- Fat: 1g
- Saturated Fat: 0g
- Unsaturated Fat: 0g
- Trans Fat: 0g
- Carbohydrates: 10g
- Fiber: 1g
- Protein: 3g
- Cholesterol: 5mg
Keywords: Frozen Cherry Yogurt Bites, Healthy Snacks, Frozen Treats, Yogurt Bites