Easter Jell-O Pie: Creamy, Colorful Delight Awaits!
Sensory-Rich Introduction with Immediate Craving
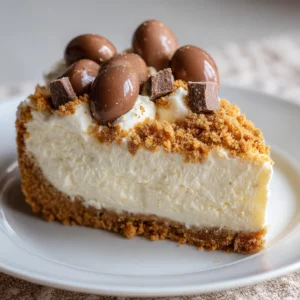
Imagine slicing into a vibrant pie that reveals layers of bright colors, each one a tantalizing promise of fruity flavor. The creamy texture of the Easter Jell-O Pie contrasts beautifully with the crunchy graham cracker crust, creating a delightful experience for your taste buds. This dessert is not just a feast for the eyes; it’s a nostalgic nod to childhood celebrations, where every bite brings back memories of family gatherings and laughter. Perfect for Easter brunch, spring picnics, or any festive occasion, this pie is sure to be the centerpiece of your dessert table, evoking joy and excitement in everyone who sees it.
Why You’ll Love This Easter Jell-O Pie
- Texture Contrast: The creamy filling paired with a crunchy graham cracker crust creates a delightful mouthfeel that keeps each bite interesting.
- Flavor Balance: The fruity flavors of strawberry, orange, lime, and blue raspberry harmonize beautifully, offering a refreshing taste that’s not overly sweet.
- Versatility: This pie can be customized with different Jell-O flavors or toppings, making it suitable for various occasions and preferences.
- Ease of Preparation: With simple steps and minimal cooking, this pie is perfect for both novice and experienced bakers.
- Universal Appeal: Its colorful presentation and fruity flavors make it a hit with both kids and adults, ensuring it will be a crowd-pleaser at any gathering.
Essential Tools & Preparation Strategy
- 9-inch Pie Pan: Essential for shaping and holding the pie; a deep dish is recommended to accommodate the layers.
- Mixing Bowls: Needed for combining the crust and Jell-O mixtures; opt for glass or stainless steel for easy mixing.
- Whisk: Useful for thoroughly mixing the Jell-O with water, ensuring no lumps remain.
- Measuring Cups: Important for accurate ingredient measurements; a set with both liquid and dry measurements is ideal.
- Rubber Spatula: Helps in spreading whipped cream evenly over layers, ensuring a smooth finish.
- Refrigerator: Necessary for setting the Jell-O layers properly; ensure there’s enough space for the pie to sit undisturbed.
- Baking Sheet: Useful for placing the pie pan in the oven, preventing spills and making it easier to handle.
- Cooling Rack: Allows the crust to cool evenly after baking, preventing sogginess.
Ingredients & Their Roles in This Easter Jell-O Pie
Crust
- Graham Cracker Crumbs: Provides a sweet, crunchy base that complements the creamy filling.
- Unsalted Butter: Binds the crumbs together and adds richness.
- Granulated Sugar: Enhances the sweetness of the crust.
Filling
- Strawberry, Orange, Lime, Blue Raspberry Jell-O: Each flavor adds a distinct fruity taste and vibrant color to the pie.
- Boiling Water: Activates the Jell-O, allowing it to dissolve properly.
- Cold Water: Helps to cool the mixture before layering.
- Whipped Cream or Whipped Topping: Adds creaminess and lightness, balancing the density of the Jell-O layers.
Substitutions
- For a gluten-free option, use gluten-free graham crackers for the crust.
- Substitute whipped cream with a dairy-free alternative for a vegan version.
Step-by-Step Guide to Perfect Easter Jell-O Pie
- Preheat the Oven: Set your oven to 350°F (175°C) to prepare for baking the crust.
- Prepare the Crust: In a bowl, combine graham cracker crumbs, melted butter, and sugar. Mix until well combined.
- Form the Crust: Press the mixture into the bottom of a 9-inch pie pan to form the crust. Bake for 8-10 minutes until golden brown. Remove and let cool.
- Dissolve Jell-O: In a large bowl, dissolve each flavor of Jell-O in ½ cup of boiling water, stirring until completely dissolved.
- Add Cold Water: Mix in ¼ cup of cold water to each dissolved Jell-O mixture and stir well.
- Layer the Jell-O: Pour the first layer of Jell-O into the cooled crust and refrigerate until set, about 1 hour.
- Add Whipped Cream: Once set, spread ¼ cup of whipped cream over the first layer, then pour the next layer of Jell-O on top. Repeat this process for each flavor, refrigerating until each layer is set before adding the next.
- Final Touch: After the final layer is set, top the pie with remaining whipped cream and refrigerate for at least 2 hours before serving.
Chef’s Notes & Pro Tips for Flawless Results
- Make-Ahead Instructions: This pie can be made a day in advance and stored in the refrigerator, making it perfect for busy holiday preparations.
- Storage: Store leftovers in an airtight container in the fridge for up to 3 days.
- Equipment Recommendations: A deep pie pan is crucial to prevent overflow; consider using a glass pan for easy monitoring of the crust.
- Customization Options: Feel free to experiment with different Jell-O flavors or add fresh fruit between layers for added texture and flavor.
Avoid These Common Cooking Mistakes
- Not Allowing Each Layer to Set: This can cause the layers to mix together. Solution: Be patient and refrigerate each layer until firm.
- Using Too Much Water: This can make the Jell-O too runny. Solution: Stick to the recommended water measurements.
- Overbaking the Crust: This can lead to a dry crust. Solution: Bake just until golden brown.
- Skipping the Whipped Cream: This can make the pie less creamy. Solution: Always include whipped cream for texture.
- Not Cooling the Crust: This can cause the Jell-O to melt. Solution: Ensure the crust is completely cool before adding Jell-O.
- Using Expired Jell-O: This can affect the setting process. Solution: Check expiration dates before use.
- Not Using a Deep Enough Pie Pan: This can lead to overflow. Solution: Use a standard 9-inch deep pie pan.
Creative Variations & Customizations
- Tropical Twist: Substitute Jell-O flavors with pineapple, coconut, and mango for a tropical vibe.
- Berry Medley: Use mixed berry Jell-O flavors for a berry explosion.
- Chocolate Layer: Add a layer of chocolate pudding between Jell-O layers for a decadent twist.
- Vegan Version: Use plant-based whipped cream and gelatin alternatives for a vegan-friendly dessert.
- Seasonal Flavors: Incorporate seasonal fruits like peaches or cherries for a fresh take.
Perfect Pairings: What to Serve With Easter Jell-O Pie
- Fresh Berries: Serve with strawberries, blueberries, or raspberries for added flavor and texture.
- Vanilla Ice Cream: A scoop of ice cream provides a creamy contrast to the pie.
- Light Fruit Salad: A refreshing side that complements the pie’s sweetness.
- Chocolate Sauce: Drizzle over the pie for a decadent twist.
- Lemon Meringue Pie: Serve alongside for a colorful dessert table.
- Sparkling Beverage: Pair with a sparkling lemonade or fruit punch for a festive touch.
- Whipped Cream on the Side: Offer extra whipped cream for those who want to indulge.
- Picnic Desserts: Include this pie in a spread of light desserts for a springtime feast.
Storage & Meal Prep Instructions
- Refrigeration: Store the pie in the refrigerator for up to 3 days in an airtight container.
- Freezing: While not recommended for long-term storage, you can freeze individual slices for up to a month. Thaw in the refrigerator before serving.
- Reheating: This pie is best served cold; simply slice and enjoy straight from the fridge.
Nutrition Facts & Health Insights
| Nutrient | Amount per Serving (1 slice) |
|---|---|
| Calories | 250 |
| Sugar | 20 grams |
| Sodium | 150 milligrams |
| Fat | 10 grams |
| Saturated Fat | 5 grams |
| Unsaturated Fat | 3 grams |
| Trans Fat | 0 grams |
| Carbohydrates | 35 grams |
| Fiber | 1 gram |
| Protein | 2 grams |
| Cholesterol | 20 milligrams |
Health Benefits of Key Ingredients
- Graham Crackers: Provide fiber and essential nutrients.
- Whipped Cream: Adds a source of calcium and can be made lighter with alternatives.
- Fruits in Jell-O: Offer vitamins and antioxidants, enhancing the nutritional profile.
Frequently Asked Questions
- Can I use different flavors of Jell-O?Yes, feel free to mix and match flavors to suit your taste.
- How long does the pie need to set?Each layer should set for about 1 hour, and the final pie should chill for at least 2 hours.
- Can I make this pie vegan?Yes, use plant-based whipped cream and gelatin alternatives.
- What if my Jell-O doesn’t set?Ensure you used the correct water measurements and check the expiration date of the Jell-O.
- Can I freeze the pie?It’s best served fresh, but individual slices can be frozen for up to a month.
- How do I store leftovers?Keep in an airtight container in the refrigerator for up to 3 days.
- Can I add fresh fruit to the layers?Yes, fresh fruit can be added between layers for extra flavor and texture.
- What if I don’t have a pie pan?You can use a square or rectangular baking dish as an alternative.
Final Inspiration & Kitchen Confidence
As you prepare this Easter Jell-O Pie, remember that cooking is not just about following a recipe; it’s about creating memories and sharing joy with loved ones. Celebrate your achievements in the kitchen, and don’t hesitate to experiment with flavors and presentations. This colorful dessert is sure to bring smiles and satisfaction, so gather your ingredients, unleash your creativity, and enjoy the delightful process of making this festive treat!
Print
Easter Jell-O Pie: Creamy, Colorful Delight Awaits!
- Total Time: 3 hours
- Yield: 8 servings 1x
- Diet: Vegetarian
Description
Easter Jell-O Pie is a vibrant, creamy dessert that tantalizes the taste buds with its smooth texture and fruity flavors. Each slice reveals a rainbow of colors, making it a visually stunning centerpiece for any spring celebration.
Ingredients
- Crust:
- 1 ½ cups graham cracker crumbs
- ½ cup unsalted butter, melted
- ¼ cup granulated sugar
- Filling:
- 1 package (3 oz) of strawberry Jell-O
- 1 package (3 oz) of orange Jell-O
- 1 package (3 oz) of lime Jell-O
- 1 package (3 oz) of blue raspberry Jell-O
- 2 cups boiling water
- 1 cup cold water
- 1 cup whipped cream or whipped topping
Instructions
- Preheat the oven to 350°F (175°C).
- In a bowl, combine graham cracker crumbs, melted butter, and sugar. Mix until well combined.
- Press the mixture into the bottom of a 9-inch pie pan to form the crust. Bake for 8-10 minutes until golden brown. Remove and let cool.
- In a large bowl, dissolve each flavor of Jell-O in ½ cup of boiling water, stirring until completely dissolved.
- Add ¼ cup of cold water to each dissolved Jell-O mixture and stir well.
- Pour the first layer of Jell-O into the cooled crust and refrigerate until set, about 1 hour.
- Once set, spread ¼ cup of whipped cream over the first layer, then pour the next layer of Jell-O on top. Repeat this process for each flavor, refrigerating until each layer is set before adding the next.
- After the final layer is set, top the pie with remaining whipped cream and refrigerate for at least 2 hours before serving.
Notes
- This pie can be made a day in advance and stored in the refrigerator.
- Store leftovers in an airtight container in the fridge for up to 3 days.
- For a gluten-free option, use gluten-free graham crackers for the crust.
- Prep Time: 30 minutes
- Cook Time: 10 minutes
- Category: desserts
- Method: baking and chilling
- Cuisine: American
Nutrition
- Serving Size: 1 slice (1/8 of pie)
- Calories: 250
- Sugar: 20 grams
- Sodium: 150 milligrams
- Fat: 10 grams
- Saturated Fat: 5 grams
- Unsaturated Fat: 3 grams
- Trans Fat: 0 grams
- Carbohydrates: 35 grams
- Fiber: 1 gram
- Protein: 2 grams
- Cholesterol: 20 milligrams
Keywords: Easter Jell-O Pie, colorful dessert, spring dessert, creamy pie, festive dessert, Jell-O recipe, easy pie recipe, no-bake dessert, holiday dessert, fruit-flavored pie, layered dessert, party dessert, kid-friendly dessert, vibrant pie, seasonal dessert