Sensory-Rich Introduction with Immediate Craving
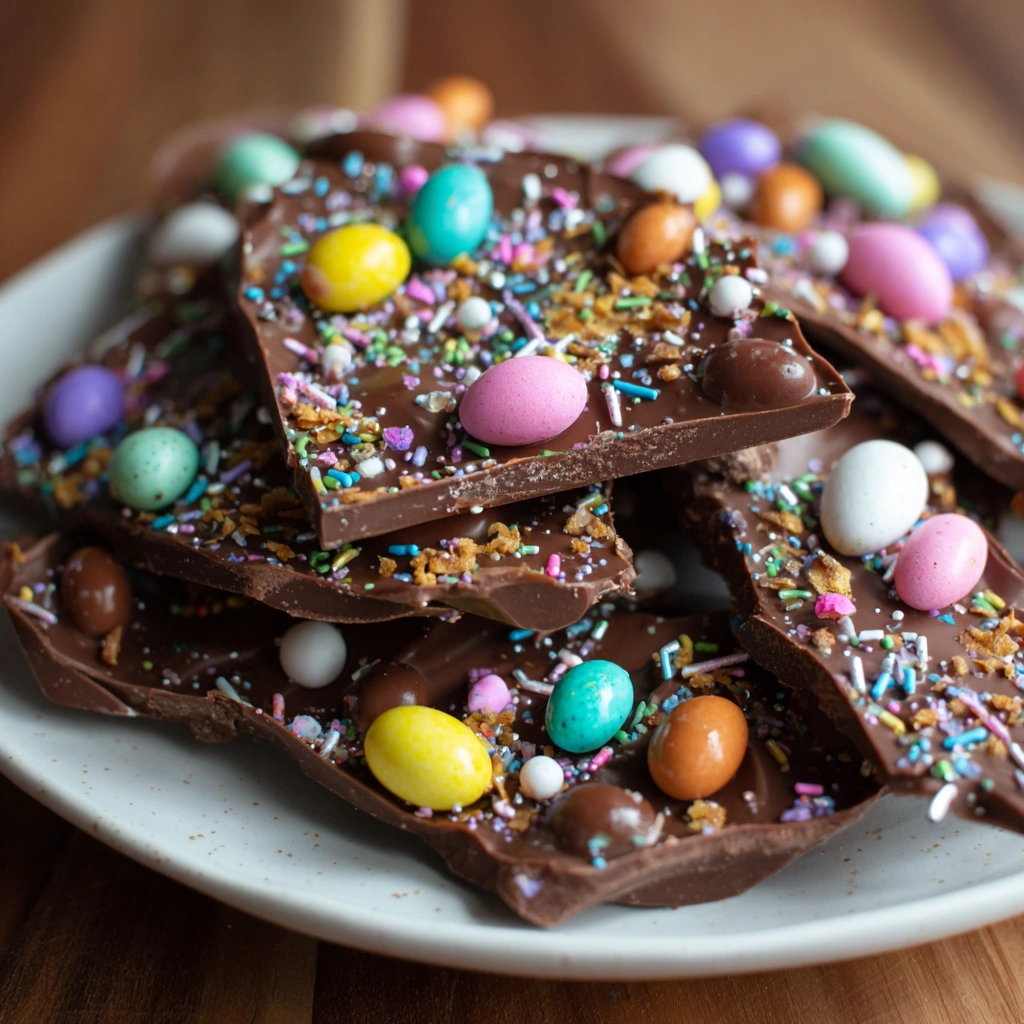
Imagine a beautiful spring day, the sun shining brightly, and the air filled with the sweet aroma of melting chocolate. As you prepare to make Easter Chocolate Bark, the glossy sheen of the dark and milk chocolate beckons you, promising a delightful treat. The vibrant colors of crushed mini eggs and pastel sprinkles dance atop the smooth chocolate surface, creating a visual feast that’s almost too pretty to eat. But trust me, once you take that first bite, the satisfying crunch of the mini eggs will have you hooked!
Growing up, Easter was always a special time in my family. I remember gathering in the kitchen with my siblings, our hands covered in chocolate as we crafted our own versions of this festive bark. The laughter, the playful arguments over who got to sprinkle the most colorful toppings, and the sweet anticipation of sharing our creations with family made those moments unforgettable. It was more than just a treat; it was a celebration of togetherness and joy.
This Easter Chocolate Bark is not just a dessert; it’s a symbol of connection. Whether you’re hosting an Easter gathering, enjoying a spring picnic, or simply celebrating the arrival of warmer days, this treat brings people together. Each piece is a reminder of the warmth and happiness that comes from sharing delicious food with loved ones. So, gather your family and friends, and let’s create some sweet memories together!
Why You’ll Love This Easter Chocolate Bark
Let me tell you, there are so many reasons to fall head over heels for this Easter Chocolate Bark. It’s not just a treat; it’s an experience that tantalizes your taste buds and brings a smile to your face!
Texture Contrast
First off, let’s talk about texture. The smoothness of melted chocolate creates a luxurious base, while the crunch of mini eggs adds a delightful surprise in every bite. It’s that perfect contrast that keeps you coming back for more, as you savor the creamy richness followed by a satisfying crunch. Trust me, your mouth will thank you!
Flavor Balance
Now, onto the flavor. The rich, slightly bitter notes of dark chocolate beautifully complement the sweet creaminess of milk chocolate. Add in the sugary burst from the mini eggs, and you’ve got a harmonious taste experience that dances on your palate. It’s like a symphony of flavors, each note perfectly in tune with the others.
Versatility
One of the best parts about this recipe is its versatility. You can easily customize it with different toppings or chocolate types to suit your preferences. Want to swap out the mini eggs for crushed nuts? Go for it! Feeling adventurous? Try adding a sprinkle of sea salt for a sweet and salty twist. The possibilities are endless!
Ease of Preparation
Let’s be real—sometimes we just don’t have the time or energy for complicated recipes. That’s where this Easter Chocolate Bark shines. The simple melting and mixing process makes it accessible for all skill levels, from novice cooks to seasoned pros. In just a short time, you’ll have a stunning dessert that looks like it took hours to create!
Universal Appeal
Finally, this treat has universal appeal. It’s loved by both children and adults alike, making it the perfect addition to any gathering. Whether you’re hosting an Easter brunch, a spring picnic, or just a cozy family night, this chocolate bark is sure to be a hit. Everyone will be reaching for seconds (and thirds!), and you’ll be the star of the show!
Essential Tools & Preparation Strategy
Before diving into the delightful world of Easter Chocolate Bark, let’s gather our essential tools and set the stage for a smooth preparation process. Trust me, having the right equipment makes all the difference!
Double Boiler
This is your best friend when it comes to melting chocolate gently without burning it. If you don’t have one, you can create a makeshift double boiler using a heatproof bowl set over a pot of simmering water. Just be sure to keep an eye on it!
Baking Sheet
A flat surface is crucial for spreading your chocolate evenly. While a baking sheet is ideal, you can also use a large plate if that’s what you have on hand. Just make sure it’s sturdy enough to hold the chocolate.
Parchment Paper
This little hero prevents your chocolate from sticking to the baking sheet. If you’re in a pinch, wax paper can work, but parchment is preferred for its non-stick properties. Trust me, you’ll thank yourself later when it’s time to remove the bark!
Spatula
A good spatula is essential for spreading and smoothing out your melted chocolate. I recommend a silicone spatula for its flexibility and ease of scraping every last bit of chocolate from the bowl.
Measuring Cups
Accurate measurements are key to achieving the perfect balance of flavors. If you have a kitchen scale, feel free to use that for precision, especially when it comes to chocolate!
Refrigerator
We’ll need this trusty appliance to set our chocolate bark quickly. If you don’t have room in your fridge, a cool, dry place will do, but be prepared to wait a bit longer for it to set.
Ingredients & Their Roles in This Easter Chocolate Bark
Now that we have our tools ready, let’s talk about the star players in our Easter Chocolate Bark recipe. Each ingredient plays a vital role in creating that perfect balance of flavor and texture.
- Dark Chocolate (12 oz): This provides a rich, deep flavor that forms the base of our bark. The glossy sheen of melted dark chocolate not only looks stunning but also delivers a bittersweet taste that pairs beautifully with the other ingredients.
- Milk Chocolate (12 oz): Adds a creamy sweetness that beautifully complements the dark chocolate. Its smooth texture creates a delightful contrast, making each bite a harmonious blend of flavors.
- Mini Chocolate Eggs (1 cup): These little gems offer a satisfying crunch and a festive appearance. Their colorful shells bring a playful touch to the bark, and if you’re feeling adventurous, you can substitute them with other candies like crushed nuts or dried fruit for a unique twist!
- Pastel Sprinkles (1/2 cup): Not only do they enhance the visual appeal, but they also add a fun, colorful touch that screams celebration. You can swap these out for seasonal-themed sprinkles if you like, making this treat perfect for any occasion.
Step-by-Step Guide to Perfect Easter Chocolate Bark
Now that we have our ingredients and tools ready, it’s time to dive into the fun part: making your Easter Chocolate Bark! Follow these simple steps, and you’ll have a delicious treat that’s sure to impress.
- Prepare the Baking Sheet: Line a baking sheet with parchment paper and set aside. This will ensure that your chocolate bark comes off easily once it’s set.
- Melt Dark Chocolate: In a double boiler, melt the dark chocolate over medium heat, stirring until smooth (about 5-7 minutes). Keep an eye on it to prevent burning!
- Spread Dark Chocolate: Pour the melted dark chocolate onto the prepared baking sheet and spread it evenly with a spatula. Aim for a thickness of about 1/4 inch for the best texture.
- Melt Milk Chocolate: In the same double boiler, melt the milk chocolate until smooth (about 5-7 minutes). The combination of dark and milk chocolate creates a delightful flavor contrast.
- Drizzle Milk Chocolate: Drizzle the melted milk chocolate over the dark chocolate layer, creating a marbled effect. Don’t worry about perfection; the more whimsical, the better!
- Add Toppings: Sprinkle the crushed mini chocolate eggs and pastel sprinkles evenly over the top. This is where the fun really begins—feel free to get creative!
- Refrigerate: Place the baking sheet in the refrigerator for at least 1 hour or until fully set. This step is crucial for achieving that satisfying snap when you break the bark.
- Break into Pieces: Once set, break the bark into pieces and serve. You can use your hands for a rustic look or a sharp knife for cleaner cuts.
And there you have it! Your Easter Chocolate Bark is ready to be enjoyed. Whether you’re sharing it with loved ones or keeping it all to yourself (no judgment here!), this treat is sure to bring smiles all around.
Chef’s Notes & Pro Tips for Flawless Results
As you embark on your journey to create the perfect Easter Chocolate Bark, here are some invaluable tips and tricks I’ve gathered over the years. These insights will help you achieve flawless results and make the process even more enjoyable!
Make-Ahead Instructions
This chocolate bark can be made up to a week in advance, making it a fantastic option for busy holiday preparations. Just store it in an airtight container, and you’ll have a delightful treat ready to go whenever you need it!
Storage Tips
To keep your bark in tip-top shape, store it in a cool, dry place to prevent melting. Avoid direct sunlight, as it can cause the chocolate to lose its glossy finish and texture. If you live in a warmer climate, the refrigerator is your best friend!
Equipment Recommendations
For the best flavor and texture, I highly recommend using high-quality chocolate. It truly makes a difference in the final product. Additionally, consider using a silicone baking mat for easy removal of the bark once it’s set. It’s a game-changer!
Customization Options
Don’t be afraid to get creative! Experiment with different chocolate types, such as white chocolate for a sweeter twist, or add nuts for extra crunch. You can even incorporate dried fruits or flavored extracts to make this bark uniquely yours. The sky’s the limit!
With these tips in your back pocket, you’re well on your way to creating a stunning Easter Chocolate Bark that will impress everyone at your gathering. Happy baking!
Avoid These Common Cooking Mistakes
Even the most seasoned cooks can run into a few hiccups when making Easter Chocolate Bark. But don’t worry! I’ve compiled a list of common mistakes and their solutions to help you navigate the process like a pro.
- Not Tempering the Chocolate: This can result in a dull finish and poor snap. Solution: Use a thermometer to ensure proper melting temperatures. Aim for 120°F for dark chocolate and 110°F for milk chocolate.
- Overheating the Chocolate: If chocolate gets too hot, it can seize up and become unusable. Solution: Melt slowly and stir frequently, keeping the heat low to avoid any mishaps.
- Not Using Parchment Paper: This can make it difficult to remove the bark once it’s set. Solution: Always line the baking sheet with parchment paper to ensure easy removal.
- Skipping the Refrigeration Step: If you skip this, the bark may not set properly and could be too soft. Solution: Allow sufficient time in the fridge—at least 1 hour—to ensure it hardens completely.
- Using Stale Ingredients: Old ingredients can affect the flavor and texture of your bark. Solution: Check the freshness of all ingredients before use, especially the chocolate and mini eggs.
- Not Breaking the Bark Evenly: This can lead to uneven pieces that are hard to eat. Solution: Use a sharp knife for clean cuts, or simply break it by hand for a rustic look.
- Overloading with Toppings: Too many toppings can make it difficult to eat and enjoy. Solution: Use a moderate amount of toppings for balance, allowing the chocolate to shine through.
By keeping these tips in mind, you’ll be well on your way to creating a stunning Easter Chocolate Bark that’s not only beautiful but also delicious. Happy cooking!
Creative Variations & Customizations
One of the best things about Easter Chocolate Bark is its versatility! You can easily customize it to suit your taste preferences or to celebrate different occasions. Here are some fun and creative variations to inspire your next batch:
- Nutty Delight: Add chopped nuts like almonds or pecans for added crunch. The nutty flavor pairs beautifully with the chocolate, giving each bite a satisfying texture.
- Fruit Fusion: Incorporate dried fruits like cranberries or apricots for a chewy texture. The sweetness of the fruit complements the chocolate perfectly, adding a delightful contrast.
- Seasonal Swaps: Use seasonal candies or sprinkles to match different holidays. Think red and green for Christmas or pastel colors for spring celebrations—get creative!
- Spicy Kick: Add a pinch of cayenne pepper or chili powder for a surprising heat. This unexpected twist will tantalize your taste buds and keep everyone guessing!
- Vegan Version: Substitute with dairy-free chocolate and ensure all toppings are vegan-friendly. This way, everyone can enjoy the deliciousness of your Easter Chocolate Bark!
Feel free to mix and match these ideas to create your own signature bark. The beauty of this recipe is that it’s all about having fun and expressing your creativity in the kitchen. So, roll up your sleeves and let your imagination run wild!
Perfect Pairings: What to Serve With Easter Chocolate Bark
Now that you’ve created your stunning Easter Chocolate Bark, it’s time to think about how to elevate your dessert experience even further! Here are some delightful pairings that will complement the rich flavors and textures of your bark:
- Fresh Strawberries: Their tartness contrasts beautifully with the sweetness of the bark, creating a refreshing balance that’s simply irresistible. Plus, the vibrant red color adds a lovely pop to your dessert spread!
- Glass of Milk: A classic pairing that enhances the chocolate experience. The creamy texture of milk perfectly complements the rich chocolate, making each bite even more enjoyable.
- Easter Basket Treats: Include your Easter Chocolate Bark in a basket alongside other candies for a festive touch. It’s a great way to share the joy of the holiday with family and friends!
- Ice Cream Topping: Use broken pieces of bark to add crunch to your favorite ice cream. The combination of creamy ice cream and crunchy chocolate bark is a match made in dessert heaven!
- Cupcake Decoration: Top cupcakes with pieces of bark for a decorative flair. Not only does it look stunning, but it also adds a delicious chocolatey crunch that everyone will love.
- Spring Picnic: Serve as a sweet treat at outdoor gatherings. The colorful appearance of the bark will surely catch everyone’s eye, making it a hit at any picnic!
- Coffee: Pair with a cup of coffee for a delightful afternoon snack. The bitterness of the coffee beautifully balances the sweetness of the chocolate, creating a sophisticated treat.
- Dessert Charcuterie Board: Include in a variety of desserts for a visually appealing spread. The colorful bark will stand out among other treats, making your charcuterie board a feast for the eyes and the taste buds!
With these perfect pairings, your Easter Chocolate Bark will shine even brighter, bringing joy and deliciousness to every occasion. So, gather your loved ones, serve up these delightful combinations, and enjoy the sweet moments together!
Storage & Meal Prep Instructions
Now that you’ve created your delicious Easter Chocolate Bark, it’s important to know how to store it properly to maintain its freshness and flavor. Here are some handy tips for storage and meal prep:
Fridge Storage
To keep your chocolate bark in top condition, store it in an airtight container in the refrigerator. This will help preserve its texture and flavor for up to a week. Just make sure to keep it away from strong-smelling foods, as chocolate can easily absorb odors!
Freezer Storage
If you want to make your Easter Chocolate Bark ahead of time, you can freeze it for up to 3 months. Just wrap it tightly in plastic wrap or aluminum foil to prevent freezer burn. When you’re ready to enjoy it, simply transfer it to the fridge to thaw overnight.
Reheating Methods
While chocolate bark is not typically reheated, if you find yourself needing to soften it slightly, allow it to come to room temperature before serving. This will help restore its delightful texture without compromising the flavor. Just be patient—good things come to those who wait!
With these storage tips, you can enjoy your Easter Chocolate Bark at its best, whether you’re indulging right away or saving some for later. Happy snacking!
Nutrition Facts & Health Insights
As we indulge in the delightful world of Easter Chocolate Bark, it’s important to consider the nutritional aspects of this sweet treat. Here’s a closer look at the nutrition facts and some health insights that might surprise you!
| Nutrient | Amount per Serving (1 piece, approximately 1 oz) |
|---|---|
| Calories | 150 |
| Sugar | 12 grams |
| Sodium | 30 milligrams |
| Fat | 9 grams |
| Saturated Fat | 5 grams |
| Unsaturated Fat | 3 grams |
| Trans Fat | 0 grams |
| Carbohydrates | 18 grams |
| Fiber | 1 gram |
| Protein | 2 grams |
| Cholesterol | 5 milligrams |
Now, let’s talk about the health benefits! Dark chocolate, one of the key ingredients in our Easter Chocolate Bark, is packed with antioxidants that can help combat free radicals in the body. These antioxidants are known to support heart health and improve blood flow, making dark chocolate a guilt-free indulgence when enjoyed in moderation.
Additionally, the mini chocolate eggs add a fun, festive touch without excessive calories. They bring a burst of color and joy to your bark, making it not just a treat for the taste buds but also a feast for the eyes. So, while we enjoy this delicious dessert, we can also appreciate the little health perks that come along with it!
Remember, balance is key. Enjoy your Easter Chocolate Bark as part of a varied diet, and you’ll be able to savor the sweetness without any worries. Happy indulging!
Frequently Asked Questions
As you embark on your journey to create the perfect Easter Chocolate Bark, you might have a few questions along the way. Don’t worry; I’ve got you covered! Here are some of the most common queries I receive, along with helpful answers to guide you through the process.
- Can I use white chocolate instead of dark chocolate?
Absolutely! White chocolate can be a delicious alternative, offering a sweeter flavor profile. Just keep in mind that it won’t have the same depth as dark chocolate, but it will still create a lovely bark. - How long does the chocolate bark last?
When stored in an airtight container, your Easter Chocolate Bark can last up to a week in the refrigerator. If you want to keep it longer, consider freezing it for up to 3 months! - What can I substitute for mini eggs?
If mini eggs aren’t your thing, feel free to get creative! You can use crushed nuts, dried fruits, or even other candies like M&M’s or gummy bears. The key is to maintain that delightful crunch! - Can I make this bark vegan?
Yes, you can! Simply substitute the dark and milk chocolate with dairy-free chocolate options. Just be sure to check the labels on your toppings to ensure they’re vegan-friendly as well. - What if my chocolate seizes?
If your chocolate seizes, don’t panic! You can try adding a small amount of vegetable oil or coconut oil to the chocolate and gently reheating it. This can help restore its smooth texture. - How do I store leftover bark?
Store any leftover Easter Chocolate Bark in an airtight container at room temperature or in the refrigerator. Just make sure it’s completely cooled and set before storing to avoid any melting! - Can I add more toppings?
Of course! Feel free to get creative with your toppings. Just remember to use a moderate amount to maintain balance and ensure that the bark is easy to eat. - What’s the best way to break the bark into pieces?
You can break the bark by hand for a rustic look, or use a sharp knife for cleaner cuts. If you prefer uniform pieces, score the bark with a knife before it fully sets to make breaking easier. - Is it necessary to refrigerate the bark?
Refrigeration is recommended to help the bark set properly and maintain its texture. However, if you live in a cooler climate, a cool, dry place may suffice. Just be cautious of warm temperatures! - Can I use flavored chocolate?
Absolutely! Flavored chocolates, like mint or orange, can add a unique twist to your Easter Chocolate Bark. Just be mindful of how the flavors will blend with your toppings.
With these FAQs in mind, you’re well-equipped to tackle any challenges that may arise while making your Easter Chocolate Bark. Enjoy the process, and happy baking!
Final Inspiration & Kitchen Confidence
As you wrap up your journey of creating this delightful Easter Chocolate Bark, I want to take a moment to remind you just how fun and rewarding this experience can be. Cooking is not just about the end result; it’s about the joy of creating something delicious with your own hands. Each step you took, from melting the chocolate to sprinkling on those colorful toppings, is a celebration of your creativity and passion for food.
Now that you’ve crafted your beautiful bark, don’t keep it all to yourself! Share your creations with family and friends, and watch as their faces light up with delight. Food has a magical way of bringing people together, and your Easter Chocolate Bark is the perfect centerpiece for fostering those connections. Whether it’s at a holiday gathering or a simple afternoon snack, the joy of sharing your culinary triumphs is truly priceless.
So, I invite you to dive into this recipe with enthusiasm! Try it out, experiment with your own variations, and let your imagination run wild. Whether you add a pinch of spice, swap out the toppings, or even try a different type of chocolate, the possibilities are endless. Enjoy the sweet rewards of your efforts, and remember: the kitchen is a place of joy, creativity, and love. Happy baking!
Print
Easter Chocolate Bark: Creamy, Crunchy, Irresistibly Good!
- Total Time: 1 hour 30 minutes
- Yield: 24 pieces 1x
- Diet: Vegetarian
Description
Easter Chocolate Bark is a delightful treat that combines the smooth, rich flavor of melted chocolate with the satisfying crunch of mini eggs. Each bite offers a perfect balance of sweetness and texture, making it an irresistible addition to your holiday celebrations.
Ingredients
- 12 oz dark chocolate, chopped
- 12 oz milk chocolate, chopped
- 1 cup mini chocolate eggs, crushed
- 1/2 cup pastel sprinkles
Instructions
- Line a baking sheet with parchment paper and set aside.
- In a double boiler, melt the dark chocolate over medium heat, stirring until smooth (about 5-7 minutes).
- Pour the melted dark chocolate onto the prepared baking sheet and spread it evenly with a spatula.
- In the same double boiler, melt the milk chocolate until smooth (about 5-7 minutes).
- Drizzle the melted milk chocolate over the dark chocolate layer, creating a marbled effect.
- Sprinkle the crushed mini chocolate eggs and pastel sprinkles evenly over the top.
- Refrigerate for at least 1 hour or until fully set.
- Once set, break the bark into pieces and serve.
Notes
- This chocolate bark can be made up to a week in advance and stored in an airtight container.
- Store in a cool, dry place to prevent melting.
- Substitute dark chocolate with white chocolate for a different flavor profile.
- Prep Time: 15 minutes
- Cook Time: 15 minutes
- Category: desserts
- Method: melting and cooling
- Cuisine: American
Nutrition
- Serving Size: 1 piece (approximately 1 oz)
- Calories: 150
- Sugar: 12 grams
- Sodium: 30 milligrams
- Fat: 9 grams
- Saturated Fat: 5 grams
- Unsaturated Fat: 3 grams
- Trans Fat: 0 grams
- Carbohydrates: 18 grams
- Fiber: 1 gram
- Protein: 2 grams
- Cholesterol: 5 milligrams
Keywords: Easter Chocolate Bark, chocolate bark recipe, mini eggs, holiday treats, easy dessert, chocolate dessert, festive snacks, spring recipes, homemade candy, sweet treats, no-bake dessert, chocolate lovers, colorful desserts, Easter recipes