Introduction to Chocolate Turtle Fudge Recipe
Ah, chocolate turtle fudge! Just the name makes my heart skip a beat. I remember the first time I tasted this delightful treat. It was at a family gathering, and my aunt had brought a tray of her famous fudge. The moment I took a bite, I was transported to a world of rich chocolate, gooey caramel, and crunchy pecans. It was like a warm hug on a chilly day, and I knew I had to learn how to make it myself.
As a passionate home cook, I love sharing recipes that bring joy and comfort to others. This chocolate turtle fudge recipe is one of my favorites because it’s not just a dessert; it’s a memory-maker. Whether you’re celebrating a special occasion or simply indulging in a sweet treat after dinner, this fudge is sure to impress. Plus, it’s incredibly easy to whip up, making it perfect for both novice and experienced cooks alike.
In this recipe, I’ll guide you through each step, sharing tips and tricks that I’ve picked up along the way. You’ll find that making chocolate turtle fudge is not only fun but also a wonderful way to bond with family and friends. So, grab your apron, and let’s dive into the delicious world of chocolate turtle fudge!
Ingredients for Chocolate Turtle Fudge Recipe
Before we embark on our chocolatey adventure, let’s gather all the ingredients we’ll need. I always find that having everything ready makes the cooking process smoother and more enjoyable. Here’s what you’ll need for this delightful chocolate turtle fudge recipe.
Main Ingredients
- 2 cups of semi-sweet chocolate chips
- 1 can (14 ounces) of sweetened condensed milk
- 1 cup of chopped pecans
- 1 cup of caramel sauce (store-bought or homemade)
- 1 teaspoon of vanilla extract
When it comes to chocolate, I always opt for high-quality chocolate chips. They melt beautifully and give the fudge a rich flavor. If you can find chocolate with a higher cocoa content, it can add a deeper taste to your fudge. As for the sweetened condensed milk, I recommend using the full-fat version for a creamier texture. Trust me, it makes a world of difference!
Optional Add-ons
- Sea salt for sprinkling on top
- Extra chopped pecans for garnish
- Chocolate drizzle for an elegant touch
- Other nuts like walnuts or almonds for a twist
Feel free to get creative! Sometimes, I like to sprinkle a little sea salt on top of the fudge before it sets. The salty-sweet combination is simply divine. If you have a favorite nut, toss it in! The beauty of this recipe is that it’s versatile, allowing you to customize it to your taste.
Now that we have our ingredients ready, let’s move on to the fun part—preparing our chocolate turtle fudge!
How to Prepare Chocolate Turtle Fudge Recipe
Now that we have our ingredients ready, it’s time to roll up our sleeves and get cooking! Making chocolate turtle fudge is a delightful experience, and I can’t wait to share the steps with you. Each step is simple, and I’ll sprinkle in some tips to help you along the way. Let’s get started!
Step 1: Gather Your Ingredients
First things first, let’s make sure we have everything we need. I always find that having all my ingredients laid out makes the process smoother. It’s like setting the stage for a beautiful performance!
Tips for Step 1
- Check your pantry for any missing ingredients before you start.
- Measure everything out in advance. It saves time and keeps things organized.
- Keep a clean workspace. A tidy kitchen makes cooking more enjoyable!
Step 2: Melt the Chocolate
Next, we’ll melt the chocolate chips. This is where the magic begins! I love watching the chocolate transform into a silky, smooth mixture. You can use a microwave or a double boiler for this step.
Tips for Step 2
- If using a microwave, heat the chocolate in 30-second intervals, stirring in between. This prevents burning.
- For a double boiler, fill a pot with water and bring it to a simmer. Place a heatproof bowl on top, making sure it doesn’t touch the water.
- Be patient! Stirring helps the chocolate melt evenly and prevents clumps.
Step 3: Mix in the Sweetened Condensed Milk
Once your chocolate is melted, it’s time to add the sweetened condensed milk. This is what gives our fudge that creamy, dreamy texture. I can already smell the sweetness!
Tips for Step 3
- Make sure to mix thoroughly until the chocolate and milk are fully combined.
- Don’t rush this step! A good mix ensures a smooth fudge.
- If you want a richer flavor, you can add a splash of vanilla extract at this stage.
Step 4: Add Pecans and Caramel
Now comes the fun part—adding the pecans and caramel! This is where the fudge gets its signature turtle flavor. The crunch of the pecans paired with the gooey caramel is simply irresistible.
Tips for Step 4
- Gently fold in the chopped pecans to keep them whole and crunchy.
- Drizzle the caramel sauce in and mix just enough to create swirls. You want to see those beautiful ribbons of caramel!
- Feel free to taste the mixture at this point. It’s hard to resist!
Step 5: Pour into a Pan and Chill
Finally, it’s time to pour our luscious mixture into a prepared pan. I like to line my pan with parchment paper for easy removal later. Once it’s in the pan, we’ll let it chill in the fridge until it’s set.
Tips for Step 5
- Use a spatula to spread the mixture evenly in the pan.
- Press down gently to eliminate any air bubbles.
- Let it chill for at least 2 hours, or until firm. Patience is key!
And there you have it! Five simple steps to create your very own chocolate turtle fudge. I can already picture the smiles on everyone’s faces when they take that first bite. Let’s move on to the next section, where we’ll talk about the equipment you’ll need for this delicious recipe!
Equipment Needed for Chocolate Turtle Fudge Recipe
Before we dive into the delicious world of chocolate turtle fudge, let’s make sure we have the right tools at our disposal. Having the right equipment can make the cooking process smoother and more enjoyable. Here’s what you’ll need:
- Microwave or Double Boiler: You’ll need one of these to melt the chocolate. If you don’t have a double boiler, a microwave works just fine!
- Mixing Bowl: A large mixing bowl is essential for combining all those delicious ingredients. I prefer glass or stainless steel for easy mixing.
- Spatula: A silicone spatula is perfect for scraping down the sides of the bowl and ensuring every bit of chocolate goodness is mixed in.
- 9×9-inch Baking Pan: This is the ideal size for setting your fudge. If you don’t have one, a similar-sized dish will work too.
- Parchment Paper: Lining your pan with parchment paper makes it super easy to lift the fudge out once it’s set. If you don’t have parchment, you can lightly grease the pan instead.
With these tools in hand, you’re all set to create your chocolate turtle fudge masterpiece! Remember, cooking is all about improvisation, so feel free to use what you have on hand. Now, let’s move on to the variations of this delightful recipe!
Variations of Chocolate Turtle Fudge Recipe
While the classic chocolate turtle fudge is absolutely divine, I love experimenting with different flavors and textures. It’s like giving a familiar friend a fresh new outfit! Here are a few variations that I’ve tried and absolutely adore:
- Mint Chocolate Turtle Fudge: Add a few drops of peppermint extract to the melted chocolate for a refreshing twist. It’s like a cool breeze on a warm day!
- White Chocolate Turtle Fudge: Swap out the semi-sweet chocolate for white chocolate chips. The creamy sweetness pairs beautifully with the caramel and pecans.
- Spicy Turtle Fudge: For those who like a little kick, sprinkle in some cayenne pepper or chili powder. The heat balances the sweetness perfectly!
- Nut-Free Version: If you have nut allergies, simply omit the pecans and replace them with crispy rice cereal for a delightful crunch.
These variations not only keep things exciting but also allow you to cater to different tastes and preferences. I often find that trying something new can lead to delightful surprises in the kitchen. So, don’t hesitate to get creative and make this chocolate turtle fudge your own!
Cooking Notes for Chocolate Turtle Fudge Recipe
As I’ve learned through my culinary adventures, a few cooking notes can make all the difference when it comes to perfecting your chocolate turtle fudge. Here are some tips that I’ve gathered over the years to ensure your fudge turns out just right:
- Temperature Matters: Make sure your ingredients are at room temperature before you start. This helps them blend together more smoothly, especially the sweetened condensed milk.
- Storage: Once your fudge is set, store it in an airtight container in the fridge. It can last up to two weeks, but I doubt it will last that long with how delicious it is!
- Cutting the Fudge: For clean cuts, use a sharp knife and warm it slightly under hot water before slicing. This prevents the fudge from crumbling.
- Don’t Rush the Chilling: Allow the fudge to chill completely before cutting. If you’re in a hurry, you can pop it in the freezer for about 30 minutes, but keep an eye on it!
- Experiment with Toppings: Feel free to get creative with toppings! Drizzle some melted chocolate or sprinkle crushed nuts on top for an extra touch of flair.
These little notes can elevate your fudge-making experience and help you create a treat that’s not only delicious but also visually appealing. I can’t wait for you to try these tips and enjoy the sweet rewards of your hard work!
Serving Suggestions for Chocolate Turtle Fudge Recipe
Now that our chocolate turtle fudge is ready to be devoured, let’s talk about how to serve it up! Presentation can make a big difference, and I love to get a little creative when it comes to serving this delightful treat. Here are some of my favorite serving suggestions:
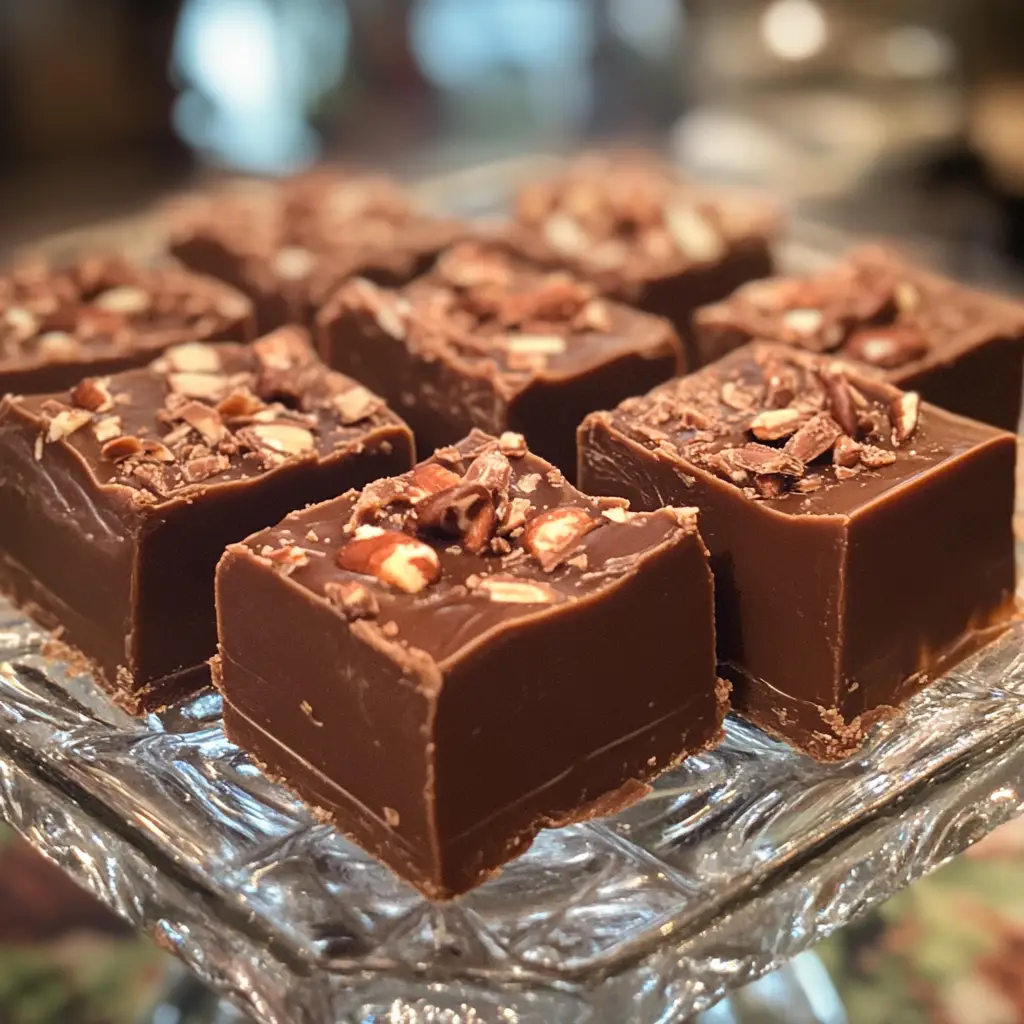
- Classic Squares: Cut the fudge into neat squares and arrange them on a beautiful platter. A sprinkle of sea salt on top adds a touch of elegance and enhances the flavor.
- Fudge Sundae: For a decadent dessert, serve a square of fudge on a scoop of vanilla ice cream. Drizzle with extra caramel sauce and top with whipped cream for a truly indulgent treat!
- Gift-Worthy Treats: Wrap individual pieces of fudge in colorful cellophane or place them in a decorative box. They make perfect gifts for friends and family, especially during the holidays.
- Pair with Coffee: Serve a piece of fudge alongside a warm cup of coffee or hot cocoa. The rich flavors complement each other beautifully, making for a cozy afternoon treat.
- Chocolate Charcuterie Board: Include fudge on a dessert charcuterie board with fresh fruits, nuts, and other sweets. It adds a delightful touch and invites everyone to indulge!
These serving suggestions not only enhance the experience of enjoying chocolate turtle fudge but also make it a centerpiece for gatherings. I love seeing the smiles on my loved ones’ faces as they take that first bite. So, whether you’re hosting a party or enjoying a quiet night in, these ideas will surely elevate your fudge game!
Tips for Perfecting Your Chocolate Turtle Fudge Recipe
As I’ve whipped up countless batches of chocolate turtle fudge, I’ve gathered a treasure trove of tips that can help you achieve fudge perfection. These little nuggets of wisdom can make a world of difference in your fudge-making journey. Let’s dive into my favorite tips!
- Use Quality Ingredients: The better the ingredients, the better the fudge! Opt for high-quality chocolate and fresh pecans. It truly elevates the flavor.
- Don’t Overheat the Chocolate: When melting chocolate, be gentle. Overheating can cause it to seize up. Remember, patience is key!
- Mix Gently: When folding in the pecans and caramel, be gentle. You want to keep those pecans crunchy and the caramel swirled, not fully mixed in.
- Chill Thoroughly: Allow the fudge to chill completely before cutting. This ensures clean, beautiful squares that hold their shape.
- Experiment with Flavors: Don’t be afraid to play around! Add a splash of your favorite liqueur or a hint of espresso powder for a unique twist.
These tips have helped me create fudge that not only tastes amazing but also looks stunning. I can’t wait for you to try them out and share your own fudge-making adventures!
Breakdown of Time for Chocolate Turtle Fudge Recipe
Now that we’ve covered the ingredients, preparation, and tips for making the perfect chocolate turtle fudge, let’s talk about the time it takes to create this delicious treat. I always find it helpful to know how long each step will take, especially when planning for gatherings or special occasions. Here’s a quick breakdown:
- Prep Time: 15 minutes
- Cooking Time: 10 minutes
- Chilling Time: 2 hours
- Total Time: 2 hours and 25 minutes
As you can see, the actual hands-on time is quite short, making this recipe perfect for a busy day. The majority of the time is spent chilling, which gives you a chance to relax or prepare other dishes. I often use this time to clean up my kitchen or plan my next culinary adventure. So, don’t let the total time scare you; the reward of delicious chocolate turtle fudge is well worth the wait!
Nutritional Information for Chocolate Turtle Fudge Recipe
As a passionate home cook, I believe it’s important to enjoy our treats while also being mindful of what we’re consuming. Here’s a quick look at the nutritional information for a typical serving of chocolate turtle fudge. Keep in mind that these values can vary based on the specific ingredients you use and the size of your fudge squares.
- Serving Size: 1 square (about 1 inch)
- Calories: Approximately 150 calories
- Total Fat: 8g
- Saturated Fat: 4g
- Cholesterol: 10mg
- Sodium: 50mg
- Total Carbohydrates: 18g
- Dietary Fiber: 1g
- Sugars: 14g
- Protein: 2g
While this fudge is certainly a treat, it’s also packed with delicious ingredients like pecans, which provide healthy fats and a bit of protein. I always remind myself that moderation is key. Enjoying a small piece of this chocolate turtle fudge can satisfy your sweet tooth without overindulging. So, go ahead and savor every bite! After all, life is too short not to enjoy the sweet moments.
Frequently Asked Questions about Chocolate Turtle Fudge Recipe
As I’ve shared my chocolate turtle fudge recipe with friends and family, I’ve noticed a few common questions pop up. It’s always great to clarify any doubts, especially when it comes to creating such a delicious treat. Here are some of the most frequently asked questions I’ve encountered, along with my answers to help you on your fudge-making journey!
Can I use different types of chocolate?
Absolutely! While I love using semi-sweet chocolate chips, you can experiment with dark chocolate or even milk chocolate if you prefer a sweeter taste. Each type of chocolate will give your fudge a unique flavor profile, so feel free to play around!
How do I store leftover fudge?
To keep your fudge fresh, store it in an airtight container in the refrigerator. It can last up to two weeks, but I doubt it will last that long! If you want to keep it longer, you can freeze it for up to three months. Just make sure to wrap it well to prevent freezer burn.
Can I make this fudge without nuts?
Of course! If you or someone you’re serving has nut allergies, simply omit the pecans. You can replace them with crispy rice cereal for a delightful crunch, or leave them out entirely for a smooth fudge experience.
What can I use instead of sweetened condensed milk?
If you’re looking for a dairy-free option, you can use coconut milk or a dairy-free condensed milk alternative. Just keep in mind that the flavor and texture may vary slightly, but it will still be delicious!
How do I know when the fudge is set?
The fudge is ready when it feels firm to the touch and holds its shape. If you gently press your finger on the surface, it should spring back. If it leaves an indentation, it needs more chilling time. Patience is key here!
These questions are just a few of the many that can arise when making chocolate turtle fudge. I hope my answers help you feel more confident in your fudge-making adventure. Remember, cooking is all about having fun and experimenting, so don’t hesitate to reach out if you have more questions or need tips along the way!
Conclusion on Chocolate Turtle Fudge Recipe
As we wrap up our delicious journey through the world of chocolate turtle fudge, I can’t help but feel a sense of joy. This recipe is more than just a sweet treat; it’s a celebration of flavors and memories. The rich chocolate, gooey caramel, and crunchy pecans come together to create a dessert that warms the heart and delights the taste buds.
What I love most about this chocolate turtle fudge recipe is its simplicity. With just a handful of ingredients and a few easy steps, you can create something truly special. Whether you’re making it for a family gathering, a cozy night in, or as a thoughtful gift, this fudge is sure to impress. Plus, the variations and personal touches you can add make it a canvas for your creativity.
So, the next time you’re in the mood for something sweet, I encourage you to give this chocolate turtle fudge a try. It’s a recipe that invites you to share, indulge, and create lasting memories with those you love. Happy cooking, and may your fudge-making adventures be as delightful as the treats themselves!