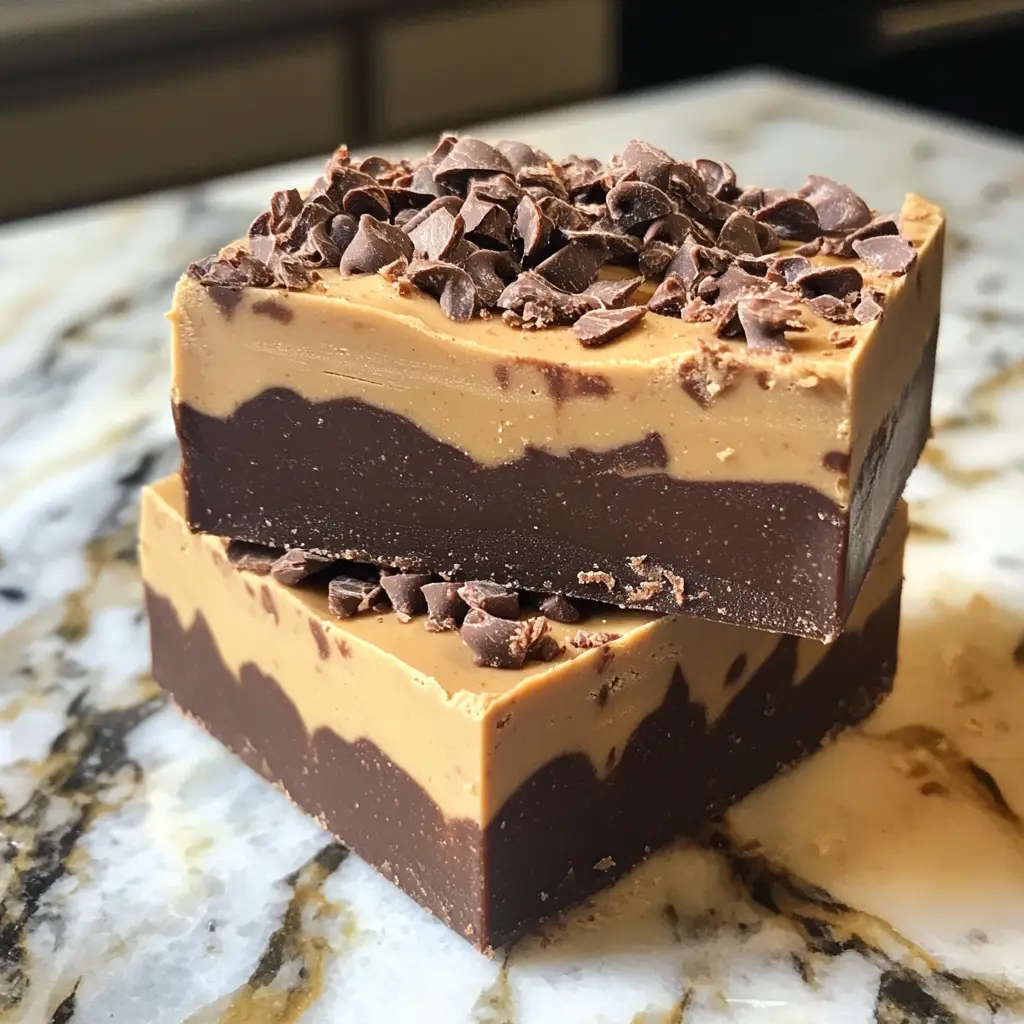
Introduction to Chocolate Peanut Butter Fudge Layered Recipe
Ah, chocolate and peanut butter—a match made in culinary heaven! I still remember the first time I tasted this delightful duo. It was a warm summer afternoon, and my grandmother had just pulled a tray of her famous fudge from the fridge. The rich aroma of chocolate wafted through the kitchen, wrapping around me like a cozy blanket. As I took my first bite, the creamy peanut butter layer melted in my mouth, and I was instantly hooked. From that moment on, I knew I had to recreate this magic in my own kitchen.
This Chocolate Peanut Butter Fudge Layered Recipe is not just a treat; it’s a celebration of flavors that dance together in perfect harmony. Each layer brings its own unique texture and taste, creating a symphony of sweetness that’s hard to resist. Whether you’re preparing for a family gathering, a cozy night in, or just a little indulgence for yourself, this recipe is sure to impress.
What I love most about this fudge is its versatility. You can easily customize it to suit your taste buds or dietary needs. Want to add a sprinkle of sea salt on top? Go for it! Prefer a nutty crunch? Toss in some chopped nuts. The possibilities are endless, and that’s what makes this recipe so special.
So, grab your apron and let’s dive into the world of chocolate and peanut butter! I promise you, this layered fudge will not only satisfy your sweet tooth but also create memories that will last a lifetime. Let’s get started on this delicious adventure!
Ingredients for Chocolate Peanut Butter Fudge Layered Recipe
Before we embark on our fudge-making journey, let’s gather all the ingredients we’ll need. I always find that having everything prepped and ready makes the cooking process smoother and more enjoyable. Here’s what you’ll need for this Chocolate Peanut Butter Fudge Layered Recipe.
Main Ingredients
- 1 cup of creamy peanut butter (I prefer natural peanut butter for its rich flavor and smooth texture)
- 1 cup of unsweetened cocoa powder (choose a high-quality brand for the best taste)
- 1 cup of sweetened condensed milk (this adds the perfect sweetness and creaminess)
- 1 cup of powdered sugar (sifted to avoid lumps)
- 1 teaspoon of vanilla extract (for that extra depth of flavor)
- 1/2 cup of unsalted butter (melted, to bind everything together)
These ingredients come together to create a luscious fudge that’s both rich and satisfying. I always make sure to use the best quality ingredients I can find, as they truly make a difference in the final product. For instance, using pure vanilla extract instead of imitation can elevate the flavor profile significantly.
Optional Add-ons
- 1/2 cup of chopped nuts (like walnuts or pecans, for a delightful crunch)
- 1/4 teaspoon of sea salt (sprinkled on top for a sweet and salty contrast)
- 1/2 cup of mini chocolate chips (for an extra chocolatey layer)
- 1/4 cup of shredded coconut (if you’re feeling adventurous!)
These optional add-ons can take your fudge to the next level. I often like to experiment with different combinations. For instance, adding a sprinkle of sea salt on top not only looks beautiful but also enhances the flavors. And if you’re a chocolate lover like me, those mini chocolate chips are a must!
Now that we have our ingredients ready, let’s move on to the fun part—preparing our delicious fudge!
How to Prepare Chocolate Peanut Butter Fudge Layered Recipe
Now that we have our ingredients all lined up like eager little soldiers, it’s time to dive into the preparation of our Chocolate Peanut Butter Fudge Layered Recipe. I find that following each step carefully makes all the difference in achieving that perfect fudge texture. So, let’s roll up our sleeves and get started!
Step 1: Prepare the Base Layer
First things first, we need to create a solid foundation for our fudge. In a medium saucepan, combine the melted butter, cocoa powder, and sweetened condensed milk. Stir it over low heat until everything is well blended and smooth. This base layer is rich and chocolatey, setting the stage for the layers to come.
Tips for Step 1
- Make sure to stir continuously to prevent the mixture from burning. It’s like giving your fudge a little love!
- If you want a deeper chocolate flavor, consider adding a splash of espresso powder. It’s a secret weapon that enhances the chocolate without being too overpowering.
Step 2: Make the Peanut Butter Layer
Next up is the creamy peanut butter layer. In a separate bowl, mix the peanut butter, powdered sugar, and vanilla extract until it’s smooth and creamy. This layer is like a warm hug, bringing a delightful contrast to the rich chocolate base.
Tips for Step 2
- For a smoother texture, you can microwave the peanut butter for about 15 seconds before mixing. It makes it easier to blend!
- Feel free to adjust the sweetness by adding more or less powdered sugar, depending on your taste preference.
Step 3: Create the Chocolate Layer
Now, let’s whip up the final chocolate layer! In the same saucepan used for the base, combine the remaining cocoa powder, melted butter, and sweetened condensed milk. Stir until it’s silky smooth. This layer is the cherry on top of our fudge sundae!
Tips for Step 3
- To make this layer extra special, consider folding in some mini chocolate chips for added texture and flavor.
- Keep the heat low to avoid scorching the chocolate. Patience is key here!
Step 4: Assemble the Layers
It’s time for the fun part—layering! In a lined baking dish, pour the chocolate base layer first, spreading it evenly. Next, gently spoon the peanut butter layer on top, smoothing it out. Finally, pour the chocolate layer over the peanut butter, creating a beautiful, decadent masterpiece.
Tips for Step 4
- Use a spatula to spread the layers evenly. It’s like painting a canvas with deliciousness!
- Don’t worry if the layers mix a little; it adds to the charm of homemade fudge.
Step 5: Chill and Set
Now that our fudge is beautifully layered, it’s time to let it chill. Place the baking dish in the refrigerator for at least 2 hours, or until the fudge is firm. This waiting game is tough, but trust me, it’s worth it!
Tips for Step 5
- For quicker setting, you can place the fudge in the freezer for about 30 minutes. Just keep an eye on it!
- Once set, let it sit at room temperature for a few minutes before cutting. This makes slicing easier and prevents it from crumbling.
And there you have it! Each step brings us closer to that glorious moment when we can finally indulge in our homemade fudge. I can already taste the creamy layers melting in my mouth. Let’s keep the momentum going and move on to the next section!
Equipment Needed for Chocolate Peanut Butter Fudge Layered Recipe
Before we dive into the delicious world of fudge, let’s make sure we have all the right tools at our fingertips. Having the right equipment can make the process smoother and more enjoyable. Here’s what you’ll need for this Chocolate Peanut Butter Fudge Layered Recipe.
- Medium saucepan: This is where the magic begins! A good-quality saucepan helps in evenly heating the ingredients without burning them.
- Mixing bowls: You’ll need a couple of these for mixing the different layers. I prefer using glass bowls because they’re easy to clean and you can see the mixture as you blend.
- Spatula: A silicone spatula is perfect for scraping down the sides of the bowls and spreading the layers evenly in the baking dish.
- Baking dish: A 9×9 inch square baking dish works wonderfully for this recipe. If you don’t have one, a similar-sized dish or even a lined loaf pan can do the trick!
- Parchment paper: Lining your baking dish with parchment paper makes it super easy to lift the fudge out once it’s set. It’s like giving your fudge a cozy blanket!
- Microwave-safe bowl (optional): If you choose to microwave your peanut butter for a smoother texture, a microwave-safe bowl will come in handy.
With these tools in hand, you’re all set to create your fudge masterpiece! Remember, cooking is all about enjoying the process, so don’t stress if you don’t have the exact equipment. Get creative and make it work with what you have. Now, let’s move on to the next delicious step!
Variations of Chocolate Peanut Butter Fudge Layered Recipe
One of the things I adore about this Chocolate Peanut Butter Fudge Layered Recipe is its flexibility. You can easily switch things up to suit your taste or to use what you have on hand. Here are a few delightful variations that I’ve tried and loved:
- Mint Chocolate Fudge: Add a few drops of peppermint extract to the chocolate layer for a refreshing twist. It’s like a cool breeze on a warm day!
- Nutty Delight: Incorporate chopped almonds or hazelnuts into the peanut butter layer. The crunch adds a wonderful texture that complements the creaminess.
- Cookie Dough Fudge: Mix in small chunks of cookie dough into the peanut butter layer. It’s like having two desserts in one!
- Spicy Kick: For those who enjoy a little heat, sprinkle in a pinch of cayenne pepper or chili powder into the chocolate layer. It’s a surprising and delightful contrast!
- Fruit Fusion: Fold in some dried fruits like cranberries or cherries into the peanut butter layer for a fruity burst of flavor.
These variations not only keep things exciting but also allow you to express your creativity in the kitchen. I often find myself experimenting with different flavors, and it’s always a fun surprise to see how they turn out. So, don’t hesitate to make this recipe your own! The world of fudge is your oyster, and I can’t wait to hear about your delicious creations!
Cooking Notes for Chocolate Peanut Butter Fudge Layered Recipe
As I’ve journeyed through the world of fudge-making, I’ve picked up a few handy cooking notes that can help elevate your Chocolate Peanut Butter Fudge Layered Recipe experience. These little tips can make a big difference in the final product, so let’s dive in!
- Temperature Matters: Make sure your ingredients are at room temperature before you start. This helps them blend together more smoothly, creating that luscious texture we all crave.
- Storage Tips: Once your fudge is set, store it in an airtight container in the fridge. It can last up to two weeks, but I doubt it will stick around that long!
- Cutting the Fudge: For clean cuts, use a sharp knife and warm it slightly under hot water before slicing. This prevents the fudge from crumbling and gives you those beautiful, neat squares.
- Experiment with Sweetness: If you prefer a less sweet fudge, feel free to reduce the amount of powdered sugar. Just remember, it might alter the texture slightly, so adjust accordingly!
- Layering Technique: When pouring the layers, do it slowly to avoid mixing. It’s like building a delicious tower of flavor, and we want each layer to shine!
These cooking notes are like little nuggets of wisdom I’ve gathered over time. They help me create the perfect fudge every time, and I hope they do the same for you. Now, let’s keep the momentum going and explore the next delicious section of our fudge adventure!
Serving Suggestions for Chocolate Peanut Butter Fudge Layered Recipe
Now that our Chocolate Peanut Butter Fudge Layered Recipe is ready to be devoured, let’s talk about how to serve it up in style! Presentation can elevate the experience, and I love to get a little creative when it comes to serving this delightful treat.
- Classic Squares: Cut the fudge into neat squares and arrange them on a beautiful platter. A sprinkle of cocoa powder or powdered sugar on top adds a touch of elegance.
- Ice Cream Delight: Serve a square of fudge on top of a scoop of vanilla or chocolate ice cream. The warm fudge melts slightly, creating a heavenly dessert!
- Garnish with Nuts: Top each piece with a sprinkle of chopped nuts or a drizzle of melted chocolate for an extra layer of flavor and texture.
- Gift-Worthy Treats: Wrap individual pieces in colorful cellophane and tie them with a ribbon. They make perfect homemade gifts for friends and family!
- Pair with Coffee: Enjoy a piece of fudge alongside a cup of freshly brewed coffee or a rich hot chocolate. The combination is simply divine!
These serving suggestions not only enhance the visual appeal but also create a delightful experience for everyone. I often find that sharing my fudge with loved ones makes it taste even better! So, get creative and enjoy every delicious bite of your homemade fudge masterpiece!
Tips for Perfecting Chocolate Peanut Butter Fudge Layered Recipe
As I’ve whipped up countless batches of this Chocolate Peanut Butter Fudge Layered Recipe, I’ve gathered a treasure trove of tips that can help you achieve fudge perfection. These little nuggets of wisdom can make all the difference, so let’s dive right in!
- Use Quality Ingredients: The better the ingredients, the better the fudge! Opt for high-quality cocoa powder and natural peanut butter. Trust me, it’s worth it!
- Don’t Rush the Chilling: Allow the fudge to chill completely before cutting. Patience is key here! If you cut it too soon, it may crumble.
- Experiment with Textures: If you love a bit of crunch, consider adding crushed graham crackers or crispy rice cereal to the peanut butter layer. It adds a delightful surprise!
- Layering Technique: When pouring each layer, do it slowly and gently. This helps maintain the distinct layers and prevents them from blending together.
- Store Properly: Keep your fudge in an airtight container in the fridge. It stays fresh longer and is perfect for those late-night cravings!
These tips have helped me create the most delicious fudge time and time again. I hope they inspire you to experiment and find your own perfect version of this delightful treat. Now, let’s keep the momentum going and explore the next delicious section of our fudge adventure!
Breakdown of Time for Chocolate Peanut Butter Fudge Layered Recipe
As a passionate home cook, I know that timing is everything in the kitchen. When it comes to making this Chocolate Peanut Butter Fudge Layered Recipe, it’s essential to plan your time wisely. Here’s a quick breakdown to help you manage your fudge-making adventure:
- Prep Time: 15 minutes – This includes gathering your ingredients, measuring them out, and mixing the layers. It’s a fun and exciting part of the process!
- Cooking Time: 20 minutes – This is the time spent on the stove, melting and blending the ingredients to create those luscious layers. Keep an eye on the heat to ensure everything comes together smoothly.
- Chilling Time: 2 hours – Patience is key here! Allowing the fudge to chill in the refrigerator ensures it sets perfectly. If you’re in a hurry, you can pop it in the freezer for about 30 minutes, but I recommend the fridge for the best texture.
- Total Time: 2 hours and 35 minutes – This includes all the prep, cooking, and chilling time. It may seem like a long wait, but trust me, the end result is worth every minute!
With this time breakdown, you can plan your fudge-making session accordingly. I often find that the anticipation makes the first bite even sweeter! So, gather your ingredients, set your timer, and let’s create some delicious memories together!
Nutritional Information for Chocolate Peanut Butter Fudge Layered Recipe
As a passionate home cook, I believe it’s important to enjoy our treats while also being mindful of what goes into them. This Chocolate Peanut Butter Fudge Layered Recipe is a delightful indulgence, and knowing its nutritional information can help you savor it even more. Here’s a quick overview of the nutritional content per serving, assuming you cut the fudge into 16 squares:
- Calories: Approximately 200 calories
- Fat: 12 grams (of which saturated fat is about 5 grams)
- Carbohydrates: 22 grams
- Fiber: 2 grams
- Sugar: 15 grams
- Protein: 4 grams
These numbers can vary based on the specific brands and ingredients you choose, so it’s always a good idea to check the labels. If you’re looking to lighten things up a bit, consider using a sugar substitute or reducing the amount of powdered sugar. Remember, moderation is key! Enjoying a piece of this fudge can be a delightful treat in a balanced diet.
Now that we’ve covered the nutritional side, let’s keep the excitement going and dive into some frequently asked questions about this delicious fudge recipe!
Frequently Asked Questions about Chocolate Peanut Butter Fudge Layered Recipe
As I’ve shared my Chocolate Peanut Butter Fudge Layered Recipe with friends and family, I’ve noticed a few common questions popping up. It’s always great to clarify any doubts, especially when it comes to creating such a delicious treat! Here are some of the most frequently asked questions, along with my answers to help you on your fudge-making journey.
Can I use crunchy peanut butter instead of creamy?
Absolutely! Using crunchy peanut butter will add a delightful texture to your fudge. The little peanut pieces create a fun contrast against the smooth chocolate layers. Just keep in mind that it may slightly alter the creaminess of the fudge, but it’s a delicious twist!
How long does the fudge last?
When stored in an airtight container in the refrigerator, your fudge can last up to two weeks. However, I doubt it will stick around that long! If you want to keep it fresh even longer, you can freeze it for up to three months. Just make sure to wrap it well to prevent freezer burn.
Can I make this fudge vegan?
Yes, you can! To make a vegan version of this fudge, simply substitute the sweetened condensed milk with a plant-based alternative, like coconut cream or a vegan sweetened condensed milk. Also, ensure that your chocolate and peanut butter are dairy-free. It’s a great way to enjoy this treat while sticking to a vegan lifestyle!
What if my fudge is too soft?
If your fudge turns out too soft, it may not have chilled long enough. Try placing it back in the refrigerator for a bit longer. If it’s still too soft after that, you can melt it down again and add a bit more powdered sugar or cocoa powder to thicken it up. Just be sure to let it chill properly afterward!
Can I add other flavors to the fudge?
Definitely! This recipe is super versatile. You can add flavors like mint, coffee, or even spices like cinnamon for a unique twist. Just remember to adjust the quantities to your taste. Experimenting with flavors is one of the best parts of cooking!
These FAQs should help clear up any uncertainties you might have while making your fudge. I love sharing this recipe, and I hope it brings as much joy to your kitchen as it has to mine. Now, let’s wrap up our delicious adventure with a sweet conclusion!
Conclusion on Chocolate Peanut Butter Fudge Layered Recipe
As we reach the end of our delicious journey through the Chocolate Peanut Butter Fudge Layered Recipe, I can’t help but feel a sense of joy and satisfaction. This recipe is more than just a sweet treat; it’s a celebration of flavors that brings people together. The rich chocolate and creamy peanut butter layers create a delightful harmony that’s hard to resist.
What I love most about this fudge is its versatility. Whether you’re making it for a special occasion or just to satisfy a sweet craving, it’s a recipe that adapts to your needs. You can customize it with various add-ons, flavors, and textures, making it uniquely yours. Plus, it’s a fantastic way to share love and joy with family and friends, as everyone can enjoy a piece of this indulgent delight.
So, the next time you find yourself in the kitchen, I encourage you to whip up this Chocolate Peanut Butter Fudge Layered Recipe. Not only will you create a delicious treat, but you’ll also craft memories that will linger long after the last bite. Happy cooking, and may your fudge adventures be as sweet as the treats themselves!