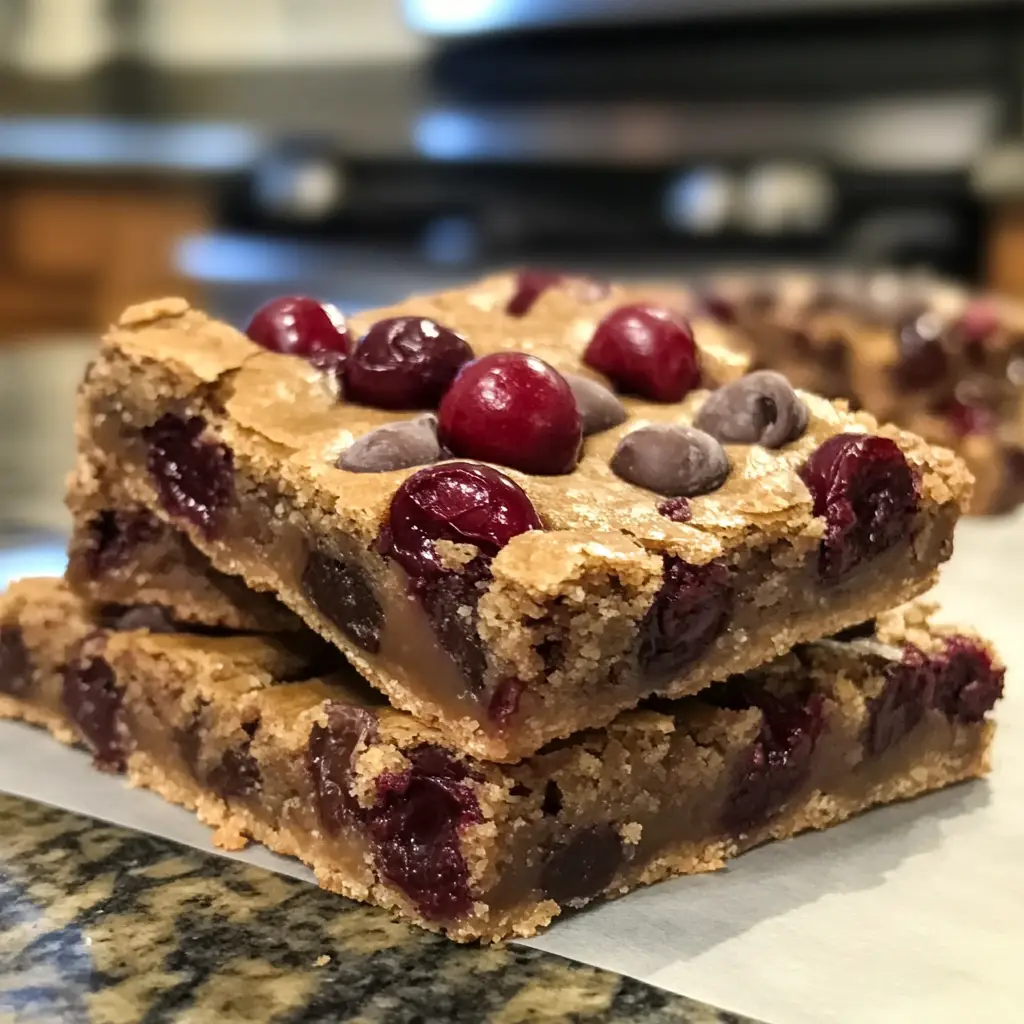
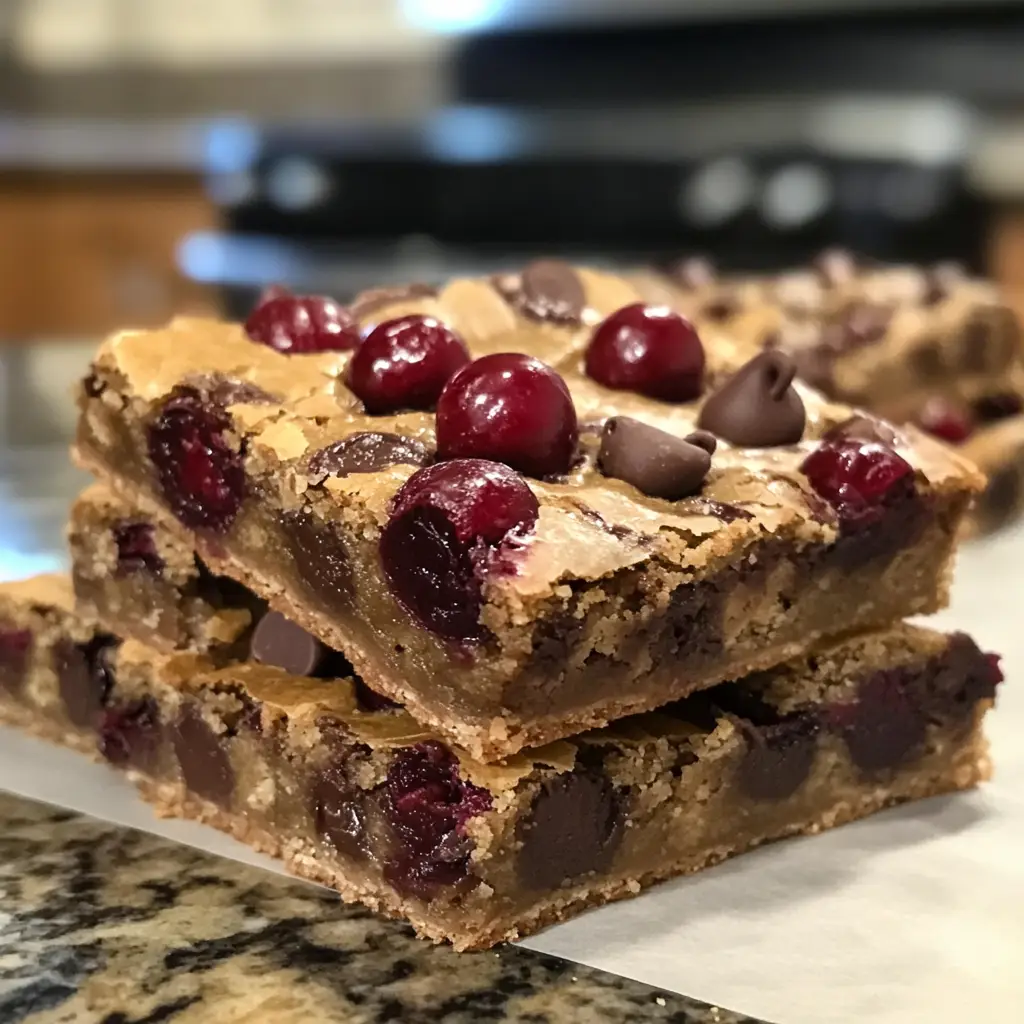
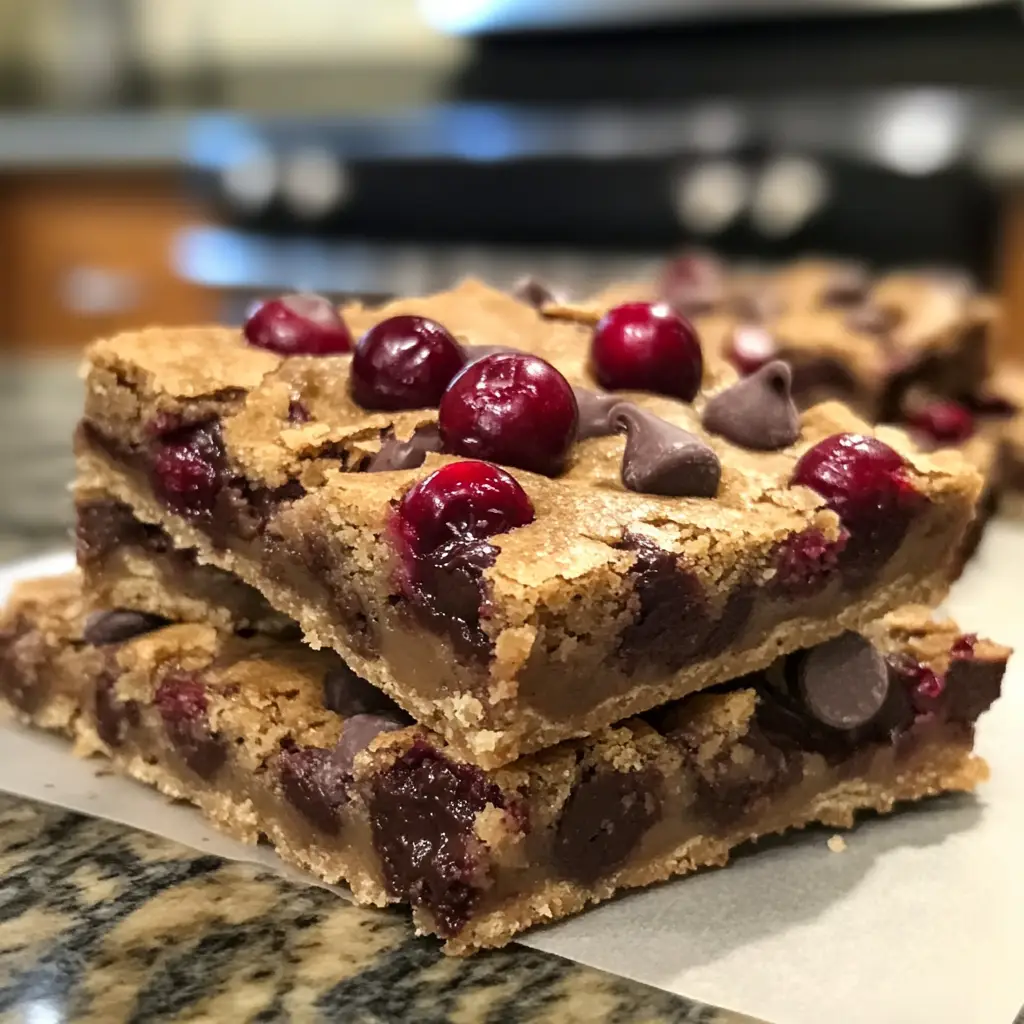
Introduction to Chocolate Chip Cherry Bars
As a busy mom, I know how precious time can be, especially when it comes to whipping up something sweet. That’s why I adore these Chocolate Chip Cherry Bars! They’re not just a treat; they’re a delightful solution for those hectic days when you want to impress your loved ones without spending hours in the kitchen. The combination of rich chocolate and juicy cherries creates a flavor explosion that’s hard to resist. Plus, they’re easy to make, so you can enjoy a homemade dessert without the fuss. Let’s dive into this delicious adventure together!
Why You’ll Love This Chocolate Chip Cherry Bars
These Chocolate Chip Cherry Bars are a game-changer for busy days! They come together in just 45 minutes, making them perfect for last-minute gatherings or a sweet treat after dinner. The chewy texture and the burst of cherry flavor paired with chocolate will have everyone asking for seconds. Plus, they’re a fantastic way to sneak in some fruit while satisfying your sweet tooth. What’s not to love?
Ingredients for Chocolate Chip Cherry Bars
Gathering the right ingredients is the first step to creating these delightful Chocolate Chip Cherry Bars. Here’s what you’ll need:
- All-purpose flour: This is the backbone of your bars, providing structure and chewiness.
- Unsalted butter: Softened butter adds richness and moisture, making your bars tender.
- Brown sugar: It brings a deep, caramel-like flavor that pairs beautifully with chocolate and cherries.
- Granulated sugar: This adds sweetness and helps achieve that lovely golden color.
- Large egg: Eggs bind the ingredients together and contribute to the bars’ soft texture.
- Vanilla extract: A splash of vanilla enhances the overall flavor, making it more aromatic.
- Baking soda: This leavening agent helps the bars rise, giving them a light and fluffy texture.
- Salt: Just a pinch balances the sweetness and enhances the flavors.
- Chocolate chips: The star of the show! Use semi-sweet or dark chocolate chips for a richer taste.
- Pitted cherries: Fresh or frozen, chopped cherries add a burst of fruity goodness that complements the chocolate.
For those looking to mix things up, consider using dark chocolate chips for a more intense flavor. If cherries aren’t your thing, feel free to swap them out for another fruit like raspberries or blueberries. Remember, the exact quantities are listed at the bottom of the article for easy printing!
How to Make Chocolate Chip Cherry Bars
Now that we have our ingredients ready, let’s dive into the fun part—making these Chocolate Chip Cherry Bars! Follow these simple steps, and you’ll have a delicious treat in no time.
Step 1: Preheat the Oven
First things first, preheat your oven to 350°F (175°C). This step is crucial because it ensures even baking. While the oven warms up, grease your baking pan. I like to use a 9×9-inch pan for these bars. A well-greased pan helps the bars release easily once they’re baked.
Step 2: Cream the Butter and Sugars
In a mixing bowl, cream together the softened butter, brown sugar, and granulated sugar until smooth. This process is essential because it incorporates air into the mixture, making your bars light and fluffy. You want a creamy texture, so don’t rush it—mix for about 2-3 minutes until it’s nice and fluffy.
Step 3: Add Egg and Vanilla
Next, add in the large egg and vanilla extract. The egg acts as a binder, holding everything together, while the vanilla adds a warm, inviting flavor. Mix until everything is well combined. You’ll notice the batter becoming even creamier, which is a good sign!
Step 4: Combine Dry Ingredients
In a separate bowl, whisk together the all-purpose flour, baking soda, and salt. Mixing dry ingredients separately helps ensure that the baking soda is evenly distributed. This step is key to achieving that perfect rise in your bars!
Step 5: Mix Wet and Dry Ingredients
Now, it’s time to combine the wet and dry ingredients. Gradually add the dry mixture to the wet ingredients, stirring gently. Be careful not to overmix; you want to combine them just until you see no more flour. Overmixing can lead to tough bars, and we want them soft and chewy!
Step 6: Fold in Chocolate Chips and Cherries
Here comes the fun part! Gently fold in the chocolate chips and chopped cherries. Folding is a technique that helps maintain the airiness of the batter. Use a spatula to scoop from the bottom and turn the mixture over, ensuring the chocolate and cherries are evenly distributed without deflating the batter.
Step 7: Spread and Bake
Spread the batter evenly into your prepared baking pan. Use a spatula to smooth the top, making sure it’s level. Bake in the preheated oven for 25-30 minutes, or until the edges are golden brown. The center might look a bit soft, but it will firm up as it cools.
Step 8: Cool and Cut
Once baked, remove the pan from the oven and let it cool for about 10-15 minutes. This cooling time is important; it allows the bars to set properly. After cooling, cut them into squares. I like to use a sharp knife for clean edges. Enjoy your delicious Chocolate Chip Cherry Bars!
Tips for Success
- Make sure your butter is softened for easy creaming.
- Use a light hand when folding in the chocolate chips and cherries to keep the batter airy.
- Check for doneness by inserting a toothpick; it should come out with a few moist crumbs.
- Let the bars cool completely before cutting for cleaner edges.
- Store leftovers in an airtight container to keep them fresh.
Equipment Needed
- 9×9-inch baking pan (or an 8×8-inch pan for thicker bars)
- Mixing bowls (a large one for wet ingredients and a medium one for dry)
- Electric mixer (or a whisk for a good workout!)
- Spatula (a rubber spatula works wonders for folding)
- Measuring cups and spoons (for precise ingredient amounts)
Variations
- For a nutty twist, add 1/2 cup of chopped walnuts or pecans to the batter.
- Try using almond extract instead of vanilla for a unique flavor profile.
- Substitute half of the all-purpose flour with whole wheat flour for a healthier option.
- For a gluten-free version, use a 1:1 gluten-free baking blend in place of regular flour.
- Experiment with different fruits like blueberries or raspberries for a seasonal spin.
Serving Suggestions
- Pair your Chocolate Chip Cherry Bars with a scoop of vanilla ice cream for a delightful dessert.
- Serve with a dollop of whipped cream and a sprinkle of chocolate shavings for an elegant touch.
- Enjoy with a cup of coffee or tea for a cozy afternoon treat.
- For a festive presentation, dust with powdered sugar before serving.
FAQs about Chocolate Chip Cherry Bars
As you embark on your journey to make these delightful Chocolate Chip Cherry Bars, you might have a few questions. Here are some common queries I’ve encountered, along with helpful answers to guide you along the way.
Can I use frozen cherries instead of fresh?
Absolutely! Frozen cherries work just as well. Just make sure to thaw and drain them before chopping to avoid excess moisture in your bars.
How should I store the Chocolate Chip Cherry Bars?
Store your bars in an airtight container at room temperature for up to a week. If you want to keep them longer, you can refrigerate them for up to two weeks.
Can I make these bars ahead of time?
Yes! These bars are perfect for making ahead. Just bake, cool, and store them. They taste even better the next day as the flavors meld together.
What can I substitute for the egg?
If you need an egg substitute, try using 1/4 cup of unsweetened applesauce or a flax egg (1 tablespoon of ground flaxseed mixed with 2.5 tablespoons of water). Both options work well in this recipe!
Can I add other mix-ins?
<pDefinitely! Feel free to get creative. Chopped nuts, coconut flakes, or even a swirl of peanut butter can add a fun twist to your Chocolate Chip Cherry Bars.
Final Thoughts
Making these Chocolate Chip Cherry Bars is more than just baking; it’s about creating sweet memories in the kitchen. The joy of mixing ingredients, the delightful aroma wafting through your home, and the smiles on your loved ones’ faces when they take that first bite are priceless. These bars are a perfect blend of flavors and textures, making them a go-to treat for any occasion. Whether it’s a busy weeknight or a special gathering, these bars will surely bring happiness to your table. So, roll up your sleeves and enjoy this delicious adventure!
Print
Chocolate Chip Cherry Bars: A Delicious Treat Awaits!
- Total Time: 45 minutes
- Yield: 12 bars 1x
- Diet: Vegetarian
Description
Chocolate Chip Cherry Bars are a delightful dessert combining the rich flavors of chocolate and cherries in a soft, chewy bar.
Ingredients
- 1 cup all-purpose flour
- 1/2 cup unsalted butter, softened
- 1/2 cup brown sugar
- 1/4 cup granulated sugar
- 1 large egg
- 1 teaspoon vanilla extract
- 1/2 teaspoon baking soda
- 1/4 teaspoon salt
- 1 cup chocolate chips
- 1 cup pitted cherries, chopped
Instructions
- Preheat the oven to 350°F (175°C) and grease a baking pan.
- In a bowl, cream together the butter, brown sugar, and granulated sugar until smooth.
- Add the egg and vanilla extract, mixing well.
- In another bowl, whisk together the flour, baking soda, and salt.
- Gradually add the dry ingredients to the wet mixture, stirring until combined.
- Fold in the chocolate chips and chopped cherries.
- Spread the batter evenly in the prepared baking pan.
- Bake for 25-30 minutes or until golden brown.
- Allow to cool before cutting into bars.
Notes
- For a richer flavor, use dark chocolate chips.
- Ensure cherries are pitted and chopped to avoid any hard pieces.
- Store in an airtight container for up to a week.
- Prep Time: 15 minutes
- Cook Time: 30 minutes
- Category: Dessert
- Method: Baking
- Cuisine: American
Nutrition
- Serving Size: 1 bar
- Calories: 180
- Sugar: 12g
- Sodium: 100mg
- Fat: 8g
- Saturated Fat: 5g
- Unsaturated Fat: 3g
- Trans Fat: 0g
- Carbohydrates: 24g
- Fiber: 1g
- Protein: 2g
- Cholesterol: 20mg
Keywords: Chocolate Chip Cherry Bars, dessert, baking, treats