
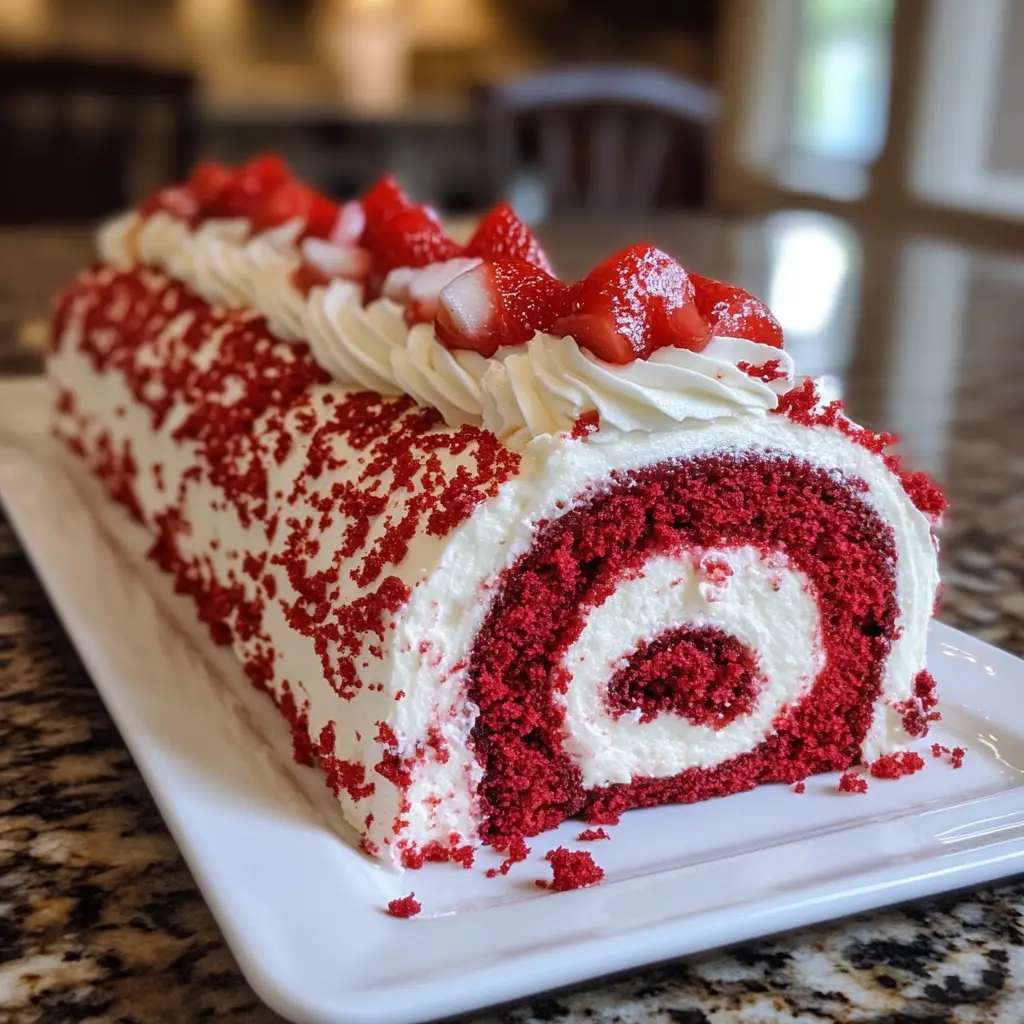
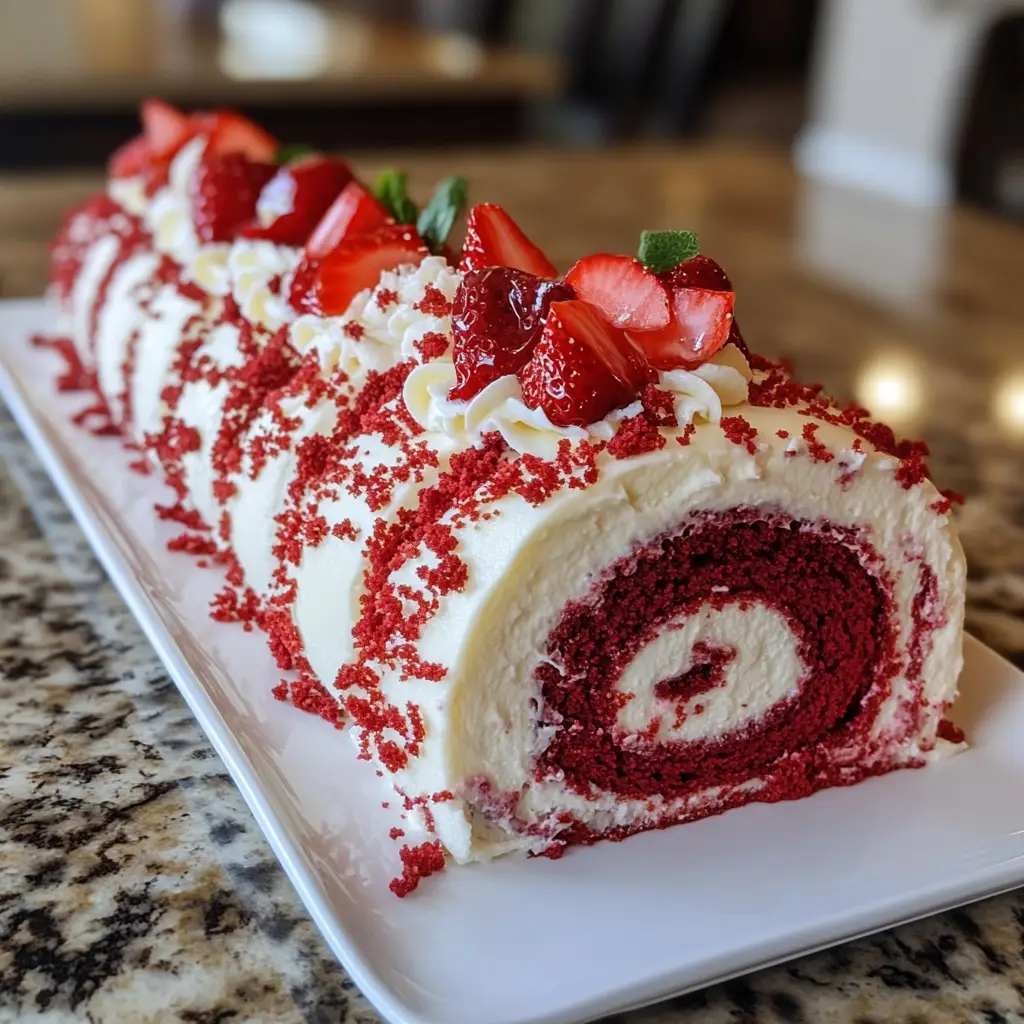
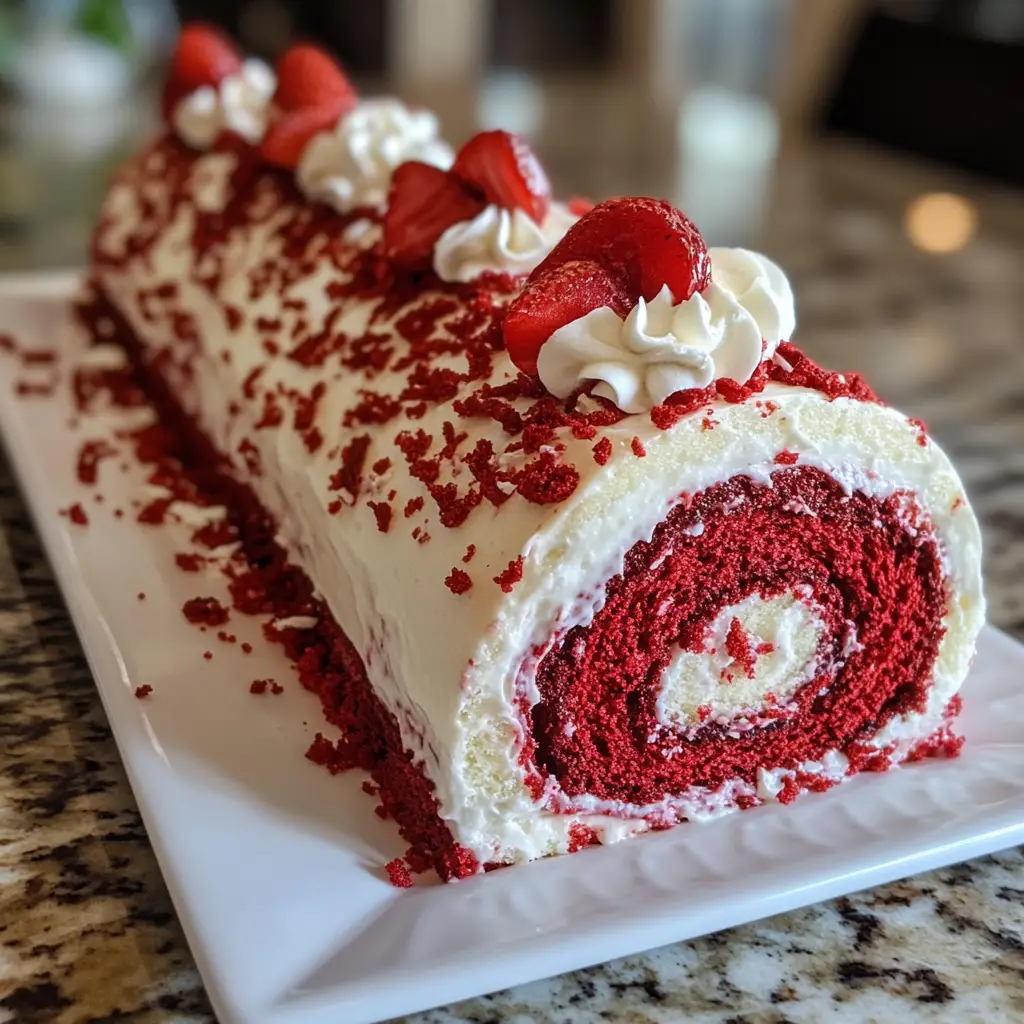
Introduction to Bloody Red Velvet Cake Roll
As a busy mom, I know how challenging it can be to whip up something special for Halloween or any festive occasion. That’s why I’m excited to share my Bloody Red Velvet Cake Roll with you! This spooky delight is not only visually stunning but also incredibly easy to make. It’s the perfect treat to impress your loved ones without spending hours in the kitchen. Plus, who can resist that rich, velvety flavor? Trust me, this cake roll will become a favorite in your home, making every celebration a little sweeter and a lot more fun!
Why You’ll Love This Bloody Red Velvet Cake Roll
This Bloody Red Velvet Cake Roll is a game-changer for busy days. It’s quick to prepare, taking just about 50 minutes from start to finish. The taste? Absolutely divine! The combination of rich cocoa and creamy filling will have everyone asking for seconds. Plus, it’s a fun way to get the kids involved in the kitchen. You’ll love how this spooky treat brings joy and excitement to any gathering!
Ingredients for Bloody Red Velvet Cake Roll
Let’s dive into the ingredients that make this Bloody Red Velvet Cake Roll a showstopper! Each component plays a vital role in creating that rich flavor and delightful texture. Here’s what you’ll need:
- All-purpose flour: The backbone of the cake, providing structure and stability.
- Granulated sugar: Sweetens the cake and helps create that lovely moist texture.
- Unsweetened cocoa powder: Adds a deep chocolate flavor, balancing the sweetness perfectly.
- Baking powder: A leavening agent that helps the cake rise and become fluffy.
- Baking soda: Works with the vinegar to create a light, airy cake.
- Salt: Enhances the flavors and balances the sweetness.
- Vegetable oil: Keeps the cake moist and tender; you can substitute with melted butter for a richer taste.
- Buttermilk: Adds a tangy flavor and helps keep the cake moist; if you don’t have it, mix milk with a splash of vinegar.
- Large eggs: Bind the ingredients together and add richness.
- Red food coloring: Gives the cake its signature vibrant hue; gel food coloring works best for a bold color.
- Vanilla extract: Adds a warm, sweet aroma that complements the cocoa.
- White vinegar: Reacts with baking soda to create a fluffy texture; don’t skip this!
- Cream cheese: The star of the filling, providing a rich and creamy texture.
- Powdered sugar: Sweetens the filling and helps it hold its shape.
- Vanilla extract (for filling): Enhances the flavor of the cream cheese filling.
- Red gel food coloring (for decoration): Creates that spooky bloody effect on top of the cake roll.
For exact measurements, check the bottom of the article where you can find everything listed for easy printing. Happy baking!
How to Make Bloody Red Velvet Cake Roll
Now that you have all your ingredients ready, let’s dive into the fun part—making the Bloody Red Velvet Cake Roll! Follow these simple steps, and you’ll have a show-stopping dessert that’s sure to impress.
Step 1: Preheat and Prepare
First things first, preheat your oven to 350°F (175°C). While that’s heating up, grab your jelly roll pan and grease it well. This will help the cake roll come out easily later on. Trust me, you don’t want to wrestle with a stuck cake!
Step 2: Mix Dry Ingredients
In a large bowl, combine the all-purpose flour, granulated sugar, cocoa powder, baking powder, baking soda, and salt. Whisk them together until they’re well mixed. This step is crucial for ensuring your cake has a uniform texture. Plus, it’s a great way to get your kids involved—let them help with the whisking!
Step 3: Combine Wet Ingredients
In another bowl, whisk together the vegetable oil, buttermilk, eggs, red food coloring, vanilla extract, and white vinegar. The vibrant red color will make your cake look extra spooky! Make sure everything is well combined; this is where the magic begins.
Step 4: Combine Mixtures
Now, gently fold the wet ingredients into the dry ingredients. Mix until just combined; don’t overdo it! A few lumps are perfectly fine. This is the secret to keeping your cake light and fluffy. You want it to be a beautiful, velvety batter.
Step 5: Bake the Cake
Pour the batter into your prepared jelly roll pan, spreading it evenly. Bake for 15-20 minutes, or until a toothpick inserted in the center comes out clean. The aroma wafting through your kitchen will be heavenly! Keep an eye on it, as every oven is a little different.
Step 6: Cool and Roll
Once baked, let the cake cool in the pan for about 5 minutes. Then, carefully roll it up in a clean kitchen towel while it’s still warm. This helps shape the cake for later. Let it cool completely in this rolled-up position. It’s like giving your cake a cozy nap!
Step 7: Prepare the Filling
While the cake cools, it’s time to whip up the filling. In a mixing bowl, beat together the softened cream cheese, powdered sugar, and vanilla extract until smooth. This creamy filling is what makes the cake roll so irresistible. You might want to sneak a taste—just saying!
Step 8: Assemble the Cake Roll
Once the cake is completely cool, gently unroll it. Spread the cream cheese filling evenly over the surface. Then, roll it back up carefully, starting from one end. This is where the magic happens! You’ll have a beautiful, swirled cake roll ready for decoration.
Step 9: Decorate
Finally, it’s time to get creative! Use red gel food coloring to create a spooky bloody effect on top of your cake roll. Drizzle it on or use a piping bag for more control. This is your chance to have fun and make it as spooky as you like!
Tips for Success
- Make sure your ingredients are at room temperature for better mixing.
- Use a clean kitchen towel to roll the cake; it helps maintain its shape.
- Don’t skip the cooling step; it prevents the filling from melting.
- Experiment with different decorations for a unique look each time.
- Store leftovers in the fridge for up to three days for the best taste.
Equipment Needed
- Jelly roll pan: A standard baking sheet works too, just ensure it has edges.
- Mixing bowls: Use any size; just make sure they’re sturdy.
- Whisk: A fork can work in a pinch for mixing.
- Kitchen towel: A clean dishcloth will do just fine.
- Spatula: A rubber spatula is great for spreading the filling.
Variations
- Gluten-free: Substitute all-purpose flour with a gluten-free blend for a delicious gluten-free version.
- Chocolate lovers: Add chocolate chips to the filling for an extra chocolatey surprise!
- Healthier option: Use Greek yogurt instead of cream cheese for a lighter filling.
- Vegan twist: Replace eggs with flaxseed meal and use a dairy-free cream cheese alternative.
- Spice it up: Add a pinch of cinnamon or nutmeg to the batter for a warm, cozy flavor.
Serving Suggestions
- Pair with ice cream: A scoop of vanilla or chocolate ice cream complements the cake beautifully.
- Serve with coffee: A warm cup of coffee or hot cocoa enhances the flavors.
- Garnish with berries: Fresh raspberries or strawberries add a pop of color and freshness.
- Presentation: Dust with powdered sugar for a spooky, ghostly effect.
FAQs about Bloody Red Velvet Cake Roll
Can I make the Bloody Red Velvet Cake Roll ahead of time?
Absolutely! This cake roll can be made a day in advance. Just store it in the refrigerator after assembling. It’ll taste even better the next day as the flavors meld together!
What can I use instead of buttermilk?
If you don’t have buttermilk on hand, you can easily make a substitute. Just mix one cup of milk with a tablespoon of vinegar or lemon juice. Let it sit for about 5 minutes, and you’re good to go!
How do I store leftovers?
To keep your Bloody Red Velvet Cake Roll fresh, wrap it tightly in plastic wrap and store it in the refrigerator. It should stay delicious for up to three days. Just remember to let it come to room temperature before serving!
Can I freeze the cake roll?
Yes, you can freeze the cake roll! Just wrap it tightly in plastic wrap and then in aluminum foil. It can be frozen for up to three months. Thaw it in the fridge overnight before serving.
What’s the best way to decorate the cake roll?
For a spooky effect, use red gel food coloring to create a bloody drizzle on top. You can also add edible glitter or spooky sprinkles for an extra festive touch. Get creative and have fun with it!
Final Thoughts
Making a Bloody Red Velvet Cake Roll is more than just baking; it’s about creating memories with your loved ones. The joy of rolling up this vibrant cake, the laughter shared in the kitchen, and the delight on everyone’s faces when they take that first bite are priceless. This spooky treat is perfect for Halloween or any festive gathering, bringing a touch of fun and creativity to your table. So, gather your family, roll up your sleeves, and dive into this delicious adventure. Trust me, it’ll become a cherished tradition in your home!
Print
Bloody Red Velvet Cake Roll: A Spooky Delight You’ll Love!
- Total Time: 50 minutes
- Yield: 8 servings 1x
- Diet: Vegetarian
Description
A spooky and delicious Bloody Red Velvet Cake Roll perfect for Halloween or any festive occasion.
Ingredients
- 1 cup all-purpose flour
- 1 cup granulated sugar
- 1/2 cup unsweetened cocoa powder
- 1 teaspoon baking powder
- 1/2 teaspoon baking soda
- 1/2 teaspoon salt
- 1 cup vegetable oil
- 1 cup buttermilk
- 2 large eggs
- 2 tablespoons red food coloring
- 1 teaspoon vanilla extract
- 1 teaspoon white vinegar
- 1 cup cream cheese, softened
- 1/2 cup powdered sugar
- 1 teaspoon vanilla extract (for filling)
- Red gel food coloring (for decoration)
Instructions
- Preheat the oven to 350°F (175°C) and grease a jelly roll pan.
- In a large bowl, mix together the flour, sugar, cocoa powder, baking powder, baking soda, and salt.
- In another bowl, whisk together the oil, buttermilk, eggs, red food coloring, vanilla extract, and vinegar.
- Combine the wet and dry ingredients until just mixed.
- Pour the batter into the prepared pan and spread evenly.
- Bake for 15-20 minutes or until a toothpick comes out clean.
- Once baked, let it cool for a few minutes, then roll it up in a clean kitchen towel and let it cool completely.
- For the filling, beat together the cream cheese, powdered sugar, and vanilla extract until smooth.
- Unroll the cooled cake, spread the filling evenly, and roll it back up.
- Decorate with red gel food coloring to create a bloody effect.
Notes
- Ensure the cake is completely cool before adding the filling to prevent it from melting.
- Use gel food coloring for a more vibrant color.
- This cake can be made a day in advance and stored in the refrigerator.
- Prep Time: 30 minutes
- Cook Time: 20 minutes
- Category: Dessert
- Method: Baking
- Cuisine: American
Nutrition
- Serving Size: 1 slice
- Calories: 350
- Sugar: 25g
- Sodium: 200mg
- Fat: 18g
- Saturated Fat: 5g
- Unsaturated Fat: 10g
- Trans Fat: 0g
- Carbohydrates: 45g
- Fiber: 2g
- Protein: 4g
- Cholesterol: 50mg
Keywords: Bloody Red Velvet Cake Roll, Halloween dessert, spooky cake, red velvet roll


