Sensory-Rich Introduction with Immediate Craving
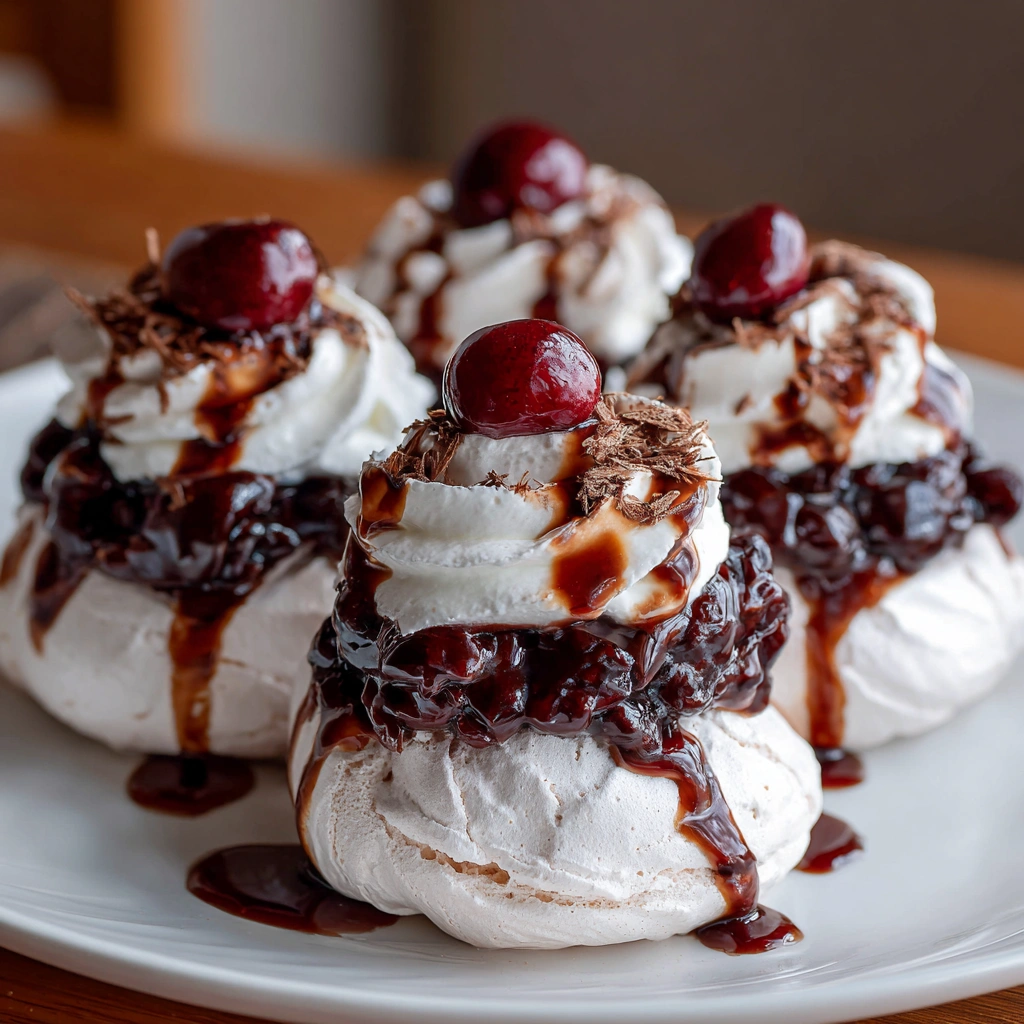
Imagine biting into a Black Forest Pavlova Bomb, where the first crunch of the crispy meringue shell gives way to a luscious, creamy center. The contrast is nothing short of magical: the airy, delicate meringue shatters beautifully, revealing a rich chocolate ganache that mingles with tart cherries, creating a symphony of flavors that dance on your palate. The aroma of vanilla and chocolate wafts through the air, inviting you to indulge in this decadent treat.
Let me take you back to a cozy family gathering last summer, where I first served these delightful pavlova bombs. As the sun set, casting a warm glow over our backyard, I presented these beauties as the grand finale to our meal. The laughter and chatter faded momentarily as everyone took their first bite, and I could see the joy spread across their faces. It was a moment of pure bliss, a reminder of how food can bring us together and create lasting memories.
These Black Forest Pavlova Bombs are not just desserts; they are a celebration in themselves. Whether it’s a casual family dinner or a festive holiday gathering, they elevate any occasion with their stunning presentation and delightful flavors. Perfect for birthdays, holidays, or as a show-stopping dessert for dinner parties, these pavlova bombs are sure to impress your guests and leave them craving more.
Why You’ll Love This Black Forest Pavlova Bombs
Let me tell you, there are so many reasons to fall head over heels for these Black Forest Pavlova Bombs. Each bite is a delightful experience that will have you coming back for more!
- Texture Contrast: The delightful crunch of the meringue shell is a joy to bite into, giving way to a smooth, rich filling that feels like a cloud on your tongue. It’s a textural adventure that keeps your taste buds engaged!
- Flavor Balance: Imagine the perfect harmony of sweet chocolate, tart cherries, and light whipped cream. Each flavor complements the others, creating a symphony that dances on your palate and leaves you wanting just one more bite.
- Versatility: One of the best parts about these pavlova bombs is their adaptability. You can easily swap out the cherry filling for seasonal fruits or even experiment with different flavored whipped creams. The possibilities are endless!
- Ease of Preparation: Don’t let the elegant appearance fool you! These pavlova bombs are surprisingly simple to make. With just a few straightforward steps, you’ll impress your friends and family, whether you’re a novice or a seasoned baker.
- Universal Appeal: This dessert is a crowd favorite, pleasing a wide range of palates. Whether you’re serving kids or adults, everyone will appreciate the delightful combination of flavors and textures.
So, whether you’re looking to impress at your next dinner party or simply want to treat yourself, these Black Forest Pavlova Bombs are the perfect choice. Trust me, once you try them, you’ll understand why they’re a beloved dessert in my kitchen!
Essential Tools & Preparation Strategy
Before diving into the delightful world of Black Forest Pavlova Bombs, let’s gather our essential tools and set the stage for success. Trust me, having the right equipment makes all the difference in achieving that perfect meringue texture and creamy filling.
- Electric Mixer: This is your best friend for whipping egg whites to the perfect stiff peaks. A stand mixer is ideal, but a hand mixer works just fine too!
- Baking Sheet: A sturdy base for baking the meringues. Make sure it’s large enough to hold all your pavlova bombs comfortably.
- Parchment Paper: This prevents the meringues from sticking to the baking sheet, ensuring a smooth release.
- Mixing Bowls: You’ll need a couple of these for combining ingredients and whipping cream. Glass or stainless steel works best.
- Spatula: A silicone spatula is perfect for gently folding ingredients without deflating your precious meringue.
- Whisk: Handy for whipping cream and mixing ganache. A balloon whisk is particularly effective for aerating.
- Piping Bag (optional): If you want to get fancy, use a piping bag to shape your meringues for a more decorative presentation.
- Cooling Rack: This allows your meringues to cool evenly after baking, preventing any sogginess.
Now that we have our tools ready, let’s talk about preparation strategy. I always recommend reading through the entire recipe before starting. It’s like a little pep talk for your baking journey! This way, you’ll know what to expect and can avoid any surprises along the way.
As you prepare, remember that patience is key. Meringue can be a bit finicky, but with the right approach, you’ll be rewarded with those beautifully crisp pavlova bombs that are sure to impress!
Ingredients & Their Roles in This Black Forest Pavlova Bombs
Understanding the ingredients in your Black Forest Pavlova Bombs is key to mastering this delightful dessert. Each component plays a crucial role in achieving that perfect balance of texture and flavor. Let’s break it down!
Meringue Ingredients:
- Egg Whites: The backbone of your meringue, egg whites provide the necessary structure and volume. When whipped, they trap air, creating that light and airy texture we all love.
- Granulated Sugar: This sweetener not only adds sweetness but also stabilizes the meringue. As it dissolves, it helps create a glossy finish and stiff peaks, essential for a perfect pavlova.
- Vanilla Extract: A splash of vanilla enhances the overall flavor profile, adding a warm, aromatic note that complements the chocolate and cherries beautifully.
- White Vinegar: This might seem unusual, but vinegar is a secret weapon! It helps stabilize the egg whites, ensuring your meringue holds its shape during baking.
- Cornstarch: Adding cornstarch gives the meringue a chewy texture, creating a delightful contrast to the crisp outer shell. It also helps absorb any moisture, keeping your pavlova bombs from becoming soggy.
Filling Ingredients:
- Heavy Whipping Cream: This is what makes the filling light and airy. Whipped to soft peaks, it adds a creamy richness that balances the sweetness of the meringue.
- Powdered Sugar: A touch of powdered sugar sweetens the whipped cream without weighing it down, allowing it to maintain its fluffy texture.
- Dark Chocolate Ganache: Rich and decadent, this ganache is made by combining dark chocolate with heavy cream. It adds a luxurious depth of flavor that pairs perfectly with the tartness of the cherries.
- Cherry Pie Filling: Whether you opt for store-bought or homemade, cherry pie filling adds a burst of tartness and a pop of color, making each bite visually appealing and delicious.
With these ingredients in hand, you’re well on your way to creating stunning Black Forest Pavlova Bombs that will impress everyone at your table. Each element works together to create a dessert that is not only beautiful but also a joy to eat!
Step-by-Step Guide to Perfect Black Forest Pavlova Bombs
Now that we have our ingredients and tools ready, it’s time to dive into the fun part: making these Black Forest Pavlova Bombs! Follow this step-by-step guide, and you’ll be well on your way to creating a dessert that’s not only stunning but also delicious.
- Preheat your oven: Set your oven to 225°F (110°C) and line a baking sheet with parchment paper. This low temperature is key to drying out the meringue without browning it.
- Beat the egg whites: In a clean, dry bowl, beat the egg whites on medium speed until soft peaks form. You’ll know you’re there when the egg whites hold a gentle curve but don’t stand up straight.
- Add the sugar: Gradually add the granulated sugar, one tablespoon at a time, while continuing to beat. Keep going until stiff peaks form and the mixture is glossy. This process usually takes about 5-7 minutes. You want the sugar fully dissolved, so rub a bit of the mixture between your fingers; it should feel smooth, not gritty.
- Fold in the flavor: Gently fold in the vanilla extract, vinegar, and cornstarch until just combined. Be careful not to deflate your precious meringue; we want to keep all that lovely air in!
- Shape the meringues: Spoon or pipe the meringue mixture into 6 large rounds on the prepared baking sheet, creating a slight well in the center of each. This well will hold your luscious filling later!
- Bake to perfection: Bake for 1 hour, then turn off the oven and let the meringues cool completely inside for at least 1 hour. This cooling step is crucial for achieving that perfect crisp exterior.
- Prepare the ganache: While the meringues cool, prepare the chocolate ganache by heating the heavy cream until just simmering. Pour it over the chopped dark chocolate and let it sit for 5 minutes. Then, stir until smooth and glossy. The aroma of chocolate will fill your kitchen, and trust me, it’s heavenly!
- Whip the cream: In a separate bowl, whip the heavy cream with powdered sugar and vanilla extract until soft peaks form. You want it to be fluffy but still hold its shape.
- Assemble the bombs: Once the meringues are cool, fill each with a layer of chocolate ganache, followed by whipped cream, and top with cherry pie filling. The colors and textures will be a feast for the eyes!
- Serve and enjoy: Serve immediately or refrigerate until ready to serve. If you can resist, let them chill for a bit to meld the flavors together. But honestly, who can wait?
And there you have it! A step-by-step guide to creating your very own Black Forest Pavlova Bombs. Each step is a chance to savor the process, and I promise, the end result will be worth every minute spent in the kitchen!
Chef’s Notes & Pro Tips for Flawless Results
As you embark on your journey to create these Black Forest Pavlova Bombs, I want to share some of my favorite tips and tricks that will help you achieve flawless results every time. Trust me, a little preparation goes a long way in the world of meringue!
- Make-ahead Instructions: Meringues can be made a day in advance and stored in an airtight container. This not only saves you time on the day of serving but also allows the flavors to develop beautifully. Just be sure to keep them in a cool, dry place to maintain their crispness!
- Storage Tips: Keep filled pavlova bombs in the refrigerator for up to 2 hours before serving for the best texture. Beyond that, the meringue may start to absorb moisture from the filling, losing its delightful crunch. If you have leftovers, I recommend storing the meringues and filling separately and assembling them just before serving.
- Equipment Recommendations: For ease and efficiency when whipping egg whites, a stand mixer is your best bet. It allows you to multitask while the mixer does the hard work. If you’re using a hand mixer, just be prepared to give it your full attention!
- Customization Options: Don’t be afraid to experiment! You can swap out the cherry filling for seasonal fruits like raspberries or strawberries, or even try flavored whipped creams, such as almond or orange zest, to suit your taste. The beauty of these pavlova bombs is their versatility!
With these pro tips in your back pocket, you’ll be well-equipped to create stunning Black Forest Pavlova Bombs that will impress your family and friends. Remember, baking is all about having fun and enjoying the process, so don’t stress too much—just savor each moment in the kitchen!
Avoid These Common Cooking Mistakes
As you embark on your journey to create the perfect Black Forest Pavlova Bombs, it’s essential to be aware of some common pitfalls that can derail your efforts. Trust me, I’ve made these mistakes myself, and learning from them has made all the difference in my baking adventures!
- Not using room temperature egg whites: This is a crucial step! Cold egg whites won’t whip up to their full volume, resulting in a less airy meringue. Let your eggs sit out for about 30 minutes before you start.
- Overbeating the egg whites: It’s easy to get carried away, but overbeating can lead to a dry, grainy meringue. Stop once you reach stiff peaks—when the mixture holds its shape but is still glossy.
- Opening the oven door while baking: I know it’s tempting to peek, but resist the urge! Opening the oven can cause sudden temperature changes, leading to cracked meringues. Trust the process and let them bake undisturbed.
- Not letting meringues cool in the oven: Cooling them in the oven is key to achieving that perfect texture. If you take them out too soon, they can become chewy instead of crisp. Patience is a virtue here!
- Filling meringues too early: This is a biggie! Filling your meringues too soon can result in soggy shells. Wait until just before serving to add your luscious fillings.
- Using too much liquid in the ganache: Follow the chocolate-to-cream ratio closely. Too much liquid can make your ganache runny, which won’t hold up well in your pavlova bombs.
- Not using a clean bowl for egg whites: Any trace of fat can prevent your egg whites from whipping properly. Make sure your mixing bowl and utensils are squeaky clean—no grease allowed!
By keeping these common mistakes in mind, you’ll be well on your way to creating stunning Black Forest Pavlova Bombs that will wow your friends and family. Remember, every baking experience is a learning opportunity, so don’t be discouraged if things don’t go perfectly the first time. Happy baking!
Creative Variations & Customizations
One of the best things about Black Forest Pavlova Bombs is their versatility! You can easily customize them to suit your taste or the season. Here are some delightful variations that will keep your dessert game exciting:
- Berry Pavlova Bombs: For a fresh twist, substitute the cherries with a medley of mixed berries. Think strawberries, raspberries, and blueberries for a vibrant, colorful filling that bursts with flavor!
- Nutty Chocolate: If you’re a fan of texture, consider adding crushed nuts—like hazelnuts or almonds—to the chocolate ganache. This will give your pavlova bombs a delightful crunch that complements the creamy filling beautifully.
- Mint Chocolate: For a refreshing flavor, incorporate a few drops of mint extract into the whipped cream. The coolness of mint pairs wonderfully with the rich chocolate and adds a unique twist to your pavlova bombs.
- Seasonal Spices: Embrace the flavors of the season by adding a pinch of cinnamon or nutmeg to the meringue. This subtle spice will elevate the flavor profile and make your pavlova bombs perfect for cozy gatherings.
- Vegan Option: Want to make these pavlova bombs plant-based? Simply use aquafaba (the liquid from canned chickpeas) instead of egg whites. Whip it up just like you would with egg whites, and you’ll have a delicious vegan version that everyone can enjoy!
These creative variations not only keep things interesting but also allow you to tailor your Black Forest Pavlova Bombs to suit any occasion or palate. So, don’t hesitate to experiment and make this recipe your own!
Perfect Pairings: What to Serve With Black Forest Pavlova Bombs
When it comes to serving your Black Forest Pavlova Bombs, the right accompaniments can elevate the experience to new heights. Here are some delightful pairings that will enhance the flavors and textures of this exquisite dessert:
- Sweet Dessert Wine: A glass of sweet dessert wine, like a late harvest Riesling or a rich port, beautifully enhances the chocolate and cherry flavors, making each bite even more indulgent.
- Vanilla Ice Cream: The creamy, smooth texture of vanilla ice cream provides a lovely contrast to the crisp meringue, creating a delightful balance of temperatures and flavors.
- Fresh Mint Leaves: A sprinkle of fresh mint leaves adds a refreshing touch to the dessert, brightening the rich flavors and providing a pop of color on the plate.
- Dark Chocolate Shavings: For those who can’t get enough chocolate, a sprinkle of dark chocolate shavings adds an extra layer of texture and richness, making your pavlova bombs even more decadent.
- Espresso: A shot of espresso is the perfect way to balance the sweetness of the pavlova. The bold coffee flavor cuts through the richness, making for a well-rounded dessert experience.
- Chocolate Sauce: Drizzling a bit of chocolate sauce over the pavlova bombs adds an extra indulgent touch. It’s a chocolate lover’s dream come true!
- Fruit Salad: A light, refreshing fruit salad on the side complements the sweetness of the pavlova and adds a burst of freshness, making it a perfect pairing.
- Crème Fraîche: A dollop of crème fraîche offers a tangy contrast to the sweetness of the pavlova, enhancing the overall flavor profile and adding a creamy element.
These pairings not only enhance the flavors of your Black Forest Pavlova Bombs but also create a delightful dining experience that your guests will remember. So, gather your favorite accompaniments and get ready to impress!
Storage & Meal Prep Instructions
When it comes to enjoying your Black Forest Pavlova Bombs, proper storage and meal prep can make all the difference in maintaining their delightful texture and flavor. Here’s how to keep your pavlova bombs fresh and ready to impress!
- Fridge Storage: Keep filled pavlova bombs in the refrigerator for up to 2 hours before serving. This short window ensures that the meringue retains its crispness while allowing the flavors to meld beautifully. Beyond this time, the meringue may start to absorb moisture from the filling, losing that delightful crunch.
- Freezer Storage: If you want to prepare ahead, unfilled meringues can be frozen for up to 1 month. Just make sure to store them in an airtight container to prevent freezer burn. When you’re ready to serve, simply fill them with the chocolate ganache and whipped cream just before enjoying!
- Reheating Methods: These pavlova bombs are best served fresh, so I recommend avoiding reheating filled pavlova bombs. If you have leftovers, it’s best to store the meringues and filling separately and assemble them right before serving to maintain that perfect texture.
By following these storage and meal prep instructions, you’ll ensure that your Black Forest Pavlova Bombs remain a show-stopping dessert, ready to delight your guests at a moment’s notice!
Nutrition Facts & Health Insights
Understanding the nutritional profile of your Black Forest Pavlova Bombs can help you enjoy them guilt-free! Here’s a detailed breakdown of the nutrition per serving, so you can indulge while being mindful of your health.
| Nutrient | Amount per Serving |
|---|---|
| Calories | 350 |
| Sugar | 25 grams |
| Sodium | 50 milligrams |
| Fat | 20 grams |
| Saturated Fat | 10 grams |
| Unsaturated Fat | 8 grams |
| Trans Fat | 0 grams |
| Carbohydrates | 40 grams |
| Fiber | 1 gram |
| Protein | 4 grams |
| Cholesterol | 80 milligrams |
Now, let’s talk about the health benefits of some key ingredients in these delightful Black Forest Pavlova Bombs:
- Dark Chocolate: Rich in antioxidants, dark chocolate can help improve heart health by lowering blood pressure and improving blood flow. It also contains flavonoids, which may reduce the risk of heart disease.
- Cherries: These little gems are packed with vitamins, minerals, and antioxidants. They are known to reduce inflammation, improve sleep quality, and support heart health. Plus, their natural sweetness makes them a perfect addition to desserts!
- Egg Whites: A great source of protein, egg whites are low in calories and fat, making them an excellent choice for those looking to maintain a healthy diet while enjoying a sweet treat.
With these nutritional insights, you can savor your Black Forest Pavlova Bombs knowing that they not only taste amazing but also offer some health benefits. So go ahead, indulge a little—you deserve it!
Frequently Asked Questions
As you embark on your journey to create the perfect Black Forest Pavlova Bombs, you might have a few questions along the way. Don’t worry; I’ve got you covered! Here are some of the most common queries I receive, along with helpful answers to guide you through the process.
- Can I use egg whites from a carton?
Yes, you can use egg whites from a carton! Just make sure to check the packaging for the equivalent measurement. Typically, 2 tablespoons of liquid egg whites equal one large egg white. However, for the best results, I recommend using fresh egg whites, as they tend to whip up better. - How do I know when the meringue is ready?
The meringue is ready when it forms stiff peaks and has a glossy appearance. To test, you can turn the bowl upside down—if the meringue stays put, you’re good to go! Just be careful not to overbeat, as this can lead to a dry texture. - What can I substitute for heavy cream?
If you’re looking for a substitute for heavy cream, you can use coconut cream for a dairy-free option or a mixture of milk and butter (1 cup of milk with 1/3 cup of melted butter) for a lighter alternative. Keep in mind that the flavor and texture may vary slightly. - How long can I store the meringues?
Unfilled meringues can be stored in an airtight container at room temperature for up to 1 week. If you’ve filled them, it’s best to enjoy them within 2 hours for optimal texture. After that, the meringue may start to absorb moisture and lose its crispness. - Can I make these pavlova bombs gluten-free?
Absolutely! The Black Forest Pavlova Bombs are naturally gluten-free since they don’t contain any flour. Just be sure to check the labels on your chocolate and any other ingredients to ensure they are gluten-free. - What if my ganache is too thick?
If your ganache is too thick, you can gently reheat it over a double boiler or in the microwave in short bursts, stirring frequently until it reaches your desired consistency. If it’s still too thick, you can add a splash of warm heavy cream to loosen it up. - How can I prevent meringues from cracking?
To prevent cracking, avoid opening the oven door while the meringues are baking, as sudden temperature changes can cause them to crack. Additionally, letting them cool completely in the oven after baking helps maintain their structure. - Can I use fresh cherries instead of pie filling?
Yes, you can use fresh cherries! Just be sure to pit and slice them before adding them to your pavlova bombs. Fresh cherries will provide a delightful burst of flavor and a beautiful presentation, but keep in mind that they may be less sweet than pie filling.
With these FAQs answered, you’re well on your way to mastering the art of Black Forest Pavlova Bombs. Remember, every baking experience is a chance to learn and grow, so don’t hesitate to experiment and make this recipe your own!
Final Inspiration & Kitchen Confidence
As you wrap up your journey with these Black Forest Pavlova Bombs, I want to take a moment to remind you that baking is truly a journey. Each attempt, whether it’s a triumph or a learning experience, brings you one step closer to mastery. Embrace the process, and don’t be afraid to make mistakes along the way. After all, some of the best recipes come from a little trial and error!
When you finally present your beautiful pavlova bombs, take a moment to celebrate your achievement. There’s something incredibly rewarding about creating a dessert that not only looks stunning but also tastes divine. Share your creations with friends and family, and watch their faces light up with joy as they take their first bite. Food has a magical way of bringing people together, and your pavlova bombs are sure to be a hit!
Now, I invite you to dive into this recipe and make it your own. Experiment with flavors, share your experiences, and connect with fellow bakers in our community. Whether you’re hosting a gathering or simply treating yourself, these Black Forest Pavlova Bombs are a delightful way to spread joy and sweetness. So, roll up your sleeves, get into the kitchen, and let the magic of baking unfold!
Print
Black Forest Pavlova Bombs: Irresistibly Crispy & Creamy!
- Total Time: 90 minutes
- Yield: 6 servings 1x
- Diet: Gluten-Free
Description
Indulge in the delightful contrast of textures with these Black Forest Pavlova Bombs. The outer shell is a crisp, airy meringue that shatters beautifully, revealing a luscious, creamy center filled with rich chocolate and tart cherries, creating a symphony of flavors that dance on your palate.
Ingredients
- Meringue:
- 4 large egg whites
- 1 cup granulated sugar
- 1 teaspoon vanilla extract
- 1 teaspoon white vinegar
- 2 teaspoons cornstarch
- Filling:
- 1 cup heavy whipping cream
- 2 tablespoons powdered sugar
- 1 teaspoon vanilla extract
- 1 cup dark chocolate ganache (made from 6 oz dark chocolate and 1/2 cup heavy cream)
- 1 cup cherry pie filling (or fresh cherries)
Instructions
- Preheat your oven to 225°F (110°C) and line a baking sheet with parchment paper.
- In a clean, dry bowl, beat the egg whites on medium speed until soft peaks form.
- Gradually add the granulated sugar, one tablespoon at a time, while continuing to beat until stiff peaks form and the mixture is glossy.
- Gently fold in the vanilla extract, vinegar, and cornstarch until just combined.
- Spoon or pipe the meringue mixture into 6 large rounds on the prepared baking sheet, creating a slight well in the center of each.
- Bake for 1 hour, then turn off the oven and let the meringues cool completely inside for at least 1 hour.
- While the meringues cool, prepare the chocolate ganache by heating the heavy cream until just simmering, then pour it over the chopped dark chocolate. Let it sit for 5 minutes, then stir until smooth.
- In a separate bowl, whip the heavy cream with powdered sugar and vanilla extract until soft peaks form.
- Once the meringues are cool, fill each with a layer of chocolate ganache, followed by whipped cream, and top with cherry pie filling.
- Serve immediately or refrigerate until ready to serve.
Notes
- Make-ahead: Meringues can be made a day in advance and stored in an airtight container.
- Storage: Keep filled pavlova bombs in the refrigerator for up to 2 hours before serving for best texture.
- Substitutions: Use fresh berries instead of cherries for a different flavor profile.
- Prep Time: 30 minutes
- Cook Time: 60 minutes
- Category: desserts
- Method: baking
- Cuisine: American
Nutrition
- Serving Size: 1 pavlova bomb
- Calories: 350
- Sugar: 25 grams
- Sodium: 50 milligrams
- Fat: 20 grams
- Saturated Fat: 10 grams
- Unsaturated Fat: 8 grams
- Trans Fat: 0 grams
- Carbohydrates: 40 grams
- Fiber: 1 gram
- Protein: 4 grams
- Cholesterol: 80 milligrams
Keywords: Black Forest Pavlova Bombs, meringue dessert, chocolate pavlova, cherry dessert, gluten-free dessert, whipped cream, chocolate ganache, holiday desserts, easy pavlova recipe, elegant desserts, party desserts, sweet treats, festive desserts, light desserts